
Notebook PC User Guide - Windows 7
Page 7
... the computer cannot exit Hibernation 57 Calibrating a battery ...57 Step 1: Fully charge the battery 57 Step 2: Disable Hibernation and Sleep 57 Step 3: Discharge the battery 59 Step 4: Fully recharge the battery 59 Step 5: Reenable Hibernation and Sleep 60 Conserving battery power 60 Storing a battery ...60 Disposing of a used battery 61 Replacing the battery ...61 Switching between graphics modes (select...
... the computer cannot exit Hibernation 57 Calibrating a battery ...57 Step 1: Fully charge the battery 57 Step 2: Disable Hibernation and Sleep 57 Step 3: Discharge the battery 59 Step 4: Fully recharge the battery 59 Step 5: Reenable Hibernation and Sleep 60 Conserving battery power 60 Storing a battery ...60 Disposing of a used battery 61 Replacing the battery ...61 Switching between graphics modes (select...
Notebook PC User Guide - Windows 7
Page 60
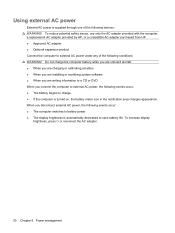
... potential safety issues, use only the AC adapter provided with the computer, a replacement AC adapter provided by HP, or a compatible AC adapter purchased from HP. ● Approved AC adapter ● Optional expansion product Connect the computer to save battery life. To increase display brightness, press f3 or reconnect the AC adapter. 50...
... potential safety issues, use only the AC adapter provided with the computer, a replacement AC adapter provided by HP, or a compatible AC adapter purchased from HP. ● Approved AC adapter ● Optional expansion product Connect the computer to save battery life. To increase display brightness, press f3 or reconnect the AC adapter. 50...

Notebook PC User Guide - Windows 7
Page 62
...display does not turn on a flat surface. Shut down on . ● The power light is not functioning and should be replaced. To test the AC adapter: 1. Remove the battery from the computer (3). 2. c. b. Connect the AC adapter to the computer, and then plug it is connected to release the... battery. Turn on the computer. ● If the power light turns on obtaining a replacement AC power adapter. 52 Chapter 5 Power management Pivot the battery (2) upward and remove the battery from the computer. Testing an AC adapter Test the ...
...display does not turn on a flat surface. Shut down on . ● The power light is not functioning and should be replaced. To test the AC adapter: 1. Remove the battery from the computer (3). 2. c. b. Connect the AC adapter to the computer, and then plug it is connected to release the... battery. Turn on the computer. ● If the power light turns on obtaining a replacement AC power adapter. 52 Chapter 5 Power management Pivot the battery (2) upward and remove the battery from the computer. Testing an AC adapter Test the ...

Notebook PC User Guide - Windows 7
Page 63
... if the AC adapter is disconnected from the computer. To reduce potential safety issues, use only the battery provided with the computer, a replacement battery provided by HP, or a compatible battery purchased from HP. Using battery power When a charged battery is in the computer slowly discharges when the computer is off and unplugged from external power. When...
... if the AC adapter is disconnected from the computer. To reduce potential safety issues, use only the battery provided with the computer, a replacement battery provided by HP, or a compatible battery purchased from HP. Using battery power When a charged battery is in the computer slowly discharges when the computer is off and unplugged from external power. When...
Notebook PC User Guide - Windows 7
Page 71
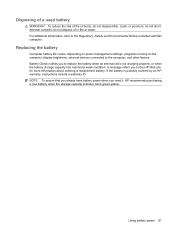
...condition. To reduce the risk of fire or burns, do not dispose of a used battery WARNING! NOTE: To ensure that you always have battery power when you to replace the battery when an internal cell is possibly covered by an HP warranty, instructions include a warranty ...contacts; Disposing of in fire or water. For additional information, refer to the computer, and other factors. Using battery power 61 Replacing the battery Computer battery life varies, depending on power management settings, programs running on the computer, display brightness, external devices connected to ...
...condition. To reduce the risk of fire or burns, do not dispose of a used battery WARNING! NOTE: To ensure that you always have battery power when you to replace the battery when an internal cell is possibly covered by an HP warranty, instructions include a warranty ...contacts; Disposing of in fire or water. For additional information, refer to the computer, and other factors. Using battery power 61 Replacing the battery Computer battery life varies, depending on power management settings, programs running on the computer, display brightness, external devices connected to ...

Notebook PC User Guide - Windows 7
Page 73
.... Click Shut down the computer 63 Shut down the computer under any of the following conditions: ● When you need to replace the battery or access components inside the computer ● When you are unable to use the preceding shutdown procedures, try the following emergency procedures... be unused and disconnected from external power for at least 5 seconds. ● Disconnect the computer from external power, and then remove the battery. Click Start. 3. Save your work and close all open programs. 2. Shutting down the computer CAUTION: Unsaved information will be lost when ...
.... Click Shut down the computer 63 Shut down the computer under any of the following conditions: ● When you need to replace the battery or access components inside the computer ● When you are unable to use the preceding shutdown procedures, try the following emergency procedures... be unused and disconnected from external power for at least 5 seconds. ● Disconnect the computer from external power, and then remove the battery. Click Start. 3. Save your work and close all open programs. 2. Shutting down the computer CAUTION: Unsaved information will be lost when ...

Notebook PC User Guide - Windows 7
Page 90
Replacing the hard drive CAUTION: To prevent information loss or an unresponsive system: Shut down the computer before removing the hard drive from the computer. 7. To ... drive: 1. Save your work. 2. Turn the computer upside down on by pressing the power button. Disconnect all external devices connected to the computer. 4. Remove the battery from the hard drive bay. Lift the hard drive cover away from the AC outlet. 5. Do not remove the hard drive while the computer is...
Replacing the hard drive CAUTION: To prevent information loss or an unresponsive system: Shut down the computer before removing the hard drive from the computer. 7. To ... drive: 1. Save your work. 2. Turn the computer upside down on by pressing the power button. Disconnect all external devices connected to the computer. 4. Remove the battery from the hard drive bay. Lift the hard drive cover away from the AC outlet. 5. Do not remove the hard drive while the computer is...

Notebook PC User Guide - Windows 7
Page 93
Tighten the hard drive cover screws (3). 6. Turn the computer right-side up. 8. 5. Replacing the hard drive 83 Reconnect any external devices. Reconnect power to the computer. 9. Replace the battery. 7.
Tighten the hard drive cover screws (3). 6. Turn the computer right-side up. 8. 5. Replacing the hard drive 83 Reconnect any external devices. Reconnect power to the computer. 9. Replace the battery. 7.

Notebook PC User Guide - Windows 7
Page 98
... module compartment screws (1). 88 Chapter 8 Adding or replacing a memory module If you are the same size. WARNING! To add or replace a memory module: 1. Then shut down the computer through the operating system. 3. Disconnect all batteries before installing a memory module. To reduce the risk... of the computer. 8 Adding or replacing a memory module The computer has one...
... module compartment screws (1). 88 Chapter 8 Adding or replacing a memory module If you are the same size. WARNING! To add or replace a memory module: 1. Then shut down the computer through the operating system. 3. Disconnect all batteries before installing a memory module. To reduce the risk... of the computer. 8 Adding or replacing a memory module The computer has one...

Notebook PC User Guide - Windows 7
Page 100
... do not bend the memory module. Align the tab (1) on the computer. 12. Do not touch the components on the computer. 90 Chapter 8 Adding or replacing a memory module a. b. Replace the battery. 15. Close the cover (2). 13.
... do not bend the memory module. Align the tab (1) on the computer. 12. Do not touch the components on the computer. 90 Chapter 8 Adding or replacing a memory module a. b. Replace the battery. 15. Close the cover (2). 13.

Notebook PC User Guide - Windows 7
Page 122
...56 disposing 61 inserting 54 low battery levels 56 recharging 59 removing 54 replacing 61 storing 60 battery bay 12 battery bay, identifying 8 Battery Check 53 battery power 53 battery release latch 54 battery release latch, identifying 8 battery temperature 60 battery, identifying 11 bays battery 8, 12 hard drive 8 BD ... copying 71 playing 68 removing 73 CD drive 78 Certificate of Authenticity label 12 changing the language of Setup Utility 98 charging batteries 55, 57 checking audio functions 40 compartments memory module 8 components additional hardware 11 bottom 8 display 9 left-side 7 right...
...56 disposing 61 inserting 54 low battery levels 56 recharging 59 removing 54 replacing 61 storing 60 battery bay 12 battery bay, identifying 8 Battery Check 53 battery power 53 battery release latch 54 battery release latch, identifying 8 battery temperature 60 battery, identifying 11 bays battery 8, 12 hard drive 8 BD ... copying 71 playing 68 removing 73 CD drive 78 Certificate of Authenticity label 12 changing the language of Setup Utility 98 charging batteries 55, 57 checking audio functions 40 compartments memory module 8 components additional hardware 11 bottom 8 display 9 left-side 7 right...

Notebook PC User Guide - Windows 7
Page 123
... 17 firewall software 95 fn key, identifying 5 full system recovery 106 G graphics modes, switching 62 H hard drive installing 82 removing 80 replacing 80 hard drive bay, identifying 8 hard drive self test 101 HDMI connecting 42 HDMI port 42 HDMI port, identifying 7 headphone (audio-out... Certificate of Authenticity 12 modem approval 12 regulatory 12 service tag 12 wireless certification 12 WLAN 12 LAN Power Saving 101 language support 101 latch, battery release 8 lights caps lock 3 optical drive 6 power 3, 6 TouchPad 2 TouchPad off indicator 28 webcam 9 webcam light 9 wireless 3 local area ...
... 17 firewall software 95 fn key, identifying 5 full system recovery 106 G graphics modes, switching 62 H hard drive installing 82 removing 80 replacing 80 hard drive bay, identifying 8 hard drive self test 101 HDMI connecting 42 HDMI port 42 HDMI port, identifying 7 headphone (audio-out... Certificate of Authenticity 12 modem approval 12 regulatory 12 service tag 12 wireless certification 12 WLAN 12 LAN Power Saving 101 language support 101 latch, battery release 8 lights caps lock 3 optical drive 6 power 3, 6 TouchPad 2 TouchPad off indicator 28 webcam 9 webcam light 9 wireless 3 local area ...


