
User Manual
Page 1
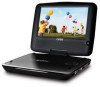
TFDVD1029 10.1″ Widescreen TFT Portable DVD/CD/MP3 Player Instruction Manual Please read this manual carefully before operation.
TFDVD1029 10.1″ Widescreen TFT Portable DVD/CD/MP3 Player Instruction Manual Please read this manual carefully before operation.

User Manual
Page 2
Model No. CAUTION: This Digital Video Disc player employs a laser system. FCC Notice: FCC Statement:this product will not occur in a particular installation. Increase the separation between the equipment and receiver.- Use of ... may cause undesired operation. PRECAUTIONS CAUTION RISK OF ELECTRIC SHOCK DO NOT OPEN For Customer Use: Enter below the serial number that is protected by U.S. TFDVD1029 The lightning flash with the instructions, may result in the literature accompanying the appliance. Use of this equipment does cause harmful interference to correct the...
Model No. CAUTION: This Digital Video Disc player employs a laser system. FCC Notice: FCC Statement:this product will not occur in a particular installation. Increase the separation between the equipment and receiver.- Use of ... may cause undesired operation. PRECAUTIONS CAUTION RISK OF ELECTRIC SHOCK DO NOT OPEN For Customer Use: Enter below the serial number that is protected by U.S. TFDVD1029 The lightning flash with the instructions, may result in the literature accompanying the appliance. Use of this equipment does cause harmful interference to correct the...

User Manual
Page 7
......17 Previous /Next (Skip)...17 Forward/Reverse (Search 17 Slow/Step...17 Menu Navigation...18 Numeric Keypad...18 Disc Error Messages...18 Power Management...18 PLAYER FUNCTIONS...19 Menu/Title...19 Setup...19 Display...19 CD/DVD...19 JPEG...19 Repeat Mode...19 Repeat A-B Mode...20 7
......17 Previous /Next (Skip)...17 Forward/Reverse (Search 17 Slow/Step...17 Menu Navigation...18 Numeric Keypad...18 Disc Error Messages...18 Power Management...18 PLAYER FUNCTIONS...19 Menu/Title...19 Setup...19 Display...19 CD/DVD...19 JPEG...19 Repeat Mode...19 Repeat A-B Mode...20 7

User Manual
Page 10
... surface of the disc. Small dust particles and light stains will damage the surface of the following discs. ABOUT OPTICAL DISCS Disc Requirements This DVD player supports playback of the disc permanently. 10 Playback Time 133 min (SS-SL) 242 min (SS-DL) 266 min (DS-SL) 484 min (DS-DL...
... surface of the disc. Small dust particles and light stains will damage the surface of the following discs. ABOUT OPTICAL DISCS Disc Requirements This DVD player supports playback of the disc permanently. 10 Playback Time 133 min (SS-SL) 242 min (SS-DL) 266 min (DS-SL) 484 min (DS-DL...

User Manual
Page 14
b). Slide the AV switch to the external input source by the RCA cable. Connect the player to OUT position. b). Output the AV Signal a). AV IN - Before connecting the DVD player to a TV set, be sure to TV or the moniter by the RCA cable. Input the AV Signal a). TV / Moniter / ...External AV Source To VIDEO To AUDIO Audio/Video cable To AUDIO/ VIDEO NOTE: 1. CONNECTIONS Audio & Video Connections AV Out - Connect the player to turn the power off and unplug both units from the wall outlet. Slide the AV switch to the owner's manual of your TV as...
b). Slide the AV switch to the external input source by the RCA cable. Connect the player to OUT position. b). Output the AV Signal a). AV IN - Before connecting the DVD player to a TV set, be sure to TV or the moniter by the RCA cable. Input the AV Signal a). TV / Moniter / ...External AV Source To VIDEO To AUDIO Audio/Video cable To AUDIO/ VIDEO NOTE: 1. CONNECTIONS Audio & Video Connections AV Out - Connect the player to turn the power off and unplug both units from the wall outlet. Slide the AV switch to the owner's manual of your TV as...

User Manual
Page 15
...8226; When the built-in battery power is charging; See above. (The Battery Charge indicator will light red while it for a while, and then the player will go off automatically. It takes about 4 hours to fully charge the battery. • To charge the built-in battery, just connect the AC ... low, the low battery icon will flash on the upper right corner of in high temperature or near heat sources. Refer servicing only to the player and a specified wall outlet. CONNECTIONS Power Connection • Connecting to the wall outlet Caution: • Do not connect the power plug to do...
...8226; When the built-in battery power is charging; See above. (The Battery Charge indicator will light red while it for a while, and then the player will go off automatically. It takes about 4 hours to fully charge the battery. • To charge the built-in battery, just connect the AC ... low, the low battery icon will flash on the upper right corner of in high temperature or near heat sources. Refer servicing only to the player and a specified wall outlet. CONNECTIONS Power Connection • Connecting to the wall outlet Caution: • Do not connect the power plug to do...

User Manual
Page 19
PLAYER FUNCTIONS , All 19
PLAYER FUNCTIONS , All 19
User Manual
Page 20
exit 20 and playback. PLAYER FUNCTIONS In JPEG Mode 100% Clear Search by display the search bar shown below: 02/12 03/06 Current Title Total Chapters Total Titles Current Chapter _:__:__ In DVD mode, p numeric Play/Pause 5.
exit 20 and playback. PLAYER FUNCTIONS In JPEG Mode 100% Clear Search by display the search bar shown below: 02/12 03/06 Current Title Total Chapters Total Titles Current Chapter _:__:__ In DVD mode, p numeric Play/Pause 5.

User Manual
Page 21
... and press the ENTER button to confirm. Repeat steps 1-3 until you have finished programming your selections or when you have programmed the maximum 20 tracks. 6. PLAYER FUNCTIONS Press the LCD Mode button once to show the picture below: • Press the Up/Down direction button to select the desired item, press...
... and press the ENTER button to confirm. Repeat steps 1-3 until you have finished programming your selections or when you have programmed the maximum 20 tracks. 6. PLAYER FUNCTIONS Press the LCD Mode button once to show the picture below: • Press the Up/Down direction button to select the desired item, press...

User Manual
Page 22
PLAYER FUNCTIONS CD Program Mode Track 1. Press the CLEAR/STOP button to cancel. 22 Repeat steps 1-2 until you have finished programming your selections or when you have programmed the maximum 20 tracks. 5. Press the PROGRAM button to delete. 6. The programmed track will be listed in the left column. 4. Load a CD and press the PROGRAM button. 2. Press the DIRECTION buttons to select the Track and press the ENTER button to start playback. Press the Play/Pause button to confirm. 3.
PLAYER FUNCTIONS CD Program Mode Track 1. Press the CLEAR/STOP button to cancel. 22 Repeat steps 1-2 until you have finished programming your selections or when you have programmed the maximum 20 tracks. 5. Press the PROGRAM button to delete. 6. The programmed track will be listed in the left column. 4. Load a CD and press the PROGRAM button. 2. Press the DIRECTION buttons to select the Track and press the ENTER button to start playback. Press the Play/Pause button to confirm. 3.

User Manual
Page 23
Press ENTER to select the desired item. 3. Language Setup ACB OSDACB Menu Audio Subtitle Language Setup Encoding Screen Setup Sets the Encoding Mode Western European 23 Press the direction buttons to confirm. Press the SETUP button to show the setup menu. 2. SETUP Various features of the player can be adjusted in the SETUP menu 1.
Press ENTER to select the desired item. 3. Language Setup ACB OSDACB Menu Audio Subtitle Language Setup Encoding Screen Setup Sets the Encoding Mode Western European 23 Press the direction buttons to confirm. Press the SETUP button to show the setup menu. 2. SETUP Various features of the player can be adjusted in the SETUP menu 1.

User Manual
Page 24
Sets the Angle Mark on/off Sets all settings to factory default state Style1 ON Read 24 SETUP Digital Out Downmix Custom Setup Lo/Ro,Lt/Rt Parental Control W Off SPDIF/RAW Lo/Ro Password Style Angle Mark Default Sets the style of the menus of the player.
Sets the Angle Mark on/off Sets all settings to factory default state Style1 ON Read 24 SETUP Digital Out Downmix Custom Setup Lo/Ro,Lt/Rt Parental Control W Off SPDIF/RAW Lo/Ro Password Style Angle Mark Default Sets the style of the menus of the player.
User Manual
Page 26
...-side up . 26 Clean the disc or try another one. • Reset your player from the Setup menu. • Select a different aspect ratio option from the DVD disc menu. COBY Electronics Technical Support 150 Knowlton Way Savannah, GA 31407 Email: [email protected] Web: www.cobyusa.com Phone...8226; Check if the connection cables are damaged. There is set up . • Ensure that the disc's rating level does not exceed the player's parental rating level. • Ensure that the Power Switch on for Frequently Asked Questions (FAQs) and firmware updates. If these resources do...
...-side up . 26 Clean the disc or try another one. • Reset your player from the Setup menu. • Select a different aspect ratio option from the DVD disc menu. COBY Electronics Technical Support 150 Knowlton Way Savannah, GA 31407 Email: [email protected] Web: www.cobyusa.com Phone...8226; Check if the connection cables are damaged. There is set up . • Ensure that the disc's rating level does not exceed the player's parental rating level. • Ensure that the Power Switch on for Frequently Asked Questions (FAQs) and firmware updates. If these resources do...
User Manual
Page 27
the restore function should reset the player. 27 The player has malfunctioned. • Unplug the player. After 30 minutes, plug in the remote retain a charge and have been installed correctly. • Try replacing the remote's batteries. TROUBLESHOOTING • Ensure ...that the TV and amplifier connections are no obstacles between the remote and the player. • Point the remote at the remote sensor on the player -- The remote control doesn't work. • Ensure that the Power Switch has been physically set to the ON position....
the restore function should reset the player. 27 The player has malfunctioned. • Unplug the player. After 30 minutes, plug in the remote retain a charge and have been installed correctly. • Try replacing the remote's batteries. TROUBLESHOOTING • Ensure ...that the TV and amplifier connections are no obstacles between the remote and the player. • Point the remote at the remote sensor on the player -- The remote control doesn't work. • Ensure that the Power Switch has been physically set to the ON position....


