Hardware Installation Guide
Page 58
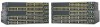
... cable specifications for 1000BASE-X and 100BASE-X small form-factor (SFP) modules available for the Catalyst 2960 switch. Cable locks are separated on switches... 2960-8TC-S, and 2960PD-8TT-L switches cable guard part number: CBLGRD-C2960-8TC= • Catalyst 2960G-8TC-L switch cable guard part number: ... and 48-Port Switches)." To order a cable guard, contact your Cisco representative and use shorter lengths of single-mode fiber-optic cable, you... Chapter 3 Switch Installation (8-Port Switches) • Do not stack switches or place switches side-by-side unless they are available from...
... cable specifications for 1000BASE-X and 100BASE-X small form-factor (SFP) modules available for the Catalyst 2960 switch. Cable locks are separated on switches... 2960-8TC-S, and 2960PD-8TT-L switches cable guard part number: CBLGRD-C2960-8TC= • Catalyst 2960G-8TC-L switch cable guard part number: ... and 48-Port Switches)." To order a cable guard, contact your Cisco representative and use shorter lengths of single-mode fiber-optic cable, you... Chapter 3 Switch Installation (8-Port Switches) • Do not stack switches or place switches side-by-side unless they are available from...

Hardware Installation Guide
Page 60
... port, and run Express Setup. See the "Connecting to the 10/100 and 10/100/1000 Ports" section on page 2-14, the "Connecting to SFP Modules" section on page 2-18, and the "Connecting to the recessed areas on all sides by -side unless they are separated on the bottom of the... you do these steps: Step 1 Step 2 Locate the adhesive strip with Rack-Mount Brackets), page 3-16 Desk- If you attach the rubber feet. Do not stack switches or place switches side-by at least 3 inches (7.6 cm) of clearance from the adhesive strip, and attach them to a Dual-Purpose Port" section on...
... port, and run Express Setup. See the "Connecting to the 10/100 and 10/100/1000 Ports" section on page 2-14, the "Connecting to SFP Modules" section on page 2-18, and the "Connecting to the recessed areas on all sides by -side unless they are separated on the bottom of the... you do these steps: Step 1 Step 2 Locate the adhesive strip with Rack-Mount Brackets), page 3-16 Desk- If you attach the rubber feet. Do not stack switches or place switches side-by at least 3 inches (7.6 cm) of clearance from the adhesive strip, and attach them to a Dual-Purpose Port" section on...
Hardware Installation Guide
Page 107
... 1-21 serial number location 4-6 SFP modules 1000BASE-T supported speeds 1-17 bale-clasp...management platforms 1-22 software switch management 1-22 specifications A-1 speed, troubleshooting 4-4 stacking the chassis warning 2-2, 3-2 straight-through cable pinout four twisted-pair 1000BASE-T...speed, duplex, and autonegotiation 4-4 switch performance 4-4 troubleshooting spanning tree loops 4-4 W wall-mounting 2-11, 3-16 warnings attaching the Cisco RPS 2-2, 2-6 circuit protection 2-3 class 1 laser product 2-3, 3-2 disconnecting device 2-3 Ethernet cables 2-2, 3-2 Ethernet ports 3-3 ground ...
... 1-21 serial number location 4-6 SFP modules 1000BASE-T supported speeds 1-17 bale-clasp...management platforms 1-22 software switch management 1-22 specifications A-1 speed, troubleshooting 4-4 stacking the chassis warning 2-2, 3-2 straight-through cable pinout four twisted-pair 1000BASE-T...speed, duplex, and autonegotiation 4-4 switch performance 4-4 troubleshooting spanning tree loops 4-4 W wall-mounting 2-11, 3-16 warnings attaching the Cisco RPS 2-2, 2-6 circuit protection 2-3 class 1 laser product 2-3, 3-2 disconnecting device 2-3 Ethernet cables 2-2, 3-2 Ethernet ports 3-3 ground ...


