
User Guide
Page 2
.... CASIO COMPUTER CO., LTD. You are registered trademarks of CASIO COMPUTER CO., LTD. CASIO COMPUTER CO., ...with the XJ-A130, XJ-A140, XJ-A230, and XJ-A240 E-9 Using the CD-ROM that comes with the XJ-A135, XJ-A145, XJ-A235, and XJ-A245 ...E-10 General Guide E-11 Preparing the Remote Controller E-12 Getting Ready E-14 Setting Up the Projector E-14 Setup Precautions E-15 Adjusting the Projector Elevation Angle.......E-16 Connecting a Computer to the Projector .....E-17 Connecting to a Standard Video Device ......E-17 Turning...
.... CASIO COMPUTER CO., LTD. You are registered trademarks of CASIO COMPUTER CO., LTD. CASIO COMPUTER CO., ...with the XJ-A130, XJ-A140, XJ-A230, and XJ-A240 E-9 Using the CD-ROM that comes with the XJ-A135, XJ-A145, XJ-A235, and XJ-A245 ...E-10 General Guide E-11 Preparing the Remote Controller E-12 Getting Ready E-14 Setting Up the Projector E-14 Setup Precautions E-15 Adjusting the Projector Elevation Angle.......E-16 Connecting a Computer to the Projector .....E-17 Connecting to a Standard Video Device ......E-17 Turning...
User Guide
Page 3
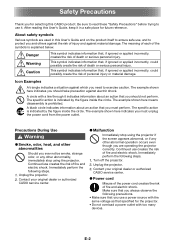
... risk of injury and against material damage. Immediately perform the following steps. 1. Unplug the projector. 3. Contact your original dealer or authorized CASIO service center. ● Malfunction - Safety Precautions Thank you for selecting this User's Guide, keep it in this User's Guide and on... here indicates you should take precaution against which you need to exercise caution. Should you use a power source with too many devices. Turn off the projector. 2. Make sure that you always observe the following precautions. • Make sure that you ever notice smoke, strange...
... risk of injury and against material damage. Immediately perform the following steps. 1. Unplug the projector. 3. Contact your original dealer or authorized CASIO service center. ● Malfunction - Safety Precautions Thank you for selecting this User's Guide, keep it in this User's Guide and on... here indicates you should take precaution against which you need to exercise caution. Should you use a power source with too many devices. Turn off the projector. 2. Make sure that you always observe the following precautions. • Make sure that you ever notice smoke, strange...
User Guide
Page 4
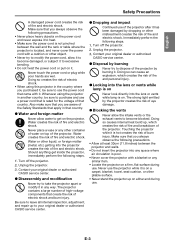
...way. Touching the projector while it . Should anything get on - Continued use a power cord that you always observe the following steps. 1. Turn off the projector. 2. Unplug the projector. 3. Make sure that is on the projector. Whenever using this projector in another country, be ... using the projector in the country where you are wet. " Never touch the power cord or plug while your original dealer or authorized CASIO service center. ● Disassembly and modification ! Water creates the risk of fire and electric shock. % Water or other pliable surface. ...
...way. Touching the projector while it . Should anything get on - Continued use a power cord that you always observe the following steps. 1. Turn off the projector. 2. Unplug the projector. 3. Make sure that is on the projector. Whenever using this projector in another country, be ... using the projector in the country where you are wet. " Never touch the power cord or plug while your original dealer or authorized CASIO service center. ● Disassembly and modification ! Water creates the risk of fire and electric shock. % Water or other pliable surface. ...
User Guide
Page 5
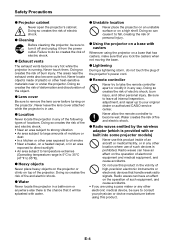
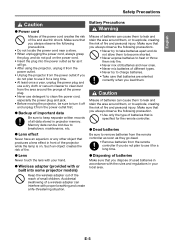
...sure that handle weak radio signals. Be sure to leave all internal inspection, adjustment, and repair up to your physician or device manufacturer before turning on a base with or built into some projector models) - Never touch them. Doing so creates the risk of deformation and discoloration of ...The exhaust vents become very hot while the projector is 5°C to 35°C (41°F to consult your original dealer or authorized CASIO service center. + Never allow the remote controller to remove the lens cover before using this product in an area exposed to direct sunlight •...
...sure that handle weak radio signals. Be sure to leave all internal inspection, adjustment, and repair up to your physician or device manufacturer before turning on a base with or built into some projector models) - Never touch them. Doing so creates the risk of deformation and discoloration of ...The exhaust vents become very hot while the projector is 5°C to 35°C (41°F to consult your original dealer or authorized CASIO service center. + Never allow the remote controller to remove the lens cover before using this product in an area exposed to direct sunlight •...
User Guide
Page 6
... area around the prongs of the power plug. • Never use it from the power outlet first. ● Backup of important data + Be sure to turn it off and unplug it for a long time. ● Lens Never touch the lens with or built into some projector models) - Make sure that you...
... area around the prongs of the power plug. • Never use it from the power outlet first. ● Backup of important data + Be sure to turn it off and unplug it for a long time. ● Lens Never touch the lens with or built into some projector models) - Make sure that you...
User Guide
Page 9
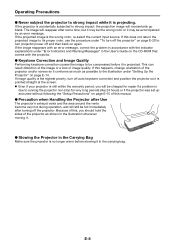
... as possible to the illustration under "Setting Up the Projector" on the CD-ROM that comes with the indicator explanations under "To turn off the projector" on again. If the projected image is accidentally subjected to strong impact, the projection image will still be hot immediately ...exhaust vents and the area around the vents become very hot during operation, and will momentarily go blank. If image quality is the highest priority, turn projector power off the projector. E-8 If the image reappears with an error message, correct the problem in the User's Guide on page E-14....
... as possible to the illustration under "Setting Up the Projector" on the CD-ROM that comes with the indicator explanations under "To turn off the projector" on again. If the projected image is accidentally subjected to strong impact, the projection image will still be hot immediately ...exhaust vents and the area around the vents become very hot during operation, and will momentarily go blank. If image quality is the highest priority, turn projector power off the projector. E-8 If the image reappears with an error message, correct the problem in the User's Guide on page E-14....
User Guide
Page 15
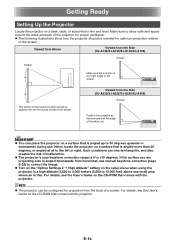
... the projector on a surface that comes with the projector. NOTE The projector can be configured for projection from the Side (XJ-A230/XJ-A235/XJ-A240/XJ-A245) Screen Position the projector so the lens side is at a right angle to 30 degrees upwards or downwards during use. Such ...-ROM that is firm and level. Viewed from Above Viewed from horizontal, use manual keystone correction (page E-22) to correct the image. Turn on the "Option Settings 2 High Altitude" setting on a surface that comes with the horizontal center of the screen. Important! ...
... the projector on a surface that comes with the projector. NOTE The projector can be configured for projection from the Side (XJ-A230/XJ-A235/XJ-A240/XJ-A245) Screen Position the projector so the lens side is at a right angle to 30 degrees upwards or downwards during use. Such ...-ROM that is firm and level. Viewed from Above Viewed from horizontal, use manual keystone correction (page E-22) to correct the image. Turn on the "Option Settings 2 High Altitude" setting on a surface that comes with the horizontal center of the screen. Important! ...
User Guide
Page 18
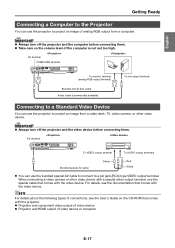
... Connecting a Computer to the Projector You can use the projector to project an image of the computer is not set too high. Important! Always turn off the projector and the computer before connecting them . Take care so the volume level of analog RGB output from a video deck, TV, video... available) To line output terminal Connecting to a pin jack (RCA) type VIDEO output terminal. When connecting a video camera or other video device. Important! Always turn off the projector and the video device before connecting them .
... Connecting a Computer to the Projector You can use the projector to project an image of the computer is not set too high. Important! Always turn off the projector and the computer before connecting them . Take care so the volume level of analog RGB output from a video deck, TV, video... available) To line output terminal Connecting to a pin jack (RCA) type VIDEO output terminal. When connecting a video camera or other video device. Important! Always turn off the projector and the video device before connecting them .
User Guide
Page 19
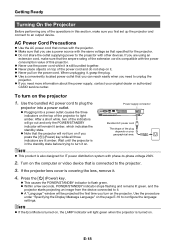
Getting Ready Turning On the Projector Before performing any of the projector to light amber. Use the bundled AC power cord to plug the projector into a power outlet. Plugging into a power outlet causes the three indicators on your original dealer or authorized CASIO service center. After a ...short while, two of the plug depends on the top of the operations in the standby state before trying to the projector. 3. NOTE This product is turned on . If the projector lens cover ...
Getting Ready Turning On the Projector Before performing any of the projector to light amber. Use the bundled AC power cord to plug the projector into a power outlet. Plugging into a power outlet causes the three indicators on your original dealer or authorized CASIO service center. After a ...short while, two of the plug depends on the top of the operations in the standby state before trying to the projector. 3. NOTE This product is turned on . If the projector lens cover ...
User Guide
Page 20
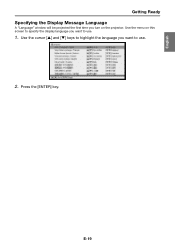
Use the cursor [] and [] keys to highlight the language you turn on this screen to specify the display language you want to use . 2. Press the [ENTER] key. English Getting Ready Specifying the Display Message Language A "Language" window will be projected the first time you want to use . 1. E-19 Use the menu on the projector.
Use the cursor [] and [] keys to highlight the language you turn on this screen to specify the display language you want to use . 2. Press the [ENTER] key. English Getting Ready Specifying the Display Message Language A "Language" window will be projected the first time you want to use . 1. E-19 Use the menu on the projector.
User Guide
Page 21
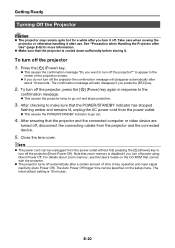
...the connected device. 5. After ensuring that zoom memory is 10 minutes. Note that the projector and the connected computer or video device are turned off . Take care when moving the projector or otherwise handling it off , disconnect the connecting cables from the power outlet without first pressing...cover. See "Precaution when Handling the Projector after a certain amount of time of the projection screen. If you do not turn off the projector 1. The Auto Power Off trigger time can be specified on the CD-ROM that the POWER/STANDBY indicator has stopped ...
...the connected device. 5. After ensuring that zoom memory is 10 minutes. Note that the projector and the connected computer or video device are turned off . Take care when moving the projector or otherwise handling it off , disconnect the connecting cables from the power outlet without first pressing...cover. See "Precaution when Handling the Projector after a certain amount of time of the projection screen. If you do not turn off the projector 1. The Auto Power Off trigger time can be specified on the CD-ROM that the POWER/STANDBY indicator has stopped ...
User Guide
Page 22
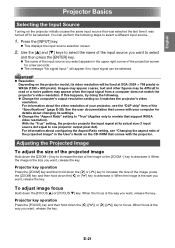
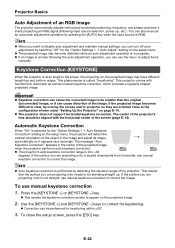
... perform the following . Change the computer's output resolution setting so it . English Projector Basics Selecting the Input Source Turning on the projector initially causes the same input source that was turned off to be selected. When focus is the size you want , release the key. When the image is the way...
... perform the following . Change the computer's output resolution setting so it . English Projector Basics Selecting the Input Source Turning on the projector initially causes the same input source that was turned off to be selected. When focus is the size you want , release the key. When the image is the way...
User Guide
Page 23
... adjustment operation by detecting the elevation angle of the projector. NOTE When you want to disable auto adjustment and maintain manual settings, you can turn off auto adjustment by selecting "Off" for the "Option Settings 1 Auto Adjust" setting on the setup menu, the projector will detect the vertical orientation...
... adjustment operation by detecting the elevation angle of the projector. NOTE When you want to disable auto adjustment and maintain manual settings, you can turn off auto adjustment by selecting "Off" for the "Option Settings 1 Auto Adjust" setting on the setup menu, the projector will detect the vertical orientation...
User Guide
Page 25
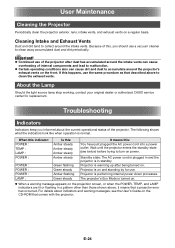
... Continued use . About the Lamp Should the light source lamp stop working, contact your original dealer or authorized CASIO service center for use of the projector after being turned on power. POWER : Amber steady Standby state: The AC power cord is plugged in a pattern other than ...those shown above to turn on . POWER : Green flashing Projector is turned on. When a warning message appears on the front. For details about the current operational status of internal components...
... Continued use . About the Lamp Should the light source lamp stop working, contact your original dealer or authorized CASIO service center for use of the projector after being turned on power. POWER : Amber steady Standby state: The AC power cord is plugged in a pattern other than ...those shown above to turn on . POWER : Green flashing Projector is turned on. When a warning message appears on the front. For details about the current operational status of internal components...
User Guide
Page 26
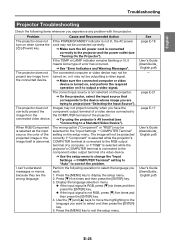
... E-17 User's Guide (UsersGuide_ English.pdf) User's Guide (UsersGuide_ English.pdf) E-25 Problem Cause and Recommended Action The projector does not turn on the projector. ➔ On the projector, select the input source that corresponds to the device whose image you are the wrong language.... Warning Messages". Press the [MENU] key to exit the setup menu. connected video device. ➔ Try using the projector's AV terminal (see "Turning On the Projector"). I press the [P] (Power) key. If the TEMP or LAMP indicator remains flashing or lit, it may not be outputting ...
... E-17 User's Guide (UsersGuide_ English.pdf) User's Guide (UsersGuide_ English.pdf) E-25 Problem Cause and Recommended Action The projector does not turn on the projector. ➔ On the projector, select the input source that corresponds to the device whose image you are the wrong language.... Warning Messages". Press the [MENU] key to exit the setup menu. connected video device. ➔ Try using the projector's AV terminal (see "Turning On the Projector"). I press the [P] (Power) key. If the TEMP or LAMP indicator remains flashing or lit, it may not be outputting ...
User Guide
Page 27
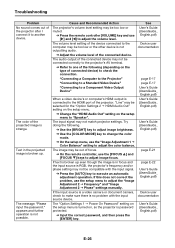
... protected. ➔ Input the correct password, and then press the [ENTER] key. The "Option Settings 1 Power On Password" setting on the setup menu is turned on, so the projector is not possible. Text in focus and the input source is RGB, the projector's frequency and/or phase setting may not...
... protected. ➔ Input the correct password, and then press the [ENTER] key. The "Option Settings 1 Power On Password" setting on the setup menu is turned on, so the projector is not possible. Text in focus and the input source is RGB, the projector's frequency and/or phase setting may not...

User Guide
Page 28
...27 Important! Try performing the following steps, which may or may be dead. Plug the power cord back in and turn the projector back on again. If normal operation does not resume after you operate it. The TEMP or LAMP indicator ...replacement. Lamp does not light. Cause and Recommended Action See The remote controller batteries may not return the projector to your original dealer or authorized CASIO service center for at least 10 minutes. 2. User's Guide (UsersGuide_ English.pdf) ➔ See "Error Indicators and Warning Messages". English ...
...27 Important! Try performing the following steps, which may or may be dead. Plug the power cord back in and turn the projector back on again. If normal operation does not resume after you operate it. The TEMP or LAMP indicator ...replacement. Lamp does not light. Cause and Recommended Action See The remote controller batteries may not return the projector to your original dealer or authorized CASIO service center for at least 10 minutes. 2. User's Guide (UsersGuide_ English.pdf) ➔ See "Error Indicators and Warning Messages". English ...

User Guide
Page 34
...with the limits for help. If this device must be determined by turning the equipment off and on a circuit different from that interference will not occur in a residential installation. Responsible party: CASIO AMERICA, INC. FCC WARNING Changes or modifications not expressly approved by one... for connection to host computer and/or peripherals in accordance with Part 15 of Conformity Model Number: XJ-A130/XJ-A135/XJ-A140/XJ-A145/XJ-A230/XJ-A235/XJ-A240/XJ-A245 Trade Name: CASIO COMPUTER CO., LTD. PLEASANT AVENUE, DOVER, NEW JERSEY 07801 Telephone number: 973-361-5400 This ...
...with the limits for help. If this device must be determined by turning the equipment off and on a circuit different from that interference will not occur in a residential installation. Responsible party: CASIO AMERICA, INC. FCC WARNING Changes or modifications not expressly approved by one... for connection to host computer and/or peripherals in accordance with Part 15 of Conformity Model Number: XJ-A130/XJ-A135/XJ-A140/XJ-A145/XJ-A230/XJ-A235/XJ-A240/XJ-A245 Trade Name: CASIO COMPUTER CO., LTD. PLEASANT AVENUE, DOVER, NEW JERSEY 07801 Telephone number: 973-361-5400 This ...
User Guide
Page 35
... interference will not occur in a residential installation. Operation is no guarantee that may not cause harmful interference, and (2) this device must not be determined by turning the equipment off and on a circuit different from that to which can radiate radio frequency energy and, if not installed and used in conjunction with...
... interference will not occur in a residential installation. Operation is no guarantee that may not cause harmful interference, and (2) this device must not be determined by turning the equipment off and on a circuit different from that to which can radiate radio frequency energy and, if not installed and used in conjunction with...
User Manual
Page 3
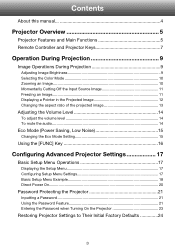
... Setup Menu Example 18 Direct Power On...20 Password Protecting the Projector 21 Inputting a Password 21 Using the Password Feature 21 Entering the Password when Turning On the Projector 23 Restoring Projector Settings to Their Initial Factory Defaults 24 3
... Setup Menu Example 18 Direct Power On...20 Password Protecting the Projector 21 Inputting a Password 21 Using the Password Feature 21 Entering the Password when Turning On the Projector 23 Restoring Projector Settings to Their Initial Factory Defaults 24 3