
Users Manual - English
Page 2
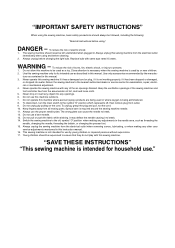
... or service center for its intended use this sewing machine from outlet. 9. Always unplug the sewing machine from the accumulation of electric shock: 1. Young children should never be followed, including the following: "Read all moving parts. Always unplug this machine outdoors. 7. Always unplug before cleaning. 2....unplug, grasp the plug and pull, not the cord. 10. Always use a bent needle. 13. Switch the sewing machine to break. 14. The sewing machine should be used by young children or impaired persons without supervision. 17. Special care is not working properly, if...
... or service center for its intended use this sewing machine from outlet. 9. Always unplug the sewing machine from the accumulation of electric shock: 1. Young children should never be followed, including the following: "Read all moving parts. Always unplug this machine outdoors. 7. Always unplug before cleaning. 2....unplug, grasp the plug and pull, not the cord. 10. Always use a bent needle. 13. Switch the sewing machine to break. 14. The sewing machine should be used by young children or impaired persons without supervision. 17. Special care is not working properly, if...
Users Manual - English
Page 7
CONTENTS CONTENTS KNOWING YOUR SEWING MACHINE STRAIGHT AND ZIGZAG STITCHING KNOWING YOUR SEWING MACHINE PRINCIPAL PARTS 2 ACCESSORIES 3 OPERATING YOUR SEWING MACHINE 4 Connecting Plugs 4 Main Power and Sewing Light Switches 5 Foot Controller 5 Inserting the Needle 6 Checking the Needle 6 Changing the Presser Foot 7 Converting to Free-Arm Style 8 Steadying the Machine 8 VARIOUS CONTROLS 9 Stitch Length Dial 9 Reverse Sewing Lever 10 Stitch Width Dial...
CONTENTS CONTENTS KNOWING YOUR SEWING MACHINE STRAIGHT AND ZIGZAG STITCHING KNOWING YOUR SEWING MACHINE PRINCIPAL PARTS 2 ACCESSORIES 3 OPERATING YOUR SEWING MACHINE 4 Connecting Plugs 4 Main Power and Sewing Light Switches 5 Foot Controller 5 Inserting the Needle 6 Checking the Needle 6 Changing the Presser Foot 7 Converting to Free-Arm Style 8 Steadying the Machine 8 VARIOUS CONTROLS 9 Stitch Length Dial 9 Reverse Sewing Lever 10 Stitch Width Dial...
Users Manual - English
Page 76
... Stitch 49 P Performance Checklist 57-58 Presser Foot Replacement 7 Principal Parts 2 R Repacking 65 S Sewing Direction 26 Sewing Fabric Edges 27 Sewing Light Bulb Replacement 53 Switch 5 Sewing on Very Thin Fabric 29 Shuttle Hook Removal 55 Shuttle Race Cleaning 55 Spool Installing 16 Steadying the Machine 8 Stitch Length Dial 9 Stitch Width Dial 11 Straight Stitching 25...
... Stitch 49 P Performance Checklist 57-58 Presser Foot Replacement 7 Principal Parts 2 R Repacking 65 S Sewing Direction 26 Sewing Fabric Edges 27 Sewing Light Bulb Replacement 53 Switch 5 Sewing on Very Thin Fabric 29 Shuttle Hook Removal 55 Shuttle Race Cleaning 55 Spool Installing 16 Steadying the Machine 8 Stitch Length Dial 9 Stitch Width Dial 11 Straight Stitching 25...
User Manual - French
Page 2
... causing it to break. 12. "IMPORTANT SAFETY INSTRUCTIONS" When using the sewing machine, basic safety precautions should always be followed, including the following: "Read all moving parts. WARNING - Use this sewing machine only for examination, repair, electrical or mechanical adjustment. 4. Do not operate this machine outdoors. 7. Special care is not working properly, if it is required...
... causing it to break. 12. "IMPORTANT SAFETY INSTRUCTIONS" When using the sewing machine, basic safety precautions should always be followed, including the following: "Read all moving parts. WARNING - Use this sewing machine only for examination, repair, electrical or mechanical adjustment. 4. Do not operate this machine outdoors. 7. Special care is not working properly, if it is required...

User Manual - French
Page 7
CONTENTS CONTENTS KNOWING YOUR SEWING MACHINE STRAIGHT AND ZIGZAG STITCHING KNOWING YOUR SEWING MACHINE PRINCIPAL PARTS 2 ACCESSORIES 3 OPERATING YOUR SEWING MACHINE 4 Connecting Plugs 4 Main Power and Sewing Light Switches 5 Foot Controller 5 Inserting the Needle 6 Checking the Needle 6 Changing the Presser Foot 7 Converting to Free-Arm Style 8 Steadying the Machine 8 VARIOUS CONTROLS 9 Stitch Length Dial 9 Reverse Sewing Lever 10 Stitch Width Dial...
CONTENTS CONTENTS KNOWING YOUR SEWING MACHINE STRAIGHT AND ZIGZAG STITCHING KNOWING YOUR SEWING MACHINE PRINCIPAL PARTS 2 ACCESSORIES 3 OPERATING YOUR SEWING MACHINE 4 Connecting Plugs 4 Main Power and Sewing Light Switches 5 Foot Controller 5 Inserting the Needle 6 Checking the Needle 6 Changing the Presser Foot 7 Converting to Free-Arm Style 8 Steadying the Machine 8 VARIOUS CONTROLS 9 Stitch Length Dial 9 Reverse Sewing Lever 10 Stitch Width Dial...

User Manual - French
Page 76
... Stitch 49 P Performance Checklist 57-58 Presser Foot Replacement 7 Principal Parts 2 R Repacking 65 S Sewing Direction 26 Sewing Fabric Edges 27 Sewing Light Bulb Replacement 53 Switch 5 Sewing on Very Thin Fabric 29 Shuttle Hook Removal 55 Shuttle Race Cleaning 55 Spool Installing 16 Steadying the Machine 8 Stitch Length Dial 9 Stitch Width Dial 11 Straight Stitching 25...
... Stitch 49 P Performance Checklist 57-58 Presser Foot Replacement 7 Principal Parts 2 R Repacking 65 S Sewing Direction 26 Sewing Fabric Edges 27 Sewing Light Bulb Replacement 53 Switch 5 Sewing on Very Thin Fabric 29 Shuttle Hook Removal 55 Shuttle Race Cleaning 55 Spool Installing 16 Steadying the Machine 8 Stitch Length Dial 9 Stitch Width Dial 11 Straight Stitching 25...


