
The Bose® Lifestyle® amplifier - Owner's guide
Page 5
... a multi-room interface 7 Connecting the Lifestyle® stereo amplifier to a Lifestyle® media center 9 Setting up the remote control 10 Setting Zone 2 Protocol 10 Connecting the Lifestyle® stereo amplifier to a Model 20 music center 11 Connecting the Lifestyle® stereo amplifier to a Model 5 music center 13 Connecting speakers to your Lifestyle® stereo amplifier 14 Checking...
... a multi-room interface 7 Connecting the Lifestyle® stereo amplifier to a Lifestyle® media center 9 Setting up the remote control 10 Setting Zone 2 Protocol 10 Connecting the Lifestyle® stereo amplifier to a Model 20 music center 11 Connecting the Lifestyle® stereo amplifier to a Model 5 music center 13 Connecting speakers to your Lifestyle® stereo amplifier 14 Checking...

The Bose® Lifestyle® amplifier - Owner's guide
Page 9
Figure 6 Cable connections between a multi-room interface and the Lifestyle® stereo amplifier Lifestyle® stereo amplifier rear panel Multi-room interface rear panel 4 Ω MINIMUM LL R L SYSTEM RR CONTROL L R +- DO NOT plug the amplifier ... until you have completed all other end of the audio input cable, insert the 3.5 mm mini-plug into the L (left) INPUT jack. Setting Up Your Lifestyle® Stereo Amplifier Connecting the Lifestyle® stereo amplifier to a multi-room interface CAUTION: Before making any connections, turn the...
Figure 6 Cable connections between a multi-room interface and the Lifestyle® stereo amplifier Lifestyle® stereo amplifier rear panel Multi-room interface rear panel 4 Ω MINIMUM LL R L SYSTEM RR CONTROL L R +- DO NOT plug the amplifier ... until you have completed all other end of the audio input cable, insert the 3.5 mm mini-plug into the L (left) INPUT jack. Setting Up Your Lifestyle® Stereo Amplifier Connecting the Lifestyle® stereo amplifier to a multi-room interface CAUTION: Before making any connections, turn the...

The Bose® Lifestyle® amplifier - Owner's guide
Page 10
...all connected rooms as room A, B, C, and D, with the Personal® music center Systems that share a source Press the HOUSE button to your Lifestyle® system owner's guide for more information on operating your system, the Personal music center displays ROOM and HOUSE buttons, and room indicators (A, B, C, and/or... more rooms are connected to as one room. However, if you purchase a second Personal music center, you must follow the procedure for setting up to four sets of Bose® powered speakers placed in individual rooms. These rooms are referred to your system in other...
...all connected rooms as room A, B, C, and D, with the Personal® music center Systems that share a source Press the HOUSE button to your Lifestyle® system owner's guide for more information on operating your system, the Personal music center displays ROOM and HOUSE buttons, and room indicators (A, B, C, and/or... more rooms are connected to as one room. However, if you purchase a second Personal music center, you must follow the procedure for setting up to four sets of Bose® powered speakers placed in individual rooms. These rooms are referred to your system in other...

The Bose® Lifestyle® amplifier - Owner's guide
Page 13
...the amplifier. 3. Setting Up Your Lifestyle® Stereo Amplifier Connecting the Lifestyle® stereo amplifier to a Model 20 music center ® Figure 10 Cable connections between the Model 20 music center and the Lifestyle® stereo amplifier CAUTION: Before ...making connections, turn the Lifestyle® system off and disconnect the music center from the AC (mains) power outlet. Lifestyle® stereo amplifier rear panel 4 Ω...
...the amplifier. 3. Setting Up Your Lifestyle® Stereo Amplifier Connecting the Lifestyle® stereo amplifier to a Model 20 music center ® Figure 10 Cable connections between the Model 20 music center and the Lifestyle® stereo amplifier CAUTION: Before ...making connections, turn the Lifestyle® system off and disconnect the music center from the AC (mains) power outlet. Lifestyle® stereo amplifier rear panel 4 Ω...

The Bose® Lifestyle® amplifier - Owner's guide
Page 14
...your system in more information on ). ON K40 l 2345678 12 January 4, 2002 AM262840_00_V.pdf Note: Refer to your Lifestyle® system owner's guide for Zone 2 If your system uses a Model 20 music center, you need to set up a second RC-20 remote control to operate the ZONE 2 outputs. 1. Setting ...Up Your Lifestyle® Stereo Amplifier Figure 11 Setting up a Zone 2 remote control Setting up the RC-20 remote ...
...your system in more information on ). ON K40 l 2345678 12 January 4, 2002 AM262840_00_V.pdf Note: Refer to your Lifestyle® system owner's guide for Zone 2 If your system uses a Model 20 music center, you need to set up a second RC-20 remote control to operate the ZONE 2 outputs. 1. Setting ...Up Your Lifestyle® Stereo Amplifier Figure 11 Setting up a Zone 2 remote control Setting up the RC-20 remote ...

The Bose® Lifestyle® amplifier - Owner's guide
Page 15
...available from the FIXED R and FIXED L OUTPUT jacks. Figure 12 Cable connections between the Model 5 music center and the Lifestyle® stereo amplifier Model 5 music center rear panel Lifestyle® stereo amplifier rear panel 4 Ω MINIMUM LL LL SYSTEM RR CONTROL R +- ... RCA connector into the R (right) FIXED OUTPUT jack. Setting Up Your Lifestyle® Stereo Amplifier Connecting the Lifestyle® stereo amplifier to a Model 5 music center In systems using a Model 5 music center, home theater speakers are connected to the SPEAKERS A or SPEAKERS B ...
...available from the FIXED R and FIXED L OUTPUT jacks. Figure 12 Cable connections between the Model 5 music center and the Lifestyle® stereo amplifier Model 5 music center rear panel Lifestyle® stereo amplifier rear panel 4 Ω MINIMUM LL LL SYSTEM RR CONTROL R +- ... RCA connector into the R (right) FIXED OUTPUT jack. Setting Up Your Lifestyle® Stereo Amplifier Connecting the Lifestyle® stereo amplifier to a Model 5 music center In systems using a Model 5 music center, home theater speakers are connected to the SPEAKERS A or SPEAKERS B ...

The Bose® Lifestyle® amplifier - Owner's guide
Page 16
... on ). Note: Refer to the SPEAKER OUTPUT L terminals in your Lifestyle® stereo amplifier CAUTION: DO NOT connect the amplifier to powered speakers of any make or model, nor to any amplified music sources. Doing so may cause damage to the SPEAKER OUTPUT R terminals ...(Figure 14). Notice which speaker cable is connected to the L (left speaker cable to your Lifestyle® system owner's guide for more information on the left in...
... on ). Note: Refer to the SPEAKER OUTPUT L terminals in your Lifestyle® stereo amplifier CAUTION: DO NOT connect the amplifier to powered speakers of any make or model, nor to any amplified music sources. Doing so may cause damage to the SPEAKER OUTPUT R terminals ...(Figure 14). Notice which speaker cable is connected to the L (left speaker cable to your Lifestyle® system owner's guide for more information on the left in...

The Bose® Lifestyle® amplifier - Owner's guide
Page 17
....pdf January 4, 2002 15 If you have a dual voltage Lifestyle® amplifier • Dual voltage units have a voltage selection switch on the rear panel of the Lifestyle® stereo amplifier and your Lifestyle® music system to an AC (mains) outlet. 3. Connect the power... cord of the amplifier. 115 V Setting Up Your Lifestyle® Stereo Amplifier Checking to see if your unit...
....pdf January 4, 2002 15 If you have a dual voltage Lifestyle® amplifier • Dual voltage units have a voltage selection switch on the rear panel of the Lifestyle® stereo amplifier and your Lifestyle® music system to an AC (mains) outlet. 3. Connect the power... cord of the amplifier. 115 V Setting Up Your Lifestyle® Stereo Amplifier Checking to see if your unit...

The Bose® Lifestyle® amplifier - Owner's guide
Page 18
...sprays near the amplifier. Protecting outdoor wiring Although some Bose® speakers are correct. For additional help, see the troubleshooting information in your Bose dealer to arrange for home theater (Lifestyle® 12 or Lifestyle® 8 systems), make sure the amplifier audio ...chemicals, or cleaning solutions containing alcohol, ammonia, or abrasives. Troubleshooting If you do Neither speaker plays • Make sure the Lifestyle® music center and the amplifier are plugged in and turned on. • Make sure the plugs are inserted fully and the...
...sprays near the amplifier. Protecting outdoor wiring Although some Bose® speakers are correct. For additional help, see the troubleshooting information in your Bose dealer to arrange for home theater (Lifestyle® 12 or Lifestyle® 8 systems), make sure the amplifier audio ...chemicals, or cleaning solutions containing alcohol, ammonia, or abrasives. Troubleshooting If you do Neither speaker plays • Make sure the Lifestyle® music center and the amplifier are plugged in and turned on. • Make sure the plugs are inserted fully and the...

Owner's guide
Page 2
... or repaired by anyone except properly qualified service personnel. The compact disc player should not be located on the back panel and bottom of your Lifestyle® music center and the bottom panel of your Acoustimass® module: The lightning flash with this owner's guide. Additional safety information See the additional instructions...
... or repaired by anyone except properly qualified service personnel. The compact disc player should not be located on the back panel and bottom of your Lifestyle® music center and the bottom panel of your Acoustimass® module: The lightning flash with this owner's guide. Additional safety information See the additional instructions...

Owner's guide
Page 5
...Before you keep your records Serial numbers are located on the music center 13 Operating Your Lifestyle® 5 music system The music center display 14 The system controls ...14 The music center controls 15 The Lifestyle® remote control 15 Listening to the radio 16 Listening ...Adding speakers ...20 Troubleshooting ...21 Warranty period ...22 Customer service ...22 Cleaning the Lifestyle® 5 music system 22 Product Information Technical information 23 Accessories ...23 Index ...24 Bose® Corporation inside back cover For your sales slip and warranty card together with ...
...Before you keep your records Serial numbers are located on the music center 13 Operating Your Lifestyle® 5 music system The music center display 14 The system controls ...14 The music center controls 15 The Lifestyle® remote control 15 Listening to the radio 16 Listening ...Adding speakers ...20 Troubleshooting ...21 Warranty period ...22 Customer service ...22 Cleaning the Lifestyle® 5 music system 22 Product Information Technical information 23 Accessories ...23 Index ...24 Bose® Corporation inside back cover For your sales slip and warranty card together with ...

Owner's guide
Page 6
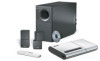
Your system includes: • A Lifestyle® music center with a hide-away Acoustimass module • An easy-to-use remote control 4 October 22, 2001 AM251174_03_V.pdf Setting Up Before you begin Thank you for a video sound source, an auxiliary source, and a tape deck • Powered Acoustimass® speakers with built-in AM/FM radio and compact disc (CD) player • Inputs for purchasing the Bose® Lifestyle® 5 music system. This complete audio system offers superb sound, elegance, technology, and simplicity for music and home entertainment.
Your system includes: • A Lifestyle® music center with a hide-away Acoustimass module • An easy-to-use remote control 4 October 22, 2001 AM251174_03_V.pdf Setting Up Before you begin Thank you for a video sound source, an auxiliary source, and a tape deck • Powered Acoustimass® speakers with built-in AM/FM radio and compact disc (CD) player • Inputs for purchasing the Bose® Lifestyle® 5 music system. This complete audio system offers superb sound, elegance, technology, and simplicity for music and home entertainment.

Owner's guide
Page 7
...Notify Bose® or your Lifestyle® 5 music system. Dual voltage systems include 1 power cord, 1 adapter , and 2 power packs. The original packing materials provide the safest way to be sure your system. Then write them on your Lifestyle® 5 music system: • Lifestyle® music center... speaker cables • 4 self-adhesive rubber feet (for the Acoustimass module) • Lifestyle® system CD ® Treble Bass Acoustimass module ® Lifestyle® music center 2 cube speaker arrays AC power cord ® Wire cover Audio input cable AC ...
...Notify Bose® or your Lifestyle® 5 music system. Dual voltage systems include 1 power cord, 1 adapter , and 2 power packs. The original packing materials provide the safest way to be sure your system. Then write them on your Lifestyle® 5 music system: • Lifestyle® music center... speaker cables • 4 self-adhesive rubber feet (for the Acoustimass module) • Lifestyle® system CD ® Treble Bass Acoustimass module ® Lifestyle® music center 2 cube speaker arrays AC power cord ® Wire cover Audio input cable AC ...

Owner's guide
Page 8
...3 feet (1 m) or as far apart as 15 feet (4.6 m). 2. The speaker cables allow up to 20 feet (6.1 m) distance from Bose®. Figure 2 Recommended speaker locations Left speaker Right speaker Acoustimass module 6 October 22, 2001 AM251174_03_V.pdf For the most pleasing to you. Placing...quality. Speaker locations Follow these guidelines to select locations for your speakers. CAUTION: Choose a stable and level surface for your Lifestyle® 5 music system. They can be sure to place each one cube of charge, from the Acoustimass® module. Setting Up Select ...
...3 feet (1 m) or as far apart as 15 feet (4.6 m). 2. The speaker cables allow up to 20 feet (6.1 m) distance from Bose®. Figure 2 Recommended speaker locations Left speaker Right speaker Acoustimass module 6 October 22, 2001 AM251174_03_V.pdf For the most pleasing to you. Placing...quality. Speaker locations Follow these guidelines to select locations for your speakers. CAUTION: Choose a stable and level surface for your Lifestyle® 5 music system. They can be sure to place each one cube of charge, from the Acoustimass® module. Setting Up Select ...

Owner's guide
Page 9
...2). 2. Note: Since some TVs can interfere with the TV picture, place the Acoustimass module at equal distances from scratches. 6. Place the music center within reach of the module. 3. Place the module along the wall to block the ventilation openings of the audio input cable, speaker ... Select a location for the Acoustimass module (Figure 3). If you may want to connect all of your dealer or call Bose®. 3. Select a position for the music center. 1. Do not place the module on the end provide ventilation for cable length. Setting Up Figure 3 Acoustimass module...
...2). 2. Note: Since some TVs can interfere with the TV picture, place the Acoustimass module at equal distances from scratches. 6. Place the music center within reach of the module. 3. Place the module along the wall to block the ventilation openings of the audio input cable, speaker ... Select a location for the Acoustimass module (Figure 3). If you may want to connect all of your dealer or call Bose®. 3. Select a position for the music center. 1. Do not place the module on the end provide ventilation for cable length. Setting Up Figure 3 Acoustimass module...

Owner's guide
Page 10
..., connect the speakers. The wire marked with L and R molded into the black terminal. a. b. Setting Up Connect the speakers and Lifestyle® music center Once you begin hooking up the system. Match the correct cable to the terminals on the + wire are unplugged from any terminal touch any ... (-). Bridged wires create short circuits that affect proper operation of the matching cube speaker array. To purchase cables, see your dealer, electronics store, or call Bose® customer service. 1. Repeat this step for your system. 3.
..., connect the speakers. The wire marked with L and R molded into the black terminal. a. b. Setting Up Connect the speakers and Lifestyle® music center Once you begin hooking up the system. Match the correct cable to the terminals on the + wire are unplugged from any terminal touch any ... (-). Bridged wires create short circuits that affect proper operation of the matching cube speaker array. To purchase cables, see your dealer, electronics store, or call Bose® customer service. 1. Repeat this step for your system. 3.

Owner's guide
Page 11
... and speaker connections Setting Up Connecting the Acoustimass® module to the Lifestyle® music center Connect the Acoustimass module to the music center with the audio input cable (Figure 5). 1. Insert the three connectors at the angle shown in ...not inserted fully into each of the audio input cable into SYSTEM CONTROL 1 ® LIFESTYLE ® MODEL 5 MUSIC CENTER B Z T G642 950 D S BOSE Corporation UL LISTED 917D AUDIO ® EQUIPMENT MANUFACTURED: TÜV Rheinland BOSE CORPORATION, FRAMINGHAM, MA 01701-9168 MADE IN USA geprüdfte Sicherheit SPEAKERS L ...
... and speaker connections Setting Up Connecting the Acoustimass® module to the Lifestyle® music center Connect the Acoustimass module to the music center with the audio input cable (Figure 5). 1. Insert the three connectors at the angle shown in ...not inserted fully into each of the audio input cable into SYSTEM CONTROL 1 ® LIFESTYLE ® MODEL 5 MUSIC CENTER B Z T G642 950 D S BOSE Corporation UL LISTED 917D AUDIO ® EQUIPMENT MANUFACTURED: TÜV Rheinland BOSE CORPORATION, FRAMINGHAM, MA 01701-9168 MADE IN USA geprüdfte Sicherheit SPEAKERS L ...

Owner's guide
Page 12
...Plug the small end of the power (mains) cord into the AC POWER jack on the end of the Lifestyle® music center. 2. Connecting the music center AC (mains) power pack The Lifestyle® music center comes with a 120V AC (mains) power pack for use in Australia 1. Setting Up Connecting the Acoustimass... If you are complete. Note: Do not plug the AC power pack into a power outlet until all component connections are in doubt, contact your music center. • Model PS71, 120V in North America • Model PS74, 230V in UK or Singapore • Model PS72, 230V in Europe...
...Plug the small end of the power (mains) cord into the AC POWER jack on the end of the Lifestyle® music center. 2. Connecting the music center AC (mains) power pack The Lifestyle® music center comes with a 120V AC (mains) power pack for use in Australia 1. Setting Up Connecting the Acoustimass... If you are complete. Note: Do not plug the AC power pack into a power outlet until all component connections are in doubt, contact your music center. • Model PS71, 120V in North America • Model PS74, 230V in UK or Singapore • Model PS72, 230V in Europe...

Owner's guide
Page 13
..., you prefer to connect the audio outputs from your TV to the music center, be connected to the Lifestyle® music system. AM251174_03_V.pdf October 22, 2001 11 For additional assistance with RIAA equalization). Figure 8 Music center connectors ® LIFESTYLE ® MODEL 5 MUSIC CENTER B Z G642 950 D S T BOSE Corporation UL LISTED 917D AUDIO ® EQUIPMENT MANUFACTURED: TÜV Rheinland...
..., you prefer to connect the audio outputs from your TV to the music center, be connected to the Lifestyle® music system. AM251174_03_V.pdf October 22, 2001 11 For additional assistance with RIAA equalization). Figure 8 Music center connectors ® LIFESTYLE ® MODEL 5 MUSIC CENTER B Z G642 950 D S T BOSE Corporation UL LISTED 917D AUDIO ® EQUIPMENT MANUFACTURED: TÜV Rheinland...

Owner's guide
Page 14
...4. Connecting to a cable radio signal To connect your Lifestyle® music center provides connections for optimum AM reception. Loosen the AM ANTENNA screw terminals on the back of the Lifestyle® music center. 2. Stand the loop antenna on the back ... panel. Figure 9 The antenna connections FM antenna AM antenna jack terminals ® LIFESTYLE ® MODEL 5 MUSIC CENTER B Z G642 950 D S T BOSE Corporation UL LISTED 917D AUDIO ® EQUIPMENT MANUFACTURED: TÜV Rheinland BOSE CORPORATION, FRAMINGHAM, MA 01701-9168 MADE IN USA geprüdfte Sicherheit SPEAKERS L...
...4. Connecting to a cable radio signal To connect your Lifestyle® music center provides connections for optimum AM reception. Loosen the AM ANTENNA screw terminals on the back of the Lifestyle® music center. 2. Stand the loop antenna on the back ... panel. Figure 9 The antenna connections FM antenna AM antenna jack terminals ® LIFESTYLE ® MODEL 5 MUSIC CENTER B Z G642 950 D S T BOSE Corporation UL LISTED 917D AUDIO ® EQUIPMENT MANUFACTURED: TÜV Rheinland BOSE CORPORATION, FRAMINGHAM, MA 01701-9168 MADE IN USA geprüdfte Sicherheit SPEAKERS L...


