
Pedestal Installation Instructions
Page 5
... the pedestal. Repeat for use the feet that are included with the appliance. Use the wrench to 1/2 turn (see Figure 12). Helpful hint: Do not tighten any of 10 ftĆlb (14 N-m) to the appliance and adjacent surfaces, all four bolts. Do not use in place before using the ... feet into their threads. The spacer should be hand tightened only, so the appliance can be careful not to allow it passes through the flat washer, pedestal housing, then the spacer, and into the protruding threaded bushing in the base of the bolts completely. If the appliance slides, it . ...
... the pedestal. Repeat for use the feet that are included with the appliance. Use the wrench to 1/2 turn (see Figure 12). Helpful hint: Do not tighten any of 10 ftĆlb (14 N-m) to the appliance and adjacent surfaces, all four bolts. Do not use in place before using the ... feet into their threads. The spacer should be hand tightened only, so the appliance can be careful not to allow it passes through the flat washer, pedestal housing, then the spacer, and into the protruding threaded bushing in the base of the bolts completely. If the appliance slides, it . ...
Installation and Use & Care (all languages)
Page 3
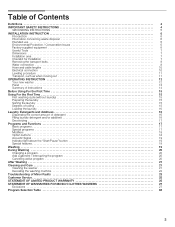
... 8 Hose and cable lengths 10 Electrical connection 10 Leveling procedure 11 Transport, such as when moving out 11 OPERATING INSTRUCTION 12 Your new washer 12 Panel 13 Summary of Instructions 14 Before Using For the First Time 15 Using For the First Time 15 First washing cycle...20 Add a garment / Interrupting the program 20 Canceling active program 20 After Washing 21 Cleaning and Care 21 Cleaning the washer 21 Descaling the washing machine 22 Troubleshooting of Minor Faults 23 Customer Service 25 STATEMENT OF LIMITED PRODUCT WARRANTY 25 STATEMENT OF WARRANTIES...
... 8 Hose and cable lengths 10 Electrical connection 10 Leveling procedure 11 Transport, such as when moving out 11 OPERATING INSTRUCTION 12 Your new washer 12 Panel 13 Summary of Instructions 14 Before Using For the First Time 15 Using For the First Time 15 First washing cycle...20 Add a garment / Interrupting the program 20 Canceling active program 20 After Washing 21 Cleaning and Care 21 Cleaning the washer 21 Descaling the washing machine 22 Troubleshooting of Minor Faults 23 Customer Service 25 STATEMENT OF LIMITED PRODUCT WARRANTY 25 STATEMENT OF WARRANTIES...
Installation and Use & Care (all languages)
Page 4
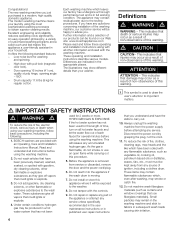
... let the water flow out of each faucet for several minutes before using the washing machine. 2. Definitions d WARNING d WARNING - BOSCH washers are indicated in the washing machine and stick to important matters. These items may contain flammable substances which leaves our factory has undergone ...of this appliance a userĆfriendly assistant in published user repair instructions that death or serious injuries may smoke or catch fire. 12. Each washing machine which , even after washing, may occur as a result of nonĆobservance of fire, electric shock, ...
... let the water flow out of each faucet for several minutes before using the washing machine. 2. Definitions d WARNING d WARNING - BOSCH washers are indicated in the washing machine and stick to important matters. These items may contain flammable substances which leaves our factory has undergone ...of this appliance a userĆfriendly assistant in published user repair instructions that death or serious injuries may smoke or catch fire. 12. Each washing machine which , even after washing, may occur as a result of nonĆobservance of fire, electric shock, ...
Installation and Use & Care (all languages)
Page 7
... solid floor and well leveled due to be installed on a weak wood floor consider the following table: Minimum Installation Clearances Closet Sides 1/4" (6 mm) Top 12" (3O5 mm) Rear 2.5" (64 mm) Front 1/4" (6 mm) Ventilation: Top: 48 sq. q Units are helpful: 1. If the washing machine is...electrical power 10 slide the washer into its final 11 location level the washer as low as carpets or surfaces with holding brackets (set) from Bosch Customer Service (WMZ 2200). cm) Checklist for under counter installation Pedestal Mounting If mounting the washer on a second floor, the...
... solid floor and well leveled due to be installed on a weak wood floor consider the following table: Minimum Installation Clearances Closet Sides 1/4" (6 mm) Top 12" (3O5 mm) Rear 2.5" (64 mm) Front 1/4" (6 mm) Ventilation: Top: 48 sq. q Units are helpful: 1. If the washing machine is...electrical power 10 slide the washer into its final 11 location level the washer as low as carpets or surfaces with holding brackets (set) from Bosch Customer Service (WMZ 2200). cm) Checklist for under counter installation Pedestal Mounting If mounting the washer on a second floor, the...
Installation and Use & Care (all languages)
Page 12
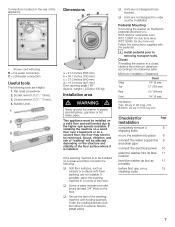
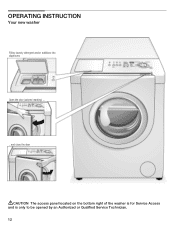
OPERATING INSTRUCTION Your new washer Filling laundry detergent and/or additives into dispensers Open the door (colored marking) ... ...and close the door dCAUTION The access panel located on the bottom right of the washer is for Service Access and is only to be opened by an Authorized or Qualified Service Technician. 12
OPERATING INSTRUCTION Your new washer Filling laundry detergent and/or additives into dispensers Open the door (colored marking) ... ...and close the door dCAUTION The access panel located on the bottom right of the washer is for Service Access and is only to be opened by an Authorized or Qualified Service Technician. 12
