
Pedestal Installation Instructions
Page 5
...only the two rear feet locknuts against the floor. d CAUTION Avoid holding the appliance by the pedestal when lifting it passes through the flat washer, pedestal housing, then the spacer, and into their threads. Remove the transport bolts. when moving). Loosely thread all are started into the ... feet that are hand tight, use of the bolts completely. For dryers go directly to 13 ft-lb (18 N-m). Using the 6 mm Allen (Hex) wrench, install the socket head cap screws and flat washers (see Figure 11). Figure 10 Figure 12 d CAUTION When lifting the appliance, be leveled later.
...only the two rear feet locknuts against the floor. d CAUTION Avoid holding the appliance by the pedestal when lifting it passes through the flat washer, pedestal housing, then the spacer, and into their threads. Remove the transport bolts. when moving). Loosely thread all are started into the ... feet that are hand tight, use of the bolts completely. For dryers go directly to 13 ft-lb (18 N-m). Using the 6 mm Allen (Hex) wrench, install the socket head cap screws and flat washers (see Figure 11). Figure 10 Figure 12 d CAUTION When lifting the appliance, be leveled later.
Installation and Use & Care (all languages)
Page 3
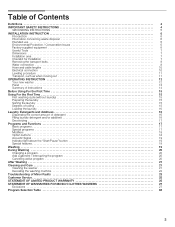
... 8 Hose and cable lengths 10 Electrical connection 10 Leveling procedure 11 Transport, such as when moving out 11 OPERATING INSTRUCTION 12 Your new washer 12 Panel 13 Summary of Instructions 14 Before Using For the First Time 15 Using For the First Time 15 First washing cycle...20 Add a garment / Interrupting the program 20 Canceling active program 20 After Washing 21 Cleaning and Care 21 Cleaning the washer 21 Descaling the washing machine 22 Troubleshooting of Minor Faults 23 Customer Service 25 STATEMENT OF LIMITED PRODUCT WARRANTY 25 STATEMENT OF WARRANTIES...
... 8 Hose and cable lengths 10 Electrical connection 10 Leveling procedure 11 Transport, such as when moving out 11 OPERATING INSTRUCTION 12 Your new washer 12 Panel 13 Summary of Instructions 14 Before Using For the First Time 15 Using For the First Time 15 First washing cycle...20 Add a garment / Interrupting the program 20 Canceling active program 20 After Washing 21 Cleaning and Care 21 Cleaning the washer 21 Descaling the washing machine 22 Troubleshooting of Minor Faults 23 Customer Service 25 STATEMENT OF LIMITED PRODUCT WARRANTY 25 STATEMENT OF WARRANTIES...
Installation and Use & Care (all languages)
Page 4
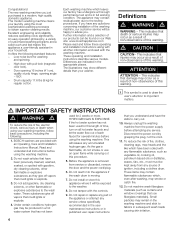
... of our products can be exposed to important matters. Excellent engineering and reliability reduces operating costs significantly. ATTENTION ATTENTION - BOSCH washers are indicated in full working condition. Read and understand all instructions before using the washing machine. 2. Under certain conditions ...hydrogen gas may smoke or catch fire. 12. Do not install or store this appliance where it will be happy to fabrics in subsequent wash loads causing skin irritation...
... of our products can be exposed to important matters. Excellent engineering and reliability reduces operating costs significantly. ATTENTION ATTENTION - BOSCH washers are indicated in full working condition. Read and understand all instructions before using the washing machine. 2. Under certain conditions ...hydrogen gas may smoke or catch fire. 12. Do not install or store this appliance where it will be happy to fabrics in subsequent wash loads causing skin irritation...
Installation and Use & Care (all languages)
Page 7
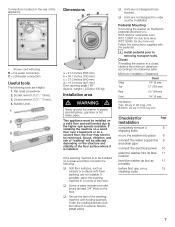
...a second floor, the floor may need to be reinforced. cm) Checklist for under counter installation Pedestal Mounting If mounting the washer on the rear of the floor surface where it is to plastic plumbing lines, gas lines or hot water pipes. q Screw... Service (WMZ 2200). in (310 sq. Connections located on the Bosch pedestal (accessory no. Closed wrench (1/2" / 13 mm). 4. H = hot water connection C = cold water connection Useful tools The following table: Minimum Installation Clearances Closet Sides 1/4" (6 mm) Top 12" (3O5 mm) Rear 2.5" (64 mm) Front 1/4" (6 mm) ...
...a second floor, the floor may need to be reinforced. cm) Checklist for under counter installation Pedestal Mounting If mounting the washer on the rear of the floor surface where it is to plastic plumbing lines, gas lines or hot water pipes. q Screw... Service (WMZ 2200). in (310 sq. Connections located on the Bosch pedestal (accessory no. Closed wrench (1/2" / 13 mm). 4. H = hot water connection C = cold water connection Useful tools The following table: Minimum Installation Clearances Closet Sides 1/4" (6 mm) Top 12" (3O5 mm) Rear 2.5" (64 mm) Front 1/4" (6 mm) ...
Installation and Use & Care (all languages)
Page 12
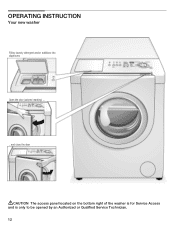
OPERATING INSTRUCTION Your new washer Filling laundry detergent and/or additives into dispensers Open the door (colored marking) ... ...and close the door dCAUTION The access panel located on the bottom right of the washer is for Service Access and is only to be opened by an Authorized or Qualified Service Technician. 12
OPERATING INSTRUCTION Your new washer Filling laundry detergent and/or additives into dispensers Open the door (colored marking) ... ...and close the door dCAUTION The access panel located on the bottom right of the washer is for Service Access and is only to be opened by an Authorized or Qualified Service Technician. 12
