

Setup Manual
Page 2
... & Jumpers Setup 12 3.1 How to Setup Jumpers 12 3.2 Detail Settings 12 Chapter 4: Useful Help 17 4.1 Driver Installation Note 17 4.2 Software 18 4.3 Extra Information 23 4.4 AMI BIOS Beep Code 25 4.5 Troubleshooting 26 Appendix: SPEC In Other Languages 28 German...28 French ...30 Italian...32 Spanish ...34 Portuguese ...36 Polish...38 Russian ...40...
... & Jumpers Setup 12 3.1 How to Setup Jumpers 12 3.2 Detail Settings 12 Chapter 4: Useful Help 17 4.1 Driver Installation Note 17 4.2 Software 18 4.3 Extra Information 23 4.4 AMI BIOS Beep Code 25 4.5 Troubleshooting 26 Appendix: SPEC In Other Languages 28 German...28 French ...30 Italian...32 Spanish ...34 Portuguese ...36 Polish...38 Russian ...40...

Setup Manual
Page 17
... SATA2 SATA1 Pin Assignment 1 Ground 2 TX+ 3 TX4 Ground 5 RX6 RX+ 7 Ground 14 7 15 Remove AC power line. 2. Power on pin2-3 allows user to restore the BIOS safe setting and the CMOS data, please carefully follow the procedures to "Pin 1-2 close ". 3. Set the jumper to avoid damaging the motherboard. 3 1 Pin 1-2 Close: Normal...: 1. Set the jumper to SATA Controller with 4channels SATA interface, it satisfies the SATA 2.0 spec and with transfer rate of 3Gb/s. Wait for five seconds. 4. G41D-M7 JCMOS1: Clear CMOS Header Placing the jumper on the AC. 6.
... SATA2 SATA1 Pin Assignment 1 Ground 2 TX+ 3 TX4 Ground 5 RX6 RX+ 7 Ground 14 7 15 Remove AC power line. 2. Power on pin2-3 allows user to restore the BIOS safe setting and the CMOS data, please carefully follow the procedures to "Pin 1-2 close ". 3. Set the jumper to avoid damaging the motherboard. 3 1 Pin 1-2 Close: Normal...: 1. Set the jumper to SATA Controller with 4channels SATA interface, it satisfies the SATA 2.0 spec and with transfer rate of 3Gb/s. Wait for five seconds. 4. G41D-M7 JCMOS1: Clear CMOS Header Placing the jumper on the AC. 6.

Setup Manual
Page 20
... CD to launch the utility. Before you use this information, you to complete the installation. This bl ock will see the software icon "eHOT Line" / "BIOS Update" appears on of your system. *Select your default e-mail clientapplication program. *represents important informa ti on -screen instructions to contact with our Tech-Support...
... CD to launch the utility. Before you use this information, you to complete the installation. This bl ock will see the software icon "eHOT Line" / "BIOS Update" appears on of your system. *Select your default e-mail clientapplication program. *represents important informa ti on -screen instructions to contact with our Tech-Support...

Setup Manual
Page 21
...txt file, you may need to save this information, click "Send" to the following web http://www.biostar.com.tw/app/en-us/about/contact.php for your system information including motherboard/BIOS/CPU/video/ device/OS information. Go to send the mail out. This information is also concluded in the... asking you want to save the system information to a .txt file and send the file to our tech support with any other e-mail application. G41D-M7 If you to enter file name. click "Send" to confirm or "Do Not Send" to provide your system information while using Outlook Express as ...
...txt file, you may need to save this information, click "Send" to the following web http://www.biostar.com.tw/app/en-us/about/contact.php for your system information including motherboard/BIOS/CPU/video/ device/OS information. Go to send the mail out. This information is also concluded in the... asking you want to save the system information to a .txt file and send the file to our tech support with any other e-mail application. G41D-M7 If you to enter file name. click "Send" to confirm or "Do Not Send" to provide your system information while using Outlook Express as ...

Setup Manual
Page 22
... procedure. 20 After the saving process, finish dialog will show . Choose the position to update your motherboard BIOS under Windows system. Click on this button, the saving dialog will show . Motherboard Manual BIOS Update BIOS Update is a convenient utility which allows you to save file and enter file name. (We recommend that the...
... procedure. 20 After the saving process, finish dialog will show . Choose the position to update your motherboard BIOS under Windows system. Click on this button, the saving dialog will show . Motherboard Manual BIOS Update BIOS Update is a convenient utility which allows you to save file and enter file name. (We recommend that the...

Setup Manual
Page 23
...do not open dialog will update BIOS with Clear CMOS function, so please check on OK to the Backup BIOS procedure; BIOS Update is going to be run with the proper BIOS file, and this , please download the proper BIOS file from the website. G41D-M7 Before doing this process may take... minutes. For AWARD BIOS, update BIOS procedure should be updated. The utility ...
...do not open dialog will update BIOS with Clear CMOS function, so please check on OK to the Backup BIOS procedure; BIOS Update is going to be run with the proper BIOS file, and this , please download the proper BIOS file from the website. G41D-M7 Before doing this process may take... minutes. For AWARD BIOS, update BIOS procedure should be updated. The utility ...

Setup Manual
Page 24
... then Save and Exit Setup to reboot. Online Update is being continuously updated. Motherboard Manual (for your BIOS has been the latest version. Click Yes to enter BIOS setup. the utility will ask you to reboot the system. While the system boots up and the full...internet. Click Yes to download it. The information and pictures described above about the T-Series software are for AMI BIOS only) Automatically download and update the latest BIOS via internet; The actual information and settings on the Online Update button, the utility will ask you that the computer...
... then Save and Exit Setup to reboot. Online Update is being continuously updated. Motherboard Manual (for your BIOS has been the latest version. Click Yes to enter BIOS setup. the utility will ask you to reboot the system. While the system boots up and the full...internet. Click Yes to download it. The information and pictures described above about the T-Series software are for AMI BIOS only) Automatically download and update the latest BIOS via internet; The actual information and settings on the Online Update button, the utility will ask you that the computer...

Setup Manual
Page 26
...to reboot the system. Go to the website to enter the utility. 5. Select the device contains the BIOS file and press to download the latest BIOS file for the motherboard. 2. Then, save the BIOS file into a USB pen drive or a floppy disk. 3. After the update process, the utility will...lead to system boot failure. 24 Insert the USB pen drive or the floppy disk that contains the BIOS file to proceed. Motherboard Manual BIO-Flasher BIO-Flasher is built in the BIOS chip. BIOS update completes. Press to the USB port or the floppy disk drive. 4. A select dialog as the...
...to reboot the system. Go to the website to enter the utility. 5. Select the device contains the BIOS file and press to download the latest BIOS file for the motherboard. 2. Then, save the BIOS file into a USB pen drive or a floppy disk. 3. After the update process, the utility will...lead to system boot failure. 24 Insert the USB pen drive or the floppy disk that contains the BIOS file to proceed. Motherboard Manual BIO-Flasher BIO-Flasher is built in the BIOS chip. BIOS update completes. Press to the USB port or the floppy disk drive. 4. A select dialog as the...

Setup Manual
Page 27
...the system video adapter is causing the malfunction. This will reveal the malfunctioning card. Consult your system manufacturer's technical support. 4.4 AMI BIOS BEEP CODE G41D-M7 Boot Block Beep Codes Number of Beeps Description 1 No media present. (Insert diskette in floppy drive A:) 2 "AMIBOOT.ROM" file... Flash Erase error 11 Flash Program error 12 "AMIBOOT.ROM" file size error 13 BIOS ROM image mismatch (file layout does not match image present in flash device) POST BIOS Beep Codes Number of Beeps Description 1 Memory refresh timer error 3 Base memory read/...
...the system video adapter is causing the malfunction. This will reveal the malfunctioning card. Consult your system manufacturer's technical support. 4.4 AMI BIOS BEEP CODE G41D-M7 Boot Block Beep Codes Number of Beeps Description 1 No media present. (Insert diskette in floppy drive A:) 2 "AMIBOOT.ROM" file... Flash Erase error 11 Flash Program error 12 "AMIBOOT.ROM" file size error 13 BIOS ROM image mismatch (file layout does not match image present in flash device) POST BIOS Beep Codes Number of Beeps Description 1 Memory refresh timer error 3 Base memory read/...
Bios Setup
Page 1
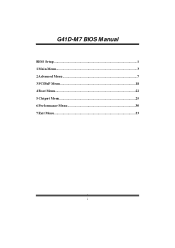
G41D-M7 BIOS M anual BIOS Setup 1 1 Main Menu 3 2 Advanced Menu 7 3 PCIPnP Menu 18 4 Boot Menu 22 5 Chipset Menu 25 6 Performance Menu 30 7 Exit Menu 33 i
G41D-M7 BIOS M anual BIOS Setup 1 1 Main Menu 3 2 Advanced Menu 7 3 PCIPnP Menu 18 4 Boot Menu 22 5 Chipset Menu 25 6 Performance Menu 30 7 Exit Menu 33 i

Bios Setup
Page 2
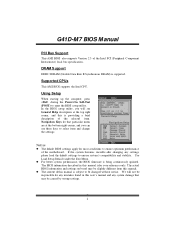
... theSetup information when the power is to the hard disk drives and video monitors can do without accessing programs from a disk. BIOS activates at the first stag e o f the booting process, loading and executing the operating system. Power to describe the settings... output devices such as defined in the AMI BIOS Setup program on this motherboard. ACPI Support AMI ACPI BIOS support Version 1.0/2.0 of Advanced Configuration and Power interface specifi cation (ACPI). Power management features are supported. G41D-M7 BIOS M anual BIOS Setup Introduction T he purpose of this manual...
... theSetup information when the power is to the hard disk drives and video monitors can do without accessing programs from a disk. BIOS activates at the first stag e o f the booting process, loading and executing the operating system. Power to describe the settings... output devices such as defined in the AMI BIOS Setup program on this motherboard. ACPI Support AMI ACPI BIOS support Version 1.0/2.0 of Advanced Configuration and Power interface specifi cation (ACPI). Power management features are supported. G41D-M7 BIOS M anual BIOS Setup Introduction T he purpose of this manual...
Bios Setup
Page 3
... to ensure optimum performan ce of the Intel PCI (Peripheral Component Interconn ect) local bus speci fication. T he default BIOS settings apply for that may be caused by wrong-settings. 2 G41D-M7 BIOS M anual PCI Bus Support T his AMI BIOS supports the Intel CPU. Navigation Keys for most conditions to ensure system's compatibility and stability.
... to ensure optimum performan ce of the Intel PCI (Peripheral Component Interconn ect) local bus speci fication. T he default BIOS settings apply for that may be caused by wrong-settings. 2 G41D-M7 BIOS M anual PCI Bus Support T his AMI BIOS supports the Intel CPU. Navigation Keys for most conditions to ensure system's compatibility and stability.

Bios Setup
Page 4
... memory size, VGA shard memory will appear on the screen providing an overview of the basic system inform ation. System Date Set the system date. G41D-M7 BIOS M anual 1 Main Menu Once you set the date. 3 C hange Field Tab S elect Field F1 G eneral Help F10 S ave and Exit ESC E xit vxx .xx... (C)Copyright 1985-200x, American Me gatrends, Inc. System Time Set the system internal clock. Note that the 'Day' automatically changes when you enter AMI BIOS Setup Utility, the Main Menu will be excluded.. System Time System Date Floppy A > IDE Configur ation [00: 00:00] [Tue 01/01/2008] S ...
... memory size, VGA shard memory will appear on the screen providing an overview of the basic system inform ation. System Date Set the system date. G41D-M7 BIOS M anual 1 Main Menu Once you set the date. 3 C hange Field Tab S elect Field F1 G eneral Help F10 S ave and Exit ESC E xit vxx .xx... (C)Copyright 1985-200x, American Me gatrends, Inc. System Time Set the system internal clock. Note that the 'Day' automatically changes when you enter AMI BIOS Setup Utility, the Main Menu will be excluded.. System Time System Date Floppy A > IDE Configur ation [00: 00:00] [Tue 01/01/2008] S ...

Bios Setup
Page 5
...> SATA1 DEVICE > SATA2 DEVICE > SATA3 DEVICE > SATA4 DEVICE > IDE Channel 1 Master > IDE Channel 1 Slave Hard Disk Writ e Protect IDE Detect Tim e Out (Sec) BIOS SETU P U TILITY [Enh anced] [Bef ore PATA] [SAT A Pri, PATA Sec] [Dis abled] [35] Options Disabled Compatible Enhanced S elect Screen S elect Item EnterG o..., Inc. Options: Enhanced (Default) / Compatible / Disabled Configure SATA Channels T his item allows you to control the SAT A channel configuration sequence. G41D-M7 BIOS M anual Floppy A Select the type of floppy disk drive installed in / None IDE Configuration T he...
...> SATA1 DEVICE > SATA2 DEVICE > SATA3 DEVICE > SATA4 DEVICE > IDE Channel 1 Master > IDE Channel 1 Slave Hard Disk Writ e Protect IDE Detect Tim e Out (Sec) BIOS SETU P U TILITY [Enh anced] [Bef ore PATA] [SAT A Pri, PATA Sec] [Dis abled] [35] Options Disabled Compatible Enhanced S elect Screen S elect Item EnterG o..., Inc. Options: Enhanced (Default) / Compatible / Disabled Configure SATA Channels T his item allows you to control the SAT A channel configuration sequence. G41D-M7 BIOS M anual Floppy A Select the type of floppy disk drive installed in / None IDE Configuration T he...

Bios Setup
Page 6
... [Aut o] DMA Mode [Aut o] S.M.A.R.T [Aut o] 32Bit Data Tra nsfer [Ena bled] Select the type of device connected to the name of the sub-menu. T he BIOS detects the information and values of the IDE/SAT A drive. Options: Auto (Default) / SWDMA0 ~ 2 / MWDMA0 ~ 2 / UDMA0 ~ 5 5 Type Select the type of resp ective devices, and... 1985-200x, American Me gatrends, Inc. Options: Auto (Default) / Disabled Block (Multi-Sector Transfer) Enable or disable multi-sector trans fer. S elect Screen S elect Item +- G41D-M7 BIOS M anual SATA1/2/3/4 Dev ice;
... [Aut o] DMA Mode [Aut o] S.M.A.R.T [Aut o] 32Bit Data Tra nsfer [Ena bled] Select the type of device connected to the name of the sub-menu. T he BIOS detects the information and values of the IDE/SAT A drive. Options: Auto (Default) / SWDMA0 ~ 2 / MWDMA0 ~ 2 / UDMA0 ~ 5 5 Type Select the type of resp ective devices, and... 1985-200x, American Me gatrends, Inc. Options: Auto (Default) / Disabled Block (Multi-Sector Transfer) Enable or disable multi-sector trans fer. S elect Screen S elect Item +- G41D-M7 BIOS M anual SATA1/2/3/4 Dev ice;

Bios Setup
Page 7
Options: Enabled (Default) / Disabled Hard Disk Write Protect Disable or enable device write protection. Options: 35 (Default) / 30 / 25 / 20 / 15 / 10 / 5 / 0 6 G41D-M7 BIOS M anual S.M.A.R.T Set the Smart Monitoring, Analysis, and ReportingT echnology. T his will be effective only if the device is accessed through BIOS. Options: Disabled (Default) / Enabled IDE Detect Time Out (Sec) Select the time out value for detecting IDE/SAT A devices. Options: Auto (Default) / Disabled / Enabled 32Bit Data Transfer Enable or disable 32-bit data transfer.
Options: Enabled (Default) / Disabled Hard Disk Write Protect Disable or enable device write protection. Options: 35 (Default) / 30 / 25 / 20 / 15 / 10 / 5 / 0 6 G41D-M7 BIOS M anual S.M.A.R.T Set the Smart Monitoring, Analysis, and ReportingT echnology. T his will be effective only if the device is accessed through BIOS. Options: Disabled (Default) / Enabled IDE Detect Time Out (Sec) Select the time out value for detecting IDE/SAT A devices. Options: Auto (Default) / Disabled / Enabled 32Bit Data Transfer Enable or disable 32-bit data transfer.

Bios Setup
Page 8
...Configur ation > SuperIO Conf iguration > Hardware Hea lth Configuration > Smart Fan Co nfiguration > Power Config uration > USB Configur ation Configure CPU. Advance d BIOS SETUP UTIL ITY Configure a dvanced CPU settings Module Vers ion:xx.xx Manufacture r:Intel Frequency : FSB Speed : Cache L1 : Cache L2 : Ratio ... Exit Advanced Setti ngs WARNING: Setti ng wrong values in items of CPU, Super I nc. 7 For DP/MP servers, it e nabled. G41D-M7 BIOS M anual 2 Advanced Menu T he Advanced Menu allows you to Sub Screen F1 G eneral Help F10 S ave and Exit ESC E xit vxx...
...Configur ation > SuperIO Conf iguration > Hardware Hea lth Configuration > Smart Fan Co nfiguration > Power Config uration > USB Configur ation Configure CPU. Advance d BIOS SETUP UTIL ITY Configure a dvanced CPU settings Module Vers ion:xx.xx Manufacture r:Intel Frequency : FSB Speed : Cache L1 : Cache L2 : Ratio ... Exit Advanced Setti ngs WARNING: Setti ng wrong values in items of CPU, Super I nc. 7 For DP/MP servers, it e nabled. G41D-M7 BIOS M anual 2 Advanced Menu T he Advanced Menu allows you to Sub Screen F1 G eneral Help F10 S ave and Exit ESC E xit vxx...

Bios Setup
Page 9
T his determines the kind ofbasic information CPUID can do so, it as well. Befo re it can provide the operating system. G41D-M7 BIOS M anual Hardware Prefetcher T he processor has a h ardw are likely to be required in the near future. Options: Enabled (Default) / Disabled Adj acent Cache Line Prefetch T ...
T his determines the kind ofbasic information CPUID can do so, it as well. Befo re it can provide the operating system. G41D-M7 BIOS M anual Hardware Prefetcher T he processor has a h ardw are likely to be required in the near future. Options: Enabled (Default) / Disabled Adj acent Cache Line Prefetch T ...

Bios Setup
Page 10
If you to determine how the serial port1 should function. G41D-M7 BIOS M anual SuperIO Configuration Advanced BIOS S ETUP UTILITY Confi gure ITE8712 Super IO Chi pset Onboa rd Floppy Con troller Seria l Port1 Addre ss Ser ial Port1 Mod e Seria... (FDC) installed on AC Powe r Loss [ Enabled] [ 3F8/IRQ4] [ Normal] [ 2F8/IRQ3] [ Normal] [ 378] [ Normal] [ IRQ7] [ Disabled] [ Disabled] [ Power Off] Allo ws BIOS to determine how the serial port2 should function. Options: Normal (Default) Serial Port2 Address Select an address and corresponding interrupt fo r the first and second...
If you to determine how the serial port1 should function. G41D-M7 BIOS M anual SuperIO Configuration Advanced BIOS S ETUP UTILITY Confi gure ITE8712 Super IO Chi pset Onboa rd Floppy Con troller Seria l Port1 Addre ss Ser ial Port1 Mod e Seria... (FDC) installed on AC Powe r Loss [ Enabled] [ 3F8/IRQ4] [ Normal] [ 2F8/IRQ3] [ Normal] [ 378] [ Normal] [ IRQ7] [ Disabled] [ Disabled] [ Power Off] Allo ws BIOS to determine how the serial port2 should function. Options: Normal (Default) Serial Port2 Address Select an address and corresponding interrupt fo r the first and second...

Bios Setup
Page 11
... Selected T his item allows you to determine access onboard p arallel port controller with which I/O Address. Options: Normal (Default) Using Parallel port as ECP & EPP mode. G41D-M7 BIOS M anual Parallel Port Address T his item will show only when Keyboard PowerOn is set "Stroke Key."
... Selected T his item allows you to determine access onboard p arallel port controller with which I/O Address. Options: Normal (Default) Using Parallel port as ECP & EPP mode. G41D-M7 BIOS M anual Parallel Port Address T his item will show only when Keyboard PowerOn is set "Stroke Key."

