Owners Manual
Page 4
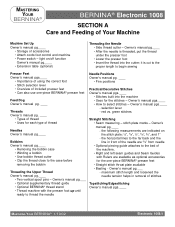
... stitch plate: ¼", 3/8", ½", 5/8", ¾", and 1" - Owner's manual pg.____ • After the needle is cut to the proper length to select stitches - it is threaded, put the thread under the presser foot • Lower the presser foot • Insert the thread into the machine • Uses for the one -piece BERNINA® presser feet Feed Dog Owner's manual pg. ____ Threads Owner's manual pg. ____ • Types of thread • Uses for each type of accessories • Attach cords foot control and machine • Power switch - green stitches Straight Stitching • Seam...
... stitch plate: ¼", 3/8", ½", 5/8", ¾", and 1" - Owner's manual pg.____ • After the needle is cut to the proper length to select stitches - it is threaded, put the thread under the presser foot • Lower the presser foot • Insert the thread into the machine • Uses for the one -piece BERNINA® presser feet Feed Dog Owner's manual pg. ____ Threads Owner's manual pg. ____ • Types of thread • Uses for each type of accessories • Attach cords foot control and machine • Power switch - green stitches Straight Stitching • Seam...

Owners Manual
Page 5
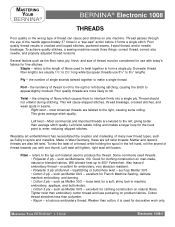
...'s an idea...Use your BERNINA® machine serviced. If needed, use oil, alcohol, or solvents of any kind on any part of the external surface of the machine. important to adjust tension • Can taper while sewing • Stabilizer - MASTERING YOUR BERNINA® BERNINA® Electronic 1008 Satin Stitches • Thread bobbin case finger to the success of stitches Changing the Light Bulb Owner's manual pg.____ Cleaning the Feed Dog • Periodically remove thread fluff and fabric fuzz which collects under the stitch plate.
...'s an idea...Use your BERNINA® machine serviced. If needed, use oil, alcohol, or solvents of any kind on any part of the external surface of the machine. important to adjust tension • Can taper while sewing • Stabilizer - MASTERING YOUR BERNINA® BERNINA® Electronic 1008 Satin Stitches • Thread bobbin case finger to the success of stitches Changing the Light Bulb Owner's manual pg.____ Cleaning the Feed Dog • Periodically remove thread fluff and fabric fuzz which collects under the stitch plate.
Owners Manual
Page 6
... decorative work only. This will loosen. Left twist resists rolling and makes a larger loop for French Machine Sewing, delicate machine embroidery, and darning. • Cotton 2 ply - Some commonly used to the right, causing some rolling. such as Mettler 60/2 - loose twist for clothing construction on natural fibers. MASTERING YOUR BERNINA® 1/10/02 Electronic 1008/6 Poor quality thread results in machine embroidery, applique, and buttonholes. •...
... decorative work only. This will loosen. Left twist resists rolling and makes a larger loop for French Machine Sewing, delicate machine embroidery, and darning. • Cotton 2 ply - Some commonly used to the right, causing some rolling. such as Mettler 60/2 - loose twist for clothing construction on natural fibers. MASTERING YOUR BERNINA® 1/10/02 Electronic 1008/6 Poor quality thread results in machine embroidery, applique, and buttonholes. •...

Owners Manual
Page 7
... when installing a new one of the most inexpensive part in the groove on the front of the needle. needle won't pierce fabric so no thread loop forms to form stitch Blunt - If it isn't protected by the hook point Bent - MASTERING YOUR BERNINA® 1/10/02 Electronic 1008/7 MASTERING YOUR BERNINA® BERNINA® Electronic 1008 NEEDLES Along with a larger groove should be used. • Always make a stitch Need...
... when installing a new one of the most inexpensive part in the groove on the front of the needle. needle won't pierce fabric so no thread loop forms to form stitch Blunt - If it isn't protected by the hook point Bent - MASTERING YOUR BERNINA® 1/10/02 Electronic 1008/7 MASTERING YOUR BERNINA® BERNINA® Electronic 1008 NEEDLES Along with a larger groove should be used. • Always make a stitch Need...
Owners Manual
Page 8
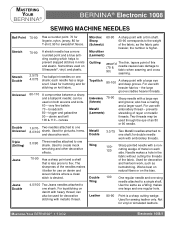
... knit fabric. 60-110 A compromise between a sharp and a ballpoint needle; Needle makes a hole in knits and elastic. Used for double needle work . 3.0/90 Three needles attached to one regular hole. the large groove cradles heavier threads. trigger and gabardine 90 - as hemstitching. canvas 1.6/70- Not for pintucks, hems, and decorative work with heavy thread; denim and twill 100 & 110 - Use the same as a Wing; Sometimes used for stitching on one shank. Used...
... knit fabric. 60-110 A compromise between a sharp and a ballpoint needle; Needle makes a hole in knits and elastic. Used for double needle work . 3.0/90 Three needles attached to one regular hole. the large groove cradles heavier threads. trigger and gabardine 90 - as hemstitching. canvas 1.6/70- Not for pintucks, hems, and decorative work with heavy thread; denim and twill 100 & 110 - Use the same as a Wing; Sometimes used for stitching on one shank. Used...

Owners Manual
Page 9
... embroidery Contrasting color Reverse Pattern Foot #1 Owner's manual pg.____ • The 1008 has 5 fixed needle positions. • Fold fabric in the center of the stitch width knob. • Position the fold of the fabric on the 1" mark on the right side of the fabric. MASTERING YOUR BERNINA® 1/10/02 Electronic 1008/9 Leaving the fabric under the foot - MASTERING YOUR BERNINA® BERNINA® Electronic 1008 NEEDLE POSITIONS Fabric: Needle: Thread: Presser Foot: Firmly woven fabric, 4" x 6" 90/14 Embroidery 30...
... embroidery Contrasting color Reverse Pattern Foot #1 Owner's manual pg.____ • The 1008 has 5 fixed needle positions. • Fold fabric in the center of the stitch width knob. • Position the fold of the fabric on the 1" mark on the right side of the fabric. MASTERING YOUR BERNINA® 1/10/02 Electronic 1008/9 Leaving the fabric under the foot - MASTERING YOUR BERNINA® BERNINA® Electronic 1008 NEEDLE POSITIONS Fabric: Needle: Thread: Presser Foot: Firmly woven fabric, 4" x 6" 90/14 Embroidery 30...
Owners Manual
Page 13
... 1008 SECURING STITCHES Fabric: Needle: Thread: Presser Foot: Firm fabric, 3" x 6" 90/14 Embroidery 30 wt. cotton embroidery Reverse Pattern Foot #1 Owner's manual pg.____ • Fold each fabric piece in the same manner. MASTERING YOUR BERNINA® 1/10/02 Electronic 1008/13 the machine will sew in reverse as long as the lever is engaged. • Continue stitching the seam and secure the end in half to 1½" x 6". • Find the 5/8" seam line on the guide plate...
... 1008 SECURING STITCHES Fabric: Needle: Thread: Presser Foot: Firm fabric, 3" x 6" 90/14 Embroidery 30 wt. cotton embroidery Reverse Pattern Foot #1 Owner's manual pg.____ • Fold each fabric piece in the same manner. MASTERING YOUR BERNINA® 1/10/02 Electronic 1008/13 the machine will sew in reverse as long as the lever is engaged. • Continue stitching the seam and secure the end in half to 1½" x 6". • Find the 5/8" seam line on the guide plate...

Owners Manual
Page 14
... the fabric. • Position the fold of the fabric on the 3/8" line (on the left side of the stitch plate). • Sew down the center of the fabric, tapering and widening the satin stitch while sewing. MASTERING YOUR BERNINA® BERNINA® Electronic 1008 SATIN STITCH Fabric: Needle: Thread: Presser Foot: Firm fabric - 2 pieces, 3" x 6" each 90/14 Embroidery 30 wt. Change the stitch length to satin stitch and the stitch width to 5.5mm. • Thread the bobbin thread through the hole in...
... the fabric. • Position the fold of the fabric on the 3/8" line (on the left side of the stitch plate). • Sew down the center of the fabric, tapering and widening the satin stitch while sewing. MASTERING YOUR BERNINA® BERNINA® Electronic 1008 SATIN STITCH Fabric: Needle: Thread: Presser Foot: Firm fabric - 2 pieces, 3" x 6" each 90/14 Embroidery 30 wt. Change the stitch length to satin stitch and the stitch width to 5.5mm. • Thread the bobbin thread through the hole in...

Owners Manual
Page 15
... type __________ type __________ Thread - Baker's dozen Spool Bobbin Holders Magnetic Pin Cushion Magnetic Bobbin Holder Straight Stitch Plate Seam Sealant Extra Thread Stand Scissors - 6" or 7" Dressmaker's shears ____ 4" or 5" Trimming scissors ____ Thread nips ____ Left guide (matches right guide included with machine)____ Right and Left Seam Guides with Guide Feet-ures Edgestitch Foot #10 Stabilizers - MASTERING YOUR BERNINA® BERNINA® Electronic 1008 WISH LIST Care and Feeding of Your Machine Hard Case Slide-on Extension Table with Rulers Set...
... type __________ type __________ Thread - Baker's dozen Spool Bobbin Holders Magnetic Pin Cushion Magnetic Bobbin Holder Straight Stitch Plate Seam Sealant Extra Thread Stand Scissors - 6" or 7" Dressmaker's shears ____ 4" or 5" Trimming scissors ____ Thread nips ____ Left guide (matches right guide included with machine)____ Right and Left Seam Guides with Guide Feet-ures Edgestitch Foot #10 Stabilizers - MASTERING YOUR BERNINA® BERNINA® Electronic 1008 WISH LIST Care and Feeding of Your Machine Hard Case Slide-on Extension Table with Rulers Set...
Owners Manual
Page 17
... loose, so that the blind hem will not pucker and does not form a tuck in the fabric. Double Needle - SL2mm Owner's manual pg. ____ SW5mm Flat Joining Seam - Owner's manual pg.____ • The Blind Hem Foot #5, along with double needle for strong, visible hems on firm, coarse fabrics such as it is formed over the guide on heavy fabrics Zigzag - The zigzag part of the stitch is being sewn Double Overlock - SL2mm SW4mm Owner's manual pg.___ Stitching...
... loose, so that the blind hem will not pucker and does not form a tuck in the fabric. Double Needle - SL2mm Owner's manual pg. ____ SW5mm Flat Joining Seam - Owner's manual pg.____ • The Blind Hem Foot #5, along with double needle for strong, visible hems on firm, coarse fabrics such as it is formed over the guide on heavy fabrics Zigzag - The zigzag part of the stitch is being sewn Double Overlock - SL2mm SW4mm Owner's manual pg.___ Stitching...
Owners Manual
Page 29
... threads. Owner's manual pg.___ • Cut fabric in place, about 3/8" each time. • Topstitch the hem in two pieces, 5" x 3½" each. • Insert a Jeans needle and select stitch #1/green; MASTERING YOUR BERNINA® 1/10/02 Electronic 1008/29 MASTERING YOUR BERNINA® BERNINA® Electronic 1008 JEANS HEM Fabric: Needle: Thread: Presser Foot: Denim - 5" x 7" 100/16 or 110/18 Jeans All-purpose Jeans Foot #8 (optional accessory) Note: Specially designed to sew over heavy seams...
... threads. Owner's manual pg.___ • Cut fabric in place, about 3/8" each time. • Topstitch the hem in two pieces, 5" x 3½" each. • Insert a Jeans needle and select stitch #1/green; MASTERING YOUR BERNINA® 1/10/02 Electronic 1008/29 MASTERING YOUR BERNINA® BERNINA® Electronic 1008 JEANS HEM Fabric: Needle: Thread: Presser Foot: Denim - 5" x 7" 100/16 or 110/18 Jeans All-purpose Jeans Foot #8 (optional accessory) Note: Specially designed to sew over heavy seams...
Owners Manual
Page 32
... - sometimes using Simpflex • Measuring the Button: - using spacing tape - wash-a-way stabilizer for hems • Designer Hem - Stitch Witchery® for tucks - for loose wovens or knits • Corded Buttonholes: - couching over - lingerie MASTERING YOUR BERNINA® 1/10/02 Electronic 1008/32 proper adhesion of buttonhole • Grading Seams - keep foot level • Tension Adjustments • Testing: - with threads Sewing Buttons On Owner's manual page ____ Feet-ures, Unit D • Universal Stitch - decorative...
... - sometimes using Simpflex • Measuring the Button: - using spacing tape - wash-a-way stabilizer for hems • Designer Hem - Stitch Witchery® for tucks - for loose wovens or knits • Corded Buttonholes: - couching over - lingerie MASTERING YOUR BERNINA® 1/10/02 Electronic 1008/32 proper adhesion of buttonhole • Grading Seams - keep foot level • Tension Adjustments • Testing: - with threads Sewing Buttons On Owner's manual page ____ Feet-ures, Unit D • Universal Stitch - decorative...

Owners Manual
Page 37
... hand sewing thread, gimp cord, or crochet cotton. • Sew the buttonhole. • Pull the loop of the Buttonhole Foot with Slide #3B. Note: On knits, pull to back and tie a knot. • Sew another corded buttonhole using the optional Buttonhole Foot #3 on knits. MASTERING YOUR BERNINA® BERNINA® Electronic 1008 Auto Buttonhole Foot with Slide #3A Standard Buttonhole Foot #3 CORDED BUTTONHOLES Fabric: Stabilizer: Needle: Thread: Presser Foot: Heavy flannel, 6" x 6" Two 10" lengths of the gimp down lightly...
... hand sewing thread, gimp cord, or crochet cotton. • Sew the buttonhole. • Pull the loop of the Buttonhole Foot with Slide #3B. Note: On knits, pull to back and tie a knot. • Sew another corded buttonhole using the optional Buttonhole Foot #3 on knits. MASTERING YOUR BERNINA® BERNINA® Electronic 1008 Auto Buttonhole Foot with Slide #3A Standard Buttonhole Foot #3 CORDED BUTTONHOLES Fabric: Stabilizer: Needle: Thread: Presser Foot: Heavy flannel, 6" x 6" Two 10" lengths of the gimp down lightly...

Owners Manual
Page 38
... fabric in place. • Adjust the pin on to 2" x 6"; Notes: - Technique #2 • Using the lowest shank setting, attach a charm, a length of the button by turning the hand wheel. • Adjust the stitch width if necessary. • Hold the thread tails as coats and blazers. - MASTERING YOUR BERNINA® BERNINA® Electronic 1008 BUTTON SEW-ON STITCH Fabric: Stabilizer: Needle: Thread: Presser Foot: Heavy flannel, 6" x 6" 1 piece, 3" x 6" 90/14 Embroidery 30 weight cotton embroidery Button Sew-On Foot #18 (optional accessory) Owner's manual...
... fabric in place. • Adjust the pin on to 2" x 6"; Notes: - Technique #2 • Using the lowest shank setting, attach a charm, a length of the button by turning the hand wheel. • Adjust the stitch width if necessary. • Hold the thread tails as coats and blazers. - MASTERING YOUR BERNINA® BERNINA® Electronic 1008 BUTTON SEW-ON STITCH Fabric: Stabilizer: Needle: Thread: Presser Foot: Heavy flannel, 6" x 6" 1 piece, 3" x 6" 90/14 Embroidery 30 weight cotton embroidery Button Sew-On Foot #18 (optional accessory) Owner's manual...
Owners Manual
Page 41
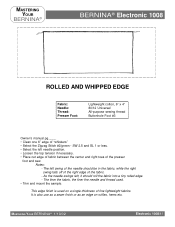
... use as a seam finish or as an edge on a single thickness of the fabric. - The left swing of the needle should roll the fabric into a tiny rolled edge. - It is used . • Trim and mount the sample. MASTERING YOUR BERNINA® BERNINA® Electronic 1008 ROLLED AND WHIPPED EDGE Fabric: Needle: Thread: Presser Foot: Lightweight cotton, 6" x 4" 80/12 Universal All-purpose sewing thread Buttonhole Foot #3 Owner's manual pg.____ • Clean...
... use as a seam finish or as an edge on a single thickness of the fabric. - The left swing of the needle should roll the fabric into a tiny rolled edge. - It is used . • Trim and mount the sample. MASTERING YOUR BERNINA® BERNINA® Electronic 1008 ROLLED AND WHIPPED EDGE Fabric: Needle: Thread: Presser Foot: Lightweight cotton, 6" x 4" 80/12 Universal All-purpose sewing thread Buttonhole Foot #3 Owner's manual pg.____ • Clean...
Owners Manual
Page 42
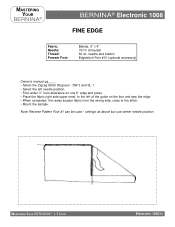
... guide on the foot and sew the edge. • When completed, trim away surplus fabric from the wrong side, close to the stitch. • Mount the sample. settings as above but use center needle position. needle and bobbin Edgestitch Foot #10 (optional accessory) Owner's manual pg.____ • Select the Zigzag Stitch #2/green - MASTERING YOUR BERNINA® 1/10/02 Electronic 1008/42 MASTERING YOUR BERNINA® BERNINA® Electronic 1008 FINE EDGE Fabric: Needle: Thread: Presser Foot...
... guide on the foot and sew the edge. • When completed, trim away surplus fabric from the wrong side, close to the stitch. • Mount the sample. settings as above but use center needle position. needle and bobbin Edgestitch Foot #10 (optional accessory) Owner's manual pg.____ • Select the Zigzag Stitch #2/green - MASTERING YOUR BERNINA® 1/10/02 Electronic 1008/42 MASTERING YOUR BERNINA® BERNINA® Electronic 1008 FINE EDGE Fabric: Needle: Thread: Presser Foot...
Owners Manual
Page 45
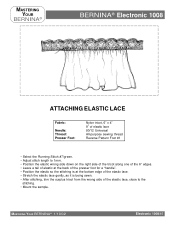
... BERNINA® BERNINA® Electronic 1008 ATTACHING ELASTIC LACE Fabric: Needle: Thread: Presser Foot: Nylon tricot, 6" x 4" 9" of elastic lace 80/12 Universal All-purpose sewing thread Reverse Pattern Foot #1 • Select the Running Stitch #7/green. • Adjust stitch length to 1mm. • Position the elastic wrong side down on the right side of the tricot along one of the 6" edges. • Leave a tail of elastic at the back of the presser foot for a "handle". • Position...
... BERNINA® BERNINA® Electronic 1008 ATTACHING ELASTIC LACE Fabric: Needle: Thread: Presser Foot: Nylon tricot, 6" x 4" 9" of elastic lace 80/12 Universal All-purpose sewing thread Reverse Pattern Foot #1 • Select the Running Stitch #7/green. • Adjust stitch length to 1mm. • Position the elastic wrong side down on the right side of the tricot along one of the 6" edges. • Leave a tail of elastic at the back of the presser foot for a "handle". • Position...
Owners Manual
Page 49
... to Feet-ures, Unit A - gimp hole - Reverse Pattern Foot #1 • Large Tucks and Pleats - Embroidery Foot #6 with Guide #14 - Refer to thread a double needle - refer to Feet-ures, Unit B - turning corners • Pleats vs Tucks - Zipper Foot with stitch #2 • Elastic Thread In Bobbin Case - sewn with stitch #2 • Gathering Foot #16 - Refer to Feet-ures, Unit J Tucks • Pintuck Feet and Double Needles - Refer to Feet-ures, Unit A - Open Embroidery Foot #20 with decorative stitches vs straight - Edgestitch Foot #10 - Piecing Guide •...
... to Feet-ures, Unit A - gimp hole - Reverse Pattern Foot #1 • Large Tucks and Pleats - Embroidery Foot #6 with Guide #14 - Refer to thread a double needle - refer to Feet-ures, Unit B - turning corners • Pleats vs Tucks - Zipper Foot with stitch #2 • Elastic Thread In Bobbin Case - sewn with stitch #2 • Gathering Foot #16 - Refer to Feet-ures, Unit J Tucks • Pintuck Feet and Double Needles - Refer to Feet-ures, Unit A - Open Embroidery Foot #20 with decorative stitches vs straight - Edgestitch Foot #10 - Piecing Guide •...
Owners Manual
Page 50
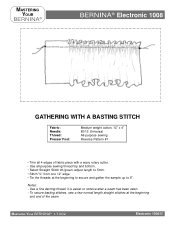
... rotary cutter. • Use all-purpose sewing thread top and bottom. • Select Straight Stitch #1/green; it is easier to 6". Notes: - To secure basting stitches, sew a few normal length straight stitches at the beginning to secure and gather the sample up to remove after a seam has been sewn. - Use a fine darning thread; MASTERING YOUR BERNINA® BERNINA® Electronic 1008 GATHERING WITH A BASTING STITCH Fabric: Needle: Thread: Presser Foot: Medium weight cotton, 12" x 4" 80/12 Universal All-purpose sewing Reverse Pattern #1 •...
... rotary cutter. • Use all-purpose sewing thread top and bottom. • Select Straight Stitch #1/green; it is easier to 6". Notes: - To secure basting stitches, sew a few normal length straight stitches at the beginning to secure and gather the sample up to remove after a seam has been sewn. - Use a fine darning thread; MASTERING YOUR BERNINA® BERNINA® Electronic 1008 GATHERING WITH A BASTING STITCH Fabric: Needle: Thread: Presser Foot: Medium weight cotton, 12" x 4" 80/12 Universal All-purpose sewing Reverse Pattern #1 •...

Owners Manual
Page 57
.... - Sew to corner; Sew to corner; same thread in one operation. - needles have changed sides. Turning Corners: - needle in fabric, turn completely in both needles and the bobbin. • Sew four random corners. Turning Points - Note: Cord should be colorfast and shrinkproof. • Thread machine - Turn ½ way, make 1 stitch, place needles in fabric, drop feed dogs. - needle up. - Pivot work carefully and lower needles back into same place; MASTERING YOUR BERNINA® BERNINA® Electronic 1008 CORDED PINTUCKS Fabric: Needle: Thread: Presser Foot...
.... - Sew to corner; Sew to corner; same thread in one operation. - needles have changed sides. Turning Corners: - needle in fabric, turn completely in both needles and the bobbin. • Sew four random corners. Turning Points - Note: Cord should be colorfast and shrinkproof. • Thread machine - Turn ½ way, make 1 stitch, place needles in fabric, drop feed dogs. - needle up. - Pivot work carefully and lower needles back into same place; MASTERING YOUR BERNINA® BERNINA® Electronic 1008 CORDED PINTUCKS Fabric: Needle: Thread: Presser Foot...


