Owners Manual
Page 2
...YOUR BERNINA® BERNINA® 009DCC SECTION ... • Light Switch - Owner's manual pg.___ • The Looper Cover - using the needle inserter • Loosening/re-tightening needle screws Threading Owner's manual pg.___ ...used for better fabric feeding - Right Needle (Green) - Owner's manual pg__ • Attaching the Foot Control and Power Cord - Owner's manual pg.___ • Loopers - Owner's manual pg.___ • Change the needle often; Lock thread into guide. • Cover Stitch Threading Order - - Left Needle (Yellow) MASTERING YOUR BERNINA® 1/04/02 009DCC...
...YOUR BERNINA® BERNINA® 009DCC SECTION ... • Light Switch - Owner's manual pg.___ • The Looper Cover - using the needle inserter • Loosening/re-tightening needle screws Threading Owner's manual pg.___ ...used for better fabric feeding - Right Needle (Green) - Owner's manual pg__ • Attaching the Foot Control and Power Cord - Owner's manual pg.___ • Loopers - Owner's manual pg.___ • Change the needle often; Lock thread into guide. • Cover Stitch Threading Order - - Left Needle (Yellow) MASTERING YOUR BERNINA® 1/04/02 009DCC...
Owners Manual
Page 3
... of the machine. • Following the oiling guide inside the looper cover, place a drop of sewing. MASTERING YOUR BERNINA® 1/04/02 009DCC/3 this releases the needle threads from serger. If you encounter any resistance, stop at the end of the two oiling points...release the threads from the loopers. • Open the looper cover and side door. • Using a vacuum cleaner adapter or a 1" cosmetic brush, remove all threads at the back. • Place fabric under presser foot; MASTERING YOUR BERNINA® BERNINA® 009DCC • Chain Stitch Threading Order - - First -
... of the machine. • Following the oiling guide inside the looper cover, place a drop of sewing. MASTERING YOUR BERNINA® 1/04/02 009DCC/3 this releases the needle threads from serger. If you encounter any resistance, stop at the end of the two oiling points...release the threads from the loopers. • Open the looper cover and side door. • Using a vacuum cleaner adapter or a 1" cosmetic brush, remove all threads at the back. • Place fabric under presser foot; MASTERING YOUR BERNINA® BERNINA® 009DCC • Chain Stitch Threading Order - - First -
Owners Manual
Page 4
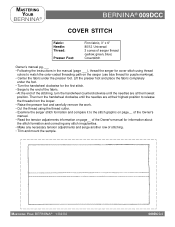
... BERNINA® BERNINA® 009DCC COVER STITCH Fabric: Needle: Thread: Presser Foot: Firm fabric, 3" x 6" 80/12 Universal 3 cones of serger thread (yellow, green, blue) Coverstitch Owner's manual pg.___ • Following the instructions in the manual (page ___), thread the serger for cover stitch using ...Make any necessary tension adjustments and serge another row of stitching. • Trim and mount the sample. MASTERING YOUR BERNINA® 1/04/02 009DCC/4 Then turn the handwheel counterclockwise until the needles are at their lowest position. Lift the presser foot and place the ...
... BERNINA® BERNINA® 009DCC COVER STITCH Fabric: Needle: Thread: Presser Foot: Firm fabric, 3" x 6" 80/12 Universal 3 cones of serger thread (yellow, green, blue) Coverstitch Owner's manual pg.___ • Following the instructions in the manual (page ___), thread the serger for cover stitch using ...Make any necessary tension adjustments and serge another row of stitching. • Trim and mount the sample. MASTERING YOUR BERNINA® 1/04/02 009DCC/4 Then turn the handwheel counterclockwise until the needles are at their lowest position. Lift the presser foot and place the ...
Owners Manual
Page 5
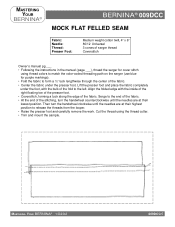
... colors to match the color-coded threading path on the serger (use blue for cover stitch using the thread cutter. • Trim and mount the sample. MASTERING YOUR BERNINA® 1/04/02 009DCC/5 Align the folded edge with the bulk of the fold to the left. Then turn...counterclockwise until the needles are at their lowest position. Lift the presser foot and place the fabric completely under the presser foot. MASTERING YOUR BERNINA® BERNINA® 009DCC MOCK FLAT FELLED SEAM Fabric: Needle: Thread: Presser Foot: Medium weight cotton twill, 4" x 6" 80/12 Universal 3 cones of ...
... colors to match the color-coded threading path on the serger (use blue for cover stitch using the thread cutter. • Trim and mount the sample. MASTERING YOUR BERNINA® 1/04/02 009DCC/5 Align the folded edge with the bulk of the fold to the left. Then turn...counterclockwise until the needles are at their lowest position. Lift the presser foot and place the fabric completely under the presser foot. MASTERING YOUR BERNINA® BERNINA® 009DCC MOCK FLAT FELLED SEAM Fabric: Needle: Thread: Presser Foot: Medium weight cotton twill, 4" x 6" 80/12 Universal 3 cones of ...
Owners Manual
Page 6
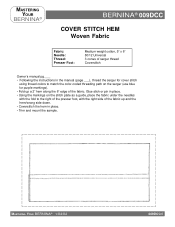
MASTERING YOUR BERNINA® 1/04/02 009DCC/6 Glue stick or pin in place. • Using the markings on the stitch plate as a guide, place the fabric under the needles with the fold to the right of the presser foot, with ... the color-coded threading path on the serger (use blue for purple markings). • Fold up a 2" hem along the 6" edge of serger thread Coverstitch Owner's manual pg.___ • Following the instructions in place. • Trim and mount the sample. MASTERING YOUR BERNINA® BERNINA® 009DCC COVER STITCH HEM Woven Fabric Fabric: Needle...
MASTERING YOUR BERNINA® 1/04/02 009DCC/6 Glue stick or pin in place. • Using the markings on the stitch plate as a guide, place the fabric under the needles with the fold to the right of the presser foot, with ... the color-coded threading path on the serger (use blue for purple markings). • Fold up a 2" hem along the 6" edge of serger thread Coverstitch Owner's manual pg.___ • Following the instructions in place. • Trim and mount the sample. MASTERING YOUR BERNINA® BERNINA® 009DCC COVER STITCH HEM Woven Fabric Fabric: Needle...
Owners Manual
Page 7
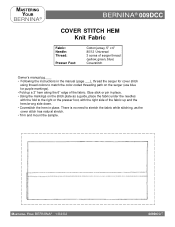
... Following the instructions in the manual (page ___), thread the serger for cover stitch using thread colors to the right or the presser foot, with the right side of the fabric. MASTERING YOUR BERNINA® 1/04/02 009DCC/7 Glue stick or pin in place. There is no need to stretch the fabric ...while stitching, as a guide, place the fabric under the needles with the fold to match the color-coded threading path on the serger (use blue for purple markings). &#...
... Following the instructions in the manual (page ___), thread the serger for cover stitch using thread colors to the right or the presser foot, with the right side of the fabric. MASTERING YOUR BERNINA® 1/04/02 009DCC/7 Glue stick or pin in place. There is no need to stretch the fabric ...while stitching, as a guide, place the fabric under the needles with the fold to match the color-coded threading path on the serger (use blue for purple markings). &#...
Owners Manual
Page 8
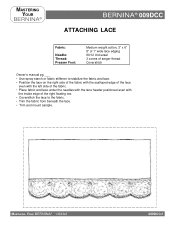
MASTERING YOUR BERNINA® BERNINA® 009DCC ATTACHING LACE Fabric: Needle: Thread: Presser Foot: Medium weight cotton, 3" x 6" 8" of 1" wide lace edging 80/12 Universal 3 cones of serger thread Coverstitch Owner's manual pg.___ • Use spray starch or fabric stiffener to stabilize the fabric and lace. • Position the lace on the right side of... right floating toe. • Coverstitch the lace to the fabric. • Trim the fabric from beneath the lace. • Trim and mount sample. MASTERING YOUR BERNINA® 1/04/02 009DCC/8
MASTERING YOUR BERNINA® BERNINA® 009DCC ATTACHING LACE Fabric: Needle: Thread: Presser Foot: Medium weight cotton, 3" x 6" 8" of 1" wide lace edging 80/12 Universal 3 cones of serger thread Coverstitch Owner's manual pg.___ • Use spray starch or fabric stiffener to stabilize the fabric and lace. • Position the lace on the right side of... right floating toe. • Coverstitch the lace to the fabric. • Trim the fabric from beneath the lace. • Trim and mount sample. MASTERING YOUR BERNINA® 1/04/02 009DCC/8
Owners Manual
Page 9
... Owner's manual, raise the presser foot and carefully remove the work. • Cut the thread using thread colors to the stitch graphic on page__ of stitching. • Trim and mount the sample. MASTERING YOUR BERNINA® 1/04/02 009DCC/9 Align the the raw edges with the 5/8" mark on the stitch plate. • Turn...
... Owner's manual, raise the presser foot and carefully remove the work. • Cut the thread using thread colors to the stitch graphic on page__ of stitching. • Trim and mount the sample. MASTERING YOUR BERNINA® 1/04/02 009DCC/9 Align the the raw edges with the 5/8" mark on the stitch plate. • Turn...
Owners Manual
Page 11
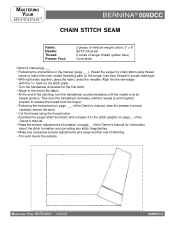
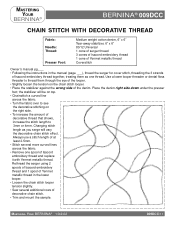
...; Chainstitch a curved line across the fabric. • Remove one thread. MASTERING YOUR BERNINA® 1/04/02 009DCC/11 the stabilizer will vary the decorative chain stitch effect. Always use a stitch length of at least 2.5mm. • Stitch several additional rows of decorative... chain stitch. • Trim and mount the sample. MASTERING YOUR BERNINA® BERNINA® 009DCC CHAIN STITCH WITH DECORATIVE THREAD Fabric: Needle: Thread...
...; Chainstitch a curved line across the fabric. • Remove one thread. MASTERING YOUR BERNINA® 1/04/02 009DCC/11 the stabilizer will vary the decorative chain stitch effect. Always use a stitch length of at least 2.5mm. • Stitch several additional rows of decorative... chain stitch. • Trim and mount the sample. MASTERING YOUR BERNINA® BERNINA® 009DCC CHAIN STITCH WITH DECORATIVE THREAD Fabric: Needle: Thread...


