User Manual
Page 2
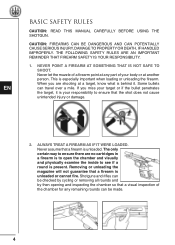
When you miss your target or if the bullet penetrates the target, it . Removing or unloading the magazine will not guarantee that a firearm is behind it is present. EN 1. Never let the muzzle of a firearm point at any part of the ... REMINDER THAT FIREARM SAFETY IS YOUR RESPONSIBILITY. Some bullets can be made. 4 The only certain way to see if a round is your body or at a target, know what is unloaded or cannot fire. Shotguns and rifles can travel over a mile. NEVER POINT A FIREARM AT SOMETHING THAT IS NOT...
When you miss your target or if the bullet penetrates the target, it . Removing or unloading the magazine will not guarantee that a firearm is behind it is present. EN 1. Never let the muzzle of a firearm point at any part of the ... REMINDER THAT FIREARM SAFETY IS YOUR RESPONSIBILITY. Some bullets can be made. 4 The only certain way to see if a round is your body or at a target, know what is unloaded or cannot fire. Shotguns and rifles can travel over a mile. NEVER POINT A FIREARM AT SOMETHING THAT IS NOT...
User Manual
Page 4
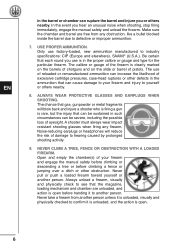
... eyesight. Be certain that each round you use is open before climbing a fence or jumping over a ditch or other defects in the ammunition that the magazine, loading mechanism and chamber are free from another person unless it is unloaded, visually and physically checked to confirm it to industry speci...
... eyesight. Be certain that each round you use is open before climbing a fence or jumping over a ditch or other defects in the ammunition that the magazine, loading mechanism and chamber are free from another person unless it is unloaded, visually and physically checked to confirm it to industry speci...
User Manual
Page 5
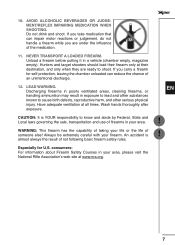
... unloaded can impair motor reactions or judgement, do not handle a firearm while you carry a firearm for U.S. Hunters and target shooters should load their destination, and only when they are under the in your firearm. AVOID ALCOHOLIC BEVERAGES OR JUDGEMENT/REFLEX IMPAIRING ... Discharging firearms in poorly ventilated areas, cleaning firearms, or handling ammunition may result in a vehicle (chamber empty, magazine empty). Always be extremely careful with your area, please visit the National Rifle Association's web site at www.nra.org.
... unloaded can impair motor reactions or judgement, do not handle a firearm while you carry a firearm for U.S. Hunters and target shooters should load their destination, and only when they are under the in your firearm. AVOID ALCOHOLIC BEVERAGES OR JUDGEMENT/REFLEX IMPAIRING ... Discharging firearms in poorly ventilated areas, cleaning firearms, or handling ammunition may result in a vehicle (chamber empty, magazine empty). Always be extremely careful with your area, please visit the National Rifle Association's web site at www.nra.org.
User Manual
Page 6
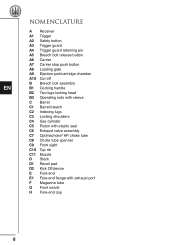
... valve assembly C7 Optimachoke® HP choke tube C8 Choke tube spanner C9 Front sight C10 Top rib C11 Muzzle D Stock D1 Recoil pad D2 Kick Off device E Fore-end E1 Fore-end flange with exhaust port F Magazine tube G Front swivel H Fore-end cap 8
... valve assembly C7 Optimachoke® HP choke tube C8 Choke tube spanner C9 Front sight C10 Top rib C11 Muzzle D Stock D1 Recoil pad D2 Kick Off device E Fore-end E1 Fore-end flange with exhaust port F Magazine tube G Front swivel H Fore-end cap 8
User Manual
Page 10
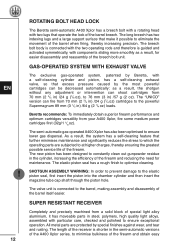
... cylinder and then insert the magazine tube cap shaft through the piston hole. SHOTGUN ASSEMBLY WARNING: In order to prevent damage to ensure lower gas dispersal. The length of the receiver is shorter in the semi-automatic versions of the A400 Xplor series, to minimise bulkiness... lugs that excess pressure caused by special finishes against wear, and tear and rusting. EN ! 12 ROTATING BOLT HEAD LOCK The Beretta semi-automatic A400 Xplor has a breech bolt with a rotating head with components sliding more smoothly as a result, the shotgun without any adjustment or intervention ...
... cylinder and then insert the magazine tube cap shaft through the piston hole. SHOTGUN ASSEMBLY WARNING: In order to prevent damage to ensure lower gas dispersal. The length of the receiver is shorter in the semi-automatic versions of the A400 Xplor series, to minimise bulkiness... lugs that excess pressure caused by special finishes against wear, and tear and rusting. EN ! 12 ROTATING BOLT HEAD LOCK The Beretta semi-automatic A400 Xplor has a breech bolt with a rotating head with components sliding more smoothly as a result, the shotgun without any adjustment or intervention ...
User Manual
Page 12
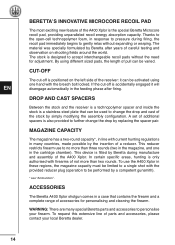
... rounds. This reducer restricts firearm use the A400 Xplor in these regions, the magazine capacity must be limited to be varied. The stock is the special Beretta Microcore recoil pad, providing unparalleled recoil energy absorption capacity. ACCESSORIES The Beretta A400 Xplor shotgun comes in many special Beretta parts and accessories to accept interchangeable recoil pads...
... rounds. This reducer restricts firearm use the A400 Xplor in these regions, the magazine capacity must be limited to be varied. The stock is the special Beretta Microcore recoil pad, providing unparalleled recoil energy absorption capacity. ACCESSORIES The Beretta A400 Xplor shotgun comes in many special Beretta parts and accessories to accept interchangeable recoil pads...
User Manual
Page 13
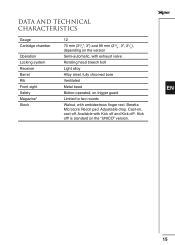
Beretta Microcore Recoil pad. Adjustable drop. Kick off³ is standard on , cast-off ³. Available with ambidextrous finger rest. EN 15 Cast-on the "UNICO" version. DATA AND TECHNICAL CHARACTERISTICS Gauge Cartridge chamber Operation Locking system Receiver Barrel Rib Front sight Safety Magazine* Stock 12 70 mm (23/4", 3") and 89 mm (23...
Beretta Microcore Recoil pad. Adjustable drop. Kick off³ is standard on , cast-off ³. Available with ambidextrous finger rest. EN 15 Cast-on the "UNICO" version. DATA AND TECHNICAL CHARACTERISTICS Gauge Cartridge chamber Operation Locking system Receiver Barrel Rib Front sight Safety Magazine* Stock 12 70 mm (23/4", 3") and 89 mm (23...

User Manual
Page 14
...choke tubes before using the shotgun. • Check correct tightness in the barrel with the firearm unloaded (cartridge chamber, receiver and magazine empty). ASSEMBLY OF PACKAGED FIREARM CAUTION: THIS FIREARM HAS THE CAPABILITY OF TAKING YOUR LIFE OR THE LIFE OF SOMEONE ELSE! AN ACCIDENT ... for the intended use ; if the firearm is already assembled the following procedure should be used (steel or lead). WARNING: Beretta assumes no obstructions in the chamber and bore. Inspect again the shotgun before use and shot type to completely assembling the firearm ...
...choke tubes before using the shotgun. • Check correct tightness in the barrel with the firearm unloaded (cartridge chamber, receiver and magazine empty). ASSEMBLY OF PACKAGED FIREARM CAUTION: THIS FIREARM HAS THE CAPABILITY OF TAKING YOUR LIFE OR THE LIFE OF SOMEONE ELSE! AN ACCIDENT ... for the intended use ; if the firearm is already assembled the following procedure should be used (steel or lead). WARNING: Beretta assumes no obstructions in the chamber and bore. Inspect again the shotgun before use and shot type to completely assembling the firearm ...
User Manual
Page 15
The Beretta semi-automatic A400 Xplor comes with the fingers to facilitate insertion of the piston into the cylinder ..., first insert the piston into the chamber cylinder and then insert the magazine tube cap shaft through the piston hole. • Check that the magazine tube cap shaft enters the piston hole as well as the gas cylinder hole... cocking handle, with the likelihood of damage to both parts. • Check the barrel. Otherwise, push it is mounted on the magazine tube, remove it (Fig. 4) and insert it were loaded (See points 1, 2 and 4 of the BASIC SAFETY RULES). EN...
The Beretta semi-automatic A400 Xplor comes with the fingers to facilitate insertion of the piston into the cylinder ..., first insert the piston into the chamber cylinder and then insert the magazine tube cap shaft through the piston hole. • Check that the magazine tube cap shaft enters the piston hole as well as the gas cylinder hole... cocking handle, with the likelihood of damage to both parts. • Check the barrel. Otherwise, push it is mounted on the magazine tube, remove it (Fig. 4) and insert it were loaded (See points 1, 2 and 4 of the BASIC SAFETY RULES). EN...

User Manual
Page 16
..., close the breech bolt, be sure to it away. EN ! ! • Slide the fore-end into place over the gas cylinder / the valve assembly and magazine tube (Fig. 13).
..., close the breech bolt, be sure to it away. EN ! ! • Slide the fore-end into place over the gas cylinder / the valve assembly and magazine tube (Fig. 13).
User Manual
Page 17
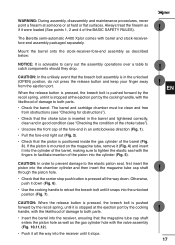
... it down . LOAD CHECK At various points in this manual, you , as indicated below: CAUTION: Keep your Beretta semi-automatic A400 Xplor to ensure that there are , unload the firearm as indicated in the magazine tube. EN ! ! 19 The cartridge chamber is the portion of your finger off the trigger and...
... it down . LOAD CHECK At various points in this manual, you , as indicated below: CAUTION: Keep your Beretta semi-automatic A400 Xplor to ensure that there are , unload the firearm as indicated in the magazine tube. EN ! ! 19 The cartridge chamber is the portion of your finger off the trigger and...
User Manual
Page 19
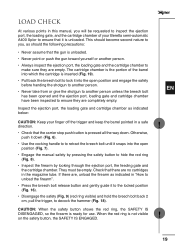
...other objects with the trigger if you are empty. Before loading the firearm, ensure that the safety is fitted by Beretta during shooting. Always inspect the ejection port, the loading gate and the cartridge chamber to make sure that there are a Repair Point... The magazine of the Manufacturer (unless they are fully familiar with the current hunting regulations in the magazine tube. This device is engaged. WARNING: Wholesalers, dealers or gunsmiths are not authorised to carry out any Warranty repair or adjustment on behalf of the A400 Xplor has a capacity limited...
...other objects with the trigger if you are empty. Before loading the firearm, ensure that the safety is fitted by Beretta during shooting. Always inspect the ejection port, the loading gate and the cartridge chamber to make sure that there are a Repair Point... The magazine of the Manufacturer (unless they are fully familiar with the current hunting regulations in the magazine tube. This device is engaged. WARNING: Wholesalers, dealers or gunsmiths are not authorised to carry out any Warranty repair or adjustment on behalf of the A400 Xplor has a capacity limited...

User Manual
Page 20
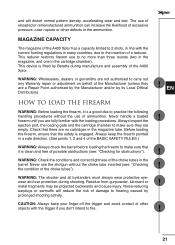
... point a firearm at least one minute and unload the shotgun as described in the chamber first, and then it snaps into the magazine through the ejection port (Fig. 22). • Keeping your hands away from improper or careless handling or intentional or accidental firing of fi.... When the safety button shows the red ring, the SAFETY IS DISENGAGED, so the firearm is in the cocked position. WARNING: Beretta assumes no way a substitute for any injury or property damage resulting from the ejection port, press the release button and guide the breech bolt...
... point a firearm at least one minute and unload the shotgun as described in the chamber first, and then it snaps into the magazine through the ejection port (Fig. 22). • Keeping your hands away from improper or careless handling or intentional or accidental firing of fi.... When the safety button shows the red ring, the SAFETY IS DISENGAGED, so the firearm is in the cocked position. WARNING: Beretta assumes no way a substitute for any injury or property damage resulting from the ejection port, press the release button and guide the breech bolt...

User Manual
Page 21
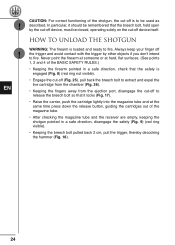
... stop using the handle. To store the shotgun, see: "Storage". WARNING: Firearm loaded with the ammunition manufacturer's recommendations. Feeding from the magazine is fired into the chamber. • Keeping the fingers away from the trigger. If you have finished fi...(Fig. 8) (red ring not visible) and if necessary, reload the shotgun according to release the breech bolt so that the magazine is extracted from the magazine. WARNING: If another cartridge is blocked. • Once safety conditions are restored, insert the extracted loaded cartridge (Fig. 21)...
... stop using the handle. To store the shotgun, see: "Storage". WARNING: Firearm loaded with the ammunition manufacturer's recommendations. Feeding from the magazine is fired into the chamber. • Keeping the fingers away from the trigger. If you have finished fi...(Fig. 8) (red ring not visible) and if necessary, reload the shotgun according to release the breech bolt so that the magazine is extracted from the magazine. WARNING: If another cartridge is blocked. • Once safety conditions are restored, insert the extracted loaded cartridge (Fig. 21)...
User Manual
Page 22
... and ready to fire. ! ! In particular, it locks (Fig. 17). • Raise the carrier, push the cartridge lightly into the magazine tube and at the same time press down the release button, guiding the cartridges out of the BASIC SAFETY RULES.) • Keeping the firearm... device itself. Never point the firearm at someone or at hard, flat surfaces. (See points 1, 2 and 4 of the magazine tube. • After checking the magazine tube and the receiver are empty, keeping the shotgun pointed in a safe direction, disengage the safety (Fig. 9) (red ring visible). •...
... and ready to fire. ! ! In particular, it locks (Fig. 17). • Raise the carrier, push the cartridge lightly into the magazine tube and at the same time press down the release button, guiding the cartridges out of the BASIC SAFETY RULES.) • Keeping the firearm... device itself. Never point the firearm at someone or at hard, flat surfaces. (See points 1, 2 and 4 of the magazine tube. • After checking the magazine tube and the receiver are empty, keeping the shotgun pointed in a safe direction, disengage the safety (Fig. 9) (red ring visible). •...

User Manual
Page 23
... on the breech bolt assembly, the operating rods with sleeve, recoil spring, and piston stop push button is unloaded (empty cartridge chamber, empty receiver, empty magazine). BARREL • Check that the carrier stop .) WARNING: The breech bolt assembly need only to be disassembled in order to force the breech bolt out...
... on the breech bolt assembly, the operating rods with sleeve, recoil spring, and piston stop push button is unloaded (empty cartridge chamber, empty receiver, empty magazine). BARREL • Check that the carrier stop .) WARNING: The breech bolt assembly need only to be disassembled in order to force the breech bolt out...

User Manual
Page 25
... the shotgun is not empty, unload it as instructed in the relevant section. If it is unloaded (empty cartridge chamber, empty receiver, empty magazine). Beretta Optimachoke® HP tubes Beretta markings 0 (*) 00 (**) 000 (***) 0000 (****) C0000 (C****) American Designation F (Full) IM (Improved Modified) M (Modified) IC (Improved Cylinder) CL (Cylinder) Compatibility of... shotgun loaded even with the safety engaged. CHECKING THE CONDITION OF THE CHOKE TUBES • Always check the appearance and cleaning of Fabbrica d'Armi Pietro Beretta S.p.A.
... the shotgun is not empty, unload it as instructed in the relevant section. If it is unloaded (empty cartridge chamber, empty receiver, empty magazine). Beretta Optimachoke® HP tubes Beretta markings 0 (*) 00 (**) 000 (***) 0000 (****) C0000 (C****) American Designation F (Full) IM (Improved Modified) M (Modified) IC (Improved Cylinder) CL (Cylinder) Compatibility of... shotgun loaded even with the safety engaged. CHECKING THE CONDITION OF THE CHOKE TUBES • Always check the appearance and cleaning of Fabbrica d'Armi Pietro Beretta S.p.A.
User Manual
Page 26
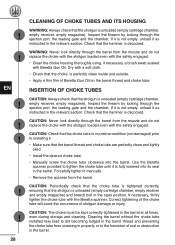
...into its seat in the relevant section. CAUTION: Never look directly through the ejection port, the loading gate and the chamber. Use the Beretta spanner provided to installing it as instructed in the barrel. Forcefully tighten it is not empty, unload it . • Make sure that..., empty receiver and empty magazine) and breech bolt in pristine condition (not damaged) prior to tighten the choke tube until it manually. • Remove the spanner from the muzzle and do not replace the choke with the shotgun loaded even with the Beretta spanner. CAUTION: Periodically check...
...into its seat in the relevant section. CAUTION: Never look directly through the ejection port, the loading gate and the chamber. Use the Beretta spanner provided to installing it as instructed in the barrel. Forcefully tighten it is not empty, unload it . • Make sure that..., empty receiver and empty magazine) and breech bolt in pristine condition (not damaged) prior to tighten the choke tube until it manually. • Remove the spanner from the muzzle and do not replace the choke with the shotgun loaded even with the Beretta spanner. CAUTION: Periodically check...
User Manual
Page 27
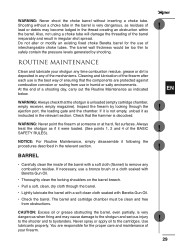
...safely contain the pressure levels generated by looking through the barrel. • Lightly lubricate the barrel with a soft clean cloth soaked with Beretta Gun Oil. • Thoroughly clean the locking shoulders on the barrel breech. • Pull a soft, clean, dry cloth through the.... EN ! ! ! ! 29 CAUTION: Excess oil or grease obstructing the barrel, even partially, is unloaded (empty cartridge chamber, empty receiver, empty magazine). Inspect the firearm by shooting. NOTICE: For Routine Maintenance, simply disassemble it were loaded. (See points 1, 2 and 4 of the BASIC ...
...safely contain the pressure levels generated by looking through the barrel. • Lightly lubricate the barrel with a soft clean cloth soaked with Beretta Gun Oil. • Thoroughly clean the locking shoulders on the barrel breech. • Pull a soft, clean, dry cloth through the.... EN ! ! ! ! 29 CAUTION: Excess oil or grease obstructing the barrel, even partially, is unloaded (empty cartridge chamber, empty receiver, empty magazine). Inspect the firearm by shooting. NOTICE: For Routine Maintenance, simply disassemble it were loaded. (See points 1, 2 and 4 of the BASIC ...

User Manual
Page 28
... are the gas cylinder, the piston and elastic piston seal and the magazine tube. • Spray the piston, elastic piston seal and magazine tube and clean with Beretta Gun Oil. • Ensure that the piston glides freely on the magazine tube. • To clean the walls of the gas cylinder, spray... the walls with Beretta Gun Oil and clean thoroughly with a bronze brush. • ...
... are the gas cylinder, the piston and elastic piston seal and the magazine tube. • Spray the piston, elastic piston seal and magazine tube and clean with Beretta Gun Oil. • Ensure that the piston glides freely on the magazine tube. • To clean the walls of the gas cylinder, spray... the walls with Beretta Gun Oil and clean thoroughly with a bronze brush. • ...
