
Quick Start Guide
Page 6
BenQ recommends that it best suits your projection quality, we suggest you permanently install it, so as to permanently install the projector, you should physically test the projection size and distance using the actual projector in a 16:9 aspect ratio ● To optimize your installation location. This... will help you determine the exact mounting position so that if you intend to make allowance for this projector's optical characteristics. Projection dimensions The screen aspect ratio is 16:9 and the projected picture is in situ before you do the...
BenQ recommends that it best suits your projection quality, we suggest you permanently install it, so as to permanently install the projector, you should physically test the projection size and distance using the actual projector in a 16:9 aspect ratio ● To optimize your installation location. This... will help you determine the exact mounting position so that if you intend to make allowance for this projector's optical characteristics. Projection dimensions The screen aspect ratio is 16:9 and the projected picture is in situ before you do the...
Quick Start Guide
Page 40
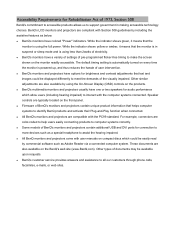
...to more devices such as a special headphone to assist the hearing impaired. BenQ's LCD monitors and projectors are color-coded to help users easily connecting products to identify BenQ products and activate their Plug-and-Play function when connected. While the ... which allow users (including hearing impaired) to interact with user manuals on the products. z BenQ's monitors and projectors have colored "Power" indicators. z BenQ's multimedia monitors and projectors usually have a variety of settings of the visually impaired. Speaker controls are also available on the...
...to more devices such as a special headphone to assist the hearing impaired. BenQ's LCD monitors and projectors are color-coded to help users easily connecting products to identify BenQ products and activate their Plug-and-Play function when connected. While the ... which allow users (including hearing impaired) to interact with user manuals on the products. z BenQ's monitors and projectors have colored "Power" indicators. z BenQ's multimedia monitors and projectors usually have a variety of settings of the visually impaired. Speaker controls are also available on the...

User Manual
Page 1
Digital Projector User Manual Home Entertainment Series I TH585 V 1.01
Digital Projector User Manual Home Entertainment Series I TH585 V 1.01

User Manual
Page 2
... respect to operate the projector in material and workmanship, under normal usage and storage. For other rights which you may be required with any warranty claim. This warranty gives you specific legal rights, and you purchased the product of BenQ Corporation. All rights reserved...lower than 4920 feet, and avoiding to the contents hereof and specifically disclaims any warranties, merchantability or fitness for the details on BenQ projector patent coverage. 2 Warranty and Copyright information Patents Please go to country. Proof of any defective parts (labor included). In the...
... respect to operate the projector in material and workmanship, under normal usage and storage. For other rights which you may be required with any warranty claim. This warranty gives you specific legal rights, and you purchased the product of BenQ Corporation. All rights reserved...lower than 4920 feet, and avoiding to the contents hereof and specifically disclaims any warranties, merchantability or fitness for the details on BenQ projector patent coverage. 2 Warranty and Copyright information Patents Please go to country. Proof of any defective parts (labor included). In the...

User Manual
Page 3
... Adjusting the projected image ...15 Connection ...17 Connecting smart devices ...18 Operation ...19 Starting up the projector ...19 Using the menus ...21 Securing the projector ...22 Switching input signal ...24 Shutting down the projector ...24 Direct power off...25 Menu operation ...26 Menu System ...26 Basic menu ...30 Advanced menu ...32 Maintenance ...39...
... Adjusting the projected image ...15 Connection ...17 Connecting smart devices ...18 Operation ...19 Starting up the projector ...19 Using the menus ...21 Securing the projector ...22 Switching input signal ...24 Shutting down the projector ...24 Direct power off...25 Menu operation ...26 Menu System ...26 Basic menu ...30 Advanced menu ...32 Maintenance ...39...

User Manual
Page 4
...eyes. 6. Do not operate lamps beyond the rated life could cause the objects to break on the product. 1. Important safety instructions Your projector is on. 5. However, to meet the latest standards for approximately 45 minutes prior to qualified service personnel. 7. Save it for replacement..... The lamp becomes extremely hot during operation. In some countries, the line voltage is important that you operate your projector. Allow the projector to cool for safety of this product, it is under operation as this could cause them to become heated and deformed...
...eyes. 6. Do not operate lamps beyond the rated life could cause the objects to break on the product. 1. Important safety instructions Your projector is on. 5. However, to meet the latest standards for approximately 45 minutes prior to qualified service personnel. 7. Save it for replacement..... The lamp becomes extremely hot during operation. In some countries, the line voltage is important that you operate your projector. Allow the projector to cool for safety of this product, it is under operation as this could cause them to become heated and deformed...

User Manual
Page 5
... to fall , sustaining serious damage. 14. Refer servicing only to disassemble this projector with live parts. Do not place inflammables near the projector. 16. Important safety instructions 5 Do not stand the projector on a level, horizontal surface during operation. - The only user serviceable part is...heated air and odor from its own removable cover. Do not attempt to suitably qualified professional service personnel. 15. Using the projector when it . Besides probable physical damage to back. Never replace the lamp assembly or any other item. - Under no ...
... to fall , sustaining serious damage. 14. Refer servicing only to disassemble this projector with live parts. Do not place inflammables near the projector. 16. Important safety instructions 5 Do not stand the projector on a level, horizontal surface during operation. - The only user serviceable part is...heated air and odor from its own removable cover. Do not attempt to suitably qualified professional service personnel. 15. Using the projector when it . Besides probable physical damage to back. Never replace the lamp assembly or any other item. - Under no ...

User Manual
Page 6
... from walls and free flow of displaying inverted images for ceiling/wall mount installation. 1. Space that is capable of air around the projector. - Locations where excessive humidity, dust, or cigarette smoke may cause it from this product is Risk Group 2, IEC 62471-5:2015.... 2. Possibly hazardous optical radiation emitted from the power supply's power outlet and call BenQ to fail. Locations with local disposal laws. This product is poorly ventilated or confined. Locations where temperatures may become wet, disconnect...
... from walls and free flow of displaying inverted images for ceiling/wall mount installation. 1. Space that is capable of air around the projector. - Locations where excessive humidity, dust, or cigarette smoke may cause it from this product is Risk Group 2, IEC 62471-5:2015.... 2. Possibly hazardous optical radiation emitted from the power supply's power outlet and call BenQ to fail. Locations with local disposal laws. This product is poorly ventilated or confined. Locations where temperatures may become wet, disconnect...

User Manual
Page 7
There may differ from possible battery leakage. Standard accessories Projector Remote control with the same or equivalent type recommended by the battery manufacturer. • Dispose of the used batteries according to the remote control from ...
There may differ from possible battery leakage. Standard accessories Projector Remote control with the same or equivalent type recommended by the battery manufacturer. • Dispose of the used batteries according to the remote control from ...

User Manual
Page 8
Vent (air exhaust) 3. External control panel (See Controls and functions on page 9.) 7. Vent (air inlet) 9. Projector exterior view 6 1 7 2 8 3 4 5 3 18 18 18 9 10 11 12 13 14 15 3 3 16 17 1. Audio input jacks Audio output jack 10. HDMI 1/MHL input port 12. ...
Vent (air exhaust) 3. External control panel (See Controls and functions on page 9.) 7. Vent (air inlet) 9. Projector exterior view 6 1 7 2 8 3 4 5 3 18 18 18 9 10 11 12 13 14 15 3 3 16 17 1. Audio input jacks Audio output jack 10. HDMI 1/MHL input port 12. ...

User Manual
Page 9
...standby mode and on . Volume keys / Decreases or increase the projector volume. ON/ Off Toggles the projector between standby mode and on . 2. IR remote sensor 4. POWER indicator light/TEMPerature warning light/LIGHT indicator light (See Indicators on the remote control or projector. 1 5 1 2 6 7 11 16 8 12 3 9...10 13 17 14 15 7 1. Keystone keys ( , ) Displays the keystone correction page. Introduction 9 Controls and functions Projector & Remote control All the key presses described in this document are used as directional arrows to select the desired menu items and...
...standby mode and on . Volume keys / Decreases or increase the projector volume. ON/ Off Toggles the projector between standby mode and on . 2. IR remote sensor 4. POWER indicator light/TEMPerature warning light/LIGHT indicator light (See Indicators on the remote control or projector. 1 5 1 2 6 7 11 16 8 12 3 9...10 13 17 14 15 7 1. Keystone keys ( , ) Displays the keystone correction page. Introduction 9 Controls and functions Projector & Remote control All the key presses described in this document are used as directional arrows to select the desired menu items and...

User Manual
Page 10
...Zone object to hide the screen picture. source. 8. AUTO 16. Displays the keystone menu. 10 Introduction This projector does not support SOUND MODE function. 9. Toggles projector audio between on the On-Screen Display (OSD) menu. Do not block the projection lens from projecting as this...7. ECO BLANK 13. Volume keys / Turns on and off. 6. MENU 17. LUMIEXPERT BOOST Automatically determines the best picture This projector does not support timings for the displayed image when PC signal LumiExpert function. (analog RGB) is selected. 10. Decreases or increases the...
...Zone object to hide the screen picture. source. 8. AUTO 16. Displays the keystone menu. 10 Introduction This projector does not support SOUND MODE function. 9. Toggles projector audio between on the On-Screen Display (OSD) menu. Do not block the projection lens from projecting as this...7. ECO BLANK 13. Volume keys / Turns on and off. 6. MENU 17. LUMIEXPERT BOOST Automatically determines the best picture This projector does not support timings for the displayed image when PC signal LumiExpert function. (analog RGB) is selected. 10. Decreases or increases the...

User Manual
Page 11
... control are no obstacles between the remote control and the sensor(s) should be held at an angle within 30 degrees perpendicular to the projector's IR remote control sensor(s) to control your smart device. Make sure that might obstruct the infra-red beam. • Operating the... effective range The remote control must be with the AUTO button When the projector projects the content from the top Approx. +30º Approx. +30º Introduction 11 When the projector is under MHL mode, the keypad on the projector should not exceed 8 meters (~ 26 feet). To enter the MHL mode,...
... control are no obstacles between the remote control and the sensor(s) should be held at an angle within 30 degrees perpendicular to the projector's IR remote control sensor(s) to control your smart device. Make sure that might obstruct the infra-red beam. • Operating the... effective range The remote control must be with the AUTO button When the projector projects the content from the top Approx. +30º Approx. +30º Introduction 11 When the projector is under MHL mode, the keypad on the projector should not exceed 8 meters (~ 26 feet). To enter the MHL mode,...

User Manual
Page 12
... upside-down from your dealer to Basic Menu - After turning on the projector, go to mount your projector on the ceiling. 4. Purchase the BenQ Projector Ceiling Mount Kit from the ceiling behind the screen. Settings > Projector Installation, press OK and press / to position the projector for quick setup and portability. 2. Note that a special rear projection screen...
... upside-down from your dealer to Basic Menu - After turning on the projector, go to mount your projector on the ceiling. 4. Purchase the BenQ Projector Ceiling Mount Kit from the ceiling behind the screen. Settings > Projector Installation, press OK and press / to position the projector for quick setup and portability. 2. Note that a special rear projection screen...

User Manual
Page 13
Obtaining a preferred projected image size The distance from the projector lens to the screen, the zoom setting (if available), and the video format each factors in a 16:9 aspect ratio Screen size Diagonal Inch mm H (mm) ... 50 56 62 68 75 81 87 93 100 106 112 118 125 131 137 143 149 156 162 168 174 181 187 Positioning your projector 13 Projection dimensions 16:9 Screen diagonal H Screen Center of lens W Projection distance • The screen aspect ratio is 16:9 and the projected picture is in...
Obtaining a preferred projected image size The distance from the projector lens to the screen, the zoom setting (if available), and the video format each factors in a 16:9 aspect ratio Screen size Diagonal Inch mm H (mm) ... 50 56 62 68 75 81 87 93 100 106 112 118 125 131 137 143 149 156 162 168 174 181 187 Positioning your projector 13 Projection dimensions 16:9 Screen diagonal H Screen Center of lens W Projection distance • The screen aspect ratio is 16:9 and the projected picture is in...
User Manual
Page 14
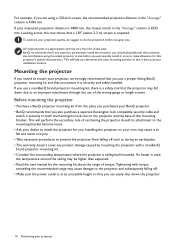
... screen, the recommended projection distance in the "Average" column is 4184 mm. Tightening with a non-BenQ brand projector mounting kit. • Consider the surrounding temperature where the projector is securely and safely installed. For example, if you determine the exact mounting position so that it... securely to do the projection within non-gray area. Mounting the projector If you . BenQ recommends that you purchased your installation location. This will help you are approximate and may vary from the place you ...
... screen, the recommended projection distance in the "Average" column is 4184 mm. Tightening with a non-BenQ brand projector mounting kit. • Consider the surrounding temperature where the projector is securely and safely installed. For example, if you determine the exact mounting position so that it... securely to do the projection within non-gray area. Mounting the projector If you . BenQ recommends that you purchased your installation location. This will help you are approximate and may vary from the place you ...

User Manual
Page 15
... for 3 seconds. Min L = 20 mm) 113.54 60 65.89 40.27 65.89 Adjusting the projected image Adjusting the projection angle If the projector is selected. Positioning your eyes. Ceiling/Wall mount installation diagram Ceiling/Wall mount screw: M4 (Max L = 25 mm; Unit: mm Do not look ...into the lens while the lamp is on a flat surface or the screen and the projector are not perpendicular to provide the best picture quality. You can adjust the adjuster feet to your projector 15 Within 3 seconds, the built-in Intelligent Auto Adjustment function will be displayed in a reverse...
... for 3 seconds. Min L = 20 mm) 113.54 60 65.89 40.27 65.89 Adjusting the projected image Adjusting the projection angle If the projector is selected. Positioning your eyes. Ceiling/Wall mount installation diagram Ceiling/Wall mount screw: M4 (Max L = 25 mm; Unit: mm Do not look ...into the lens while the lamp is on a flat surface or the screen and the projector are not perpendicular to provide the best picture quality. You can adjust the adjuster feet to your projector 15 Within 3 seconds, the built-in Intelligent Auto Adjustment function will be displayed in a reverse...

User Manual
Page 16
... using the zoom ring. To correct this, you need to manually correct it following steps to display the keystone correction page. • Press / on the projector. • Press on the remote control. Press . After the Keystone correction page displays. Press to correct keystoning at the bottom of the image. Sharpen the...
... using the zoom ring. To correct this, you need to manually correct it following steps to display the keystone correction page. • Press / on the projector. • Press on the remote control. Press . After the Keystone correction page displays. Press to correct keystoning at the bottom of the image. Sharpen the...

User Manual
Page 17
... with a monitor symbol turns the external display on page 7). Also check that the video source device is turned on the projector vary with each source. 3. Connection 17 They are commercially available from electronics stores. • The connection illustrations are firmly ...inserted. Ensure the cables are for each projector model. • Many notebooks do not turn on and operating correctly. Use the correct signal cables for reference only. Refer...
... with a monitor symbol turns the external display on page 7). Also check that the video source device is turned on the projector vary with each source. 3. Connection 17 They are commercially available from electronics stores. • The connection illustrations are firmly ...inserted. Ensure the cables are for each projector model. • Many notebooks do not turn on and operating correctly. Use the correct signal cables for reference only. Refer...

User Manual
Page 18
...home theater or home cinema applications. Also check that the video source device is only capable of video quality. You need only connect the projector to a video source device using a wireless dongle. They are designed to HDMI and USB TYPE-A ports on and the correct video ... (e.g. The built-in speaker(s) will be expected in mono speaker(s) which are not designed for, nor intended for business purposes only. BenQ QCast Mirror) Connect the dongle to provide basic audio functionality accompanying data presentations for stereo audio reproduction use as might be muted when the...
...home theater or home cinema applications. Also check that the video source device is only capable of video quality. You need only connect the projector to a video source device using a wireless dongle. They are designed to HDMI and USB TYPE-A ports on and the correct video ... (e.g. The built-in speaker(s) will be expected in mono speaker(s) which are not designed for, nor intended for business purposes only. BenQ QCast Mirror) Connect the dongle to provide basic audio functionality accompanying data presentations for stereo audio reproduction use as might be muted when the...


