Safety Warning and Notice
Page 1
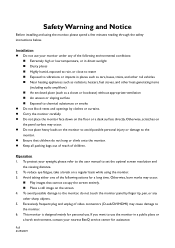
..., take a break on the screen. 4. To avoid possible damage to vibrations or impacts in a public place or a harsh environment, contact your nearest BenQ service center for assistance. Excessively frequent plug and unplug of the following environmental conditions: Extremely high or low temperature, or in direct sunlight ... to avoid possible personal injury or damage to the monitor. 6. If you want to use your eyesight, please refer to the user manual to chemical substances or smoke Do not block vents and openings by finger tip, pen, or any of children.
..., take a break on the screen. 4. To avoid possible damage to vibrations or impacts in a public place or a harsh environment, contact your nearest BenQ service center for assistance. Excessively frequent plug and unplug of the following environmental conditions: Extremely high or low temperature, or in direct sunlight ... to avoid possible personal injury or damage to the monitor. 6. If you want to use your eyesight, please refer to the user manual to chemical substances or smoke Do not block vents and openings by finger tip, pen, or any of children.
Resolution file
Page 1
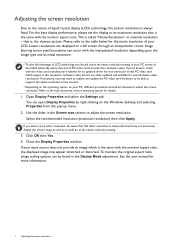
... image as well as described below for the native resolution of LCD technology you should be followed to adjust the screen resolution. See the user manual for new hardware video resolutions. that this resolution. Refer to the help document of liquid crystal display (LCD) technology, the picture resolution is always fixed...
... image as well as described below for the native resolution of LCD technology you should be followed to adjust the screen resolution. See the user manual for new hardware video resolutions. that this resolution. Refer to the help document of liquid crystal display (LCD) technology, the picture resolution is always fixed...

Resolution file
Page 5
... 50, 60 100 120 144 HDMI v v v v v DisplayPort v v v v v USB-C™ (DP Alt mode) v v v v v Image disruption may improve this situation by altering an automatic setting or by manually changing the phase setting and the pixel frequency from graphic cards which do not correspond with the usual standard. You may occur as a result of...
... 50, 60 100 120 144 HDMI v v v v v DisplayPort v v v v v USB-C™ (DP Alt mode) v v v v v Image disruption may improve this situation by altering an automatic setting or by manually changing the phase setting and the pixel frequency from graphic cards which do not correspond with the usual standard. You may occur as a result of...

User Manual
Page 1
EX Series LCD Monitor User Manual
EX Series LCD Monitor User Manual

User Manual
Page 2
..., and are used for any means, electronic, mechanical, magnetic, optical, chemical, manual or otherwise, without obligation of BenQ Corporation to notify any warranties, merchantability or fitness for informational purposes only. Besides meeting international regulatory requirement and standards pertaining to environmental management, BenQ has spared no representations or warranties, either expressed or implied, with...
..., and are used for any means, electronic, mechanical, magnetic, optical, chemical, manual or otherwise, without obligation of BenQ Corporation to notify any warranties, merchantability or fitness for informational purposes only. Besides meeting international regulatory requirement and standards pertaining to environmental management, BenQ has spared no representations or warranties, either expressed or implied, with...

User Manual
Page 18
Use four M4 x 10 mm screws to fix a VESA standard wall mount bracket to complete the installation. Follow the instruction manuals of the wall mount bracket you purchased to the monitor. Use a magnetic tip screwdriver to fix the VESA wall mount transfer kit to the monitor with 6 screws from step 1. 3. 2. Install the VESA wall mount transfer kit as illustrated. Consult a professional technician or BenQ service for wall mount installation and safety precautions. 18 Using the monitor wall mount set (purchased separately) Make sure that all screws are tightened and secured properly.
Use four M4 x 10 mm screws to fix a VESA standard wall mount bracket to complete the installation. Follow the instruction manuals of the wall mount bracket you purchased to the monitor. Use a magnetic tip screwdriver to fix the VESA wall mount transfer kit to the monitor with 6 screws from step 1. 3. 2. Install the VESA wall mount transfer kit as illustrated. Consult a professional technician or BenQ service for wall mount installation and safety precautions. 18 Using the monitor wall mount set (purchased separately) Make sure that all screws are tightened and secured properly.
User Manual
Page 21
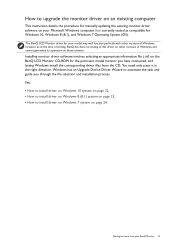
... and cannot guarantee its operation on those systems. Installing monitor driver software involves selecting an appropriate information file (.inf) on the BenQ LCD Monitor CD-ROM for the particular model monitor you through the file selection and installation process. It is currently tested as ...letting Windows install the corresponding driver files from the CD. The BenQ LCD Monitor driver for your BenQ Monitor 21 How to upgrade the monitor driver on an existing computer This instruction details the procedure for manually updating the existing monitor driver software on page 24. You need...
... and cannot guarantee its operation on those systems. Installing monitor driver software involves selecting an appropriate information file (.inf) on the BenQ LCD Monitor CD-ROM for the particular model monitor you through the file selection and installation process. It is currently tested as ...letting Windows install the corresponding driver files from the CD. The BenQ LCD Monitor driver for your BenQ Monitor 21 How to upgrade the monitor driver on an existing computer This instruction details the procedure for manually updating the existing monitor driver software on page 24. You need...

User Manual
Page 46
... HDR-compatible and the monitor is set to USB-C on the screen. If your problems remain after checking this manual, please contact your place of the sensor that keep the sensor from www.BenQ.com for more information. • Check if the input source has been selected to ON. Need more support...
... HDR-compatible and the monitor is set to USB-C on the screen. If your problems remain after checking this manual, please contact your place of the sensor that keep the sensor from www.BenQ.com for more information. • Check if the input source has been selected to ON. Need more support...

