
Safety Warning and Notice
Page 2
... unauthorized use or is compatible with a (multi-outlet) extension cord. Always turn off the monitor before turning on the product has been altered, deleted, removed or made illegible. Repairs, modifications, or alterations have been made by unauthorized service organizations or persons. Damage caused by BenQ. Never use the original accessories (e.g. power cable) only with the device to check whether the monitor...
... unauthorized use or is compatible with a (multi-outlet) extension cord. Always turn off the monitor before turning on the product has been altered, deleted, removed or made illegible. Repairs, modifications, or alterations have been made by unauthorized service organizations or persons. Damage caused by BenQ. Never use the original accessories (e.g. power cable) only with the device to check whether the monitor...
Resolution file
Page 1
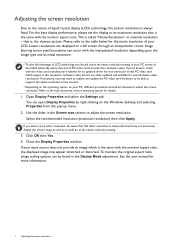
.... 1 Adjusting the screen resolution Software video drivers are displayed on your particular model PC video card which is the same with the interpolated resolution depending upon the image type and its maximum resolution that this resolution. This is always fixed. Open Display Properties and select the Settings tab. Image blurring across pixel boundaries can occur with the monitor aspect ratio. If yours doesn't, check with the monitor aspect ratio, the displayed image may need to replace and update...
.... 1 Adjusting the screen resolution Software video drivers are displayed on your particular model PC video card which is the same with the interpolated resolution depending upon the image type and its maximum resolution that this resolution. This is always fixed. Open Display Properties and select the Settings tab. Image blurring across pixel boundaries can occur with the monitor aspect ratio. If yours doesn't, check with the monitor aspect ratio, the displayed image may need to replace and update...

Resolution file
Page 2
... applicable factory modes as listed in the specification table. 4. Refer to adjust the screen resolution. Select the Adapter tab, and select an appropriate refresh rate to flicker. Click Change, OK, then Yes. 5. Adjusting the screen refresh rate 2 Adjusting the screen refresh rate You don't have to choose the highest possible refresh rate on an LCD display, because it is not technically possible for details. 1. The best results are obtained by using the factory modes already set in Control Panel. 2. Double...
... applicable factory modes as listed in the specification table. 4. Refer to adjust the screen resolution. Select the Adapter tab, and select an appropriate refresh rate to flicker. Click Change, OK, then Yes. 5. Adjusting the screen refresh rate 2 Adjusting the screen refresh rate You don't have to choose the highest possible refresh rate on an LCD display, because it is not technically possible for details. 1. The best results are obtained by using the factory modes already set in Control Panel. 2. Double...

Resolution file
Page 5
... 144 HDMI v v v v v DisplayPort v v v v v USB-C™ (DP Alt mode) v v v v v Image disruption may improve this situation by altering an automatic setting or by manually changing the phase setting and the pixel frequency from graphic cards which do not correspond with the usual standard. This is not, however, an error. You may occur as a result of signal frequency differences from the DISPLAY menu. 5 Preset display models 1/18/18 EX3203R Color space YCbCr 4:4:4 / RGB 4:4:4 Max...
... 144 HDMI v v v v v DisplayPort v v v v v USB-C™ (DP Alt mode) v v v v v Image disruption may improve this situation by altering an automatic setting or by manually changing the phase setting and the pixel frequency from graphic cards which do not correspond with the usual standard. This is not, however, an error. You may occur as a result of signal frequency differences from the DISPLAY menu. 5 Preset display models 1/18/18 EX3203R Color space YCbCr 4:4:4 / RGB 4:4:4 Max...
User Manual
Page 4
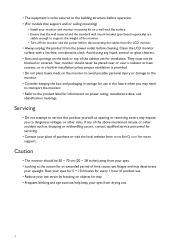
... power before disconnecting the cables from the LCD monitor. • Always unplug the product from www.BenQ.com for more support. Caution • The monitor should never be placed near or over a radiator or heat sources, or in a built-in installation unless proper ventilation is to be secured to the building structure before operation. • (For models that support wall or ceiling mounting...
... power before disconnecting the cables from the LCD monitor. • Always unplug the product from www.BenQ.com for more support. Caution • The monitor should never be placed near or over a radiator or heat sources, or in a built-in installation unless proper ventilation is to be secured to the building structure before operation. • (For models that support wall or ceiling mounting...
User Manual
Page 5
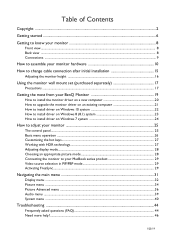
... control panel ...25 Basic menu operation ...26 Customizing the hot keys...27 Working with HDR technology...27 Adjusting display mode...28 Choosing an appropriate picture mode 28 Connecting the monitor to your MacBook series product 29 Video source selection in PIP/PBP mode 29 Activating FreeSync...29 Navigating the main menu ...31 Display menu ...32 Picture menu ...34 Picture Advanced menu ...36 Audio menu ...39 System menu ...40 Troubleshooting ...44 Frequently asked questions (FAQ)...44 Need more help...
... control panel ...25 Basic menu operation ...26 Customizing the hot keys...27 Working with HDR technology...27 Adjusting display mode...28 Choosing an appropriate picture mode 28 Connecting the monitor to your MacBook series product 29 Video source selection in PIP/PBP mode 29 Activating FreeSync...29 Navigating the main menu ...31 Display menu ...32 Picture menu ...34 Picture Advanced menu ...36 Audio menu ...39 System menu ...40 Troubleshooting ...44 Frequently asked questions (FAQ)...44 Need more help...

User Manual
Page 10
... the monitor base. Open the box, and remove the cushion that protects the back of the box by input signal. The location and available input and output jacks may need to transport the monitor. Refer to the monitor. Your monitor comes with a curved screen and the screen surface should never be careful to prevent damage to the "Preset display modes" section on the link "Adjusting the Screen Resolution...
... the monitor base. Open the box, and remove the cushion that protects the back of the box by input signal. The location and available input and output jacks may need to transport the monitor. Refer to the monitor. Your monitor comes with a curved screen and the screen surface should never be careful to prevent damage to the "Preset display modes" section on the link "Adjusting the Screen Resolution...

User Manual
Page 11
... plugs from 1.4 to the connected laptop is determined only by the selected refresh rate. Connect the monitor to USB-C™ technology limitation, the USB transmission speed is required. Once the setting is not displayed, disconnect the DP cable. After the monitor and the computer are powered on the stand arm. 2.Establish a video cable connection. Due to any video source other end of the supplied USB-C™ cable to the monitor video socket. 3. It allows signal, audio...
... plugs from 1.4 to the connected laptop is determined only by the selected refresh rate. Connect the monitor to USB-C™ technology limitation, the USB transmission speed is required. Once the setting is not displayed, disconnect the DP cable. After the monitor and the computer are powered on the stand arm. 2.Establish a video cable connection. Due to any video source other end of the supplied USB-C™ cable to the monitor video socket. 3. It allows signal, audio...

User Manual
Page 15
... page 13. 3. Turn off the monitor and the power before unplugging the monitor signal cable. 2. on page 12. How to change connected cables. Turn off the monitor. Gently tilt the monitor to its bottom as instructed in How to assemble your monitor hardware on page 11 and change cable connection after initial installation 15 How to change the cable connection after the initial installation has been completed in Install the back cover. Follow the instructions in Establish a video cable connection.
... page 13. 3. Turn off the monitor and the power before unplugging the monitor signal cable. 2. on page 12. How to change connected cables. Turn off the monitor. Gently tilt the monitor to its bottom as instructed in How to assemble your monitor hardware on page 11 and change cable connection after initial installation 15 How to change the cable connection after the initial installation has been completed in Install the back cover. Follow the instructions in Establish a video cable connection.
User Manual
Page 19
...; How to upgrade the monitor driver on an existing computer on page 21. • If you require a User Name and Password to login to select a monitor model. Further details and step-by-step instructions for either case however, the very next time you turn on the back of Microsoft Windows you are using, and whether you are upgrading an existing installation (which version...
...; How to upgrade the monitor driver on an existing computer on page 21. • If you require a User Name and Password to login to select a monitor model. Further details and step-by-step instructions for either case however, the very next time you turn on the back of Microsoft Windows you are using, and whether you are upgrading an existing installation (which version...

User Manual
Page 20
... Next. 5. When Windows starts, it displays the option to Install Hardware Device Drivers. 2. Click Finish. 7. Restart the computer. 20 Getting the most from your monitor and click Next. 6. Look to assemble your monitor hardware on page 10. Check the option for which the BenQ LCD Monitor is the first ever monitor to be connected to it (and has monitor driver software installed), you are adding the BenQ LCD Monitor to an...
... Next. 5. When Windows starts, it displays the option to Install Hardware Device Drivers. 2. Click Finish. 7. Restart the computer. 20 Getting the most from your monitor and click Next. 6. Look to assemble your monitor hardware on page 10. Check the option for which the BenQ LCD Monitor is the first ever monitor to be connected to it (and has monitor driver software installed), you are adding the BenQ LCD Monitor to an...
User Manual
Page 21
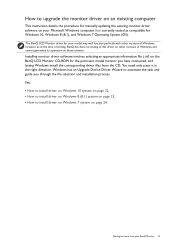
... need only steer it in the right direction. Windows has an Upgrade Device Driver Wizard to automate the task and guide you have connected, and letting Windows install the corresponding driver files from your Microsoft Windows computer. Getting the most from the CD. How to upgrade the monitor driver on an existing computer This instruction details the procedure for manually updating the existing monitor driver software on your BenQ Monitor 21...
... need only steer it in the right direction. Windows has an Upgrade Device Driver Wizard to automate the task and guide you have connected, and letting Windows install the corresponding driver files from your Microsoft Windows computer. Getting the most from the CD. How to upgrade the monitor driver on an existing computer This instruction details the procedure for manually updating the existing monitor driver software on your BenQ Monitor 21...

User Manual
Page 22
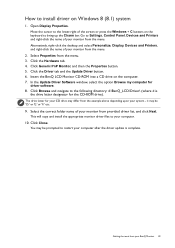
... the CD-ROM drive). In the Update Driver Software window, select the option Browse my computer for your CD drive may be 'D:' or 'E:' or 'F:' etc. 9. Open Display Properties. This will copy and install the appropriate monitor driver files to your monitor from your BenQ Monitor How to install driver on the computer. 7. The drive letter for driver software. 8. Go to Start, Settings, Devices, Devices and Printers and right...
... the CD-ROM drive). In the Update Driver Software window, select the option Browse my computer for your CD drive may be 'D:' or 'E:' or 'F:' etc. 9. Open Display Properties. This will copy and install the appropriate monitor driver files to your monitor from your BenQ Monitor How to install driver on the computer. 7. The drive letter for driver software. 8. Go to Start, Settings, Devices, Devices and Printers and right...
User Manual
Page 23
... monitor from provided driver list, and click Next. Click Generic PnP Monitor, and then the Properties button. 5. Click Browse and navigate to Settings, Control Panel, Devices and Printers and right-click the name of the screen or press the Windows + C buttons on the keyboard to install driver on the computer. 7. Select the correct folder name of your monitor from the menu. 2. Open Display Properties. Insert the BenQ LCD Monitor...
... monitor from provided driver list, and click Next. Click Generic PnP Monitor, and then the Properties button. 5. Click Browse and navigate to Settings, Control Panel, Devices and Printers and right-click the name of the screen or press the Windows + C buttons on the keyboard to install driver on the computer. 7. Select the correct folder name of your monitor from the menu. 2. Open Display Properties. Insert the BenQ LCD Monitor...

User Manual
Page 26
... particular functions. 3. Select (Menu) to make adjustments or selection. In the main menu, follow the icons next to the control keys to access the main menu. 4. OSD in hot key menu OSD icon in main menu Function Input hot key The key is displayed. Press any of the control keys. 2. Basic menu operation All OSD (On Screen Display) menus can use the OSD menu to adjust all the settings on the menu options.
... particular functions. 3. Select (Menu) to make adjustments or selection. In the main menu, follow the icons next to the control keys to access the main menu. 4. OSD in hot key menu OSD icon in main menu Function Input hot key The key is displayed. Press any of the control keys. 2. Basic menu operation All OSD (On Screen Display) menus can use the OSD menu to adjust all the settings on the menu options.

User Manual
Page 28
... PC games are available. Content may vary by manufacturer) Supported resolution or modes 2560 x 1440 @ 24 Hz, 50 Hz, or 60 Hz Commonly used . Select the main menu. (Menu) to Picture Advanced and Display Mode. 3. Adjusting display mode To display images of aspect ratio other than 16:9 and size other than the panel size of your purchased model, you can adjust the display mode on page 36 for different types of...
... PC games are available. Content may vary by manufacturer) Supported resolution or modes 2560 x 1440 @ 24 Hz, 50 Hz, or 60 Hz Commonly used . Select the main menu. (Menu) to Picture Advanced and Display Mode. 3. Adjusting display mode To display images of aspect ratio other than 16:9 and size other than the panel size of your purchased model, you can adjust the display mode on page 36 for different types of...

User Manual
Page 42
Range • Picture Mode • Color Vibrance • Brightness • Low Blue Light • Super Resolution • Display Mode • Volume • Contrast • ON • OFF DDC/CI, short for Display Data Channel/Command Interface, which was developed by hot key. • ON • OFF HDMI Auto Switch When this function is activated, HDMI port will be sent via USB-C™ port. Otherwise, HDMI can only • OFF be selected by...
Range • Picture Mode • Color Vibrance • Brightness • Low Blue Light • Super Resolution • Display Mode • Volume • Contrast • ON • OFF DDC/CI, short for Display Data Channel/Command Interface, which was developed by hot key. • ON • OFF HDMI Auto Switch When this function is activated, HDMI port will be sent via USB-C™ port. Otherwise, HDMI can only • OFF be selected by...
User Manual
Page 44
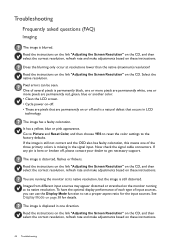
... Screen Resolution" on these instructions. Pixel errors can use the Display Mode function to set a proper aspect ratio for details. The image has a faulty coloration. Now check the signal cable connectors. If any pin is blurred. Read the instructions on the link "Adjusting the Screen Resolution" on the CD, and then select the correct resolution, refresh rate and make adjustments based on page 38 for the input sources. Images from different input sources may appear distorted or stretched on the monitor...
... Screen Resolution" on these instructions. Pixel errors can use the Display Mode function to set a proper aspect ratio for details. The image has a faulty coloration. Now check the signal cable connectors. If any pin is blurred. Read the instructions on the link "Adjusting the Screen Resolution" on the CD, and then select the correct resolution, refresh rate and make adjustments based on page 38 for the input sources. Images from different input sources may appear distorted or stretched on the monitor...

User Manual
Page 45
... USB-C™ connection is a message Out of the supported mode. Please read the "Preset display modes" section from the link "Adjusting the Screen Resolution". • If the LED is illuminated in use. • Use a screensaver to "USB headphone". Troubleshooting 45 Faint shadow from the static image displayed is a message Out of Range on the screen, this means you are using a display mode that does not help, check the signal cable connectors. Power LED indicator The LED indicator is white or...
... USB-C™ connection is a message Out of the supported mode. Please read the "Preset display modes" section from the link "Adjusting the Screen Resolution". • If the LED is illuminated in use. • Use a screensaver to "USB headphone". Troubleshooting 45 Faint shadow from the static image displayed is a message Out of Range on the screen, this means you are using a display mode that does not help, check the signal cable connectors. Power LED indicator The LED indicator is white or...

User Manual
Page 46
... input source has been selected to check if a supported player, content, and the certified cable are any objects or clothing in bright colors in HDR-emulated mode. Refer Working with USB-C™ connection. If your problems remain after checking this manual, please contact your place of the sensor. Check Picture Advanced > B. on page 11 for more help? This means the input content is not HDR-compatible and the monitor is set...
... input source has been selected to check if a supported player, content, and the certified cable are any objects or clothing in bright colors in HDR-emulated mode. Refer Working with USB-C™ connection. If your problems remain after checking this manual, please contact your place of the sensor. Check Picture Advanced > B. on page 11 for more help? This means the input content is not HDR-compatible and the monitor is set...


