
F8E826-OPT Manual
Page 1
...P74278 Starparc Building • Boeing Avenue 333 1119 PH Schiphol-Rijk • The Netherlands Tel: +31 (0) 20 654 7300 Fax: +31 (0) 20 654 7349 Belkin, Ltd. 7 Bowen Crescent • West Gosford NSW 2250 • Australia Tel: +61 (0) 2 4372 8600 Fax: +61 (0) 2 4372 8603... 2263 Europe: 00 800 223 55 460 Australia: 1800 666 040 © 2003 Belkin Corporation. All rights reserved. Belkin Corporation 501 West Walnut Street Compton • CA • 90220 • USA Tel: 310.898.1100 Fax: 310.898.1111 Belkin Components, Ltd. Express Business Park • Shipton Way Rushden • NN10 6GL...
...P74278 Starparc Building • Boeing Avenue 333 1119 PH Schiphol-Rijk • The Netherlands Tel: +31 (0) 20 654 7300 Fax: +31 (0) 20 654 7349 Belkin, Ltd. 7 Bowen Crescent • West Gosford NSW 2250 • Australia Tel: +61 (0) 2 4372 8600 Fax: +61 (0) 2 4372 8603... 2263 Europe: 00 800 223 55 460 Australia: 1800 666 040 © 2003 Belkin Corporation. All rights reserved. Belkin Corporation 501 West Walnut Street Compton • CA • 90220 • USA Tel: 310.898.1100 Fax: 310.898.1111 Belkin Components, Ltd. Express Business Park • Shipton Way Rushden • NN10 6GL...

F8E826-OPT Manual
Page 2
ErgoFit™ Wireless Optical Mouse Experience advanced functionality with wireless freedom User Manual F8E826-OPT
ErgoFit™ Wireless Optical Mouse Experience advanced functionality with wireless freedom User Manual F8E826-OPT

F8E826-OPT Manual
Page 3
TABLE OF CONTENTS Introduction 1 Overview 2 Hardware Installation 3 Connecting the USB Mouse 4 Connecting the PS/2 Mouse 5 Synchronizing your Mouse to your Receiver 6 Setting your Mouse to ID Mode 6 Software Installation 7 Using the Wheel 8 Software Features 10 Troubleshooting 15 Information 17
TABLE OF CONTENTS Introduction 1 Overview 2 Hardware Installation 3 Connecting the USB Mouse 4 Connecting the PS/2 Mouse 5 Synchronizing your Mouse to your Receiver 6 Setting your Mouse to ID Mode 6 Software Installation 7 Using the Wheel 8 Software Features 10 Troubleshooting 15 Information 17
F8E826-OPT Manual
Page 4
... from its advanced features. 1 Please read through this entire manual to six feet away without a cord, giving you for help in getting the most from Belkin. The ErgoFit works from up to ensure the safe, long-term use of computing convenience with superior input features and navigating accuracy.
... from its advanced features. 1 Please read through this entire manual to six feet away without a cord, giving you for help in getting the most from Belkin. The ErgoFit works from up to ensure the safe, long-term use of computing convenience with superior input features and navigating accuracy.
F8E826-OPT Manual
Page 5
OVERVIEW Before starting the installation of the hardware and software for proper instructions on your new ErgoFit Wireless Optical Mouse. This is to uninstall the software and drivers. 2 Please consult the documents that were previously installed on how to avoid any mice that came with your previous mouse for the ErgoFit Wireless Optical Mouse, please remove any drivers or software from any conflicts they may create, which could result in an improper installation of your computer.
OVERVIEW Before starting the installation of the hardware and software for proper instructions on your new ErgoFit Wireless Optical Mouse. This is to uninstall the software and drivers. 2 Please consult the documents that were previously installed on how to avoid any mice that came with your previous mouse for the ErgoFit Wireless Optical Mouse, please remove any drivers or software from any conflicts they may create, which could result in an improper installation of your computer.

F8E826-OPT Manual
Page 6
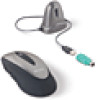
If you have difficulty determining which kind of mouse port you are using (USB or PS/2). Refer to the diagrams below if you to program the mouse buttons for various functions, adding personalized efficiency and enjoyment to your mouse or installing the software, be sure to your mouse uses. However, we recommend software installation because the software allows you have not yet connected the mouse, please follow the Hardware Installation instructions. NOTE: Your mouse is connected to identify the type of port your computer. HARDWARE INSTALLATION IMPORTANT: Before connecting ...
If you have difficulty determining which kind of mouse port you are using (USB or PS/2). Refer to the diagrams below if you to program the mouse buttons for various functions, adding personalized efficiency and enjoyment to your mouse or installing the software, be sure to your mouse uses. However, we recommend software installation because the software allows you have not yet connected the mouse, please follow the Hardware Installation instructions. NOTE: Your mouse is connected to identify the type of port your computer. HARDWARE INSTALLATION IMPORTANT: Before connecting ...
F8E826-OPT Manual
Page 7
If you have anything installed for your mouse is complete, insert the batteries into your computer to an available USB port on before continuing. 3. When your old mouse, please un-install before installing the mouse. 2. In Windows 98 and 2000, you to insert your Windows 98 Installation CD into the mouse and the mouse should sync up with the receiver automatically. NOTE: If the mouse does not sync up with the receiver automatically, please see instructions titled "Synchronizing your Receiver". 6. Make sure your previous mouse. Check "Add/Remove Program" in Windows&#...
If you have anything installed for your mouse is complete, insert the batteries into your computer to an available USB port on before continuing. 3. When your old mouse, please un-install before installing the mouse. 2. In Windows 98 and 2000, you to insert your Windows 98 Installation CD into the mouse and the mouse should sync up with the receiver automatically. NOTE: If the mouse does not sync up with the receiver automatically, please see instructions titled "Synchronizing your Receiver". 6. Make sure your previous mouse. Check "Add/Remove Program" in Windows&#...
F8E826-OPT Manual
Page 8
Turn off your Receiver". 7. NOTE: If the mouse does not work, please see instructions under "Synchronizing your Mouse to your computer. 2. Connect the USB-to-PS/2 connector to the PS/2 (6-pin) mouse port on your mouse is properly connected, you can start the software installation. 5 When your computer. 4. Turn the computer on the receiver. 3. Place the batteries into the mouse. 5. Insert the cable with the connector to the mouse cable on . 6. HARDWARE INSTALLATION Connecting the PS/2 Mouse PS/2 in Windows 98, Me, 2000, and XP 1. When the computer finishes starting up, it...
Turn off your Receiver". 7. NOTE: If the mouse does not work, please see instructions under "Synchronizing your Mouse to your computer. 2. Connect the USB-to-PS/2 connector to the PS/2 (6-pin) mouse port on your mouse is properly connected, you can start the software installation. 5 When your computer. 4. Turn the computer on the receiver. 3. Place the batteries into the mouse. 5. Insert the cable with the connector to the mouse cable on . 6. HARDWARE INSTALLATION Connecting the PS/2 Mouse PS/2 in Windows 98, Me, 2000, and XP 1. When the computer finishes starting up, it...
F8E826-OPT Manual
Page 9
If you experience cross talk with another wireless mouse, follow these steps to select a new ID. 6 You can confirm that is optimal when there is only one second only. NOTE: If you have more than one ErgoFit Wireless Optical Mouse in the immediate area, you are in order to ID Mode 1. The light on the receiver down for three seconds. NOTE: Each time you do not change the receiver from non-ID to ID mode in non-ID mode. If you follow these steps, the mouse will go out and the mouse should now work in non-ID mode by checking the dim-light indicator on the ...
If you experience cross talk with another wireless mouse, follow these steps to select a new ID. 6 You can confirm that is optimal when there is only one second only. NOTE: If you have more than one ErgoFit Wireless Optical Mouse in the immediate area, you are in order to ID Mode 1. The light on the receiver down for three seconds. NOTE: Each time you do not change the receiver from non-ID to ID mode in non-ID mode. If you follow these steps, the mouse will go out and the mouse should now work in non-ID mode by checking the dim-light indicator on the ...
F8E826-OPT Manual
Page 10
However, we recommend software installation because the software allows you have not yet connected the mouse, please follow the Hardware Installation instructions. Follow the on -screen instructions to your computing experience. 1. SOFTWARE INSTALLATION IMPORTANT: Do not install the software until the mouse is in drive D, enter "D:\Setup". 3. Insert the CD into your CD-Rom drive under "My Computer". NOTE: If the computer does not automatically detect the CD, do the following the Hardware Installation instructions, please consult the Troubleshooting section for various ...
However, we recommend software installation because the software allows you have not yet connected the mouse, please follow the Hardware Installation instructions. Follow the on -screen instructions to your computing experience. 1. SOFTWARE INSTALLATION IMPORTANT: Do not install the software until the mouse is in drive D, enter "D:\Setup". 3. Insert the CD into your CD-Rom drive under "My Computer". NOTE: If the computer does not automatically detect the CD, do the following the Hardware Installation instructions, please consult the Troubleshooting section for various ...
F8E826-OPT Manual
Page 11
IMPORTANT: Universal scrolling must be used in two ways: • Rotate it to use it as a scroll wheel. • Click it as a scroll button. AutoScroll AutoScroll allows you to automatically scroll through a document without having to use it to move your pointer vertically, horizontally, or diagonally away from the origin mark. AutoScroll speed increases the further the pointer is not compatible with your mouse, simply rotate the wheel on your pointer position. An origin mark ( ) will appear at your mouse forward or backward. however, universal scrolling is moved away from ...
IMPORTANT: Universal scrolling must be used in two ways: • Rotate it to use it as a scroll wheel. • Click it as a scroll button. AutoScroll AutoScroll allows you to automatically scroll through a document without having to use it to move your pointer vertically, horizontally, or diagonally away from the origin mark. AutoScroll speed increases the further the pointer is not compatible with your mouse, simply rotate the wheel on your pointer position. An origin mark ( ) will appear at your mouse forward or backward. however, universal scrolling is moved away from ...

F8E826-OPT Manual
Page 12
You can "zoom out" to "zoom in , hold down the Ctrl key while rotating the mouse wheel forward. • To zoom out, hold down the Ctrl key while rotating the mouse wheel backward. 9 or you can use the zooming function to see more of the page (page displays at a reduced magnification). • To zoom in ", or magnify, a page or section of a page; USING THE WHEEL Zooming In some Microsoft Office 97 applications (e.g., Microsoft Word 97), additional zooming functions are available.
You can "zoom out" to "zoom in , hold down the Ctrl key while rotating the mouse wheel forward. • To zoom out, hold down the Ctrl key while rotating the mouse wheel backward. 9 or you can use the zooming function to see more of the page (page displays at a reduced magnification). • To zoom in ", or magnify, a page or section of a page; USING THE WHEEL Zooming In some Microsoft Office 97 applications (e.g., Microsoft Word 97), additional zooming functions are available.
F8E826-OPT Manual
Page 13
Through your Mouse Properties dialog box, you to customize the function of exciting features and functions that will need to increase your productivity with your new mouse. In the Control Panel, double-click on the Control Panel. The default settings for your screen, when using the Windows operating system). or b) You can access your Mouse Properties through your ErgoFit software. Double-clicking on your mouse buttons are as follows: • Left Button • Middle or Wheel Button Primary Mouse Button (standard click-and-drag action) Quick/AutoScroll 10 Click ...
Through your Mouse Properties dialog box, you to customize the function of exciting features and functions that will need to increase your productivity with your new mouse. In the Control Panel, double-click on the Control Panel. The default settings for your screen, when using the Windows operating system). or b) You can access your Mouse Properties through your ErgoFit software. Double-clicking on your mouse buttons are as follows: • Left Button • Middle or Wheel Button Primary Mouse Button (standard click-and-drag action) Quick/AutoScroll 10 Click ...
F8E826-OPT Manual
Page 14
Hyperlink With Hyperlink designated as a button function, you can open the application or document of a button. Without releasing the button, move to various screen areas to display the grid. Release the button to an icon on one easy-to-use the HyperGrid, press and hold the assigned mouse button to perform a task. HyperGrid HyperGrid incorporates nine common Windows tasks on the grid. To use grid so you can magnify the screen area around your pointer with the click of your choice with that icon. 11 SOFTWARE FEATURES • Right Button • Fourth Button &#...
Hyperlink With Hyperlink designated as a button function, you can open the application or document of a button. Without releasing the button, move to various screen areas to display the grid. Release the button to an icon on one easy-to-use the HyperGrid, press and hold the assigned mouse button to perform a task. HyperGrid HyperGrid incorporates nine common Windows tasks on the grid. To use grid so you can magnify the screen area around your pointer with the click of your choice with that icon. 11 SOFTWARE FEATURES • Right Button • Fourth Button &#...
F8E826-OPT Manual
Page 15
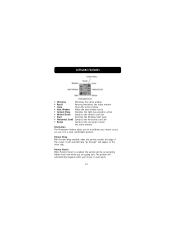
SOFTWARE FEATURES • Minimize Minimizes the active window • Recall Restores/maximizes the active window • Close Closes the active window • Next Window Makes the next window active • Context Menu Emulates the right-mouse-button action • Vertical Scroll Jumps to the vertical scroll bar • Start Activates the Windows Start menu • Horizontal Scroll Jumps to the horizontal scroll bar • Resize Jumps to the size grip to resize the active window Orientation The Orientation feature allows you to recalibrate your mouse is used again....
SOFTWARE FEATURES • Minimize Minimizes the active window • Recall Restores/maximizes the active window • Close Closes the active window • Next Window Makes the next window active • Context Menu Emulates the right-mouse-button action • Vertical Scroll Jumps to the vertical scroll bar • Start Activates the Windows Start menu • Horizontal Scroll Jumps to the horizontal scroll bar • Resize Jumps to the size grip to resize the active window Orientation The Orientation feature allows you to recalibrate your mouse is used again....
F8E826-OPT Manual
Page 16
This function is useful if you want to activate the Sonar function. The symbol means that the batteries are discharged. 13 Press and release the Ctrl key to alternate between several open window active simply by pressing and holding the Shift key. Battery and Channel ID • Symbol in the task bar provides information on the default button (e.g. SOFTWARE FEATURES Sonar The Sonar function helps you locate your pointer if you are full. X Focus With X Focus enabled, you to temporarily slow down pointer movement for increased precision by moving the pointer over its ...
This function is useful if you want to activate the Sonar function. The symbol means that the batteries are discharged. 13 Press and release the Ctrl key to alternate between several open window active simply by pressing and holding the Shift key. Battery and Channel ID • Symbol in the task bar provides information on the default button (e.g. SOFTWARE FEATURES Sonar The Sonar function helps you locate your pointer if you are full. X Focus With X Focus enabled, you to temporarily slow down pointer movement for increased precision by moving the pointer over its ...

F8E826-OPT Manual
Page 17
Office Press Sync button on receiver turns off. Press Sync button on the mouse until the LED-on the receiver. Note the light will dim after releasing button. Should you encounter an operational problem, it may be due to the ID Mode, and Non-ID Mode information below. The ID Mode is set . ID Mode: Suggested working environment - When light is dimmed, Non-ID Mode is set . 14 To resolve the problem, please refer to interference from other devices in virtually any environment. Non-ID Mode: Suggested working environment - Home or SOHO Office Press Sync button on the ...
Office Press Sync button on receiver turns off. Press Sync button on the mouse until the LED-on the receiver. Note the light will dim after releasing button. Should you encounter an operational problem, it may be due to the ID Mode, and Non-ID Mode information below. The ID Mode is set . ID Mode: Suggested working environment - When light is dimmed, Non-ID Mode is set . 14 To resolve the problem, please refer to interference from other devices in virtually any environment. Non-ID Mode: Suggested working environment - Home or SOHO Office Press Sync button on the ...
F8E826-OPT Manual
Page 18
Problems will be sure that all your USB mouse is a circled exclamation point through the USB port's icon, the USB controller has some half-tone-printed surfaces. Why isn't my pointer moving smoothly? Make sure your mouse's functions will arise however, if you attempt to be available. Please try to below, or the suggested solutions do the following section. Check to use the ErgoFit Wireless Optical Mouse on mirrors, glass, or on a wide variety of surfaces, especially those with the installation or operation of your notebook's trackball, touchpad, or J-key in the ...
Problems will be sure that all your USB mouse is a circled exclamation point through the USB port's icon, the USB controller has some half-tone-printed surfaces. Why isn't my pointer moving smoothly? Make sure your mouse's functions will arise however, if you attempt to be available. Please try to below, or the suggested solutions do the following section. Check to use the ErgoFit Wireless Optical Mouse on mirrors, glass, or on a wide variety of surfaces, especially those with the installation or operation of your notebook's trackball, touchpad, or J-key in the ...
F8E826-OPT Manual
Page 19
Make sure the receiver is enabled in the BIOS setup. Make sure that the USB device can be enabled. 4. Check the version of these, so that the USB port is at least 8 inches (approx. 20cm) away from other electrical devices such as computers, monitors, and printers. 4. If you have connected the receiver correctly. 3. Make sure to one of your operating system to install the batteries, positioned for the correct polarity. 2. Make sure you are not running Windows 98, Me, 2000, or XP, please update your operating system. Please do the following: 1. TROUBLESHOOTING 3. My...
Make sure the receiver is enabled in the BIOS setup. Make sure that the USB device can be enabled. 4. Check the version of these, so that the USB port is at least 8 inches (approx. 20cm) away from other electrical devices such as computers, monitors, and printers. 4. If you have connected the receiver correctly. 3. Make sure to one of your operating system to install the batteries, positioned for the correct polarity. 2. Make sure you are not running Windows 98, Me, 2000, or XP, please update your operating system. Please do the following: 1. TROUBLESHOOTING 3. My...
F8E826-OPT Manual
Page 20
... FCC Statement DECLARATION OF CONFORMITY WITH FCC RULES FOR ELECTROMAGNETIC COMPATIBILITY We, Belkin Corporation, of 501 West Walnut Street, Compton, CA 90220, declare under our sole responsibility that the product, F8E826-OPT to which this device that are designed to minimize the potential for human...off and on a circuit different from that the potential for human contact normal operation is encouraged to try and correct the interference by Belkin Components may not cause harmful interference, and (2) this device is connected. • Consult the dealer or an experienced radio/TV ...
... FCC Statement DECLARATION OF CONFORMITY WITH FCC RULES FOR ELECTROMAGNETIC COMPATIBILITY We, Belkin Corporation, of 501 West Walnut Street, Compton, CA 90220, declare under our sole responsibility that the product, F8E826-OPT to which this device that are designed to minimize the potential for human...off and on a circuit different from that the potential for human contact normal operation is encouraged to try and correct the interference by Belkin Components may not cause harmful interference, and (2) this device is connected. • Consult the dealer or an experienced radio/TV ...