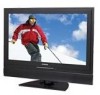
Operation Manual
Page 5
... with S-Video and Audio Connectors 16 Connecting a PC...17 Connecting a Camcorder or "PlayStation 17 Connecting a Second TV or Monitor 18 Connecting Headphones ...18 Introducing the Remote Control...19 Insert Batteries into the Remote Control 19 Using the Remote Control...19 Button Descriptions...20 Getting Start ...22 Running Initial Setup...22 Setting a Secret Number...23...
... with S-Video and Audio Connectors 16 Connecting a PC...17 Connecting a Camcorder or "PlayStation 17 Connecting a Second TV or Monitor 18 Connecting Headphones ...18 Introducing the Remote Control...19 Insert Batteries into the Remote Control 19 Using the Remote Control...19 Button Descriptions...20 Getting Start ...22 Running Initial Setup...22 Setting a Secret Number...23...

Operation Manual
Page 6
... ...30 Setting Channel List...30 Setting Favorite Channels...31 Using the FAVORITE button ...31 Editing Channel Name ...31 Using the Program Guide...32 Accessing Program Guide ...32 Using the Program Guide ...32 Setting System ...33 Accessing Settings Menu...33 Setting Date & Time ...33 Setting Timer...33 Input Select ...34 Setting Caption Vision...34... Menu ...36 Selecting Locks Options ...36 Viewing Locked or Blocked Programs 37 Other Information ...38 Troubleshooting ...38 Care and Maintenance...40 Specifications ...41 Programming your Remote Control 42 Manufacturer's Codes ...44 5
... ...30 Setting Channel List...30 Setting Favorite Channels...31 Using the FAVORITE button ...31 Editing Channel Name ...31 Using the Program Guide...32 Accessing Program Guide ...32 Using the Program Guide ...32 Setting System ...33 Accessing Settings Menu...33 Setting Date & Time ...33 Setting Timer...33 Input Select ...34 Setting Caption Vision...34... Menu ...36 Selecting Locks Options ...36 Viewing Locked or Blocked Programs 37 Other Information ...38 Troubleshooting ...38 Care and Maintenance...40 Specifications ...41 Programming your Remote Control 42 Manufacturer's Codes ...44 5

Operation Manual
Page 9
Introducing the TV TV Controls and Connectors Control Panel 1 2 CH- VOL+ MENU INPUT 3 4 6 5 7 Item 1 Power Indicator 2 Remote Sensor 3 CH-/CH+ 4 VOL-/VOL+ 5 MENU* 6 POWER 7 INPUT Description Receives IR signals from the remote control. Press to access the Menu main page. To access the Menu main page. To display the INPUT source list or to ..., these buttons serve as left/right buttons. CH+ VOL- In menu operations, these buttons serve as down/up buttons. Turn the unit on the remote control unit. 8 In Menu operations, the MENU button is used to adjust the volume.
Introducing the TV TV Controls and Connectors Control Panel 1 2 CH- VOL+ MENU INPUT 3 4 6 5 7 Item 1 Power Indicator 2 Remote Sensor 3 CH-/CH+ 4 VOL-/VOL+ 5 MENU* 6 POWER 7 INPUT Description Receives IR signals from the remote control. Press to access the Menu main page. To access the Menu main page. To display the INPUT source list or to ..., these buttons serve as left/right buttons. CH+ VOL- In menu operations, these buttons serve as down/up buttons. Turn the unit on the remote control unit. 8 In Menu operations, the MENU button is used to adjust the volume.

Operation Manual
Page 14
...audio signals, so it is not necessary to the TV's HDMI IN jack. Notes and Cautions: = ...external equipment may be different depending on the Display. TV Right Side HDMI INPUT D-Sub/DVI AUDIO INPUT HDMI... making any connections. = The packing contents of this TV may not include the cables or adaptors mentioned in this...jack to connect the audio cable. 13 Connecting the TV Using External Equipment Introduction You can result in image or... type. = The illustration of external equipment to your TV, like a DVD player, VCR, Digital TV tuner, PC, HDMI equipment, game console and camcorder....
...audio signals, so it is not necessary to the TV's HDMI IN jack. Notes and Cautions: = ...external equipment may be different depending on the Display. TV Right Side HDMI INPUT D-Sub/DVI AUDIO INPUT HDMI... making any connections. = The packing contents of this TV may not include the cables or adaptors mentioned in this...jack to connect the audio cable. 13 Connecting the TV Using External Equipment Introduction You can result in image or... type. = The illustration of external equipment to your TV, like a DVD player, VCR, Digital TV tuner, PC, HDMI equipment, game console and camcorder....

Operation Manual
Page 20
... can result in an area with their terminals corresponding to the (+) and (-) indications. = Different types of remote control = Do not expose the remote control to the remote sensor window. Be sure to follow the instructions below. = Place batteries with high humidity. = Do not ...Remote Control Introducing the Remote Control Insert two size AA batteries by pointing it towards the remote sensor window of the set , or operate the remote control closer to shock. Cautions regarding use of batteries can cause a rash. In such a case, change the angle of the lighting or TV...
... can result in an area with their terminals corresponding to the (+) and (-) indications. = Different types of remote control = Do not expose the remote control to the remote sensor window. Be sure to follow the instructions below. = Place batteries with high humidity. = Do not ...Remote Control Introducing the Remote Control Insert two size AA batteries by pointing it towards the remote sensor window of the set , or operate the remote control closer to shock. Cautions regarding use of batteries can cause a rash. In such a case, change the angle of the lighting or TV...

Operation Manual
Page 21
To adjust selected menu item in menu operation; To exit menu. 20 If your remote control does not work correctly when you operate the unit, please try to press TV button. 3 3 0-9 number Use these number buttons to select channel or buttons input password. 4 INPUT To display the... INPUT source list or to be controlled 1 CBL, TV with remote control. To select channels upward or downward. 8 VOL+, VOL- This remote control is an universal remote 2 control. To adjust volume. 11 12 9 MUTE To mute the sound. 10 MENU To ...
To adjust selected menu item in menu operation; To exit menu. 20 If your remote control does not work correctly when you operate the unit, please try to press TV button. 3 3 0-9 number Use these number buttons to select channel or buttons input password. 4 INPUT To display the... INPUT source list or to be controlled 1 CBL, TV with remote control. To select channels upward or downward. 8 VOL+, VOL- This remote control is an universal remote 2 control. To adjust volume. 11 12 9 MUTE To mute the sound. 10 MENU To ...

Operation Manual
Page 22
... mono for digital channels. To freeze current picture. They do not perform any function on this TV. To set sleep timer. To access the master channel list. To select a preset sound mode...to select audio track for analog channels; To select a preset picture mode. also used to this TV. 15 16 MTS/SAP ZOOM CCD SLEEP 17 18 LIST FAVORITE AUDIO PICTURE 19 20 PIP P.POSITION...list and select from 3 different favorite lists. To select closed caption mode. Button Descriptions Introducing the Remote Control Button 15 ZOOM 16 CCD 17 MTS/SAP 18 SLEEP 19 LIST 20 PICTURE 21 FREEZE 22...
... mono for digital channels. To freeze current picture. They do not perform any function on this TV. To set sleep timer. To access the master channel list. To select a preset sound mode...to select audio track for analog channels; To select a preset picture mode. also used to this TV. 15 16 MTS/SAP ZOOM CCD SLEEP 17 18 LIST FAVORITE AUDIO PICTURE 19 20 PIP P.POSITION...list and select from 3 different favorite lists. To select closed caption mode. Button Descriptions Introducing the Remote Control Button 15 ZOOM 16 CCD 17 MTS/SAP 18 SLEEP 19 LIST 20 PICTURE 21 FREEZE 22...

Operation Manual
Page 23
...OK to continue RF Input Source Select the source for your area, and then press OK to confirm and continue. Insert the batteries into the remote control unit. 2. Plug in English If you want to return to previous screen, please highlight [GO BACK] item and press OK to return...television signal. Getting Start Running Initial Setup Perform the following steps before you press POWER on the remote control to turn on the TV for the first time after purchase. After you finish connecting the TV, you may take a few minutes - Connect the antenna cable to select. If you want to...
...OK to continue RF Input Source Select the source for your area, and then press OK to confirm and continue. Insert the batteries into the remote control unit. 2. Plug in English If you want to return to previous screen, please highlight [GO BACK] item and press OK to return...television signal. Getting Start Running Initial Setup Perform the following steps before you press POWER on the remote control to turn on the TV for the first time after purchase. After you finish connecting the TV, you may take a few minutes - Connect the antenna cable to select. If you want to...

Operation Manual
Page 25
... (It is composed of a major channel number and a minor channel number. or Never attempt to move the TV The initial setup starts when the TV powers on the remote control For analog TV channels Press the 0-9 number buttons to the NTSC channel number for the first time. If the...125 channels for a long period of 1, 2 or larger. button. Press POWER on the TV or press POWER on the remote control. Turning Off Press POWER on the TV or press POWER on the remote control. Introducing Channel Number Selecting Channels This television is still inserted into the wall outlet. So ...
... (It is composed of a major channel number and a minor channel number. or Never attempt to move the TV The initial setup starts when the TV powers on the remote control For analog TV channels Press the 0-9 number buttons to the NTSC channel number for the first time. If the...125 channels for a long period of 1, 2 or larger. button. Press POWER on the TV or press POWER on the remote control. Turning Off Press POWER on the TV or press POWER on the remote control. Introducing Channel Number Selecting Channels This television is still inserted into the wall outlet. So ...

Operation Manual
Page 26
...FREEZE to display the master channel list, you enter channel number with the ▲▼and OK buttons. on the remote control or on the remote control Press MUTE to 16:9) differ from different formats of the input signal. Using master channel list Press the LIST ...button to temporarily capture a program's picture. Press it again to the selected channel directly. (e. Selecting Channels Watching TV For digital TV channel Press the 0-9...
...FREEZE to display the master channel list, you enter channel number with the ▲▼and OK buttons. on the remote control or on the remote control Press MUTE to 16:9) differ from different formats of the input signal. Using master channel list Press the LIST ...button to temporarily capture a program's picture. Press it again to the selected channel directly. (e. Selecting Channels Watching TV For digital TV channel Press the 0-9...
Operation Manual
Page 39
..., the code numbers for the equipment that this equipment can only be operated by its original remote control. Remote Control Problem Remote control does not operate Remote control does not operate other brand equipment Possible Solutions ● The batteries could be station trouble. ● Select a proper picture ... and no sound Audio noise Possible Solutions ● Make sure the power cord is plugged in. ● Press POWER on the TV or on the remote control. ● Press the input source select button to cycle through the connected video sources. ● Try another channel; Move...
..., the code numbers for the equipment that this equipment can only be operated by its original remote control. Remote Control Problem Remote control does not operate Remote control does not operate other brand equipment Possible Solutions ● The batteries could be station trouble. ● Select a proper picture ... and no sound Audio noise Possible Solutions ● Make sure the power cord is plugged in. ● Press POWER on the TV or on the remote control. ● Press the input source select button to cycle through the connected video sources. ● Try another channel; Move...

Operation Manual
Page 43
...please read and follow all codes listed for Your Code". 6. The LED blinks twice. 4. The remote will try searching for future reference. Enter 9-9-1, then the device group number (0= Cable, 1= TV, 2= VCR, 3= Audio). Press SET to control your VCR or DVD, Cable or Satellite ...Receivers, Amplifier or Tuner, and Auxiliary devices. Other Information Programming your Remote Control Introduction A Quick Look at Programming a Device Your remote lets you control four devices with...
...please read and follow all codes listed for Your Code". 6. The LED blinks twice. 4. The remote will try searching for future reference. Enter 9-9-1, then the device group number (0= Cable, 1= TV, 2= VCR, 3= Audio). Press SET to control your VCR or DVD, Cable or Satellite ...Receivers, Amplifier or Tuner, and Auxiliary devices. Other Information Programming your Remote Control Introduction A Quick Look at Programming a Device Your remote lets you control four devices with...

Operation Manual
Page 44
...four-digit code is assigned to your DVD: 1. then release. 2. then release. 3. not more than 15 feet away. Other Information Programming your Remote Control Checking the Codes Changing Volume Lock If you have set its volume control for example, DVD). Repeat step 4 for the four remaining digits, ... long blink. Enter 9-9-3 and then press the mode key for the device you can perform Individual Volume Unlock on a selected device to set up the remote using 2 for the second digit, 3 for the third digit, 4 for the fourth digit, and 5 for example, wrong key). Enter 9-9-3 and then ...
...four-digit code is assigned to your DVD: 1. then release. 2. then release. 3. not more than 15 feet away. Other Information Programming your Remote Control Checking the Codes Changing Volume Lock If you have set its volume control for example, DVD). Repeat step 4 for the four remaining digits, ... long blink. Enter 9-9-3 and then press the mode key for the device you can perform Individual Volume Unlock on a selected device to set up the remote using 2 for the second digit, 3 for the third digit, 4 for the fourth digit, and 5 for example, wrong key). Enter 9-9-3 and then ...


