User Guide
Page 4
...!...8 Installing a nano SIM card...9 Removing a nano SIM card...10 Installing a memory card...11 Removing a memory card...12 Starting for the first time...16 Using the touchscreen...18 2 There's no place like Home Zen Home features...21 Home screen...21 Quick settings...23 Notifications...24 Personalizing your Home screen 25 App & Widgets ...25 Wallpapers...26 Easy Mode...27 Kids Mode...30 Setting up the date and time...32 Setting up your ringtone and alert sounds 32 Lock Screen...33 Customizing your lock screen...33 Using and customizing the quick access buttons...
...!...8 Installing a nano SIM card...9 Removing a nano SIM card...10 Installing a memory card...11 Removing a memory card...12 Starting for the first time...16 Using the touchscreen...18 2 There's no place like Home Zen Home features...21 Home screen...21 Quick settings...23 Notifications...24 Personalizing your Home screen 25 App & Widgets ...25 Wallpapers...26 Easy Mode...27 Kids Mode...30 Setting up the date and time...32 Setting up your ringtone and alert sounds 32 Lock Screen...33 Customizing your lock screen...33 Using and customizing the quick access buttons...

User Guide
Page 5
... block list...61 Social networking with your contacts 62 Send messages and more 63 Google Messenger...63 5 Fun and entertainment Using a headset...64 Connecting the audio jack...64 Google Play Music...65 6 Your precious moments Capture moments...66 Launching the Camera app...66 Advanced camera features...68 Using the Gallery...70 Viewing files from your social network or cloud storage 70 Viewing the photo location...71 Sharing files from the Gallery...72 Deleting files...
... block list...61 Social networking with your contacts 62 Send messages and more 63 Google Messenger...63 5 Fun and entertainment Using a headset...64 Connecting the audio jack...64 Google Play Music...65 6 Your precious moments Capture moments...66 Launching the Camera app...66 Advanced camera features...68 Using the Gallery...70 Viewing files from your social network or cloud storage 70 Viewing the photo location...71 Sharing files from the Gallery...72 Deleting files...

User Guide
Page 11
... or injure your ASUS Phone. To install a memory card: 1. NOTE: • Some memory cards may not be compatible with the gold contacts facing down (as shown). 3. Installing a memory card Your ASUS Phone supports a microSD™ and microSDXC™ memory card with up , insert the tool that you remove the cover. • Do not forcibly remove, shear, or distort the card slot cover. • Do not use only compatible memory cards to prevent loss...
... or injure your ASUS Phone. To install a memory card: 1. NOTE: • Some memory cards may not be compatible with the gold contacts facing down (as shown). 3. Installing a memory card Your ASUS Phone supports a microSD™ and microSDXC™ memory card with up , insert the tool that you remove the cover. • Do not forcibly remove, shear, or distort the card slot cover. • Do not use only compatible memory cards to prevent loss...
User Guide
Page 16
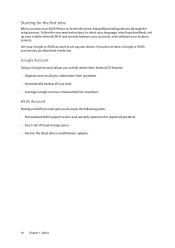
... and create one. Use your Google or ASUS account to select your language, select input methods, set up your mobile network, Wi-Fi and security features, sync accounts, and configure your location services. Starting for the first time When you turn your ASUS Phone on for registered products. • Free 5 GB of Cloud storage space. • Receive the latest device and firmware updates. 16 Chapter 1: Basics ASUS Account Having an ASUS Account gets you through the setup process.
... and create one. Use your Google or ASUS account to select your language, select input methods, set up your mobile network, Wi-Fi and security features, sync accounts, and configure your location services. Starting for the first time When you turn your ASUS Phone on for registered products. • Free 5 GB of Cloud storage space. • Receive the latest device and firmware updates. 16 Chapter 1: Basics ASUS Account Having an ASUS Account gets you through the setup process.

User Guide
Page 25
... Apps list or the Widgets screen, tap and hold an empty area on your Home screen. • Swipe up from your screen. Chapter 2: There's no place like Home 25 Select an attractive design as your wallpaper, add shortcuts for quick access to an empty area on your favorite apps, and add widgets for a quick review of your Home screen. App & Widgets App shortcuts make it to quickly-access your often-used or favorite apps...
... Apps list or the Widgets screen, tap and hold an empty area on your Home screen. • Swipe up from your screen. Chapter 2: There's no place like Home 25 Select an attractive design as your wallpaper, add shortcuts for quick access to an empty area on your favorite apps, and add widgets for a quick review of your Home screen. App & Widgets App shortcuts make it to quickly-access your often-used or favorite apps...

User Guide
Page 32
... your phone ringtone, notifications such as text messages, emails, and event alerts. You can also choose to enable or disable the dial pad touch tones, touch sounds, screen lock sound, or you can opt to use the 24-hour format, if you tap on your Home screen automatically syncs with your mobile provider's settings. Set up the date and time By default, the date and time displayed on it. Slide Automatic date & time and Automatic time zone to have your ASUS Phone vibrate...
... your phone ringtone, notifications such as text messages, emails, and event alerts. You can also choose to enable or disable the dial pad touch tones, touch sounds, screen lock sound, or you can opt to use the 24-hour format, if you tap on your Home screen automatically syncs with your mobile provider's settings. Set up the date and time By default, the date and time displayed on it. Slide Automatic date & time and Automatic time zone to have your ASUS Phone vibrate...

User Guide
Page 33
... the Settings screen and select Lock screen. 3. Tap the screen lock option you would like Home 33 From the lock screen, you want to change your lock screen settings from sleep mode. Chapter 2: There's no place like to use. Customizing your lock screen If you can also be customized to regulate access to your mobile data and apps. Launch Quick settings then tap . 2. NOTE: For more details, see Securing your ASUS Phone. Lock Screen By default, the lock screen appears after turning...
... the Settings screen and select Lock screen. 3. Tap the screen lock option you would like Home 33 From the lock screen, you want to change your lock screen settings from sleep mode. Chapter 2: There's no place like to use. Customizing your lock screen If you can also be customized to regulate access to your mobile data and apps. Launch Quick settings then tap . 2. NOTE: For more details, see Securing your ASUS Phone. Lock Screen By default, the lock screen appears after turning...

User Guide
Page 35
... and try to set up your fingerprint ID when using your ASUS phone without your finger are clean and dry. 2. When you set up your fingerprint ID, you also need to cover different areas of your finger repeatedly until your screen lock method for the first time: 1. Find the fingerprint scanner on -screen instructions to unlock your device, access your phone calls and data. Fingerprint ID sensor...
... and try to set up your fingerprint ID when using your ASUS phone without your finger are clean and dry. 2. When you set up your fingerprint ID, you also need to cover different areas of your finger repeatedly until your screen lock method for the first time: 1. Find the fingerprint scanner on -screen instructions to unlock your device, access your phone calls and data. Fingerprint ID sensor...
User Guide
Page 49
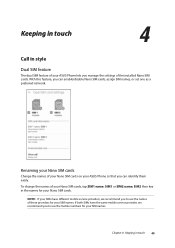
... can enable/disable Nano SIM cards, assign SIM names, or set one as a preferred network. With this feature, you to use the names of your Nano SIM cards, tap SIM1 name: SIM1 or SIM2 name: SIM2 then key in touch 49 Renaming your Nano SIM cards Change the names of your Nano SIM cards on your ASUS Phone lets you manage the settings of the installed Nano SIM cards. If both SIMs have different mobile service...
... can enable/disable Nano SIM cards, assign SIM names, or set one as a preferred network. With this feature, you to use the names of your Nano SIM cards, tap SIM1 name: SIM1 or SIM2 name: SIM2 then key in touch 49 Renaming your Nano SIM cards Change the names of your Nano SIM cards on your ASUS Phone lets you manage the settings of the installed Nano SIM cards. If both SIMs have different mobile service...

User Guide
Page 50
... to connect the call. IMPORTANT! SIM card for SMS messages To assign a SIM card for voice calls, SMS messages, and data services. To assign a SIM card for voice calls, tap Voice call then tap the SIM that you make a call from your contacts list. SIM card for data service To assign a SIM card for voice calls When you make a call , your preferred SIM for SMS messages, tap SMS messages then select from SIM1 or SIM2. 50 Chapter 4: Keeping in touch Assigning a preferred SIM card Assign a SIM card as your ASUS Phone automatically uses the preferred SIM card to use. SIM card for...
... to connect the call. IMPORTANT! SIM card for SMS messages To assign a SIM card for voice calls, SMS messages, and data services. To assign a SIM card for voice calls, tap Voice call then tap the SIM that you make a call from your contacts list. SIM card for data service To assign a SIM card for voice calls When you make a call , your preferred SIM for SMS messages, tap SMS messages then select from SIM1 or SIM2. 50 Chapter 4: Keeping in touch Assigning a preferred SIM card Assign a SIM card as your ASUS Phone automatically uses the preferred SIM card to use. SIM card for...

User Guide
Page 55
To stop recording, tap This icon appears on an active call . Call a contact or dial a number. 2. Swipe down from the other party or parties. 3. Before recording a call, ensure that you to record a conversation for permission from the top of the screen, then tap Call recording saved notification to view the recorded conversation. Chapter 4: Keeping in touch 55 IMPORTANT! Managing multiple calls Your ASUS Phone provides you can hear a beeping sound, indicating of another incoming call. Recording calls Your ASUS Phone allows...
To stop recording, tap This icon appears on an active call . Call a contact or dial a number. 2. Swipe down from the other party or parties. 3. Before recording a call, ensure that you to record a conversation for permission from the top of the screen, then tap Call recording saved notification to view the recorded conversation. Chapter 4: Keeping in touch 55 IMPORTANT! Managing multiple calls Your ASUS Phone provides you can hear a beeping sound, indicating of another incoming call. Recording calls Your ASUS Phone allows...

User Guide
Page 56
... via calls, SMS messages, emails, or social networks. When you would want to display your Contacts settings, tap > Settings from the Contacts settings. You can also sync your contacts with your email or social network accounts, link contacts' info for easy access in touch with phones, sorting list by first/last name, or viewing contact names as first/last names first. To set up your contacts from the Contacts app. Such display options include displaying only those contacts with . To add...
... via calls, SMS messages, emails, or social networks. When you would want to display your Contacts settings, tap > Settings from the Contacts settings. You can also sync your contacts with your email or social network accounts, link contacts' info for easy access in touch with phones, sorting list by first/last name, or viewing contact names as first/last names first. To set up your contacts from the Contacts app. Such display options include displaying only those contacts with . To add...

User Guide
Page 57
... an email account, tap ADD ACCOUNT then create one. 3. When you 've completed the info, tap . NOTES: • You can add a contact's extension number to your device, corporate, Google, or other contact information, tap Add another comma. •• Insert a semi-colon (;) after the main number, then enter the contact's extension number. Adding an extension number to a contact number You can also save the contact to skip the voice prompts when making a call...
... an email account, tap ADD ACCOUNT then create one. 3. When you 've completed the info, tap . NOTES: • You can add a contact's extension number to your device, corporate, Google, or other contact information, tap Add another comma. •• Insert a semi-colon (;) after the main number, then enter the contact's extension number. Adding an extension number to a contact number You can also save the contact to skip the voice prompts when making a call...

User Guide
Page 62
...your social network account under Accounts section. 3. Syncing your social network account Sync your social network account to add the social network accounts of your contacts list. 5. From the Settings screen, tap your ASUS Phone. 1. Unblocking contacts or numbers You may remove a blocked contact or number from your list and receive calls or messages from block list. Tap > Contacts then tap > Manage contacts > Block list. 2. Social networking with the activities of your contacts makes it easier for you want to launch the Settings app: •• Launch Quick settings then...
...your social network account under Accounts section. 3. Syncing your social network account Sync your social network account to add the social network accounts of your contacts list. 5. From the Settings screen, tap your ASUS Phone. 1. Unblocking contacts or numbers You may remove a blocked contact or number from your list and receive calls or messages from block list. Tap > Contacts then tap > Manage contacts > Block list. 2. Social networking with the activities of your contacts makes it easier for you want to launch the Settings app: •• Launch Quick settings then...

User Guide
Page 67
Turn on the location access from > Settings > Location. 2. Ensure that helps prevent shakiness while video recording. From the Camera app's home screen, tap the photo. > Other and activate Location services before capturing photos Switch between screen modes Enable or disable HDR Swipe to the right to use advanced camera settings Swipe to the left to use effects Touch to switch between Normal mode and Landscape mode Touch to switch between Auto mode and Manual mode See the Gallery Switch between the front and rear cameras Take photos Record videos Photo Locations To enable the ...
Turn on the location access from > Settings > Location. 2. Ensure that helps prevent shakiness while video recording. From the Camera app's home screen, tap the photo. > Other and activate Location services before capturing photos Switch between screen modes Enable or disable HDR Swipe to the right to use advanced camera settings Swipe to the left to use effects Touch to switch between Normal mode and Landscape mode Touch to switch between Auto mode and Manual mode See the Gallery Switch between the front and rear cameras Take photos Record videos Photo Locations To enable the ...

User Guide
Page 73
... media accounts, browse the Internet, or exchange data and messages wirelessly from Quick Settings screen. Tap More > Cellular networks. 3. Refer to section Quick Settings on how to ON, and configure the other mobile network settings, if necessary. 7 Staying connected Staying connected 7 Mobile network When there's no available Wi-Fi network that you can connect to, you can also enable the Wi-Fi from your ASUS Phone. NOTE: You can enable your mobile network's data access for Internet connection. Chapter 7: Staying connected 73 Enabling...
... media accounts, browse the Internet, or exchange data and messages wirelessly from Quick Settings screen. Tap More > Cellular networks. 3. Refer to section Quick Settings on how to ON, and configure the other mobile network settings, if necessary. 7 Staying connected Staying connected 7 Mobile network When there's no available Wi-Fi network that you can connect to, you can also enable the Wi-Fi from your ASUS Phone. NOTE: You can enable your mobile network's data access for Internet connection. Chapter 7: Staying connected 73 Enabling...

User Guide
Page 87
... to disable some features or stop unnecessary apps to save power. •• Battery usage: Allows you to retrieve more system memory and extend the battery life. •• Power-safe technology: Provides extended protection for optimizations to save power. •• Auto-start manager: Allows you to launch Auto-start manager app. •• Battery modes: Allows you to select your battery modes and customize your power saving settings according to your needs. •...
... to disable some features or stop unnecessary apps to save power. •• Battery usage: Allows you to retrieve more system memory and extend the battery life. •• Power-safe technology: Provides extended protection for optimizations to save power. •• Auto-start manager: Allows you to launch Auto-start manager app. •• Battery modes: Allows you to select your battery modes and customize your power saving settings according to your needs. •...
User Guide
Page 88
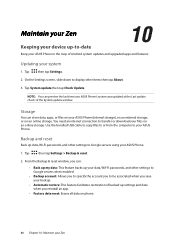
... an online storage. Backup and reset Back up settings and data when you save your backup. •• Automatic restore: This feature facilitates restoration of backed up data, Wi-Fi passwords, and other items then tap About. 3. Updating your ASUS Phone's system was updated at the Last update check: of Android system updates and upgraded apps and features. Use the bundled USB cable to copy files to or from the computer to transfer or download your files on phone...
... an online storage. Backup and reset Back up settings and data when you save your backup. •• Automatic restore: This feature facilitates restoration of backed up data, Wi-Fi passwords, and other items then tap About. 3. Updating your ASUS Phone's system was updated at the Last update check: of Android system updates and upgraded apps and features. Use the bundled USB cable to copy files to or from the computer to transfer or download your files on phone...

User Guide
Page 100
... Dialing 52 Camera 66 - adding shortcuts 28 - adding 25 - calling your last-called number 54 - exporting 61 - see also Bluetooth Tethering 77 - auto dialing 52 - marking 60 File Manager 46 - accessing the internal storage 46 Fingerprint 35 - turning on/off 15 B Backup and reset 88 Beauty - see also Block list 61 - other call...
... Dialing 52 Camera 66 - adding shortcuts 28 - adding 25 - calling your last-called number 54 - exporting 61 - see also Bluetooth Tethering 77 - auto dialing 52 - marking 60 File Manager 46 - accessing the internal storage 46 Fingerprint 35 - turning on/off 15 B Backup and reset 88 Beauty - see also Block list 61 - other call...

User Guide
Page 101
... Advanced camera features 68 PowerMaster 87 Q Quick settings 23 - sending messages 63 Google Play Music 65 - using and customizing the quick access buttons 34 M Managing your last-called number 54 - using Kids Mode 30 L Lock screen 33, 39 - setting up your ASUS phone 89 - moving through pages or screens 19 - viewing the photo location 71 GIF animation 68 - removing 12 Mobile Manager...
... Advanced camera features 68 PowerMaster 87 Q Quick settings 23 - sending messages 63 Google Play Music 65 - using and customizing the quick access buttons 34 M Managing your last-called number 54 - using Kids Mode 30 L Lock screen 33, 39 - setting up your ASUS phone 89 - moving through pages or screens 19 - viewing the photo location 71 GIF animation 68 - removing 12 Mobile Manager...


