Warranty Card English/Thai/Turkish
Page 3
... to battery from defects in any manner whatsoever. 1. The Repair Center may require support from the Product's original storage media. This warranty covers the hardware of this Warranty Card. Customer responsibility When using the Product • Read the user manual first and use within the Warranty Period, ASUS, at the back of Purchase and not sold as : cables, bag, mouse etc. In case the Product needs to...
... to battery from defects in any manner whatsoever. 1. The Repair Center may require support from the Product's original storage media. This warranty covers the hardware of this Warranty Card. Customer responsibility When using the Product • Read the user manual first and use within the Warranty Period, ASUS, at the back of Purchase and not sold as : cables, bag, mouse etc. In case the Product needs to...
Warranty Card English/Thai/Turkish
Page 4
.... The original packaging may delete any case, the packaging should meet the following : • Restoring the Product's operating system, factory-installed drivers, and applications to the factory default settings. • Installing updates, patches or service packs. • Running diagnostic tools and programs on the Product. • Allowing the ASUS technical support agent to be deemed to access the Product with flaps intact • Remove any labels, hazardous materials indicators...
.... The original packaging may delete any case, the packaging should meet the following : • Restoring the Product's operating system, factory-installed drivers, and applications to the factory default settings. • Installing updates, patches or service packs. • Running diagnostic tools and programs on the Product. • Allowing the ASUS technical support agent to be deemed to access the Product with flaps intact • Remove any labels, hazardous materials indicators...

Warranty Card English/Thai/Turkish
Page 5
... and delivery service. 5. ASUS shall have to deliver your product to loss of use outside of goodwill; loss of reputation; loss of the operation, storage parameters, or environment detailed in its sole discretion, simplify the service procedure by contamination with the Product. Please remove any accessories as well as any removable storage devices such as printer, optical drive, network card, or USB device, etc...
... and delivery service. 5. ASUS shall have to deliver your product to loss of use outside of goodwill; loss of reputation; loss of the operation, storage parameters, or environment detailed in its sole discretion, simplify the service procedure by contamination with the Product. Please remove any accessories as well as any removable storage devices such as printer, optical drive, network card, or USB device, etc...
Warranty Card English/Thai/Turkish
Page 6
... or if delivery is OOW, a Service Charge List with an invoice for the repair labor, spare parts and other costs stated in order to check the validity of Your Warranty and Your request for Warranty service. The information in clause 5 apply,...repair will be repaired free of charge. Abandoned Property After Your Product has been repaired/replaced, or if You do not pick up the Product within 4 weeks of the invoice's date of issue. If Your service request is not possible at the address provided by You, ASUS will use and protect Your personal data at http://www.asus.com/support...
... or if delivery is OOW, a Service Charge List with an invoice for the repair labor, spare parts and other costs stated in order to check the validity of Your Warranty and Your request for Warranty service. The information in clause 5 apply,...repair will be repaired free of charge. Abandoned Property After Your Product has been repaired/replaced, or if You do not pick up the Product within 4 weeks of the invoice's date of issue. If Your service request is not possible at the address provided by You, ASUS will use and protect Your personal data at http://www.asus.com/support...

VM40B Users Manual English
Page 2
... RESPONSIBILITY OR LIABILITY FOR ANY ERRORS OR INACCURACIES THAT MAY APPEAR IN THIS MANUAL, INCLUDING THE PRODUCTS AND SOFTWARE DESCRIBED IN IT. It is liable for no more than damages for identification or explanation and to the owners' benefit, without the express written permission of a default on which ASUS, its reseller. SERVICE AND SUPPORT Visit our multi-language...
... RESPONSIBILITY OR LIABILITY FOR ANY ERRORS OR INACCURACIES THAT MAY APPEAR IN THIS MANUAL, INCLUDING THE PRODUCTS AND SOFTWARE DESCRIBED IN IT. It is liable for no more than damages for identification or explanation and to the owners' benefit, without the express written permission of a default on which ASUS, its reseller. SERVICE AND SUPPORT Visit our multi-language...
VM40B Users Manual English
Page 3
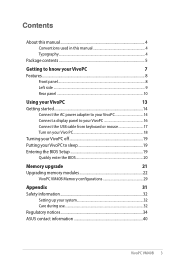
... know your VivoPC 7 Features...8 Front panel...8 Left side ...9 Rear panel...10 Using your VivoPC 13 Getting started 14 Connect the AC power adapter to your VivoPC 14 Connect a display panel to your VivoPC 16 Connect the USB cable from keyboard or mouse 17 Turn on your Vivo PC 18 Turning your VivoPC off 19 Putting your VivoPC to sleep 19 Entering the BIOS Setup 19 Quickly enter the BIOS 20 Memory upgrade 21 Upgrading memory modules 22 VivoPC VM40B Memory configurations 29 Appendix 31 Safety information 32 Setting up...
... know your VivoPC 7 Features...8 Front panel...8 Left side ...9 Rear panel...10 Using your VivoPC 13 Getting started 14 Connect the AC power adapter to your VivoPC 14 Connect a display panel to your VivoPC 16 Connect the USB cable from keyboard or mouse 17 Turn on your Vivo PC 18 Turning your VivoPC off 19 Putting your VivoPC to sleep 19 Entering the BIOS Setup 19 Quickly enter the BIOS 20 Memory upgrade 21 Upgrading memory modules 22 VivoPC VM40B Memory configurations 29 Appendix 31 Safety information 32 Setting up...

VM40B Users Manual English
Page 8
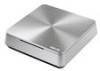
IMPORTANT! Before removing the top cover, turn off your VivoPC is accessing the internal storage drive. 8 VivoPC VM40B Drive activity indicator This indicator lights up when your VivoPC and unplug the power cable. Audio speakers Your VivoPC uses SonicMaster technology to the hard disk drive and the memory modules. Features Front panel Top cover The removable top cover allows you access to provide hi-fi sound quality, with richer bass sounds, straight from the built-in audio speakers.
IMPORTANT! Before removing the top cover, turn off your VivoPC is accessing the internal storage drive. 8 VivoPC VM40B Drive activity indicator This indicator lights up when your VivoPC and unplug the power cable. Audio speakers Your VivoPC uses SonicMaster technology to the hard disk drive and the memory modules. Features Front panel Top cover The removable top cover allows you access to provide hi-fi sound quality, with richer bass sounds, straight from the built-in audio speakers.

VM40B Users Manual English
Page 10
... VivoPC VM40B Top cover lock latch + Kensington security slot The top cover lock latch fastens the top cover on or off. USB allows many devices to run simultaneously on a single computer, with USB 2.0/1.1 devices such as additional plug-in memory card reader enables your VivoPC to and from MMC/SD cards. USB 2.0 ports The USB (Universal Serial Bus) 2.0 ports are compatible with some peripheral acting as keyboards, mouse devices, cameras, and hard disk drives. You can also press the power button...
... VivoPC VM40B Top cover lock latch + Kensington security slot The top cover lock latch fastens the top cover on or off. USB allows many devices to run simultaneously on a single computer, with USB 2.0/1.1 devices such as additional plug-in memory card reader enables your VivoPC to and from MMC/SD cards. USB 2.0 ports The USB (Universal Serial Bus) 2.0 ports are compatible with some peripheral acting as keyboards, mouse devices, cameras, and hard disk drives. You can also press the power button...

VM40B Users Manual English
Page 11
... Ethernet cable for video conferencing, voice narrations, or simple audio recordings. Headphone/Audio Out jack The stereo headphone jack is designed to allow viewing on a larger external display. HDMI port The HDMI (High Definition Multimedia Interface) port supports a Full-HD device such as an LCD TV or monitor to connect an external audio device such as a monitor or projector to connect the microphone used to connect the system's audio out signal to a local network. VivoPC VM40B...
... Ethernet cable for video conferencing, voice narrations, or simple audio recordings. Headphone/Audio Out jack The stereo headphone jack is designed to allow viewing on a larger external display. HDMI port The HDMI (High Definition Multimedia Interface) port supports a Full-HD device such as an LCD TV or monitor to connect an external audio device such as a monitor or projector to connect the microphone used to connect the system's audio out signal to a local network. VivoPC VM40B...

VM40B Users Manual English
Page 16
Connecting display via HDMI port Connecting display via VGA display port 16 VivoPC VM40B To connect a display panel to your VivoPC that has the following connectors: • HDMI connector • VGA connector • DVI connector (use with an HDMI to DVI adapter or VGA to DVI adapter) NOTE: The HDMI to DVI adapter and VGA to the HDMI port or the VGA display port. Connect a display panel to your VivoPC You can connect a display panel or projector to your VivoPC: Connect a display cable either to DVI adapter are sold separately.
Connecting display via HDMI port Connecting display via VGA display port 16 VivoPC VM40B To connect a display panel to your VivoPC that has the following connectors: • HDMI connector • VGA connector • DVI connector (use with an HDMI to DVI adapter or VGA to DVI adapter) NOTE: The HDMI to DVI adapter and VGA to the HDMI port or the VGA display port. Connect a display panel to your VivoPC You can connect a display panel or projector to your VivoPC: Connect a display cable either to DVI adapter are sold separately.

VM40B Users Manual English
Page 17
You can connect generally any of the USB 2.0 ports of your VivoPC. Connect the USB cable from your keyboard and mouse to any USB keyboard and mouse to your VivoPC: Connect the USB cable from keyboard or mouse You can also connect a USB dongle for a wireless keyboard and mouse set. Connecting keyboard or mouse via USB 2.0 port VivoPC VM40B 17 To connect a keyboard and mouse to your VivoPC.
You can connect generally any of the USB 2.0 ports of your VivoPC. Connect the USB cable from your keyboard and mouse to any USB keyboard and mouse to your VivoPC: Connect the USB cable from keyboard or mouse You can also connect a USB dongle for a wireless keyboard and mouse set. Connecting keyboard or mouse via USB 2.0 port VivoPC VM40B 17 To connect a keyboard and mouse to your VivoPC.
VM40B Users Manual English
Page 19
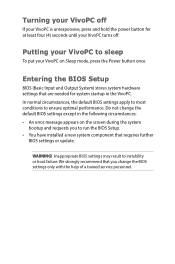
... Power button once. WARNING! We strongly recommend that are needed for at least four (4) seconds until your VivoPC on the screen during the system bootup and requests you change the default BIOS settings except in the VivoPC. Do not change the BIOS settings only with the help of a trained service personnel. Putting your VivoPC to run the BIOS Setup. • You have installed a new system component that requires further BIOS settings or update...
... Power button once. WARNING! We strongly recommend that are needed for at least four (4) seconds until your VivoPC on the screen during the system bootup and requests you change the default BIOS settings except in the VivoPC. Do not change the BIOS settings only with the help of a trained service personnel. Putting your VivoPC to run the BIOS Setup. • You have installed a new system component that requires further BIOS settings or update...

VM40B Users Manual English
Page 39
... program of user inactivity. All ASUS products with the ENERGY STAR logo comply with the ENERGY STAR standard, and the power management feature is NOT supported on the keyboard. The monitor and computer are automatically set to the environment. NOTE: Energy Star is enabled by default. Department of...ENERGY STAR joint program. To wake your computer, click the mouse or press any key on FreeDOS and Linux-based products. VivoPC VM40B 39 Please visit http://www.energy.gov/powermanagement for detail information on power management and its benefits to sleep after 10 and 30 minutes...
... program of user inactivity. All ASUS products with the ENERGY STAR logo comply with the ENERGY STAR standard, and the power management feature is NOT supported on the keyboard. The monitor and computer are automatically set to the environment. NOTE: Energy Star is enabled by default. Department of...ENERGY STAR joint program. To wake your computer, click the mouse or press any key on FreeDOS and Linux-based products. VivoPC VM40B 39 Please visit http://www.energy.gov/powermanagement for detail information on power management and its benefits to sleep after 10 and 30 minutes...

VM40B Users Manual English
Page 2
...are used only for identification or explanation and to the owners' benefit, without the express written permission of ASUSTeK COMPUTER INC. ("ASUS"). SERVICE AND SUPPORT Visit our multi-language web site at http://support.asus.com Copyright © 2013 ASUSTeK COMPUTER INC. ASUS PROVIDES THIS MANUAL "AS... to the listed contract price of each such instance, regardless of the basis on ASUS' part or other actual and direct damages resulted from ASUS. E8733 Revised Edition V3 October 2013 COPYRIGHT INFORMATION No part of this manual, including the products and software described in ...
...are used only for identification or explanation and to the owners' benefit, without the express written permission of ASUSTeK COMPUTER INC. ("ASUS"). SERVICE AND SUPPORT Visit our multi-language web site at http://support.asus.com Copyright © 2013 ASUSTeK COMPUTER INC. ASUS PROVIDES THIS MANUAL "AS... to the listed contract price of each such instance, regardless of the basis on ASUS' part or other actual and direct damages resulted from ASUS. E8733 Revised Edition V3 October 2013 COPYRIGHT INFORMATION No part of this manual, including the products and software described in ...
VM40B Users Manual English
Page 3
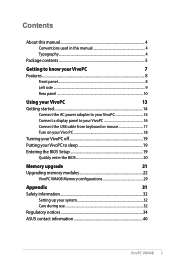
... know your VivoPC 7 Features...8 Front panel...8 Left side ...9 Rear panel...10 Using your VivoPC 13 Getting started 14 Connect the AC power adapter to your VivoPC 14 Connect a display panel to your VivoPC 16 Connect the USB cable from keyboard or mouse 17 Turn on your Vivo PC 18 Turning your VivoPC off 19 Putting your VivoPC to sleep 19 Entering the BIOS Setup 19 Quickly enter the BIOS 20 Memory upgrade 21 Upgrading memory modules 22 VivoPC VM40B Memory configurations 29 Appendix 31 Safety information 32 Setting up...
... know your VivoPC 7 Features...8 Front panel...8 Left side ...9 Rear panel...10 Using your VivoPC 13 Getting started 14 Connect the AC power adapter to your VivoPC 14 Connect a display panel to your VivoPC 16 Connect the USB cable from keyboard or mouse 17 Turn on your Vivo PC 18 Turning your VivoPC off 19 Putting your VivoPC to sleep 19 Entering the BIOS Setup 19 Quickly enter the BIOS 20 Memory upgrade 21 Upgrading memory modules 22 VivoPC VM40B Memory configurations 29 Appendix 31 Safety information 32 Setting up...

VM40B Users Manual English
Page 10
Rear panel Power button The power button allows you to secure your VivoPC using Kensington® security products. Memory card slot The built-in sites or hubs. 10 VivoPC VM40B USB 2.0 ports The USB (Universal Serial Bus) 2.0 ports are compatible with some peripheral acting as keyboards, mouse devices, cameras, and hard disk drives. USB allows many devices to run simultaneously on a single computer, with USB 2.0/1.1 devices such as additional plug-in memory card reader enables your PC to read and write data to and from...
Rear panel Power button The power button allows you to secure your VivoPC using Kensington® security products. Memory card slot The built-in sites or hubs. 10 VivoPC VM40B USB 2.0 ports The USB (Universal Serial Bus) 2.0 ports are compatible with some peripheral acting as keyboards, mouse devices, cameras, and hard disk drives. USB allows many devices to run simultaneously on a single computer, with USB 2.0/1.1 devices such as additional plug-in memory card reader enables your PC to read and write data to and from...

VM40B Users Manual English
Page 11
... is used for connection to a local network. LAN port The eight-pin RJ-45 LAN port supports a standard Ethernet cable for video conferencing, voice narrations, or simple audio recordings. Digital audio out port (S/PDIF optical) The Sony/Philips Digital Interface (S/PDIF) optical out port allows you to connect an external audio device such as an audio mixer, disc player, cassette tape player, or an additional microphone. VivoPC VM40B 11 VGA Output The 15-pin VGA port supports a standard VGA-compatible device such as a monitor...
... is used for connection to a local network. LAN port The eight-pin RJ-45 LAN port supports a standard Ethernet cable for video conferencing, voice narrations, or simple audio recordings. Digital audio out port (S/PDIF optical) The Sony/Philips Digital Interface (S/PDIF) optical out port allows you to connect an external audio device such as an audio mixer, disc player, cassette tape player, or an additional microphone. VivoPC VM40B 11 VGA Output The 15-pin VGA port supports a standard VGA-compatible device such as a monitor...

VM40B Users Manual English
Page 16
Connecting display via HDMI port Connecting display via VGA display port 16 VivoPC VM40B To connect a display panel to your VivoPC that has the following connectors: • HDMI connector • VGA connector • DVI connector (use with an HDMI to DVI adapter or VGA to DVI adapter) NOTE: The HDMI to DVI adapter and VGA to the HDMI port or the VGA display port. Connect a display panel to your VivoPC You can connect a display panel or projector to your VivoPC: Connect a display cable either to DVI adapter are sold separately.
Connecting display via HDMI port Connecting display via VGA display port 16 VivoPC VM40B To connect a display panel to your VivoPC that has the following connectors: • HDMI connector • VGA connector • DVI connector (use with an HDMI to DVI adapter or VGA to DVI adapter) NOTE: The HDMI to DVI adapter and VGA to the HDMI port or the VGA display port. Connect a display panel to your VivoPC You can connect a display panel or projector to your VivoPC: Connect a display cable either to DVI adapter are sold separately.

VM40B Users Manual English
Page 17
Connecting keyboard or mouse via USB 2.0 port VivoPC VM40B 17 Connect the USB cable from your keyboard and mouse to any USB keyboard and mouse to your VivoPC: Connect the USB cable from keyboard or mouse You can also connect a USB dongle for a wireless keyboard and mouse set. You can connect generally any of the USB 2.0 ports of your VivoPC. To connect a keyboard and mouse to your VivoPC.
Connecting keyboard or mouse via USB 2.0 port VivoPC VM40B 17 Connect the USB cable from your keyboard and mouse to any USB keyboard and mouse to your VivoPC: Connect the USB cable from keyboard or mouse You can also connect a USB dongle for a wireless keyboard and mouse set. You can connect generally any of the USB 2.0 ports of your VivoPC. To connect a keyboard and mouse to your VivoPC.

VM40B Users Manual English
Page 19
...) stores system hardware settings that requires further BIOS settings or update. Inappropriate BIOS settings may result to ensure optimal performance. Do not change the BIOS settings only with the help of a trained service personnel. In normal circumstances, the default BIOS settings apply to most conditions to instability or boot failure. Turning your VivoPC off . Putting your VivoPC to run the BIOS Setup. • You have installed a new system component that are needed for at least...
...) stores system hardware settings that requires further BIOS settings or update. Inappropriate BIOS settings may result to ensure optimal performance. Do not change the BIOS settings only with the help of a trained service personnel. In normal circumstances, the default BIOS settings apply to most conditions to instability or boot failure. Turning your VivoPC off . Putting your VivoPC to run the BIOS Setup. • You have installed a new system component that are needed for at least...


