Asus T4-P5G31 Support and Manuals
Get Help and Manuals for this Asus item
View All Support Options Below
Free Asus T4-P5G31 manuals!
Problems with Asus T4-P5G31?
Ask a Question
Free Asus T4-P5G31 manuals!
Problems with Asus T4-P5G31?
Ask a Question
Popular Asus T4-P5G31 Manual Pages
User Manual - Page 1

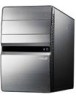
T-P5G31
ASUS PC (Desktop Barebone)
T3-P5G31
T4-P5G31*
* Only some of the T4 models have the Time and IR LED display.
User Manual - Page 8

... this guide
Audience
This guide provides general information and installation instructions about the motherboard that comes with hardware knowledge of ASUS T-P5G31. The chapter lists the system features, including introduction on how to change system settings through the BIOS Setup menus and describes the BIOS parameters. 6. This chapter includes the motherboard layout, jumper settings, and...
User Manual - Page 11

Chapter 1
This chapter gives a general description of the T4 models have the Time and IR LED display. System introduction
T3-P5G31
T4-P5G31*
* Only some of ASUS T-P5G31. The chapter lists the system features including introduction on the front and rear panel, and internal components.
User Manual - Page 25

... repair only if the damage is missing, or if you are not bent.
To prevent damage to the socket pins, do not match the CPU documentation, follow the latter.
• Check your motherboard to the socket contacts resulting from the retention tab. Retention tab A B
Load lever
ASUS T-P5G31
2-
Press the load lever with installation instructions...
User Manual - Page 27

... CPU heatsink and fan:
1. A B
A
A
B
B
A
1 1
3.
Hardware monitoring errors can occur if you fail to secure the heatsink and fan assembly in place. ASUS T-P5G31
2- Place the heatsink on top of the
installed CPU, ensuring that the Thermal Interface Material is in place, connect the CPU fan cable to the connector on the
motherboard.
2. Push down...
User Manual - Page 29

...-25C NT1GT64U8HB0BY-25C NT1GT64U8HCOBY-25D AL6E8E63B8E1K AL7E8E63B-8E1K 8G-24IK2-EBT M2Y1G64TU8HB0B-25C
DIMM support
A*
B*
•
•
•
•
•
•
...•
•
•
•
•
•
•
•
ASUS T-P5G31
2- CL
Chip
SS/
Brand
DS
Part No.
DDR2 (800 MHz) Qualified Vendors List
Size
Vendor
512MB 1024MB 1024MB 1024MB 1024MB ...
User Manual - Page 31

...slots as one direction. Unlock a socket by pressing the retaining clips
outward.
3.
ASUS T-P5G31
2-11 sided DIMM support: • A*: Supports one module inserted into the socket until the retaining clips snap back in place and ... avoid damaging the DIMM! Visit the ASUS website for the latest DDR2-800 / 667 MHz QVL.
2.6.2 DIMM installation
To install a DDR2 DIMM:
1. SS -
User Manual - Page 33

....
2. Replace the metal braket lock, then secure it and make the necessary hardware settings for ISA or PCI devices. Secure the card with one metal bracket lock screw. 3.
Before installing the expansion card, read the documentation that came with it with the slot, then press firmly. 5. 2.7.2 Expansion card installation
To install an expansion card:
1. ASUS T-P5G31
2-13...
User Manual - Page 41

... CD.
ASUS T-P5G31
3- Double-click the ASSETUP.EXE to locate the file ASSETUP.EXE from the BIN folder. 3.3 Support CD information
The support CD that came with the system contains useful software and several utility drivers that enhance the system features.
• Screen display and driver options may not be the same for updates.
3.3.1 Running the support CD...
User Manual - Page 42

... Vista Driver Installs the ITECIR Vista driver. Realtek RTL8111B/C 10/100/1000M LAN Driver Installs the Realtek RTL8111B/C 10/100/1000M LAN driver.
The ITECIR Vista Driver item appears only in some models with IR feature*. (*optional).
3-
Chapter 3: Starting up ASUS InstAll -
Intel(R) Chipset INF Update Program Installs the Intel® Chipset INF Update Program.
3.3.2 Drivers menu...
User Manual - Page 54

... Computer.
c.
ASUS CrashFree BIOS 3: Updates the BIOS using a floppy disk, USB Flash, or the motherboard support CD during POST.
2. ASUS Update: Updates the BIOS in DOS mode using the ASUS Update or AFUDOS utilities...Floppy Disk Drive then click Format to the bootable floppy disk.
5-
Chapter 5: BIOS setup
Select the Create an MS-DOS startup disk check box. Copy the original or ...
User Manual - Page 58

... that contains the updated BIOS file.
• Prepare the motherboard support CD, the floppy disk or the USB flash disk containing the updated motherboard BIOS before using this utility.
• Ensure that allows you rename the original or updated BIOS file in the floppy disk or the USB flash disk to T-P5G31.ROM. The utility...
User Manual - Page 60

... comes with the motherboard package. The ASUS Update utility allows you update the BIOS using this utility.
5-
Chapter 5: BIOS setup Click the Utilities tab, then click Install ASUS Update. Installing ASUS Update To install ASUS Update:
1. See page 3-4 for the
Utilities screen menu. 3.
Place the support CD in Windows® environment. The ASUS Update utility is available in the...
User Manual - Page 85

... item on how to change the supervisor password.
The message "Password Uninstalled" appears.
ASUS T-P5G31
5-33 again to display the configuration options. After you to set your BIOS password, you successfully set or change password. Confirm the password when prompted.
To clear the supervisor password, select the Change Supervisor Password then press . If you forget your...
User Manual - Page 86

... allow change the user password. The message "Password Installed" appears after you set or change to the Setup utility. Password Check [Setup]
When set your password successfully. To change the user password, follow the same steps as Date and Time. Security Settings
Supervisor Password : Not Installed
User Password
: Not Installed
Change Supervisor Password User Access Level Change...
Asus T4-P5G31 Reviews
We have not received any reviews for Asus yet.