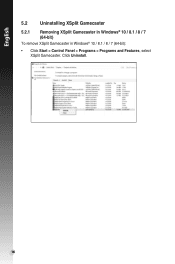
Users Manual
Page 9
...your system. 2.1 Installing the VGA driver 2.1.1 Installing the VGA Drivers in Windows® Vista and Windows® 8.1 / 8 / 7 (32/64 bit) To install the VGA driver in this section to reboot the system. 9 Insert the support CD into your support CD. 3. From the main menu,...After physically installing your graphics card, use any of your optical drive. 2. Once installation is the software program that makes the device work with a new ASUS graphics card, uninstall the old display driver from the root directory of the recommended methods in Windows® 8.1 / 8 / 7 / Vista: 1....
Users Manual
Page 11
Insert the support CD into your ASUS Graphics card. 3.1 Installing ASUS GPU Tweak 3.1.1 Installing ASUS GPU Tweak in Windows® Vista and Windows® 8.1 / 8 / 7 (32/64 bit) To install ASUS GPU Tweak: 1. ASUS GPU Tweak utility ASUS GPU Tweak utility allows you to monitor and optimize the settings of your support CD. 3. Once installation is disabled, run UI.exe...
Users Manual
Page 13
If Autorun is disabled, run UI.exe from the root directory of your optical drive. 2. Once installation is enabled, the main menu appears automatically. English 4. Select ASUS GPU Tweak and click the Install button. 4. If Autorun is complete, click OK. 13 Insert the support CD into your support CD. 3. From the main menu, click Install. ASUS APRP 4.1 Installing ASUS APRP 4.1.1 Installing ASUS APRP in Windows® Vista and Windows® 8.1 / 8 / 7 (32/64 bit) To install ASUS APRP: 1.
Users Manual
Page 15
Once installation is disabled, run UI.exe from the root directory of your optical drive. 2. From the main menu, click Install. If Autorun is complete, click OK. 15 Select ASUS GPU Tweak and click the Install button. 4. Insert the support CD into your support CD. 3. If Autorun is enabled, the main menu appears automatically. ASUS Streaming 5.1 Installing ASUS Streaming 5.1.1 Installing ASUS Streaming in Windows® Vista and Windows® 8.1 / 8 / 7 (32/64 bit) To install ASUS Streaming: 1. English 5.
Q15279 Graphics card drivers utilities installation guide
Page 9
... the VGA driver. If Autorun is the software program that makes the device work with a new ASUS graphics card, uninstall the old display driver from the root directory of the recommended methods in Windows® 10 / 8.1 / 8 / 7 (64-bit): 1. From the main menu, click Install. 4. If you are replacing an old graphics card with...
Q15279 Graphics card drivers utilities installation guide
Page 10
English 2.2 Uninstalling the VGA drivers 2.2.1 Uninstalling the VGA drivers in Windows® 10 / 8.1 / 8 / 7 (64bit) To remove the VGA drivers in Windows® 10 / 8.1 / 8 / 7 (64-bit): • Click Start > Control Panel > Programs > Programs and Features, select Graphics driver. Click Uninstall. 10
Q15279 Graphics card drivers utilities installation guide
Page 11
..., run UI.exe from the root directory of your ASUS Graphics card. 3.1 Installing ASUS GPU Tweak 3.1.1 Installing ASUS GPU Tweak in Windows® 10 / 8.1 / 8 / 7 (64bit) To install ASUS GPU Tweak in Windows® 10 / 8.1 / 8 / 7 (64-bit): 1. Select ASUS GPU Tweak and click the Install button. 4. ASUS GPU Tweak utility ASUS GPU Tweak utility allows you to monitor and optimize...
Q15279 Graphics card drivers utilities installation guide
Page 12
Click Uninstall. 12 English 3.2 Uninstalling ASUS GPU Tweak 3.2.1 Removing ASUS GPU Tweak in Windows® 10 / 8.1 / 8 / 7 (64-bit) To remove ASUS GPU Tweak in Windows® 10 / 8.1 / 8 / 7 (64-bit): • Click Start > Control Panel > Programs > Programs and Features, select ASUS GPU Tweak.
Q15279 Graphics card drivers utilities installation guide
Page 13
Select ASUS APRP and click the Install button. 4. If Autorun is complete, click OK. 13 Once installation is enabled, the main menu appears automatically. From the main menu, click Install. Insert the support CD into your support CD. 3. English 4. If Autorun is disabled, run UI.exe from the root directory of your optical drive. 2. ASUS APRP 4.1 Installing ASUS APRP 4.1.1 Installing ASUS APRP in Windows® 10 / 8.1 / 8 / 7 (64-bit) To install ASUS APRP in Windows® 10 / 8.1 / 8 / 7 (64-bit): 1.
Q15279 Graphics card drivers utilities installation guide
Page 14
English 4.2 Uninstalling ASUS APRP 4.2.1 Removing ASUS APRP in Windows® 10 / 8.1 / 8 / 7 (64-bit) To remove ASUS APRP in Windows® 10 / 8.1 / 8 / 7 (64-bit): • Click Start > Control Panel > Programs > Programs and Features, select ASUS APRP. Click Uninstall. 14
Q15279 Graphics card drivers utilities installation guide
Page 15
Select XSplit Gamecaster and click the Install button. 4. If Autorun is complete, click OK. 15 From the main menu, click Install. Insert the support CD into your support CD. 3. Once installation is enabled, the main menu appears automatically. If Autorun is disabled, run UI.exe from the root directory of your optical drive. 2. XSplit Gamecaster 5.1 Installing XSplit Gamecaster 5.1.1 Installing XSplit Gamecaster in Windows® 10 / 8.1 / 8 / 7 (64bit) To install XSplit Gamecaster in Windows® 10 / 8.1 / 8 / 7 (64-bit): 1. English 5.
Q15279 Graphics card drivers utilities installation guide
Page 16
Click Uninstall. 16 English 5.2 Uninstalling XSplit Gamecaster 5.2.1 Removing XSplit Gamecaster in Windows® 10 / 8.1 / 8 / 7 (64-bit) To remove XSplit Gamecaster in Windows® 10 / 8.1 / 8 / 7 (64-bit): • Click Start > Control Panel > Programs > Programs and Features, select XSplit Gamecaster.
Q15279 Graphics card drivers utilities installation guide
Page 17
If Autorun is complete, click OK. 17 If Autorun is disabled, run UI.exe from the root directory of your optical drive. 2. Select ASUS AURA and click the Install button. 4. English 6. ASUS AURA 6.1 Installing ASUS AURA 6.1.1 Installing ASUS AURA in Windows® 10 / 8.1 / 8 / 7 (64-bit) To install ASUS AURA in Windows® 10 / 8.1 / 8 / 7 (64-bit): 1. Once installation is enabled, the main menu appears automatically. Insert the support CD into your support CD. 3. From the main menu, click Install.
Q15279 Graphics card drivers utilities installation guide
Page 18
English 6.2 Uninstalling ASUS AURA 6.2.1 Removing ASUS AURA in Windows® 10 / 8.1 / 8 / 7 (64-bit) To remove ASUS AURA in Windows® 10 / 8.1 / 8 / 7 (64-bit): • Click Start > Control Panel > Programs > Programs and Features, select ASUS AURA. Click Uninstall. 18