User Manual
Page 9
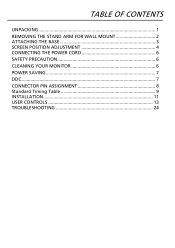
TABLE OF CONTENTS UNPACKING 1 REMOVING THE STAND ARM FOR WALL MOUNT 2 ATTACHING THE BASE 3 SCREEN POSITION ADJUSTMENT 4 CONNECTING THE POWER CORD 6 SAFETY PRECAUTION 6 CLEANING YOUR MONITOR 6 POWER SAVING 7 DDC...7 CONNECTOR PIN ASSIGNMENT 8 Standard Timing Table 9 INSTALLATION 11 USER CONTROLS 13 TROUBLESHOOTING 24
TABLE OF CONTENTS UNPACKING 1 REMOVING THE STAND ARM FOR WALL MOUNT 2 ATTACHING THE BASE 3 SCREEN POSITION ADJUSTMENT 4 CONNECTING THE POWER CORD 6 SAFETY PRECAUTION 6 CLEANING YOUR MONITOR 6 POWER SAVING 7 DDC...7 CONNECTOR PIN ASSIGNMENT 8 Standard Timing Table 9 INSTALLATION 11 USER CONTROLS 13 TROUBLESHOOTING 24
User Manual
Page 11
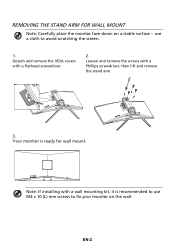
REMOVING THE STAND ARM FOR WALL MOUNT Note: Carefully place the monitor face-down on the wall. use M4 x 10 (L) mm screws to avoid scratching the screen. 1. Loosen and remove the screws with a wall mounting kit, it is ready for wall mount. Your monitor is recommended to use a cloth to fix your monitor on a stable surface -- EN-2 Note: If installing with a Phillips screwdriver, then lift and remove the stand arm. 3. Detach and remove the VESA covers with a flathead screwdriver. 2.
REMOVING THE STAND ARM FOR WALL MOUNT Note: Carefully place the monitor face-down on the wall. use M4 x 10 (L) mm screws to avoid scratching the screen. 1. Loosen and remove the screws with a wall mounting kit, it is ready for wall mount. Your monitor is recommended to use a cloth to fix your monitor on a stable surface -- EN-2 Note: If installing with a Phillips screwdriver, then lift and remove the stand arm. 3. Detach and remove the VESA covers with a flathead screwdriver. 2.


