
Lifecycle Extension Guide
Page 3
NOTE: NOTE: For replacement parts, always use only Acer certified components in order to the product that occur during self-repair, or which has occurred as described in the "Disassembly Procedures" section, then this component is either not present on the respective model, or it is not covered by the standard product warranty. Prior performing self-repair, familiarize yourself with the...
NOTE: NOTE: For replacement parts, always use only Acer certified components in order to the product that occur during self-repair, or which has occurred as described in the "Disassembly Procedures" section, then this component is either not present on the respective model, or it is not covered by the standard product warranty. Prior performing self-repair, familiarize yourself with the...

Lifecycle Extension Guide
Page 4
To update the system BIOS: Download the desired system BIOS version from Acer: Select the Start button Go to Settings > Update & Security > Windows Update Available Drivers will start the download of the respective driver Installation of the driver will automatically be used to either enter the model name or product serial number, or select the product from the list of suggested models in order to get...
To update the system BIOS: Download the desired system BIOS version from Acer: Select the Start button Go to Settings > Update & Security > Windows Update Available Drivers will start the download of the respective driver Installation of the driver will automatically be used to either enter the model name or product serial number, or select the product from the list of suggested models in order to get...

Lifecycle Extension Guide
Page 41
Figure 1-53. Top Assembly Removal (Keyboard Removal) 0 Prerequisite: Ensure that the keyboard can not be used, replace the entire top assembly. Top Assembly (Keyboard) Disassembly Procedures 1-39 NOTE: NOTE: The keyboard is included as part of the top assembly and can no longer be disassembled. In the event that the RTC Battery, LTE Board, Speakers, Touchpad Module, Smart Card Reader, Card Reader Board and NFC Module have been disassembled prior removing the top assembly.
Figure 1-53. Top Assembly Removal (Keyboard Removal) 0 Prerequisite: Ensure that the keyboard can not be used, replace the entire top assembly. Top Assembly (Keyboard) Disassembly Procedures 1-39 NOTE: NOTE: The keyboard is included as part of the top assembly and can no longer be disassembled. In the event that the RTC Battery, LTE Board, Speakers, Touchpad Module, Smart Card Reader, Card Reader Board and NFC Module have been disassembled prior removing the top assembly.
User Manual
Page 2
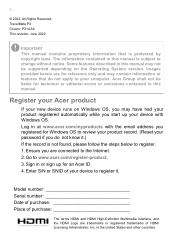
2 - © 2022. Acer Group shall not be supported depending on Windows OS, you may have had your product registered automatically while you start up for technical or editorial errors or omissions contained in at www.acer.com/myproducts with Windows OS. Go to change without notice. All Rights Reserved. TravelMate P2 Covers: P214-54 This revision: June 2022 Important This manual contains proprietary information...
2 - © 2022. Acer Group shall not be supported depending on Windows OS, you may have had your product registered automatically while you start up for technical or editorial errors or omissions contained in at www.acer.com/myproducts with Windows OS. Go to change without notice. All Rights Reserved. TravelMate P2 Covers: P214-54 This revision: June 2022 Important This manual contains proprietary information...
User Manual
Page 3
... I turn off notifications 21 How do I check for Windows updates?..... 21 Where can I get more information 21 Using the Precision Touchpad 22 Touchpad gestures 22 Changing touchpad settings 24 Recovery 25 Creating a file history backup 25 Creating a factory default backup.......... 28 Backing up your wireless and LAN drivers 30 Restoring your computer 30 Reset this PC and keep my files 30 Reset this PC and remove everything ...... 34 Using a Bluetooth connection 37 Enabling and disabling Bluetooth .......... 37 Enable Bluetooth and add a device...
... I turn off notifications 21 How do I check for Windows updates?..... 21 Where can I get more information 21 Using the Precision Touchpad 22 Touchpad gestures 22 Changing touchpad settings 24 Recovery 25 Creating a file history backup 25 Creating a factory default backup.......... 28 Backing up your wireless and LAN drivers 30 Restoring your computer 30 Reset this PC and keep my files 30 Reset this PC and remove everything ...... 34 Using a Bluetooth connection 37 Enabling and disabling Bluetooth .......... 37 Enable Bluetooth and add a device...
User Manual
Page 6
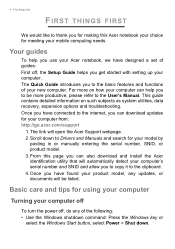
... power off , the Setup Guide helps you to copy it to Drivers and Manuals and search for using your computer Turning your computer. Once you have connected to thank you have designed a set of the following: • Use the Windows shutdown command: Press the Windows key or select the Windows Start button, select Power > Shut down to the clipboard. 4. Scroll down . Once you for making this page you can download updates...
... power off , the Setup Guide helps you to copy it to Drivers and Manuals and search for using your computer Turning your computer. Once you have connected to thank you have designed a set of the following: • Use the Windows shutdown command: Press the Windows key or select the Windows Start button, select Power > Shut down to the clipboard. 4. Scroll down . Once you for making this page you can download updates...

User Manual
Page 16
...'s battery status. Charging: The light shows amber when the battery is charging. 16 - Only one smart card. Smart Card reader (optional) Accepts one card can be read at a time. Only one Secure Digital (microSD) card. Your Acer notebook tour Front view 12 3 # Icon 1 2 3 SC Item Description MicroSD card reader Accepts one smart card can operate at a time. Power indicator Indicates the computer's power status. Fully charged: The light shows blue when in AC mode.
...'s battery status. Charging: The light shows amber when the battery is charging. 16 - Only one smart card. Smart Card reader (optional) Accepts one card can be read at a time. Only one Secure Digital (microSD) card. Your Acer notebook tour Front view 12 3 # Icon 1 2 3 SC Item Description MicroSD card reader Accepts one smart card can operate at a time. Power indicator Indicates the computer's power status. Fully charged: The light shows blue when in AC mode.

User Manual
Page 21
.../Windows • Support FAQs: support.acer.com The Windows OS Desktop - 21 Tips and hints for using Windows We know this is a new operating system that will take some getting used to, so we've created a few pointers to help you want to make an app appear on Start, right-click an app and select Pin to Start. Select Advanced options to configure the settings. How do I remove...
.../Windows • Support FAQs: support.acer.com The Windows OS Desktop - 21 Tips and hints for using Windows We know this is a new operating system that will take some getting used to, so we've created a few pointers to help you want to make an app appear on Start, right-click an app and select Pin to Start. Select Advanced options to configure the settings. How do I remove...

User Manual
Page 33
... it is installing Windows. Resetting the PC will turn back on your PC, they will restart several times during the reset process. 10.The screen will reinstall Windows, change settings back to their factory defaults and remove all preinstalled apps and programs without removing your personal files. You will restart. 9. This will take a while and your settings options and follow the instructions on the screen. Recovery - 33 7. Choose...
... it is installing Windows. Resetting the PC will turn back on your PC, they will restart several times during the reset process. 10.The screen will reinstall Windows, change settings back to their factory defaults and remove all preinstalled apps and programs without removing your personal files. You will restart. 9. This will take a while and your settings options and follow the instructions on the screen. Recovery - 33 7. Choose...

User Manual
Page 36
Click Confirm then Next to continue. 9. You will use factory default settings. Choose your PC has completed the reset process, Windows will be shown the reset progress on screen. Your PC will restart several times during the reset process. 10.The screen will turn back on when it completes. 12.When your settings options and follow the instructions on the screen. Click Reset to continue. 8. The screen will turn off during the reset process. 11.Follow the process until it is installing Windows. Recovery 7. 36 -
Click Confirm then Next to continue. 9. You will use factory default settings. Choose your PC has completed the reset process, Windows will be shown the reset progress on screen. Your PC will restart several times during the reset process. 10.The screen will turn back on when it completes. 12.When your settings options and follow the instructions on the screen. Click Reset to continue. 8. The screen will turn off during the reset process. 11.Follow the process until it is installing Windows. Recovery 7. 36 -

User Manual
Page 37
... your devices owner's manual to determine how to turn on both devices. Your computer will connect them. Bluetooth is disabled by default. This means it . 2. Press the Windows key or select the Windows Start button > Settings > Bluetooth & devices, and click the toggle under Bluetooth to add. 3. Bluetoothenabled devices include computers, cell phones, tablets, wireless headsets, and keyboards. Your devices are "paired" (or connected). Click on the Bluetooth adapter of devices. After that, simply turning on Add device then...
... your devices owner's manual to determine how to turn on both devices. Your computer will connect them. Bluetooth is disabled by default. This means it . 2. Press the Windows key or select the Windows Start button > Settings > Bluetooth & devices, and click the toggle under Bluetooth to add. 3. Bluetoothenabled devices include computers, cell phones, tablets, wireless headsets, and keyboards. Your devices are "paired" (or connected). Click on the Bluetooth adapter of devices. After that, simply turning on Add device then...

User Manual
Page 39
Connecting to the Internet - 39 CONNECTING TO THE INTERNET This chapter includes general information on types of the aircraft, disrupt communications, and even be illegal. usually a phone or cable company -- Acer computers feature a Flight mode hotkey that turns the network connection on your home or office to do so by default and Windows will detect and display a list of available networks during take-off . The ISP will install a small...
Connecting to the Internet - 39 CONNECTING TO THE INTERNET This chapter includes general information on types of the aircraft, disrupt communications, and even be illegal. usually a phone or cable company -- Acer computers feature a Flight mode hotkey that turns the network connection on your home or office to do so by default and Windows will detect and display a list of available networks during take-off . The ISP will install a small...

User Manual
Page 43
Press the Windows key or select the Windows Start button, click Settings in the Start menu. 2. Follow the instructions on both devices together. 5. To use the NFC, do the following: 1. Both devices must have NFC enabled. Select the Network & Internet to enable it. 4. Select Flight mode, then click the toggle under NFC to continue. 3. Make sure NFC is enabled if the other NFC devices across a short distance. An NFC transmitter is...
Press the Windows key or select the Windows Start button, click Settings in the Start menu. 2. Follow the instructions on both devices together. 5. To use the NFC, do the following: 1. Both devices must have NFC enabled. Select the Network & Internet to enable it. 4. Select Flight mode, then click the toggle under NFC to continue. 3. Make sure NFC is enabled if the other NFC devices across a short distance. An NFC transmitter is...

User Manual
Page 56
... turn on boot parameter is set , a prompt appears when you enter the password incorrectly, a warning message appears. If you enter the BIOS utility. • Type the Supervisor Password and press Enter to use the computer. Important You have three chances to shut down the computer. Try again and press Enter. • When the User Password is enabled, a prompt appears at boot-up. • Type the User Password and press Enter to access...
... turn on boot parameter is set , a prompt appears when you enter the password incorrectly, a warning message appears. If you enter the BIOS utility. • Type the Supervisor Password and press Enter to use the computer. Important You have three chances to shut down the computer. Try again and press Enter. • When the User Password is enabled, a prompt appears at boot-up. • Type the User Password and press Enter to access...

User Manual
Page 62
... signals to start quickly, but also uses a small amount of the following devices: keyboard, mouse, hard disk, peripherals connected to start . Press the Windows key or select the Windows Start button then search for a period of time, the computer stops some or all of these devices in power management unit that monitors system activity. Saving power Disable Fast startup Your computer uses Fast startup to the computer, and video memory. If no activity is off, your computer's battery. If...
... signals to start quickly, but also uses a small amount of the following devices: keyboard, mouse, hard disk, peripherals connected to start . Press the Windows key or select the Windows Start button then search for a period of time, the computer stops some or all of these devices in power management unit that monitors system activity. Saving power Disable Fast startup Your computer uses Fast startup to the computer, and video memory. If no activity is off, your computer's battery. If...

User Manual
Page 65
... follow the suggestions set out below 0° C (32° F) or above . • Frequent use . • Remove accessories that are not being used for a long time. Failure to self-discharge faster. • Excessive recharging decreases the battery life. • Look after your PC in a cool, dry place. the more than 1,000 charge/discharge cycles. a USB disk drive), as described above...
... follow the suggestions set out below 0° C (32° F) or above . • Frequent use . • Remove accessories that are not being used for a long time. Failure to self-discharge faster. • Excessive recharging decreases the battery life. • Look after your PC in a cool, dry place. the more than 1,000 charge/discharge cycles. a USB disk drive), as described above...

User Manual
Page 70
... Hibernate or turned off. Additionally, you should always be plugged into USB 3.2 Gen 1/Gen 2 ports. Some USB 3.2 Gen 1/Gen 2 ports support charging devices when the computer is a high-speed port which standard it . Important When removing a USB storage device, you can also charge devices such as a mouse, an external keyboard, additional storage (external hard disks), or any other devices through a USB port. You can use a USB hub to connect multiple devices to stop using the device before removing it supports. Consult...
... Hibernate or turned off. Additionally, you should always be plugged into USB 3.2 Gen 1/Gen 2 ports. Some USB 3.2 Gen 1/Gen 2 ports support charging devices when the computer is a high-speed port which standard it . Important When removing a USB storage device, you can also charge devices such as a mouse, an external keyboard, additional storage (external hard disks), or any other devices through a USB port. You can use a USB hub to connect multiple devices to stop using the device before removing it supports. Consult...

User Manual
Page 73
...computer is powered off and the monitor power switch is turned off. 2. Video and audio connectors - 73 VIDEO AND AUDIO CONNECTORS Add an external monitor to your computer's configuration. Connecting a monitor 1. connecting a microphone disables the built-in the monitor's user's guide. 5. These headsets are most commonly used by the computer. Follow any setup instructions in microphone. If necessary, change the display settings used with a built-in microphone. Attach the video cable to the monitor port on your computer via a video port. The type of port available depends...
...computer is powered off and the monitor power switch is turned off. 2. Video and audio connectors - 73 VIDEO AND AUDIO CONNECTORS Add an external monitor to your computer's configuration. Connecting a monitor 1. connecting a microphone disables the built-in the monitor's user's guide. 5. These headsets are most commonly used by the computer. Follow any setup instructions in microphone. If necessary, change the display settings used with a built-in microphone. Attach the video cable to the monitor port on your computer via a video port. The type of port available depends...

User Manual
Page 76
... start or boot up hotkey to adjust the brightness level. • The display device might be set to the computer. • The computer may be muted. Look at the volume control (speaker) 76 - Easy solutions are using on . Connect the AC adapter to save power. The computer's power management system automatically blanks the screen to recharge the battery pack. Press the display toggle hotkey to toggle the display back to an external monitor...
... start or boot up hotkey to adjust the brightness level. • The display device might be set to the computer. • The computer may be muted. Look at the volume control (speaker) 76 - Easy solutions are using on . Connect the AC adapter to save power. The computer's power management system automatically blanks the screen to recharge the battery pack. Press the display toggle hotkey to toggle the display back to an external monitor...

User Manual
Page 83
... devices connected to share files, peripheral devices and an internet connection. The ISP (Internet Service Provider) you need to a high speed DSL internet connection. Access points act as a printer) and an internet connection. Mobility Wireless LAN systems allow you access to pull cables through walls and ceilings. When you set up a network, you can share files, peripheral devices (such as a mediator between wired and wireless network. Internet and online security - 83 Network connections A LAN (Local Area Network...
... devices connected to share files, peripheral devices and an internet connection. The ISP (Internet Service Provider) you need to a high speed DSL internet connection. Access points act as a printer) and an internet connection. Mobility Wireless LAN systems allow you access to pull cables through walls and ceilings. When you set up a network, you can share files, peripheral devices (such as a mediator between wired and wireless network. Internet and online security - 83 Network connections A LAN (Local Area Network...


