

User Guide
Page 4
...Using the Windows Battery Meter 38 Optimizing Battery Life 38 Battery-low Warning 39 Power Management 42 Power Management Modes 42 Display Standby Mode 42 Hard Disk Standby Mode 43 Standby Mode 43 Hibernation Mode 44 Sleep Mode (ACPI 45 Advanced Power Management 46 Advanced Configuration and Power Interface 46 Chapter 3 Peripherals and Options 47 External Monitor 49 Setting Up Dual Display 49 Printer 51 External Pointing Device 52 External PS/2 Mouse 52 External Serial Mouse 52 External USB Mouse 53 External Keyboard and Keypad 54 Audio Devices 55 PC Cards 56 USB Devices...
...Using the Windows Battery Meter 38 Optimizing Battery Life 38 Battery-low Warning 39 Power Management 42 Power Management Modes 42 Display Standby Mode 42 Hard Disk Standby Mode 43 Standby Mode 43 Hibernation Mode 44 Sleep Mode (ACPI 45 Advanced Power Management 46 Advanced Configuration and Power Interface 46 Chapter 3 Peripherals and Options 47 External Monitor 49 Setting Up Dual Display 49 Printer 51 External Pointing Device 52 External PS/2 Mouse 52 External Serial Mouse 52 External USB Mouse 53 External Keyboard and Keypad 54 Audio Devices 55 PC Cards 56 USB Devices...

User Guide
Page 5
v Battery Pack 58 AC Adapter 58 External Battery Charger 58 Cables 58 PS/2 Y-Bridge Cable 58 File Transfer Cable 59 Key Component Upgrades 60 Memory Upgrade 60 Installing Memory 60 Hard Disk Upgrade 61 Installing a Replacement Hard Disk 62 Chapter 4 Moving with your Computer 63 ... Special Considerations 69 Traveling Internationally with the Computer 70 Preparing the Computer 70 What To Bring with You 70 Special Considerations 70 Chapter 5 Software 73 Sleep Manager 76 Accessing the Sleep Manager 76 Sleep Manager Functions 78 Create 78 Remove 80 Minimize 80 Exit...
v Battery Pack 58 AC Adapter 58 External Battery Charger 58 Cables 58 PS/2 Y-Bridge Cable 58 File Transfer Cable 59 Key Component Upgrades 60 Memory Upgrade 60 Installing Memory 60 Hard Disk Upgrade 61 Installing a Replacement Hard Disk 62 Chapter 4 Moving with your Computer 63 ... Special Considerations 69 Traveling Internationally with the Computer 70 Preparing the Computer 70 What To Bring with You 70 Special Considerations 70 Chapter 5 Software 73 Sleep Manager 76 Accessing the Sleep Manager 76 Sleep Manager Functions 78 Create 78 Remove 80 Minimize 80 Exit...
User Guide
Page 6
vi Notebook Manager 81 Information Viewer 82 POST 83 Boot Sequence 84 Password 85 Setting the Power-On Password 86 Setting the Setup Password 86 Power Management 87 Setting Advanced Features 88 Display Device 89 BIOS Utility 90 Using the BIOS Utility 90 System Information 91 Basic System Settings 93 Startup Configuration 94 Setting the Boot Drive Sequence 95 Onboard Devices Configuration 96 System Security 97 Setting a Password 98 Removing a Password 99 Changing a Password 99 Power Management 100 Load Default Settings 102 Chapter 6 Troubleshooting 103 Frequently-Asked ...
vi Notebook Manager 81 Information Viewer 82 POST 83 Boot Sequence 84 Password 85 Setting the Power-On Password 86 Setting the Setup Password 86 Power Management 87 Setting Advanced Features 88 Display Device 89 BIOS Utility 90 Using the BIOS Utility 90 System Information 91 Basic System Settings 93 Startup Configuration 94 Setting the Boot Drive Sequence 95 Onboard Devices Configuration 96 System Security 97 Setting a Password 98 Removing a Password 99 Changing a Password 99 Power Management 100 Load Default Settings 102 Chapter 6 Troubleshooting 103 Frequently-Asked ...
User Guide
Page 10
... technician to restore the product to rain or water d. Keep them in performance, indicating a need for this product through cabinet slots as the product's battery we recommend. Batteries may present a risk of power supply cord set (provided in damage and will often require extensive work by Acer's internal test labs and NSTL using Warning! Year 2000 Compliance Statement The TravelMate 330 series notebook computer is Year...
... technician to restore the product to rain or water d. Keep them in performance, indicating a need for this product through cabinet slots as the product's battery we recommend. Batteries may present a risk of power supply cord set (provided in damage and will often require extensive work by Acer's internal test labs and NSTL using Warning! Year 2000 Compliance Statement The TravelMate 330 series notebook computer is Year...

User Guide
Page 43
Start your communications manual for instructions. This modem port is not compatible with other IR-aware computers and peripherals such as infrared printers. Plugging this modem into a digital phone line will damage the modem. External display port Display device (e.g., external monitor, LCD projector) up to ... Warning! To use the fax/data modem port, connect a phone cable from the modem port to do wireless data transfer with digital phone lines...
Start your communications manual for instructions. This modem port is not compatible with other IR-aware computers and peripherals such as infrared printers. Plugging this modem into a digital phone line will damage the modem. External display port Display device (e.g., external monitor, LCD projector) up to ... Warning! To use the fax/data modem port, connect a phone cable from the modem port to do wireless data transfer with digital phone lines...

User Guide
Page 59
... the card slot when not in the BIOS Utility. The higher the storage temperature, the faster the battery pack self-discharges. Battery-low Warning You never have to worry about 300 times when used as you enabled the Battery-low Warning Beep parameter in use function also charges the battery pack. u Disable the parallel and serial ports if no devices are using the AC adapter. Excessive recharging decreases battery life...
... the card slot when not in the BIOS Utility. The higher the storage temperature, the faster the battery pack self-discharges. Battery-low Warning You never have to worry about 300 times when used as you enabled the Battery-low Warning Beep parameter in use function also charges the battery pack. u Disable the parallel and serial ports if no devices are using the AC adapter. Excessive recharging decreases battery life...
User Guide
Page 62
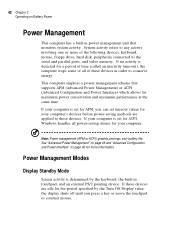
... power management unit that supports APM (Advanced Power Management) or ACPI (Advanced Configuration and Power Interface) which allows for more of these devices in order to the serial and parallel ports, and video memory. Power Management Modes Display Standby Mode Screen activity is detected for a period of time (called an inactivity time-out), the computer stops some or all power-saving chores for ACPI, Windows handles all of the following devices: keyboard, mouse, floppy drive, hard disk, peripherals connected...
... power management unit that supports APM (Advanced Power Management) or ACPI (Advanced Configuration and Power Interface) which allows for more of these devices in order to the serial and parallel ports, and video memory. Power Management Modes Display Standby Mode Screen activity is detected for a period of time (called an inactivity time-out), the computer stops some or all power-saving chores for ACPI, Windows handles all of the following devices: keyboard, mouse, floppy drive, hard disk, peripherals connected...

User Guide
Page 65
... enter a power saving mode. Do not change any devices (such as add memory or swap hard disks) when the computer is set to enter the power-saving mode. For more information on ACPI, see "Advanced Configuration and Power Interface" on which of three computer power saving modes: standby, hibernation or power off. In this set-up, you do not need to enter in. To enter Sleep mode under ACPI: u Press the Sleep hot key Fn-F4. Sleep Mode...
... enter a power saving mode. Do not change any devices (such as add memory or swap hard disks) when the computer is set to enter the power-saving mode. For more information on ACPI, see "Advanced Configuration and Power Interface" on which of three computer power saving modes: standby, hibernation or power off. In this set-up, you do not need to enter in. To enter Sleep mode under ACPI: u Press the Sleep hot key Fn-F4. Sleep Mode...

User Guide
Page 69
... Start, Settings, Control Panel. Setting Up Dual Display Dual display allows you to expand your desktop to an external display device, giving you more desktop space to the external display port. Double-click on the Settings tab. Read the monitor manual for additional instructions. c. Connect an external display device to the external display port of the computer. 2. d. Click on Display. e. Click on Yes. Note: If an external monitor is not connected, closing the display cover puts the computer into standby mode. Enable...
... Start, Settings, Control Panel. Setting Up Dual Display Dual display allows you to expand your desktop to an external display device, giving you more desktop space to the external display port. Double-click on the Settings tab. Read the monitor manual for additional instructions. c. Connect an external display device to the external display port of the computer. 2. d. Click on Display. e. Click on Yes. Note: If an external monitor is not connected, closing the display cover puts the computer into standby mode. Enable...

User Guide
Page 72
... PS/2 port. External PS/2 Mouse The built-in the Windows Control Panel to disable the internal touchpad by pressing Fn-F7. Then use a serial mouse, plug it into the serial port. External Serial Mouse If you may choose to enable the serial mouse. Note: When using an external mouse, you use the Add New Hardware tool in touchpad works alternately with an external PS/2 mouse which is hot-pluggable. 52 Chapter 3 Peripherals and Options External Pointing Device This computer accepts a PS/2-compatible, serial or USB mouse or...
... PS/2 port. External PS/2 Mouse The built-in the Windows Control Panel to disable the internal touchpad by pressing Fn-F7. Then use a serial mouse, plug it into the serial port. External Serial Mouse If you may choose to enable the serial mouse. Note: When using an external mouse, you use the Add New Hardware tool in touchpad works alternately with an external PS/2 mouse which is hot-pluggable. 52 Chapter 3 Peripherals and Options External Pointing Device This computer accepts a PS/2-compatible, serial or USB mouse or...

User Guide
Page 96
...'s BIOS and Windows APM (Advanced Power Management) or ACPI (Advanced Configuration and Power Interface) to perform these functions. Accessing the Sleep Manager There are two ways to and resuming from where you slide the power switch, the computer resumes from Hibernation mode The Hibernation file resides in power-saving functions. 76 Chapter 5 Software Sleep Manager Most notebook computers feature built-in a contiguous area on the hard disk was corrupted, Sleep Manager reallocates the hard disk...
...'s BIOS and Windows APM (Advanced Power Management) or ACPI (Advanced Configuration and Power Interface) to perform these functions. Accessing the Sleep Manager There are two ways to and resuming from where you slide the power switch, the computer resumes from Hibernation mode The Hibernation file resides in power-saving functions. 76 Chapter 5 Software Sleep Manager Most notebook computers feature built-in a contiguous area on the hard disk was corrupted, Sleep Manager reallocates the hard disk...

User Guide
Page 109
... desired level. You can also click on the item, and use the cursor keys to display device(s), such as the display brightness level. Make sure an external monitor is connected before External monitor is used to control various settings related to set the LCD screen brightness levels. Brightness for LCD Panel Click and drag to decrease the setting. 89 Display Device Display Device is selected. The items in this screen include: Item Description Boot Display Device Sets the default display device on Apply. Switching Display Device Sets the current display device.
... desired level. You can also click on the item, and use the cursor keys to display device(s), such as the display brightness level. Make sure an external monitor is connected before External monitor is used to control various settings related to set the LCD screen brightness levels. Brightness for LCD Panel Click and drag to decrease the setting. 89 Display Device Display Device is selected. The items in this screen include: Item Description Boot Display Device Sets the default display device on Apply. Switching Display Device Sets the current display device.

User Guide
Page 125
... created during the use of possible situations that may be low and unable to power the computer. Connect the AC adapter to restart the system. u If it is not lit, no power is in Standby mode. Easy answers and solutions are running on the screen. Remove or replace it may be damaged or missing. s The operating system files may arise during Windows setup...
... created during the use of possible situations that may be low and unable to power the computer. Connect the AC adapter to restart the system. u If it is not lit, no power is in Standby mode. Easy answers and solutions are running on the screen. Remove or replace it may be damaged or missing. s The operating system files may arise during Windows setup...

User Guide
Page 126
... be set to the line-out port on the computer's right panel, the internal speakers automatically turn off ). Click on the power. I want to an external monitor. 106 Chapter 6 Troubleshooting If pressing a key does not turn the display back on, two things might be the cause: u The brightness level might be turned off. I cannot eject the CD-ROM or DVD-ROM tray. Right-click on (this hot key also turns...
... be set to the line-out port on the computer's right panel, the internal speakers automatically turn off ). Click on the power. I want to an external monitor. 106 Chapter 6 Troubleshooting If pressing a key does not turn the display back on, two things might be the cause: u The brightness level might be turned off. I cannot eject the CD-ROM or DVD-ROM tray. Right-click on (this hot key also turns...

User Guide
Page 130
... addition, this series of the following actions you may need to diagnose it. Close all application programs (i.e., fax or communication programs) if you diagnose are enabled. To run PC-Doctor to take: 1. Disconnect any external devices (i.e., PC Cards, external mouse). 2. 110 Chapter 6 Troubleshooting Troubleshooting Tips This notebook computer incorporates an advanced design that helps you determine hardware configuration and clarify hardware or software problems. u If the...
... addition, this series of the following actions you may need to diagnose it. Close all application programs (i.e., fax or communication programs) if you diagnose are enabled. To run PC-Doctor to take: 1. Disconnect any external devices (i.e., PC Cards, external mouse). 2. 110 Chapter 6 Troubleshooting Troubleshooting Tips This notebook computer incorporates an advanced design that helps you determine hardware configuration and clarify hardware or software problems. u If the...

User Guide
Page 131
111 If PC-Doctor does not report a system error, reinstall the software driver from the Recovery CD for details. Please see the following section for the component you can access our online and Internet technical support services. If you still have problems, you suspect has a problem.
111 If PC-Doctor does not report a system error, reinstall the software driver from the Recovery CD for details. Please see the following section for the component you can access our online and Internet technical support services. If you still have problems, you suspect has a problem.

User Guide
Page 143
... 35 BIOS Utility 90-102 Basic System Settings sub-menu 93 Load Default Settings sub-menu 102 Onboard Devices Configuration sub-menu 96 Power Management sub-menu 100 starting 90 Startup Configuration sub-menu 94 System Information sub-menu 91 System Security sub-menu 97 boot display device setting in BIOS Utility 94 boot drive sequence setting in BIOS Utility 95 boot order setting in Notebook Manager 84 brightness hot keys 12 setting in Notebook Manager 89 C caps lock 8 on indicator 7 care AC adapter xviii battery pack xix computer xviii CD-ROM ejecting 20 ejecting manually 106 troubleshooting...
... 35 BIOS Utility 90-102 Basic System Settings sub-menu 93 Load Default Settings sub-menu 102 Onboard Devices Configuration sub-menu 96 Power Management sub-menu 100 starting 90 Startup Configuration sub-menu 94 System Information sub-menu 91 System Security sub-menu 97 boot display device setting in BIOS Utility 94 boot drive sequence setting in BIOS Utility 95 boot order setting in Notebook Manager 84 brightness hot keys 12 setting in Notebook Manager 89 C caps lock 8 on indicator 7 care AC adapter xviii battery pack xix computer xviii CD-ROM ejecting 20 ejecting manually 106 troubleshooting...
User Guide
Page 144
... monitor 49 mouse 52 mouse, PS/2 52 mouse, serial 52 printer 51 PS/2 y-bridge cable 58 USB 57 contrast setting in Notebook Manager 89 D date setting in Setup Utility 93 diagnostics 110 diskette ejecting 19 diskette drive 18 display 5 auto-dim feature 43 computer 5 hot keys 12 opening and closing 6 performance 5 power management 5, 42 setting boot device in Notebook Manager 89 setting in Notebook Manager 89 simultaneous 5 switching device in BIOS Utility 97 troubleshooting 107 ITW. See frequently-asked questions 105 H hard disk 18 installing 62 power management...
... monitor 49 mouse 52 mouse, PS/2 52 mouse, serial 52 printer 51 PS/2 y-bridge cable 58 USB 57 contrast setting in Notebook Manager 89 D date setting in Setup Utility 93 diagnostics 110 diskette ejecting 19 diskette drive 18 display 5 auto-dim feature 43 computer 5 hot keys 12 opening and closing 6 performance 5 power management 5, 42 setting boot device in Notebook Manager 89 setting in Notebook Manager 89 simultaneous 5 switching device in BIOS Utility 97 troubleshooting 107 ITW. See frequently-asked questions 105 H hard disk 18 installing 62 power management...
User Guide
Page 145
... mouse connecting externally 52 troubleshooting 107 N Notebook Manager 81-89 Boot Sequence 84 Display Device 89 hot key 11 Information Viewer 82 Password 85 POST 83 Power Management 87 starting 81 notice copyright protection xii year 2000 compliance x num lock 8 on indicator 7 numeric keypad embedded 9 num lock 9 O online services 112 options cables 58 hard disk upgrade 61 memory upgrade 60 125 PC Cards 56 spare AC adapter 58 spare battery 58 P palm rest 14 parallel port setting in BIOS Utility 97 password 30 changing in Setup Utility...
... mouse connecting externally 52 troubleshooting 107 N Notebook Manager 81-89 Boot Sequence 84 Display Device 89 hot key 11 Information Viewer 82 Password 85 POST 83 Power Management 87 starting 81 notice copyright protection xii year 2000 compliance x num lock 8 on indicator 7 numeric keypad embedded 9 num lock 9 O online services 112 options cables 58 hard disk upgrade 61 memory upgrade 60 125 PC Cards 56 spare AC adapter 58 spare battery 58 P palm rest 14 parallel port setting in BIOS Utility 97 password 30 changing in Setup Utility...

User Guide
Page 146
... viii scroll lock 8 security keylock 30 passwords 30 serial mouse connecting 52 serial port setting in BIOS Utility 96 service when to call xix Sleep Manager 76 troubleshooting 108 sleep mode 45 software bundled 75 speakers hot key 12 troubleshooting 106 specifications 119 Standby mode 43-44 entering 43 hot key 11 resuming from 44 signals 44 status indicator 7 status indicators 7 storage 18 AcerMedia Drive 18 floppy drive 18 hard disk 18 support information xvii T time setting in Setup Utility 93 touchpad 15 hot key 12 using 15-16 travel international...
... viii scroll lock 8 security keylock 30 passwords 30 serial mouse connecting 52 serial port setting in BIOS Utility 96 service when to call xix Sleep Manager 76 troubleshooting 108 sleep mode 45 software bundled 75 speakers hot key 12 troubleshooting 106 specifications 119 Standby mode 43-44 entering 43 hot key 11 resuming from 44 signals 44 status indicator 7 status indicators 7 storage 18 AcerMedia Drive 18 floppy drive 18 hard disk 18 support information xvii T time setting in Setup Utility 93 touchpad 15 hot key 12 using 15-16 travel international...


