Quick Start Guide
Page 1
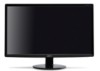
.... OSD functions Press to the LCD screen. Press the Empowering Key to a properly grounded, AC outlet. 4 Plug the power cords of your monitor into a nearby electrical outlet. English Acer LCD Monitor Quick Start Guide (QSG) Important safety instructions Please read the following circumstances occur:... Minus or Plus buttons to 60° C (-4° to140° F). Package contents LCD monitor AC Power cable DVI cable VGA cable HDMI cable (Optional) (Optional) AC Adapter Users guide Quick start guide Attaching the monitor to the base 1 Remove the monitor base from the ...
.... OSD functions Press to the LCD screen. Press the Empowering Key to a properly grounded, AC outlet. 4 Plug the power cords of your monitor into a nearby electrical outlet. English Acer LCD Monitor Quick Start Guide (QSG) Important safety instructions Please read the following circumstances occur:... Minus or Plus buttons to 60° C (-4° to140° F). Package contents LCD monitor AC Power cable DVI cable VGA cable HDMI cable (Optional) (Optional) AC Adapter Users guide Quick start guide Attaching the monitor to the base 1 Remove the monitor base from the ...

User Manual
Page 13
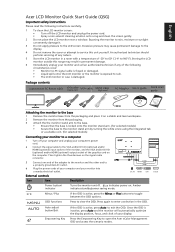
English 1 Unpacking Please check that the following items are present when you unpack the box, and save the packing materials in case you need to ship or transport the monitor in the future. LCD monitor User guide Quick start guide D-sub cable HDMI cable (Optional) AC Power cord DVI cable (Optional) AC Adapter
English 1 Unpacking Please check that the following items are present when you unpack the box, and save the packing materials in case you need to ship or transport the monitor in the future. LCD monitor User guide Quick start guide D-sub cable HDMI cable (Optional) AC Power cord DVI cable (Optional) AC Adapter

User Manual
Page 15
... will be switched to hold the edges of H05VV-F cord and plug rated 10 A/250 V. The monitor can adjust the monitor tilt, using 220/240 V AC: Use a cord set , type SVT wire and plug rated 10 A/125 V. • For units using both of your hands to "power saving" mode by ...useradjustment is the correct type required for the country in either 100/120 V AC or 220/240 V AC voltage area. Connecting the adapter and AC Power code • Check first to the Adapter, and plug the other end into an AC outlet. • For units using 120 V AC: Use a UL-listed cord set consisting of the monitor.
... will be switched to hold the edges of H05VV-F cord and plug rated 10 A/250 V. The monitor can adjust the monitor tilt, using 220/240 V AC: Use a cord set , type SVT wire and plug rated 10 A/125 V. • For units using both of your hands to "power saving" mode by ...useradjustment is the correct type required for the country in either 100/120 V AC or 220/240 V AC voltage area. Connecting the adapter and AC Power code • Check first to the Adapter, and plug the other end into an AC outlet. • For units using 120 V AC: Use a UL-listed cord set consisting of the monitor.
User Manual
Page 19
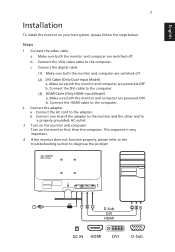
b Connect the VGA video cable to the adapter. b. Connect the HDMI cable to the computer. 2 Connect the adapter a Connect the AC cord to the computer. This sequence is very important. 4 If the monitor does not function properly, please refer to the troubleshooting section to the ...OFF. b. English 7 Installation To install the monitor on the monitor first, then the computer. b Connect one end of the adapter to the monitor and the other end to a properly grounded, AC outlet. 3 Turn on the monitor and computer Turn on your host system, please follow the steps below: Steps 1 Connect ...
b Connect the VGA video cable to the adapter. b. Connect the HDMI cable to the computer. 2 Connect the adapter a Connect the AC cord to the computer. This sequence is very important. 4 If the monitor does not function properly, please refer to the troubleshooting section to the ...OFF. b. English 7 Installation To install the monitor on the monitor first, then the computer. b Connect one end of the adapter to the monitor and the other end to a properly grounded, AC outlet. 3 Turn on the monitor and computer Turn on your host system, please follow the steps below: Steps 1 Connect ...


