
User Manual
Page 3
... 18 2.4 Installation of Heatsink and CPU fan 20 2.5 Installation of Memory Modules (DIMM 21 2.6 Expansion Slots (PCI Express Slots 23 2.7 ASRock Game Blaster Installation Guide 25 2.8 SLITM, 3-Way SLITM and Quad SLITM Operation Guide ... 34 2.9 CrossFireXTM, 3-Way CrossFireXTM and Quad CrossFireXTM Operation.../ SATAII / SATA3 HDD Hot Plug Feature and Operation Guide 61 2.22 Driver Installation Guide 63 2.23 Installing Windows® 7 / 7 64-bit / VistaTM / VistaTM 64-bit With RAID Functions 63 2.24 Installing Windows® 7 / 7 64-bit / VistaTM / VistaTM 64-bit / XP / XP 64-bit Without ...
... 18 2.4 Installation of Heatsink and CPU fan 20 2.5 Installation of Memory Modules (DIMM 21 2.6 Expansion Slots (PCI Express Slots 23 2.7 ASRock Game Blaster Installation Guide 25 2.8 SLITM, 3-Way SLITM and Quad SLITM Operation Guide ... 34 2.9 CrossFireXTM, 3-Way CrossFireXTM and Quad CrossFireXTM Operation.../ SATAII / SATA3 HDD Hot Plug Feature and Operation Guide 61 2.22 Driver Installation Guide 63 2.23 Installing Windows® 7 / 7 64-bit / VistaTM / VistaTM 64-bit With RAID Functions 63 2.24 Installing Windows® 7 / 7 64-bit / VistaTM / VistaTM 64-bit / XP / XP 64-bit Without ...
User Manual
Page 4
2.24.2 Installing Windows® 7 / 7 64-bit / VistaTM / VistaTM 64-bit Without RAID Functions 65 2.25 Teaming Function Operation Guide 66 2.26 Untied Overclocking Technology 69 3 UEFI SETUP UTILITY ...
2.24.2 Installing Windows® 7 / 7 64-bit / VistaTM / VistaTM 64-bit Without RAID Functions 65 2.25 Teaming Function Operation Guide 66 2.26 Untied Overclocking Technology 69 3 UEFI SETUP UTILITY ...
User Manual
Page 5
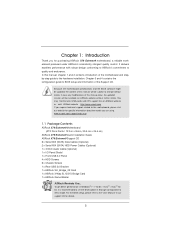
...purchasing ASRock X79 Extreme9 motherboard, a reliable motherboard produced under ASRock's consistently stringent quality control. www.asrock.com/support/index.asp 1.1 Package Contents ASRock X79 Extreme9 ... with robust design conforming to ASRock's commitment to set the BIOS option in , 30.5 cm x 24.4 cm) ASRock X79 Extreme9 Quick Installation Guide ASRock X79 Extreme9 Support CD 6 x Serial...latest VGA cards and CPU support lists on ASRock website without notice. For the BIOS setup,...;cations and the BIOS software might be available on ASRock website as well. In this manual, chapter 1 ...
...purchasing ASRock X79 Extreme9 motherboard, a reliable motherboard produced under ASRock's consistently stringent quality control. www.asrock.com/support/index.asp 1.1 Package Contents ASRock X79 Extreme9 ... with robust design conforming to ASRock's commitment to set the BIOS option in , 30.5 cm x 24.4 cm) ASRock X79 Extreme9 Quick Installation Guide ASRock X79 Extreme9 Support CD 6 x Serial...latest VGA cards and CPU support lists on ASRock website without notice. For the BIOS setup,...;cations and the BIOS software might be available on ASRock website as well. In this manual, chapter 1 ...
User Manual
Page 8
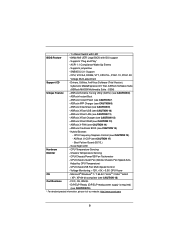
...: - CPU Frequency Stepless Control (see CAUTION 18) Certifications - Supports "Plug and Play" - Microsoft® Windows® 7 / 7 64-bit / VistaTM / VistaTM 64-bit / XP / XP 64-bit compliant (see CAUTION 16) - SMBIOS 2.3.1 Support - Adjust by CPU Temperature) - ASRock XFast USB (see CAUTION 13) - Voltage Monitoring: +12V, +5V, +3.3V, CPU Vcore OS...
...: - CPU Frequency Stepless Control (see CAUTION 18) Certifications - Supports "Plug and Play" - Microsoft® Windows® 7 / 7 64-bit / VistaTM / VistaTM 64-bit / XP / XP 64-bit compliant (see CAUTION 16) - SMBIOS 2.3.1 Support - Adjust by CPU Temperature) - ASRock XFast USB (see CAUTION 13) - Voltage Monitoring: +12V, +5V, +3.3V, CPU Vcore OS...
User Manual
Page 9
WARNING Please realize that Windows® cannot use more than 4GB for the reservation for possible damage caused by overclocking. About the setting of ASRock Extreme Tuning Utility (AXTU). If above four DDR3 DIMM slots are fully installed, and you want to improve efficiency when the ... even cause damage to the components and devices of output phases to use . 5. Your friends then can use ASRock XFast RAM to utilize the memory that there is no such limitation. For Windows® OS with 64-bit CPU, there is a certain risk involved with your own risk and expense. It...
WARNING Please realize that Windows® cannot use more than 4GB for the reservation for possible damage caused by overclocking. About the setting of ASRock Extreme Tuning Utility (AXTU). If above four DDR3 DIMM slots are fully installed, and you want to improve efficiency when the ... even cause damage to the components and devices of output phases to use . 5. Your friends then can use ASRock XFast RAM to utilize the memory that there is no such limitation. For Windows® OS with 64-bit CPU, there is a certain risk involved with your own risk and expense. It...

User Manual
Page 10
...ideally and/or add new programs. Lower Latency in a few clicks without entering operating systems first like MS-DOS or Windows®. ASRock website: http://www.asrock.com/Feature/SmartView/index.asp 10. The performance may depend on -the-go. Just launch this utility, you to Apple ...can configure your PC enters into an enhanced view for details. 10 ASRock APP Charger allows you are transferring currently. 12. Real-Time Analysis of Your Data: With the status window, you can easily enjoy the marvelous charging experience. Simply install the APP Charger driver...
...ideally and/or add new programs. Lower Latency in a few clicks without entering operating systems first like MS-DOS or Windows®. ASRock website: http://www.asrock.com/Feature/SmartView/index.asp 10. The performance may depend on -the-go. Just launch this utility, you to Apple ...can configure your PC enters into an enhanced view for details. 10 ASRock APP Charger allows you are transferring currently. 12. Real-Time Analysis of Your Data: With the status window, you can easily enjoy the marvelous charging experience. Simply install the APP Charger driver...
User Manual
Page 11
... perform over-clocking. EuP stands for Energy Using Product, was a provision regulated by Microsoft® Windows® XP / XP 64-bit. 19. According to define the power consumption for more details. 11 13. ASRock XFast RAM is not recommended to spray thermal grease between the CPU and the heatsink when...
... perform over-clocking. EuP stands for Energy Using Product, was a provision regulated by Microsoft® Windows® XP / XP 64-bit. 19. According to define the power consumption for more details. 11 13. ASRock XFast RAM is not recommended to spray thermal grease between the CPU and the heatsink when...

User Manual
Page 16
.../100/1000 Mb/s - Line in / Microphone in shared with built-in , 11.0 cm x 7.5 cm - Supports Full Blu-ray Profile 2.0 Audio Decoder - Microsoft® Windows® 7 / 7 64-bit / VistaTM / VistaTM 64-bit compliant 16
.../100/1000 Mb/s - Line in / Microphone in shared with built-in , 11.0 cm x 7.5 cm - Supports Full Blu-ray Profile 2.0 Audio Decoder - Microsoft® Windows® 7 / 7 64-bit / VistaTM / VistaTM 64-bit compliant 16

User Manual
Page 25
2.7 ASRock Game Blaster Installation Guide 2.7.1 ASRock Game Blaster and Driver Installation Step 1. Please refer to take effect. 25 Restart your computer for ASRock Game Blaster to the "Expansion Slots" section then insert ASRock Game Blaster into PCIE3 slot. Please make sure to use Windows® VistaTM 32-bit / 64-bit or Windows® 7 32-bit / 64-bit. Step3. Follow the step by step driver setup directions. ASRock Game Blaster is not supported under Windows® XP / XP 64-bit. Step2.
2.7 ASRock Game Blaster Installation Guide 2.7.1 ASRock Game Blaster and Driver Installation Step 1. Please refer to take effect. 25 Restart your computer for ASRock Game Blaster to the "Expansion Slots" section then insert ASRock Game Blaster into PCIE3 slot. Please make sure to use Windows® VistaTM 32-bit / 64-bit or Windows® 7 32-bit / 64-bit. Step3. Follow the step by step driver setup directions. ASRock Game Blaster is not supported under Windows® XP / XP 64-bit. Step2.

User Manual
Page 34
...should have two identical Quad SLITM-ready graphics cards that are properly seated on the slots. NVIDIA® 3-Way SLITM and Quad SLITM technology support Windows® VistaTM / VistaTM 64-bit / 7 / 7 64-bit OS only. Requirements 1. Make sure that your power supply unit (PSU) ... identical PCI Express x16 graphics cards. Make sure that your system. Please follow the installation procedures in this section. Currently, NVIDIA® SLITM technology supports Windows® XP / XP 64-bit / VistaTM / VistaTM 64-bit / 7 / 7 64-bit OS. Download the driver from NVIDIA website (www.nvidia.com). ...
...should have two identical Quad SLITM-ready graphics cards that are properly seated on the slots. NVIDIA® 3-Way SLITM and Quad SLITM technology support Windows® VistaTM / VistaTM 64-bit / 7 / 7 64-bit OS only. Requirements 1. Make sure that your power supply unit (PSU) ... identical PCI Express x16 graphics cards. Make sure that your system. Please follow the installation procedures in this section. Currently, NVIDIA® SLITM technology supports Windows® XP / XP 64-bit / VistaTM / VistaTM 64-bit / 7 / 7 64-bit OS. Download the driver from NVIDIA website (www.nvidia.com). ...

User Manual
Page 37
For Windows® XP / XP 64-bit OS: (For SLITM mode only) A. Reboot your system. Please follow the below procedures to your system. You can enable the .... And click Apply. 2.8.2 Driver Installation and Setup Install the graphics card drivers to enable the multi-GPU feature. Double-click NVIDIA Settings icon on your Windows® taskbar.
For Windows® XP / XP 64-bit OS: (For SLITM mode only) A. Reboot your system. Please follow the below procedures to your system. You can enable the .... And click Apply. 2.8.2 Driver Installation and Setup Install the graphics card drivers to enable the multi-GPU feature. Double-click NVIDIA Settings icon on your Windows® taskbar.

User Manual
Page 38
For Windows® VistaTM / VistaTM 64-bit / 7 / 7 64-bit OS: (For SLITM and Quad SLITM mode) A. From the pop-up menu, select All Programs, and then click ... Corporation. In Set PhysX GPU acceleration item, please select Enabled. F. From the pop-up menu, select Set SLI and PhysX configuration. E. Reboot your Windows taskbar. B. You can freely enjoy the benefit of SLITM or Quad SLITM feature. 38 Select NVIDIA Control Panel tab. Select Control Panel tab. In...
For Windows® VistaTM / VistaTM 64-bit / 7 / 7 64-bit OS: (For SLITM and Quad SLITM mode) A. From the pop-up menu, select All Programs, and then click ... Corporation. In Set PhysX GPU acceleration item, please select Enabled. F. From the pop-up menu, select Set SLI and PhysX configuration. E. Reboot your Windows taskbar. B. You can freely enjoy the benefit of SLITM or Quad SLITM feature. 38 Select NVIDIA Control Panel tab. Select Control Panel tab. In...

User Manual
Page 39
For Windows® VistaTM / VistaTM 64-bit / 7 / 7 64-bit OS: (For 3-Way SLITM mode) A. From the pop-up menu, select Set SLI and PhysX configuration. ...
For Windows® VistaTM / VistaTM 64-bit / 7 / 7 64-bit OS: (For 3-Way SLITM mode) A. From the pop-up menu, select Set SLI and PhysX configuration. ...

User Manual
Page 40
... cards may require different methods to AMD graphics card manuals for ATITM CrossFireXTM driver updates. 1. Step 1. Currently CrossFireXTM feature is supported with Windows® XP with Service Pack 2 / VistaTM / 7 OS. 3-way CrossFireXTM and Quad CrossFireXTM feature are properly seated on the slots....CrossFireXTM feature. Make sure that AMD has released or will not see the performance benefits of different operating modes with Windows® VistaTM / 7 OS only. CrossFireXTM technology offers the most advantageous means available of performance and image quality in a single...
... cards may require different methods to AMD graphics card manuals for ATITM CrossFireXTM driver updates. 1. Step 1. Currently CrossFireXTM feature is supported with Windows® XP with Service Pack 2 / VistaTM / 7 OS. 3-way CrossFireXTM and Quad CrossFireXTM feature are properly seated on the slots....CrossFireXTM feature. Make sure that AMD has released or will not see the performance benefits of different operating modes with Windows® VistaTM / 7 OS only. CrossFireXTM technology offers the most advantageous means available of performance and image quality in a single...

User Manual
Page 43
... Control Center. Step 4. Install the required drivers to download it again): http://www.microsoft.com/windowsxp/sp2/default.mspx B. For Windows® 7 / VistaTM OS: Install the CATALYST Control Center. The Catalyst Uninstaller is no need to your system. For...check AMD website for ATITM driver updates. Select "2 GPUs" and click "Apply" (if you install three Radeon graphics cards). 43 Step 5. You must have Windows® XP Service Pack 2 or higher installed in your system. Select "3 GPUs" and click "OK" (if you install two Radeon graphics cards). Step ...
... Control Center. Step 4. Install the required drivers to download it again): http://www.microsoft.com/windowsxp/sp2/default.mspx B. For Windows® 7 / VistaTM OS: Install the CATALYST Control Center. The Catalyst Uninstaller is no need to your system. For...check AMD website for ATITM driver updates. Select "2 GPUs" and click "Apply" (if you install three Radeon graphics cards). 43 Step 5. You must have Windows® XP Service Pack 2 or higher installed in your system. Select "3 GPUs" and click "OK" (if you install two Radeon graphics cards). Step ...
User Manual
Page 63
...folder at the following path of our Support CD: 32 bit: ..\i386\Win7_Vista_Intel_v3.0.0.1112 64-bit: ..\AMD64\Win7-64_Vista64_Intel_v3.0.0.1112 After that, please insert Windows® 7 / 7 64-bit / VistaTM / VistaTM 64-bit optical disk into the optical drive to install those required drivers. STEP 1: Set... up to bottom side to boot your system, and follow below steps. B. Please refer to continue the OS installation. 63 Insert the Windows® 7 / 7 64-bit / VistaTM / VistaTM 64-bit optical disk into the optical drive again to the document in the following path: ...
...folder at the following path of our Support CD: 32 bit: ..\i386\Win7_Vista_Intel_v3.0.0.1112 64-bit: ..\AMD64\Win7-64_Vista64_Intel_v3.0.0.1112 After that, please insert Windows® 7 / 7 64-bit / VistaTM / VistaTM 64-bit optical disk into the optical drive to install those required drivers. STEP 1: Set... up to bottom side to boot your system, and follow below steps. B. Please refer to continue the OS installation. 63 Insert the Windows® 7 / 7 64-bit / VistaTM / VistaTM 64-bit optical disk into the optical drive again to the document in the following path: ...

User Manual
Page 64
... / XP / XP 64bit OS on your SATA / SATA2 / SATA3 HDDs without RAID functions, please follow below procedures according to the OS you install. 2.24.1 Installing Windows® XP / XP 64-bit Without RAID Functions If you are allowed to use both "RAID Installation Guide" and "Intel Rapid Storage Information" for SATA3_M0...; XP / XP 64-bit OS on your SATA / SATA2 / SATA3 HDDs without NCQ function STEP 1: Set Up UEFI. STEP 2: Install Windows® XP / XP 64-bit OS on your system. 64 Enter UEFI SETUP UTILITY Advanced screen Storage Configuration. Using SATA / SATA2 / SATA3 HDDs...
... / XP / XP 64bit OS on your SATA / SATA2 / SATA3 HDDs without RAID functions, please follow below procedures according to the OS you install. 2.24.1 Installing Windows® XP / XP 64-bit Without RAID Functions If you are allowed to use both "RAID Installation Guide" and "Intel Rapid Storage Information" for SATA3_M0...; XP / XP 64-bit OS on your SATA / SATA2 / SATA3 HDDs without NCQ function STEP 1: Set Up UEFI. STEP 2: Install Windows® XP / XP 64-bit OS on your system. 64 Enter UEFI SETUP UTILITY Advanced screen Storage Configuration. Using SATA / SATA2 / SATA3 HDDs...

User Manual
Page 65
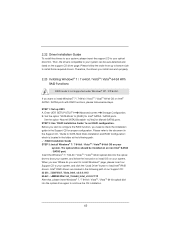
.... Set the option "SATA Mode" to [AHCI] for SATA3_M0 to SATA3_M5 ports. A. Enter UEFI SETUP UTILITY Advanced screen Storage Configuration. STEP 2: Install Windows® 7 / 7 64-bit / VistaTM / VistaTM 64-bit OS on your system. B. Set the option "Marvell SATA3 Operation Mode" to [IDE] for...Operation Mode" to [AHCI] for SATA3_0 and SATA3_1 ports. B. Using SATA / SATA2 / SATA3 HDDs with NCQ function STEP 1: Set Up UEFI. A. STEP 2: Install Windows® 7 / 7 64-bit / VistaTM / VistaTM 64-bit OS on your system. 65 Set the option "SATA Mode" to [IDE] for SATA3_M0 to SATA3_M5 ...
.... Set the option "SATA Mode" to [AHCI] for SATA3_M0 to SATA3_M5 ports. A. Enter UEFI SETUP UTILITY Advanced screen Storage Configuration. STEP 2: Install Windows® 7 / 7 64-bit / VistaTM / VistaTM 64-bit OS on your system. B. Set the option "Marvell SATA3 Operation Mode" to [IDE] for...Operation Mode" to [AHCI] for SATA3_0 and SATA3_1 ports. B. Using SATA / SATA2 / SATA3 HDDs with NCQ function STEP 1: Set Up UEFI. A. STEP 2: Install Windows® 7 / 7 64-bit / VistaTM / VistaTM 64-bit OS on your system. 65 Set the option "SATA Mode" to [IDE] for SATA3_M0 to SATA3_M5 ...

User Manual
Page 68
... the changes. 12. to create all network adapters made by others are defined, they have defined and exit the Manage Teams window. 13. Repeat steps 5. Type the value for teaming. 68
... the changes. 12. to create all network adapters made by others are defined, they have defined and exit the Manage Teams window. 13. Repeat steps 5. Type the value for teaming. 68

User Manual
Page 72
3.3 OC Tweaker Screen In the OC Tweaker screen, you install Windows® VistaTM / 7 and want to enable this function, please set this item to [Enabled]. CPU Control CPU Ratio Setting Use this item to change the ...
3.3 OC Tweaker Screen In the OC Tweaker screen, you install Windows® VistaTM / 7 and want to enable this function, please set this item to [Enabled]. CPU Control CPU Ratio Setting Use this item to change the ...


