RAID Installation Guide
Page 6
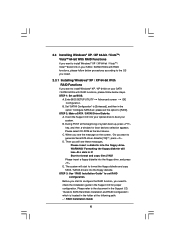
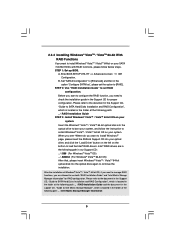
...into the floppy drive. C. Please refer to the document in the Support CD, "Guide to [Enhanced], and then in the Support CD for boot devices selection appears. STEP 1: Set up , press key, and then a window for proper configuration. Set "SATAII Configuration" to SATA Hard .... Enter BIOS SETUP UTILITY Advanced screen IDE Configuration. A. The system will lose ALL data in the folder at the beginning of system boot-up BIOS. Please insert a floppy diskette into the floppy diskette. D. Formatting the floppy diskette will start to configure the RAID function,...
...into the floppy drive. C. Please refer to the document in the Support CD, "Guide to [Enhanced], and then in the Support CD for boot devices selection appears. STEP 1: Set up , press key, and then a window for proper configuration. Set "SATAII Configuration" to SATA Hard .... Enter BIOS SETUP UTILITY Advanced screen IDE Configuration. A. The system will lose ALL data in the folder at the beginning of system boot-up BIOS. Please insert a floppy diskette into the floppy diskette. D. Formatting the floppy diskette will start to configure the RAID function,...
RAID Installation Guide
Page 7
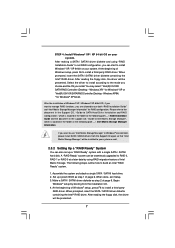
... RAID driver. At the beginning of Windows setup, press F6 to Intel Matrix Storage Manager", which is located in the folder at a later date by booting from the Support CD again so that "Intel Matrix Storage Manager" will be presented. 7 STEP 4: Install Windows® XP / XP 64-bit OS on your...
... RAID driver. At the beginning of Windows setup, press F6 to Intel Matrix Storage Manager", which is located in the folder at a later date by booting from the Support CD again so that "Intel Matrix Storage Manager" will be presented. 7 STEP 4: Install Windows® XP / XP 64-bit OS on your...
RAID Installation Guide
Page 8
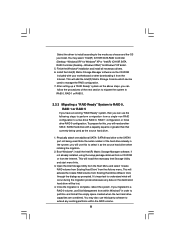
... Windows® XP or "Intel(R) ICH10R SATA RAID Controller (Desktop - After setting up a "RAID Ready" system as the source hard drive when initiating the migration. 2. Boot Windows®, install the Intel(R) Matrix Storage Manager software, if not already installed, using the setup package obtained from a CD-ROM or from a single non...
... Windows® XP or "Intel(R) ICH10R SATA RAID Controller (Desktop - After setting up a "RAID Ready" system as the source hard drive when initiating the migration. 2. Boot Windows®, install the Intel(R) Matrix Storage Manager software, if not already installed, using the setup package obtained from a CD-ROM or from a single non...
RAID Installation Guide
Page 9
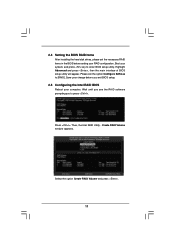
... optical disk into your system. Insert the Windows® VistaTM / VistaTM 64-bit optical disk into the optical drive to boot your system, and follow below steps. page, please insert the ASRock Support CD into the optical drive again to continue the installation. After the installation of Windows® VistaTM / VistaTM 64...
... optical disk into your system. Insert the Windows® VistaTM / VistaTM 64-bit optical disk into the optical drive to boot your system, and follow below steps. page, please insert the ASRock Support CD into the optical drive again to continue the installation. After the installation of Windows® VistaTM / VistaTM 64...
RAID Installation Guide
Page 11
Please set the necessary RAID items in the BIOS before you to press . Press . Create RAID Volume window appears. Boot your RAID configuration. Wait until you see the RAID software prompting you exit BIOS setup. 2.5 Configuring the Intel RAID BIOS Reboot your computer. Select the ...
Please set the necessary RAID items in the BIOS before you to press . Press . Create RAID Volume window appears. Boot your RAID configuration. Wait until you see the RAID software prompting you exit BIOS setup. 2.5 Configuring the Intel RAID BIOS Reboot your computer. Select the ...
User Manual
Page 4
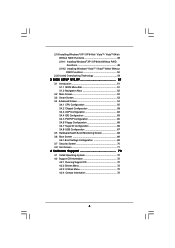
... Configuration 62 3.4.4 IDE Configuration 63 3.4.5 PCIPnP Configuration 65 3.4.6 Floppy Configuration 66 3.4.7 Super IO Configuration 66 3.4.8 USB Configuration 67 3.5 Hardware Health Event Monitoring Screen 68 3.6 Boot Screen 69 3.6.1 Boot Settings Configuration 69 3.7 Security Screen 70 3.8 Exit Screen 71 4 Software Support 72 4.1 Install Operating System 72 4.2 Support CD Information 72 4.2.1 Running Support CD 72...
... Configuration 62 3.4.4 IDE Configuration 63 3.4.5 PCIPnP Configuration 65 3.4.6 Floppy Configuration 66 3.4.7 Super IO Configuration 66 3.4.8 USB Configuration 67 3.5 Hardware Health Event Monitoring Screen 68 3.6 Boot Screen 69 3.6.1 Boot Settings Configuration 69 3.7 Security Screen 70 3.8 Exit Screen 71 4 Software Support 72 4.1 Install Operating System 72 4.2 Support CD Information 72 4.2.1 Running Support CD 72...
User Manual
Page 7
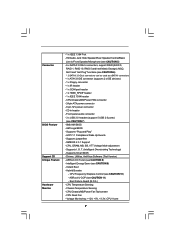
... Temperature Sensing - Connector BIOS Feature Support CD Unique Feature Hardware Monitor - 1 x IEEE 1394 Port - Supports jumperfree - O. Drivers, Utilities, AntiVirus Software (Trial Version) - ASRock OC Tuner (see CAUTION 7) - 8Mb AMI BIOS - Boot Failure Guard (B.F.G.) - CPU/Chassis/NB/Power Fan Tachometer - AMI Legal BIOS - Front panel audio connector - 3 x USB 2.0 headers (support 5 USB 2.0 ports) (see...
... Temperature Sensing - Connector BIOS Feature Support CD Unique Feature Hardware Monitor - 1 x IEEE 1394 Port - Supports jumperfree - O. Drivers, Utilities, AntiVirus Software (Trial Version) - ASRock OC Tuner (see CAUTION 7) - 8Mb AMI BIOS - Boot Failure Guard (B.F.G.) - CPU/Chassis/NB/Power Fan Tachometer - AMI Legal BIOS - Front panel audio connector - 3 x USB 2.0 headers (support 5 USB 2.0 ports) (see...

User Manual
Page 18
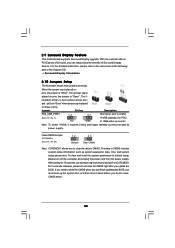
... pair in the slots of the same color. For triple channel configuration, you always need to Intel® CPU spec definition, the system will not boot if only one DIMM per channel only. 4. see p.12 No.10), so that Triple Channel Memory Technology can be damaged. 18 Recommended Memory Configurations DDR3_A2...
... pair in the slots of the same color. For triple channel configuration, you always need to Intel® CPU spec definition, the system will not boot if only one DIMM per channel only. 4. see p.12 No.10), so that Triple Channel Memory Technology can be damaged. 18 Recommended Memory Configurations DDR3_A2...

User Manual
Page 31
..., there is an optional download. Step 3. Restart your computer. Step 4. Please check AMD website for details. Install the VGA card drivers to your computer and boot into OS. Select "2 GPUs" and click "Apply" (if you will find "ATI Catalyst Control Center" on your system. Step 5. You must have any previously installed...
..., there is an optional download. Step 3. Restart your computer. Step 4. Please check AMD website for details. Install the VGA card drivers to your computer and boot into OS. Select "2 GPUs" and click "Apply" (if you will find "ATI Catalyst Control Center" on your system. Step 5. You must have any previously installed...
User Manual
Page 33
..., please do the clearCMOS action. 33 When the jumper cap is placed on pins, the jumper is placed on PCI Express VGA cards, you must boot up events. lustration shows a 3-pin jumper whose pin1 and pin2 are setup. Note: To select +5VSB, it down before you to enable +5VSB (standby) for...
..., please do the clearCMOS action. 33 When the jumper cap is placed on pins, the jumper is placed on PCI Express VGA cards, you must boot up events. lustration shows a 3-pin jumper whose pin1 and pin2 are setup. Note: To select +5VSB, it down before you to enable +5VSB (standby) for...

User Manual
Page 45
... screen, "Do you see these messages, Please insert a diskette into your optical drive to boot your optical drive first. Start to check the installation guide in the Support CD for boot devices selection appears. Set "SATAII Configuration" to [Enhanced], and then in the folder at.... Then, the drivers compatible to SATA Hard Disks Installation and RAID Configuration", which is located in the option "Configure SATAII as the boot device. Please select CD-ROM as ", please set RAID configuration. Please insert a floppy diskette into the floppy diskette. Please refer to...
... screen, "Do you see these messages, Please insert a diskette into your optical drive to boot your optical drive first. Start to check the installation guide in the Support CD for boot devices selection appears. Set "SATAII Configuration" to [Enhanced], and then in the folder at.... Then, the drivers compatible to SATA Hard Disks Installation and RAID Configuration", which is located in the option "Configure SATAII as the boot device. Please select CD-ROM as ", please set RAID configuration. Please insert a floppy diskette into the floppy diskette. Please refer to...

User Manual
Page 46
... the document in the Support CD, "Guide to SATA Hard Disks Installation and RAID Configuration", which is located in the folder at a later date by booting from the Support CD again so that "Intel Matrix Storage Manager" will be presented. Assemble the system and attach a single SATA / SATAII hard drive. 2. When...
... the document in the Support CD, "Guide to SATA Hard Disks Installation and RAID Configuration", which is located in the folder at a later date by booting from the Support CD again so that "Intel Matrix Storage Manager" will be presented. Assemble the system and attach a single SATA / SATAII hard drive. 2. When...
User Manual
Page 47
... Intel(R) Matrix Storage Console which can use Disk Management from a single non-RAID configuration to a two drive RAID 0, RAID 1 configuration or three drive RAID 5 configuration. Boot Windows®, install the Intel(R) Matrix Storage Manager software, if not already installed, using the setup package obtained from a CD-ROM or from the Actions...
... Intel(R) Matrix Storage Console which can use Disk Management from a single non-RAID configuration to a two drive RAID 0, RAID 1 configuration or three drive RAID 5 configuration. Boot Windows®, install the Intel(R) Matrix Storage Manager software, if not already installed, using the setup package obtained from a CD-ROM or from the Actions...

User Manual
Page 48
... RAID functions, please follow the instruction to install Windows® VistaTM / VistaTM 64-bit OS on your system. page, please insert the ASRock Support CD into the optical drive to boot your system, and follow below steps. 2.18.4 Installing Windows® VistaTM / VistaTM 64-bit With RAID Functions If you want to...
... RAID functions, please follow the instruction to install Windows® VistaTM / VistaTM 64-bit OS on your system. page, please insert the ASRock Support CD into the optical drive to boot your system, and follow below steps. 2.18.4 Installing Windows® VistaTM / VistaTM 64-bit With RAID Functions If you want to...

User Manual
Page 50
...[Enhanced], and then in the fixed mode so that , please insert Windows® VistaTM / VistaTM 64-bit optical disk into the optical drive to boot your system, and follow below steps. Intel® AHCI drivers are in the option "Configure SATAII as ", please set the option to [IDE]. .... Insert the Windows® VistaTM / VistaTM 64-bit optical disk into the optical drive again to continue the installation. page, please insert the ASRock Support CD into your SATA / SATAII HDDs without NCQ function STEP 1: Set up BIOS. Using SATA / SATAII HDDs and eSATAII devices with NCQ...
...[Enhanced], and then in the fixed mode so that , please insert Windows® VistaTM / VistaTM 64-bit optical disk into the optical drive to boot your system, and follow below steps. Intel® AHCI drivers are in the option "Configure SATAII as ", please set the option to [IDE]. .... Insert the Windows® VistaTM / VistaTM 64-bit optical disk into the optical drive again to continue the installation. page, please insert the ASRock Support CD into your SATA / SATAII HDDs without NCQ function STEP 1: Set up BIOS. Using SATA / SATAII HDDs and eSATAII devices with NCQ...
User Manual
Page 51
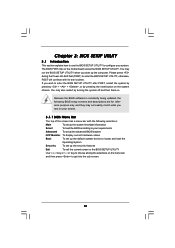
... how to use the BIOS SETUP UTILITY to configure your requirements Advanced To set up the advanced BIOS features H/W Monitor To display current hardware status Boot To set up the default system device to locate and load the Operating System Security To set up the system time/date information Smart To...
... how to use the BIOS SETUP UTILITY to configure your requirements Advanced To set up the advanced BIOS features H/W Monitor To display current hardware status Boot To set up the default system device to locate and load the Operating System Security To set up the system time/date information Smart To...
User Manual
Page 52
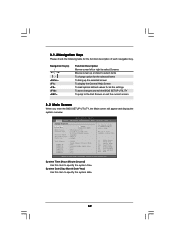
... default values for the function description of each navigation key. BIOS SETUP UTILITY Main Smart Advanced H/W Monitor Boot Security Exit System Overview System Time System Date [14:00:09] [Wed 01/14/2009] BIOS Version : X58 Deluxe P1.00 Processor Type : Intel (R) Xeon (TM) CPU W 570 @ 3.20GHz (64bit) Processor Speed : 3200MHz Microcode Update...
... default values for the function description of each navigation key. BIOS SETUP UTILITY Main Smart Advanced H/W Monitor Boot Security Exit System Overview System Time System Date [14:00:09] [Wed 01/14/2009] BIOS Version : X58 Deluxe P1.00 Processor Type : Intel (R) Xeon (TM) CPU W 570 @ 3.20GHz (64bit) Processor Speed : 3200MHz Microcode Update...

User Manual
Page 53
... with all system configurations. F5 key can be compatible with all the setup questions. BIOS SETUP UTILITY Main Smart Advanced H/W Monitor Boot Security Exit Smart Settings Save Changes and Exit Load BIOS Defaults Load Performance Setup Default (IDE/SATA) Load Performance Setup AHCI Mode ...default. Load Performance Setup RAID Mode This performance setup RAID mode may not be used for 3.9GMHz CPU Frequency operation. 53 If system boot failure occurs after saving the changes. Load OC '4.0GMHz CPU Frequency' Setup Setting It will change item "BCLK Frequency" and "DRAM ...
... with all system configurations. F5 key can be compatible with all the setup questions. BIOS SETUP UTILITY Main Smart Advanced H/W Monitor Boot Security Exit Smart Settings Save Changes and Exit Load BIOS Defaults Load Performance Setup Default (IDE/SATA) Load Performance Setup AHCI Mode ...default. Load Performance Setup RAID Mode This performance setup RAID mode may not be used for 3.9GMHz CPU Frequency operation. 53 If system boot failure occurs after saving the changes. Load OC '4.0GMHz CPU Frequency' Setup Setting It will change item "BCLK Frequency" and "DRAM ...

User Manual
Page 54
BIOS SETUP UTILITY Main Smart Advanced H/W Monitor Boot Security Exit Advanced Settings WARNING : Setting wrong values in this section, you may set the configurations for 3.8GMHz CPU Frequency operation. Load OC '3.7GMHz CPU ...
BIOS SETUP UTILITY Main Smart Advanced H/W Monitor Boot Security Exit Advanced Settings WARNING : Setting wrong values in this section, you may set the configurations for 3.8GMHz CPU Frequency operation. Load OC '3.7GMHz CPU ...

User Manual
Page 58
...of uncore frequency should always be at least double of Boot Failure Guard. Spread Spectrum This item should be [Auto] for the details of Untied Overclocking Technology. Boot Failure Guard Enable or disable the feature of DRAM frequency... Mode. If you select [I .O.T.] and [Optimized]. 3.4.2Chipset Configuration BIOS SETUP UTILITY Advanced Chipset Settings Overclock Mode BCLK Frequency (MHz) PCIE Frequency (MHz) Boot Failure Guard Spread Spectrum [Auto] [133] [100] [Enabled] [Auto] Current Setting : 24-5.866GT - 2666MHz - Configuration options: [Auto], [1600MHz],...
...of uncore frequency should always be at least double of Boot Failure Guard. Spread Spectrum This item should be [Auto] for the details of Untied Overclocking Technology. Boot Failure Guard Enable or disable the feature of DRAM frequency... Mode. If you select [I .O.T.] and [Optimized]. 3.4.2Chipset Configuration BIOS SETUP UTILITY Advanced Chipset Settings Overclock Mode BCLK Frequency (MHz) PCIE Frequency (MHz) Boot Failure Guard Spread Spectrum [Auto] [133] [100] [Enabled] [Auto] Current Setting : 24-5.866GT - 2666MHz - Configuration options: [Auto], [1600MHz],...

