User Manual
Page 30
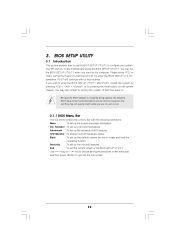
... To set up the advanced BIOS features To display current hardware status To set up the computer. Please press or during the Power-On-Self-Test (POST) to enter the BIOS SETUP UTILITY, otherwise, POST will continue with the following BIOS setup screens and descriptions are for reference purpose only, and... system device to configure your screen. 3.1.1 BIOS Menu Bar The top of the Main OC Tweaker Advanced H/W Monitor Boot screen has a menu bar with its test routines.
... To set up the advanced BIOS features To display current hardware status To set up the computer. Please press or during the Power-On-Self-Test (POST) to enter the BIOS SETUP UTILITY, otherwise, POST will continue with the following BIOS setup screens and descriptions are for reference purpose only, and... system device to configure your screen. 3.1.1 BIOS Menu Bar The top of the Main OC Tweaker Advanced H/W Monitor Boot screen has a menu bar with its test routines.
Quick Installation Guide
Page 21
... please press during the Power-On-Self-Test (POST) to enter BIOS Setup after POST, please restart the system by pressing + + , or pressing the reset button on the file "ASSETUP.EXE" from [Auto] to display the menus. 21 ASRock N68-VGS3 UCC / N68-VS3 UCC Motherboard English If the Main Menu does ... enhance motherboard features. 2.11 Untied Overclocking Technology This motherboard supports Untied Overclocking Technology, which allows you to scroll through its test routines. It is enabled in the Support CD. 4. To begin using the Support CD, insert the CD into your computer.
... please press during the Power-On-Self-Test (POST) to enter BIOS Setup after POST, please restart the system by pressing + + , or pressing the reset button on the file "ASSETUP.EXE" from [Auto] to display the menus. 21 ASRock N68-VGS3 UCC / N68-VS3 UCC Motherboard English If the Main Menu does ... enhance motherboard features. 2.11 Untied Overclocking Technology This motherboard supports Untied Overclocking Technology, which allows you to scroll through its test routines. It is enabled in the Support CD. 4. To begin using the Support CD, insert the CD into your computer.