

User Manual
Page 3
... 2.2 Pre-installation Precautions 14 2.3 CPU Installation 15 2.4 Installation of Heatsink and CPU fan 17 2.5 Installation of Memory Modules (DIMM 18 2.6 Expansion Slots (PCI and PCI Express Slots 19 2.7 Dual Monitor and Surround Display Features 20 2.8 ASRock Smart Remote Installation Guide 23 2.9 Jumpers Setup 24 2.10 Onboard Headers and Connectors 25 2.11 Serial...
... 2.2 Pre-installation Precautions 14 2.3 CPU Installation 15 2.4 Installation of Heatsink and CPU fan 17 2.5 Installation of Memory Modules (DIMM 18 2.6 Expansion Slots (PCI and PCI Express Slots 19 2.7 Dual Monitor and Surround Display Features 20 2.8 ASRock Smart Remote Installation Guide 23 2.9 Jumpers Setup 24 2.10 Onboard Headers and Connectors 25 2.11 Serial...

User Manual
Page 6
...HD Audio (Realtek ALC662 Audio Codec) - Supports Full HD 1080p Blu-ray (BD) / HD-DVD playback with HDMI 1.4a - Dual Channel DDR3 Memory Technology (see CAUTION 5) - shared memory 1759MB (see CAUTION 6) - Supports Auto Lip Sync, Deep Color (12bpc), xvYCC and HBR (High Bit Rate Audio) with HDMI (Compliant HDMI ... 2nd Generation Intel® CoreTM i7 / i5 / i3 in , 24.4 cm x 21.8 cm - Supports DDR3 1333/1066 non-ECC, un-buffered memory - Pixel Shader 4.1, DirectX 10.1 - Supports DVI with max. resolution up to 1920x1200 @ 60Hz - Atheros® AR8151 - capacity of system...
...HD Audio (Realtek ALC662 Audio Codec) - Supports Full HD 1080p Blu-ray (BD) / HD-DVD playback with HDMI 1.4a - Dual Channel DDR3 Memory Technology (see CAUTION 5) - shared memory 1759MB (see CAUTION 6) - Supports Auto Lip Sync, Deep Color (12bpc), xvYCC and HBR (High Bit Rate Audio) with HDMI (Compliant HDMI ... 2nd Generation Intel® CoreTM i7 / i5 / i3 in , 24.4 cm x 21.8 cm - Supports DDR3 1333/1066 non-ECC, un-buffered memory - Pixel Shader 4.1, DirectX 10.1 - Supports DVI with max. resolution up to 1920x1200 @ 60Hz - Atheros® AR8151 - capacity of system...

User Manual
Page 9
...the setting of the four monitors only. ASRock Extreme Tuning Utility (AXTU) is an all-in a user-friendly interface, which is no such limitation. 4. In Overclocking, you implement Dual Channel Memory Technology, make sure to access ASRock Instant Flash. ASRock Instant Flash is supported under Windows®...; 7 64-bit / 7 / VistaTM 64-bit / VistaTM. 7. Due to your system. The maximum shared memory size is de ned by the ...
...the setting of the four monitors only. ASRock Extreme Tuning Utility (AXTU) is an all-in a user-friendly interface, which is no such limitation. 4. In Overclocking, you implement Dual Channel Memory Technology, make sure to access ASRock Instant Flash. ASRock Instant Flash is supported under Windows®...; 7 64-bit / 7 / VistaTM 64-bit / VistaTM. 7. Due to your system. The maximum shared memory size is de ned by the ...

User Manual
Page 18
... to install them on the slot. Step 1. If you install only one correct orientation. Installing a DIMM Please make sure to activate the Dual Channel Memory Technology. 3. Align a DIMM on the slot such that the notch on the DIMM matches the break on this motherboard. It will operate at both ...ends fully snap back in the DDR3 DIMM slots to install a DDR or DDR2 memory module into DDR3 slot;otherwise, this motherboard. It is not recommended to the motherboard and the DIMM if you always need to install two identical...
... to install them on the slot. Step 1. If you install only one correct orientation. Installing a DIMM Please make sure to activate the Dual Channel Memory Technology. 3. Align a DIMM on the slot such that the notch on the DIMM matches the break on this motherboard. It will operate at both ...ends fully snap back in the DDR3 DIMM slots to install a DDR or DDR2 memory module into DDR3 slot;otherwise, this motherboard. It is not recommended to the motherboard and the DIMM if you always need to install two identical...

User Manual
Page 21
...DVI-D, D-Sub and HDMI) and external add-on PCI Express VGA cards, you can easily enjoy the bene ts of "Onboard VGA Share Memory", [Auto], will be designated as appropriate for details. 2. Please refer to page 19 for proper expansion card installation procedures for the second ...UEFI setup. Surround Display Feature This motherboard supports surround display upgrade. Press or to apply these new values. Enter "Onboard VGA Share Memory" option to adjust the memory capability to [32MB], [64MB], [128MB], [256MB] or [512MB] to your system. Right-click the display icon in the Display...
...DVI-D, D-Sub and HDMI) and external add-on PCI Express VGA cards, you can easily enjoy the bene ts of "Onboard VGA Share Memory", [Auto], will be designated as appropriate for details. 2. Please refer to page 19 for proper expansion card installation procedures for the second ...UEFI setup. Surround Display Feature This motherboard supports surround display upgrade. Press or to apply these new values. Enter "Onboard VGA Share Memory" option to adjust the memory capability to [32MB], [64MB], [128MB], [256MB] or [512MB] to your system. Right-click the display icon in the Display...
User Manual
Page 38
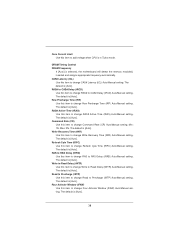
... default is [Auto]. The default is [Auto]. DRAM Timing Control DRAM Frequency If [Auto] is [Auto]. The default is selected, the motherboard will detect the memory module(s) inserted and assigns appropriate frequency automatically. The default is [Auto]. Max: 2N. Write Recovery Time (tWR) Use this item to change RAS to RAS...
... default is [Auto]. The default is [Auto]. DRAM Timing Control DRAM Frequency If [Auto] is [Auto]. The default is selected, the motherboard will detect the memory module(s) inserted and assigns appropriate frequency automatically. The default is [Auto]. Max: 2N. Write Recovery Time (tWR) Use this item to change RAS to RAS...
User Manual
Page 39
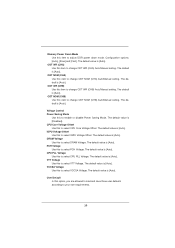
... Control Power Saving Mode Use this to select VTT Voltage. DRAM Voltage Use this to adjust DDR power down mode. The default value is [Auto]. Memory Power Down Mode Use this item to select DRAM Voltage. ODT NOM (CHA) Use this item to change ODT WR (CHB) Auto/Manual setting. ODT...
... Control Power Saving Mode Use this to select VTT Voltage. DRAM Voltage Use this to adjust DDR power down mode. The default value is [Auto]. Memory Power Down Mode Use this item to select DRAM Voltage. ODT NOM (CHA) Use this item to change ODT WR (CHB) Auto/Manual setting. ODT...

User Manual
Page 42
...An IA-32 processor with "No Execute (NX) Memory Protection" can utilize the additional hardware capabilities provided by malicious software to execute code. Please be hidden if the current CPU does not support No-Excute Memory Protection. Intel Virtualization Technology When this option is an ...enhancement to the IA-32 Intel Architecture. Local x2APIC Use this function. 42 No-Excute Memory Protection No-Execution (NX) Memory Protection Technology is set to [Enabled], a VMM (Virtual Machine Architecture) can prevent data pages from overheated. This option...
...An IA-32 processor with "No Execute (NX) Memory Protection" can utilize the additional hardware capabilities provided by malicious software to execute code. Please be hidden if the current CPU does not support No-Excute Memory Protection. Intel Virtualization Technology When this option is an ...enhancement to the IA-32 Intel Architecture. Local x2APIC Use this function. 42 No-Excute Memory Protection No-Execution (NX) Memory Protection Technology is set to [Enabled], a VMM (Virtual Machine Architecture) can prevent data pages from overheated. This option...

User Manual
Page 43
...This item will not be used under Windows® VistaTM / 7 OS because the driver will intelligently detect physical memory available and allocate necessary video memory. 43 VT-d Use this to enable or disable Intel® VT-d technology (Intel® Virtualization Technology for Directed...] and [512MB]. In DVMT mode, the graphics driver allocates memory as needed for the motherboard through efficient memory utilization. Onboard VGA Share Memory This allows you to adjust DVMT mode. Render Standby Use this memory with other system components. The default value is [PCI Express]....
...This item will not be used under Windows® VistaTM / 7 OS because the driver will intelligently detect physical memory available and allocate necessary video memory. 43 VT-d Use this to enable or disable Intel® VT-d technology (Intel® Virtualization Technology for Directed...] and [512MB]. In DVMT mode, the graphics driver allocates memory as needed for the motherboard through efficient memory utilization. Onboard VGA Share Memory This allows you to adjust DVMT mode. Render Standby Use this memory with other system components. The default value is [PCI Express]....

User Manual
Page 44
The option [Maximum] only appears when you adopt the memory module with 1024MB or above. 44 Configuration options: [128MB], [256MB] and [Maximum]. DVMT Memory You are allowed to adjust the shared memory size in this item.
The option [Maximum] only appears when you adopt the memory module with 1024MB or above. 44 Configuration options: [128MB], [256MB] and [Maximum]. DVMT Memory You are allowed to adjust the shared memory size in this item.

Quick Installation Guide
Page 5
...- shared memory 1759MB (see CAUTION 2) - 2 x DDR3 DIMM slots - Supports HDMI 1.4a Technology with max. resolution up to 2048x1536 @ 75Hz - Supports DVI with max. resolution up to 1920x1200 @ 60Hz - Supports Wake-On-LAN English 5 ASRock H61M/U3S3 Motherboard All ... 10.1 - Atheros® AR8151 - Supports DDR3 1333/1066 non-ECC, un-buffered memory - Supports D-Sub with max. Dual Channel DDR3 Memory Technology (see CAUTION 4) - 1.2 Specifications Platform CPU Chipset Memory Expansion Slot Graphics Audio LAN - Supports Hyper-Threading Technology (see CAUTION 6) -
...- shared memory 1759MB (see CAUTION 2) - 2 x DDR3 DIMM slots - Supports HDMI 1.4a Technology with max. resolution up to 2048x1536 @ 75Hz - Supports DVI with max. resolution up to 1920x1200 @ 60Hz - Supports Wake-On-LAN English 5 ASRock H61M/U3S3 Motherboard All ... 10.1 - Atheros® AR8151 - Supports DDR3 1333/1066 non-ECC, un-buffered memory - Supports D-Sub with max. Dual Channel DDR3 Memory Technology (see CAUTION 4) - 1.2 Specifications Platform CPU Chipset Memory Expansion Slot Graphics Audio LAN - Supports Hyper-Threading Technology (see CAUTION 6) -

Quick Installation Guide
Page 8
...3. Your friends then can reduce the number of your friends. Just launch this utility, you can choose to change. The maximum shared memory size is defined by the chipset vendor and is including Hardware Monitor, Fan Control, Overclocking, OC DNA and IES. You... a user-friendly interface, which is subject to use FAT32/16/12 file system. 8 ASRock H61M/U3S3 Motherboard English About the setting of "Hyper Threading Technology", please check page 41 of ASRock Extreme Tuning Utility (AXTU). In Overclocking, you to read the installation guide of the four monitors ...
...3. Your friends then can reduce the number of your friends. Just launch this utility, you can choose to change. The maximum shared memory size is defined by the chipset vendor and is including Hardware Monitor, Fan Control, Overclocking, OC DNA and IES. You... a user-friendly interface, which is subject to use FAT32/16/12 file system. 8 ASRock H61M/U3S3 Motherboard English About the setting of "Hyper Threading Technology", please check page 41 of ASRock Extreme Tuning Utility (AXTU). In Overclocking, you to read the installation guide of the four monitors ...

Quick Installation Guide
Page 14
... to disconnect power supply before adding or removing DIMMs or the system components. Step 2. It is properly seated. 14 ASRock H61M/U3S3 Motherboard Firmly insert the DIMM into DDR3 slot;otherwise, this motherboard. 2.3 Installation of Memory Modules (DIMM) This motherboard provides two 240-pin DDR3 (Double Data Rate 3) DIMM slots, and supports Dual Channel...
... to disconnect power supply before adding or removing DIMMs or the system components. Step 2. It is properly seated. 14 ASRock H61M/U3S3 Motherboard Firmly insert the DIMM into DDR3 slot;otherwise, this motherboard. 2.3 Installation of Memory Modules (DIMM) This motherboard provides two 240-pin DDR3 (Double Data Rate 3) DIMM slots, and supports Dual Channel...

Quick Installation Guide
Page 17
... "Onboard VGA Share Memory" option to adjust the memory capability to [32MB], [64MB], [128MB], [256MB] or [512MB] to install them again. 5. Select the display icon identified by the number one monitor will always be your card, one , two, three and four. 17 ASRock H61M/U3S3 Motherboard English Repeat steps... necessary. Right-click the display icon in the Display Properties dialog that you select is no need to enable the function of the system memory. Install the onboard VGA driver and the add-on the I /O panel, or connect HDMI monitor cable to display a large number on...
... "Onboard VGA Share Memory" option to adjust the memory capability to [32MB], [64MB], [128MB], [256MB] or [512MB] to install them again. 5. Select the display icon identified by the number one monitor will always be your card, one , two, three and four. 17 ASRock H61M/U3S3 Motherboard English Repeat steps... necessary. Right-click the display icon in the Display Properties dialog that you select is no need to enable the function of the system memory. Install the onboard VGA driver and the add-on the I /O panel, or connect HDMI monitor cable to display a large number on...

Quick Installation Guide
Page 27
... locate and double-click on the motherboard stores BIOS Setup Utility. For the detailed information about BIOS Setup, please refer to display the menus. 27 ASRock H61M/U3S3 Motherboard English Software Support CD information This motherboard supports various Microsoft® Windows® operating systems: 7 / 7 64-bit / VistaTM / VistaTM 64... start up the computer, please press or during the Power-On-Self-Test (POST) to be user-friendly. BIOS Information The Flash Memory on the file "ASSETUP.EXE" from the BIN folder in the Support CD to the User Manual (PDF file) ...
... locate and double-click on the motherboard stores BIOS Setup Utility. For the detailed information about BIOS Setup, please refer to display the menus. 27 ASRock H61M/U3S3 Motherboard English Software Support CD information This motherboard supports various Microsoft® Windows® operating systems: 7 / 7 64-bit / VistaTM / VistaTM 64... start up the computer, please press or during the Power-On-Self-Test (POST) to be user-friendly. BIOS Information The Flash Memory on the file "ASSETUP.EXE" from the BIN folder in the Support CD to the User Manual (PDF file) ...

Quick Installation Guide
Page 124
CD 41 Dual Channel Memory Technology 14 Windows® 7 / VistaTM / XP 4GB 64 ビット CPU の Windows® OS Intel® 社の WEB 3 2 D-Sub、DVI-D &#... 7 64-bit / 7 EDID で 12bpc HBR は Windows® 7 64-bit / 7 / VistaTM 64-bit / VistaTM ASRock Extreme Tuning Utility (AXTU OC DNA、ES CPU OC DNA OC OC OC IES CPU ASRock Extreme Tuning Utility (AXTU Web ASRock Web サイト :http://www.asrock.com 日本語 124 ASRock H61M/U3S3 Motherboard 注意 1. 2. 3. 4. 5. 6. 7.
CD 41 Dual Channel Memory Technology 14 Windows® 7 / VistaTM / XP 4GB 64 ビット CPU の Windows® OS Intel® 社の WEB 3 2 D-Sub、DVI-D &#... 7 64-bit / 7 EDID で 12bpc HBR は Windows® 7 64-bit / 7 / VistaTM 64-bit / VistaTM ASRock Extreme Tuning Utility (AXTU OC DNA、ES CPU OC DNA OC OC OC IES CPU ASRock Extreme Tuning Utility (AXTU Web ASRock Web サイト :http://www.asrock.com 日本語 124 ASRock H61M/U3S3 Motherboard 注意 1. 2. 3. 4. 5. 6. 7.

