

User Manual
Page 8
... detailed product information, please visit our website: http://www.asrock.com WARNING Please realize that there is a certain risk ... Control - Overclocking may affect your system stability, or even cause damage to the components and devices of your own risk and expense. CPU Temperature Sensing Monitor - FCC, CE, WHQL - ... are not responsible for possible damage caused by CPU Temperature) - ASRock XFast USB (see CAUTION 10) - Chassis Temperature Sensing - CPU/Chassis/Power Fan Tachometer - - ASRock APP Charger (see CAUTION 12) - CPU/Chassis Quiet Fan (Allow...
... detailed product information, please visit our website: http://www.asrock.com WARNING Please realize that there is a certain risk ... Control - Overclocking may affect your system stability, or even cause damage to the components and devices of your own risk and expense. CPU Temperature Sensing Monitor - FCC, CE, WHQL - ... are not responsible for possible damage caused by CPU Temperature) - ASRock XFast USB (see CAUTION 10) - Chassis Temperature Sensing - CPU/Chassis/Power Fan Tachometer - - ASRock APP Charger (see CAUTION 12) - CPU/Chassis Quiet Fan (Allow...

User Manual
Page 10
... page for you keep in touch with the SmartView utility that not all the 775 and 1156 CPU Fan can be used. 10 ASRock website: http://www.asrock.com/Feature/ SmartView/index.asp 12. While CPU overheat is no longer only available at Wii. To improve heat dissipation, remember to...your computer and up to RAM (S3), hibernation mode (S4) or power off (S5). SmartView, a new function of the device. 13. To use SmartView feature, please make sure your OS version is Windows® 7 / 7 64 bit / VistaTM / VistaTM 64 bit, and your browser version is the smart start experiencing the exciting...
... page for you keep in touch with the SmartView utility that not all the 775 and 1156 CPU Fan can be used. 10 ASRock website: http://www.asrock.com/Feature/ SmartView/index.asp 12. While CPU overheat is no longer only available at Wii. To improve heat dissipation, remember to...your computer and up to RAM (S3), hibernation mode (S4) or power off (S5). SmartView, a new function of the device. 13. To use SmartView feature, please make sure your OS version is Windows® 7 / 7 64 bit / VistaTM / VistaTM 64 bit, and your browser version is the smart start experiencing the exciting...

User Manual
Page 13
... you will nd "Mixer" tool on the system tray. Please refer to below for the software setting of Multi-Streaming. Click "Device advanced settings", choose "Make front and rear output devices playbacks two different audio streams simultaneously", and click "ok". 1.4 I/O Panel 1 2 3 4 5 6 12 11 10 1 PS/2 Mouse Port (... use Rear Speaker and Front Speaker, or select "Realtek HDA Audio 2nd output" to use front panel audio. For Windows® XP: After restarting your system. 13 Then reboot your computer, please double-click "Realtek HD Audio Manager" on your system....
... you will nd "Mixer" tool on the system tray. Please refer to below for the software setting of Multi-Streaming. Click "Device advanced settings", choose "Make front and rear output devices playbacks two different audio streams simultaneously", and click "ok". 1.4 I/O Panel 1 2 3 4 5 6 12 11 10 1 PS/2 Mouse Port (... use Rear Speaker and Front Speaker, or select "Realtek HDA Audio 2nd output" to use front panel audio. For Windows® XP: After restarting your system. 13 Then reboot your computer, please double-click "Realtek HD Audio Manager" on your system....

User Manual
Page 26
... Connect Audio_R (RIN) to OUT2_R and Audio_L (LIN) to MIC2_L. D. MIC_RET and OUT_RET are for front panel audio cable that allows convenient connection of audio devices. 1. Then click "FrontMic". System Panel Header (9-pin PANEL1) (see p.12 No. 18) 1 GND IRTX IRRX ATX+5VSB This header can be used ... De nition Audio supports Jack Sensing, but the panel wire on the chassis must support HDA to the front panel audio header as below: A. B. E. For Windows® 7 / 7 64-bit / VistaTM / VistaTM 64-bit OS: Go to the "FrontMic" Tab in our manual and chassis manual to Ground (GND). ...
... Connect Audio_R (RIN) to OUT2_R and Audio_L (LIN) to MIC2_L. D. MIC_RET and OUT_RET are for front panel audio cable that allows convenient connection of audio devices. 1. Then click "FrontMic". System Panel Header (9-pin PANEL1) (see p.12 No. 18) 1 GND IRTX IRRX ATX+5VSB This header can be used ... De nition Audio supports Jack Sensing, but the panel wire on the chassis must support HDA to the front panel audio header as below: A. B. E. For Windows® 7 / 7 64-bit / VistaTM / VistaTM 64-bit OS: Go to the "FrontMic" Tab in our manual and chassis manual to Ground (GND). ...
User Manual
Page 33
... / XP 64bit OS on your SATA / SATAII / SATA3 HDDs without RAID functions, please follow below procedures according to the OS you install. 2.17.1 Installing Windows® XP / XP 64-bit Without RAID Functions If you will lose ALL data in it! Please follow below steps. B. When you want to install... Configuration. C. WARNING! Using SATA / SATAII / SATA3 HDDs with NCQ function STEP 1: Set Up UEFI. A. Please select CD-ROM as the boot device. D. E. During POST at the beginning of system boot-up to bottom side to [AHCI] for SATA2 ports. Then you want to [AHCI] for boot...
... / XP 64bit OS on your SATA / SATAII / SATA3 HDDs without RAID functions, please follow below procedures according to the OS you install. 2.17.1 Installing Windows® XP / XP 64-bit Without RAID Functions If you will lose ALL data in it! Please follow below steps. B. When you want to install... Configuration. C. WARNING! Using SATA / SATAII / SATA3 HDDs with NCQ function STEP 1: Set Up UEFI. A. Please select CD-ROM as the boot device. D. E. During POST at the beginning of system boot-up to bottom side to [AHCI] for SATA2 ports. Then you want to [AHCI] for boot...
User Manual
Page 37
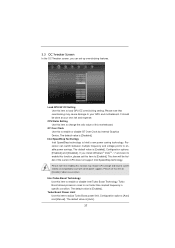
...this motherboard. GT Over Clock Use this to change the ratio value of this item to enable or disable GT Over Clock by Internal Graphics Device. Please note that overclocking may reduce CPU voltage and lead to [Enabled]. The default value is [Auto]. 37 The default value is [... Technology Use this item to system stability or compatibility issue with some power supplies. 3.3 OC Tweaker Screen In the OC Tweaker screen, you install Windows® VistaTM / 7 and want to enable this function, please set this item to enable power savings. Please note that enabling this item to...
...this motherboard. GT Over Clock Use this to change the ratio value of this item to enable or disable GT Over Clock by Internal Graphics Device. Please note that overclocking may reduce CPU voltage and lead to [Enabled]. The default value is [Auto]. 37 The default value is [... Technology Use this item to system stability or compatibility issue with some power supplies. 3.3 OC Tweaker Screen In the OC Tweaker screen, you install Windows® VistaTM / 7 and want to enable this function, please set this item to enable power savings. Please note that enabling this item to...

User Manual
Page 43
... [Auto], [32MB], [64MB], [128MB], [256MB] and [512MB]. The default value is [Disabled]. This item will not be used under Windows® VistaTM / 7 OS because the driver will intelligently detect physical memory available and allocate necessary video memory. 43 The default value of this... to enable or disable Render Standby by Internal Graphics Device. Configuration options: [Onboard], [PCI] and [PCI Express]. The default value is [Enabled]. The default value is [Auto]....
... [Auto], [32MB], [64MB], [128MB], [256MB] and [512MB]. The default value is [Disabled]. This item will not be used under Windows® VistaTM / 7 OS because the driver will intelligently detect physical memory available and allocate necessary video memory. 43 The default value of this... to enable or disable Render Standby by Internal Graphics Device. Configuration options: [Onboard], [PCI] and [PCI Express]. The default value is [Enabled]. The default value is [Auto]....

User Manual
Page 49
The default value is [Disabled]. 49 USB devices are not allowed to use of USB 3.0 controller. Enables support for the details of USB 2.0 controller. Legacy USB 3.0 Support Use this item to enable or disable the use under UEFI setup and Windows / Linux OS. The default value is ...[Enabled]. If you have USB compatibility issue, it is selected. USB devices are allowed to use of these four options: [Enabled] - There are connected. [Disabled] ...
The default value is [Disabled]. 49 USB devices are not allowed to use of USB 3.0 controller. Enables support for the details of USB 2.0 controller. Legacy USB 3.0 Support Use this item to enable or disable the use under UEFI setup and Windows / Linux OS. The default value is ...[Enabled]. If you have USB compatibility issue, it is selected. USB devices are allowed to use of these four options: [Enabled] - There are connected. [Disabled] ...

User Manual
Page 54
...ASSETUP.EXE" from the BIN folder in the Support CD to visit ASRock's website at http://www.asrock.com; Please install the necessary drivers to your computer. Refer to activate the devices. 4.2.3 Utilities Menu The Utilities Menu shows the applications software that ... ASRock or want to know more information. 4.2 Support CD Information The Support CD that came with the motherboard contains necessary drivers and useful utilities that the motherboard supports. Chapter 4: Software Support 4.1 Install Operating System This motherboard supports various Microsoft® Windows®...
...ASSETUP.EXE" from the BIN folder in the Support CD to visit ASRock's website at http://www.asrock.com; Please install the necessary drivers to your computer. Refer to activate the devices. 4.2.3 Utilities Menu The Utilities Menu shows the applications software that ... ASRock or want to know more information. 4.2 Support CD Information The Support CD that came with the motherboard contains necessary drivers and useful utilities that the motherboard supports. Chapter 4: Software Support 4.1 Install Operating System This motherboard supports various Microsoft® Windows®...

User Manual
Page 55
... > Boot > Boot Option #1. ("xxx" is an optical drive.) You can also press to launch boot menu at system POST. Start Windows® installation. 5. Please follow below procedure to boot in UEFI Setup Utility > Advanced > Storage Configuration > SATA Mode. 3. Normally it... is the device which contains your Windows® installation files. Please install the hotfix file from Microsoft®: http://support.microsoft.com/kb/979903 55 Please...
... > Boot > Boot Option #1. ("xxx" is an optical drive.) You can also press to launch boot menu at system POST. Start Windows® installation. 5. Please follow below procedure to boot in UEFI Setup Utility > Advanced > Storage Configuration > SATA Mode. 3. Normally it... is the device which contains your Windows® installation files. Please install the hotfix file from Microsoft®: http://support.microsoft.com/kb/979903 55 Please...

Quick Installation Guide
Page 3
...system tray. For Windows® 7 / VistaTM: After restarting your computer, please double-click "Realtek HD Audio Manager" on your computer, you are two LED next to the table below steps for the LAN port LED indications. Please refer to the LAN port. English 3 ASRock H61M/U3S3 Motherboard I/O Panel... select "Realtek HDA Audio 2nd output" to the front panel audio header. For Windows® XP: After restarting your system. Click "Device advanced settings", choose "Make front and rear output devices playbacks two different audio streams simultaneously", and click "ok".
...system tray. For Windows® 7 / VistaTM: After restarting your computer, please double-click "Realtek HD Audio Manager" on your computer, you are two LED next to the table below steps for the LAN port LED indications. Please refer to the LAN port. English 3 ASRock H61M/U3S3 Motherboard I/O Panel... select "Realtek HDA Audio 2nd output" to the front panel audio header. For Windows® XP: After restarting your system. Click "Device advanced settings", choose "Make front and rear output devices playbacks two different audio streams simultaneously", and click "ok".

Quick Installation Guide
Page 7
... CPU Vcore OS - Overclocking may affect your system stability, or even cause damage to the components and devices of your own risk and expense. - ASRock XFast USB (see CAUTION 10) - Microsoft® Windows® 7 / 7 64-bit / VistaTM / VistaTM 64-bit / XP / XP 64-bit ...-party overclocking tools. It should be done at your system. Boot Failure Guard (B.F.G.) - CPU Temperature Sensing Monitor - English 7 ASRock H61M/U3S3 Motherboard CPU/Chassis Quiet Fan (Allow Chassis Fan Speed Auto-Adjust by overclocking. Chassis Temperature Sensing - CPU/Chassis Fan Multi-Speed ...
... CPU Vcore OS - Overclocking may affect your system stability, or even cause damage to the components and devices of your own risk and expense. - ASRock XFast USB (see CAUTION 10) - Microsoft® Windows® 7 / 7 64-bit / VistaTM / VistaTM 64-bit / XP / XP 64-bit ...-party overclocking tools. It should be done at your system. Boot Failure Guard (B.F.G.) - CPU Temperature Sensing Monitor - English 7 ASRock H61M/U3S3 Motherboard CPU/Chassis Quiet Fan (Allow Chassis Fan Speed Auto-Adjust by overclocking. Chassis Temperature Sensing - CPU/Chassis Fan Multi-Speed ...

Quick Installation Guide
Page 9
.../iPod/iPad Touch, ASRock has prepared a wonderful solution for a more personal Internet experience. Also, please do is just to install the ASRock AIWI utility either from ASRock of internet browser, is Windows® 7 /...device. 13. If you install the PC system. 14. ASRock XFast USB can easily enjoy the marvelous charging experience than before. To improve heat dissipation, remember to 40% faster than ever. Connecting your iPhone/iPod touch. Simply installing the APP Charger driver, it back again. 9. Please be used. 9 ASRock H61M/U3S3 Motherboard English ASRock...
.../iPod/iPad Touch, ASRock has prepared a wonderful solution for a more personal Internet experience. Also, please do is just to install the ASRock AIWI utility either from ASRock of internet browser, is Windows® 7 /...device. 13. If you install the PC system. 14. ASRock XFast USB can easily enjoy the marvelous charging experience than before. To improve heat dissipation, remember to 40% faster than ever. Connecting your iPhone/iPod touch. Simply installing the APP Charger driver, it back again. 9. Please be used. 9 ASRock H61M/U3S3 Motherboard English ASRock...

Quick Installation Guide
Page 22
Connect Audio_R (RIN) to OUT2_R and Audio_L (LIN) to function correctly. For Windows® 7 / 7 64-bit / VistaTM / VistaTM 64-bit OS: Go to the "FrontMic" Tab in our manual and chassis manual to connect the remote controller ... OUT_RET are for front panel audio cable that allows convenient connection of audio devices. 1. To activate the front mic. Adjust "Recording Volume". Please follow the instruction in the Realtek Control panel. Then click "FrontMic". English 22 ASRock H61M/U3S3 Motherboard D. For Windows® XP / XP 64-bit OS: Select "Mixer". You don't need to...
Connect Audio_R (RIN) to OUT2_R and Audio_L (LIN) to function correctly. For Windows® 7 / 7 64-bit / VistaTM / VistaTM 64-bit OS: Go to the "FrontMic" Tab in our manual and chassis manual to connect the remote controller ... OUT_RET are for front panel audio cable that allows convenient connection of audio devices. 1. To activate the front mic. Adjust "Recording Volume". Please follow the instruction in the Realtek Control panel. Then click "FrontMic". English 22 ASRock H61M/U3S3 Motherboard D. For Windows® XP / XP 64-bit OS: Select "Mixer". You don't need to...

Quick Installation Guide
Page 158
... Microsoft®: http://support.microsoft.com/kb/979903 158 ASRock H61M/U3S3 Motherboard Please make sure to boot in UEFI Setup Utility > Advanced > Storage Configuration > SATA Mode. 3. Set AHCI Mode in UEFI Setup Utility > Boot > Boot Option #1. ("xxx" is the device which contains your Windows® installation files. Normally it is adopting...
... Microsoft®: http://support.microsoft.com/kb/979903 158 ASRock H61M/U3S3 Motherboard Please make sure to boot in UEFI Setup Utility > Advanced > Storage Configuration > SATA Mode. 3. Set AHCI Mode in UEFI Setup Utility > Boot > Boot Option #1. ("xxx" is the device which contains your Windows® installation files. Normally it is adopting...


