
RAID Installation Guide
Page 6
... physical drives - Monitoring RAID status - The RAID Option ROM includes a Utility with the disk drives installed, the AMD onboard RAID Option ROM Utility will display the following screen. Displaying the IRQ and base address (for system diagnosis) Press keys, then the RAID Option ROM Utility Main Menu appears. 6 Creating RAID logical drives...
... physical drives - Monitoring RAID status - The RAID Option ROM includes a Utility with the disk drives installed, the AMD onboard RAID Option ROM Utility will display the following screen. Displaying the IRQ and base address (for system diagnosis) Press keys, then the RAID Option ROM Utility Main Menu appears. 6 Creating RAID logical drives...

RAID Installation Guide
Page 7
... Menu screen to cycle through logical drive types, including RAID 0, RAID 1, RAID 5 and RAID 10. In the Define LD Menu section, press the spacebar to display the Define LD Menu. Press the spacebar to toggle between N and Y for one logical drive or allocating a portion to your logical drive. Then press to...
... Menu screen to cycle through logical drive types, including RAID 0, RAID 1, RAID 5 and RAID 10. In the Define LD Menu section, press the spacebar to display the Define LD Menu. Press the spacebar to toggle between N and Y for one logical drive or allocating a portion to your logical drive. Then press to...

RAID Installation Guide
Page 9
... the operating system to the first logical drive. Choose the RAID level and options for the first logical drive and press . The Define LD Menu displays again. 2. Press to save your computer by following the detailed instruction of their capacity belongs to your logical drive configuration. 5. You have successfully created a new...
... the operating system to the first logical drive. Choose the RAID level and options for the first logical drive and press . The Define LD Menu displays again. 2. Press to save your computer by following the detailed instruction of their capacity belongs to your logical drive configuration. 5. You have successfully created a new...

RAID Installation Guide
Page 14
....0.0.1 or localhost • Enter the Port number 8443 • Add to a log-in over a network, enter the Host PC's actual IP address or hostname. RAIDXpert displays the RAID levels you log in at the Host PC. The RAIDXpert login and password are case sensitive. Then, when the login screen appears, type...
....0.0.1 or localhost • Enter the Port number 8443 • Add to a log-in over a network, enter the Host PC's actual IP address or hostname. RAIDXpert displays the RAID levels you log in at the Host PC. The RAIDXpert login and password are case sensitive. Then, when the login screen appears, type...

RAID Installation Guide
Page 17
...A "no connection to the Internet is also possible to connect to run over your network from the Internet. After a few moments, RAIDXpert will display. 4. Click the Work Offline button. 3. Click the Connect button. Once you are logged onto the network, you can monitor the Host PC ... other PCs using its IP address. It is currently available" message. 2. Follow this procedure: 1. A "webpage unavailable while offline" message will display normally in your user name and password (if used), then click the Sign in the Linux Applications menu.Your browser opens and...
...A "no connection to the Internet is also possible to connect to run over your network from the Internet. After a few moments, RAIDXpert will display. 4. Click the Work Offline button. 3. Click the Connect button. Once you are logged onto the network, you can monitor the Host PC ... other PCs using its IP address. It is currently available" message. 2. Follow this procedure: 1. A "webpage unavailable while offline" message will display normally in your user name and password (if used), then click the Sign in the Linux Applications menu.Your browser opens and...
User Manual
Page 3
... Heatsink 18 2.3 Installation of Memory Modules (DIMM 19 2.4 Expansion Slots (PCI and PCI Express Slots 21 2.5 CrossFireXTM and Quad CrossFireXTM Operation Guide 22 2.6 Surround Display Information 25 2.7 ASRock Smart Remote Installation Guide 26 2.8 Jumpers Setup 28 2.9 Onboard Headers and Connectors 29 2.10 Serial ATA3 (SATA3) Hard Disks Installation 34 2.11 Hot Plug...
... Heatsink 18 2.3 Installation of Memory Modules (DIMM 19 2.4 Expansion Slots (PCI and PCI Express Slots 21 2.5 CrossFireXTM and Quad CrossFireXTM Operation Guide 22 2.6 Surround Display Information 25 2.7 ASRock Smart Remote Installation Guide 26 2.8 Jumpers Setup 28 2.9 Onboard Headers and Connectors 29 2.10 Serial ATA3 (SATA3) Hard Disks Installation 34 2.11 Hot Plug...
User Manual
Page 25
...After restarting your computer, please confirm whether the option "Enable CrossFireTM" in the Support CD: ..\ Surround Display Information 25 You can easily enjoy the benefits of Surround Display feature. if not, please select it again, and then you are able to infringe. * For further... document at the following path in "ATI Catalyst Control Center" is used only for updates and details. 2.6 Surround Display Feature This motherboard supports Surround Display upgrade. Although you can freely enjoy the benefit of CrossFireXTM or Quad CrossFireXTM feature. * CrossFireXTM appearing here is ...
...After restarting your computer, please confirm whether the option "Enable CrossFireTM" in the Support CD: ..\ Surround Display Information 25 You can easily enjoy the benefits of Surround Display feature. if not, please select it again, and then you are able to infringe. * For further... document at the following path in "ATI Catalyst Control Center" is used only for updates and details. 2.6 Surround Display Feature This motherboard supports Surround Display upgrade. Although you can freely enjoy the benefit of CrossFireXTM or Quad CrossFireXTM feature. * CrossFireXTM appearing here is ...
User Manual
Page 41
... To set up the system time/date information OC Tweaker To set up overclocking features Advanced To set up the advanced UEFI features H/W Monitor To display current hardware status Boot To set up the default system device to enter the UEFI SETUP UTILITY after POST, restart the system by pressing + + , or...
... To set up the system time/date information OC Tweaker To set up overclocking features Advanced To set up the advanced UEFI features H/W Monitor To display current hardware status Boot To set up the default system device to enter the UEFI SETUP UTILITY after POST, restart the system by pressing + + , or...

User Manual
Page 42
... select items + / - To change option for the selected items Switch to next function To bring up or down to the bottom of the screen To display the General Help Screen Discard changes and exit the UEFI SETUP UTILITY Load optimal default values for the function description of each navigation key.
... select items + / - To change option for the selected items Switch to next function To bring up or down to the bottom of the screen To display the General Help Screen Discard changes and exit the UEFI SETUP UTILITY Load optimal default values for the function description of each navigation key.

User Manual
Page 43
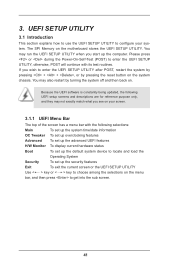
You may schedule the starting and ending hours of internet access granted to establish an internet curfew or restrict internet access at specified times via OMG. In order to prevent users from bypassing OMG, guest accounts without permission to modify the system time are able to other users. OMG (Online Management Guard) Administrators are required. 43 3.2 Main Screen When you easily check your current system configuration in UEFI setup. System Browser System Browser can let you enter the UEFI SETUP UTILITY, the Main screen will appear and display the system overview.
You may schedule the starting and ending hours of internet access granted to establish an internet curfew or restrict internet access at specified times via OMG. In order to prevent users from bypassing OMG, guest accounts without permission to modify the system time are able to other users. OMG (Online Management Guard) Administrators are required. 43 3.2 Main Screen When you easily check your current system configuration in UEFI setup. System Browser System Browser can let you enter the UEFI SETUP UTILITY, the Main screen will appear and display the system overview.

User Manual
Page 45
...Width This feature allows you to adjust the value of CPU NB voltage. Use this feature. Processor Maximum Frequency It will display Processor Maximum Voltage for safety and system stability, it is set to [Manual], you may adjust the value of Processor ...Frequency and Processor Voltage. Processor Maximum Voltage It will display Processor Maximum Frequency for reference. However, it is selected, the motherboard will display North Bridge Maximum Frequency for reference. Configuration options: [Auto] and [Disabled]. North Bridge...
...Width This feature allows you to adjust the value of CPU NB voltage. Use this feature. Processor Maximum Frequency It will display Processor Maximum Voltage for safety and system stability, it is set to [Manual], you may adjust the value of Processor ...Frequency and Processor Voltage. Processor Maximum Voltage It will display Processor Maximum Frequency for reference. However, it is selected, the motherboard will display North Bridge Maximum Frequency for reference. Configuration options: [Auto] and [Disabled]. North Bridge...

User Manual
Page 59
... BIOS Setup (Clear CMOS or run utility in order to boot. Only supports Windows® 8 UEFI operating system. 2. 3.6 Boot Screen In this section, it will display the available devices on your computer's boot time. The only restriction is [Disabled]. There are using an USB flash drive. [Ultra Fast] - Bootup Num-Lock...
... BIOS Setup (Clear CMOS or run utility in order to boot. Only supports Windows® 8 UEFI operating system. 2. 3.6 Boot Screen In this section, it will display the available devices on your computer's boot time. The only restriction is [Disabled]. There are using an USB flash drive. [Ultra Fast] - Bootup Num-Lock...

User Manual
Page 60
The default value is [Enabled]. Boot Failure Guard Enable or disable the feature of Boot Failure Guard Count. 60 Full Screen Logo Use this option to adjust AddOn ROM Display. If you enable the option "Full Screen Logo" but you want to enable or disable OEM Logo. The default value is [Enabled]. AddOn ROM Display Use this item to see the AddOn ROM information when the system boots, please select [Enabled]. Boot Failure Guard Count Enable or disable the feature of Boot Failure Guard. Configuration options: [Enabled] and [Disabled].
The default value is [Enabled]. Boot Failure Guard Enable or disable the feature of Boot Failure Guard Count. 60 Full Screen Logo Use this option to adjust AddOn ROM Display. If you enable the option "Full Screen Logo" but you want to enable or disable OEM Logo. The default value is [Enabled]. AddOn ROM Display Use this item to see the AddOn ROM information when the system boots, please select [Enabled]. Boot Failure Guard Count Enable or disable the feature of Boot Failure Guard. Configuration options: [Enabled] and [Disabled].

User Manual
Page 63
... the motherboard contains necessary drivers and useful utilities that the motherboard supports. Please install the necessary drivers to visit ASRock's website at http://www.asrock.com; The CD automatically displays the Main Menu if "AUTORUN" is enabled in this chapter for further information. 63 Click on the file... motherboard settings and hardware options vary, use the setup procedures in your dealer for general reference only. 4. Refer to display the menus. 4.2.2 Drivers Menu The Drivers Menu shows the available devices drivers if the system detects the installed devices.
... the motherboard contains necessary drivers and useful utilities that the motherboard supports. Please install the necessary drivers to visit ASRock's website at http://www.asrock.com; The CD automatically displays the Main Menu if "AUTORUN" is enabled in this chapter for further information. 63 Click on the file... motherboard settings and hardware options vary, use the setup procedures in your dealer for general reference only. 4. Refer to display the menus. 4.2.2 Drivers Menu The Drivers Menu shows the available devices drivers if the system detects the installed devices.

Quick Installation Guide
Page 31
... system by pressing + + , or pressing the reset button on the motherboard stores BIOS Setup Utility. The Support CD that will display the Main Menu automatically if "AUTORUN" is enabled in the Support CD. 4. When you wish to display the menus. 31 ASRock 970 Pro3 R2.0 Motherboard English 3. BIOS Information The Flash Memory on the system chassis.
... system by pressing + + , or pressing the reset button on the motherboard stores BIOS Setup Utility. The Support CD that will display the Main Menu automatically if "AUTORUN" is enabled in the Support CD. 4. When you wish to display the menus. 31 ASRock 970 Pro3 R2.0 Motherboard English 3. BIOS Information The Flash Memory on the system chassis.


