
User's Manual 2436Vw
Page 14
Noted : VESA mounting screw holes are not available for all models, please check with the holes in the back of the monitor. 4 Insert the 4 screws into the holes and tighten. 5 Reconnect the cables. Wall Mounting Preparing ... : 100 x 100 mm Screw specification for instructions on attaching it to assemble the wall mounting arm. 3 Place the wall mounting arm onto the back of AOC. Follow these steps: 1 Remove the base. 2 Follow the manufacturer's instructions to the wall.
Noted : VESA mounting screw holes are not available for all models, please check with the holes in the back of the monitor. 4 Insert the 4 screws into the holes and tighten. 5 Reconnect the cables. Wall Mounting Preparing ... : 100 x 100 mm Screw specification for instructions on attaching it to assemble the wall mounting arm. 3 Place the wall mounting arm onto the back of AOC. Follow these steps: 1 Remove the base. 2 Follow the manufacturer's instructions to the wall.

User's Manual 2436Vw
Page 19
... Menu button to select up or increase value. Once the desired function is closed , press button will be Source hot key function (Only for the models with dual or more inputs) .Press Source button continuously to select the input source showed in the message bar , press Menu/Enter button to change...
... Menu button to select up or increase value. Once the desired function is closed , press button will be Source hot key function (Only for the models with dual or more inputs) .Press Source button continuously to select the input source showed in the message bar , press Menu/Enter button to change...
User's Manual 2436Vw
Page 37
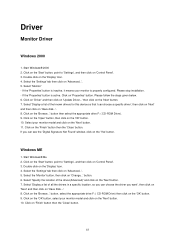
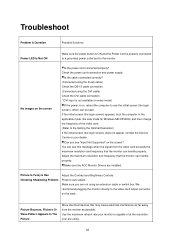
...' tab then click on the 'Next' button. 7. Driver Monitor Driver Windows 2000 1. Please stop installation. - If the 'Properties' button is inactive, it means your monitor model and click on 'Control Panel'. 3. Click on the 'Browse...' Click on the 'Start' button, point to 'Settings', and then click on the 'Next' button. 10... the 'Finish' button then the 'Close' button. Double click on the 'Next' button. 11. If the 'Properties' button is active. Windows ME 1. Select your monitor model and click on the 'Display' Icon. 4.
...' tab then click on the 'Next' button. 7. Driver Monitor Driver Windows 2000 1. Please stop installation. - If the 'Properties' button is inactive, it means your monitor model and click on 'Control Panel'. 3. Click on the 'Browse...' Click on the 'Start' button, point to 'Settings', and then click on the 'Next' button. 10... the 'Finish' button then the 'Close' button. Double click on the 'Next' button. 11. If the 'Properties' button is active. Windows ME 1. Select your monitor model and click on the 'Display' Icon. 4.

User's Manual 2436Vw
Page 40
... Display Properties dialog box. 40 button, then click on the 'Open' button, then click the 'OK' button. 12. Click on the 'Browse...' Select your monitor model and click on the 'Continue Anyway' button. 13. 8. If you can see the 'has not passed Windows® Logo testing to install' radio button. I will...
... Display Properties dialog box. 40 button, then click on the 'Open' button, then click the 'OK' button. 12. Click on the 'Browse...' Select your monitor model and click on the 'Continue Anyway' button. 13. 8. If you can see the 'has not passed Windows® Logo testing to install' radio button. I will...

User's Manual 2436Vw
Page 42
Check the "Browse my computer for your monitor model and click on the 'Next' button. 9. Select your monitor is deactivated, it means the configuration for driver software" checkbox and click "Let me pick from a ...
Check the "Browse my computer for your monitor model and click on the 'Next' button. 9. Select your monitor is deactivated, it means the configuration for driver software" checkbox and click "Let me pick from a ...

User's Manual 2436Vw
Page 46
The system will be copied from the CD to your monitor model and click the "Next" button. Select your hard disk drive. 13. Select the "xxx.inf" file and click the "Open" button. Close all open windows and remove the CD. 14. The files will automatically select the maximum refresh rate and corresponding Color Matching Profiles. 46 Restart the system. 11. Click the "OK" button. 12.
The system will be copied from the CD to your monitor model and click the "Next" button. Select your hard disk drive. 13. Select the "xxx.inf" file and click the "Open" button. Close all open windows and remove the CD. 14. The files will automatically select the maximum refresh rate and corresponding Color Matching Profiles. 46 Restart the system. 11. Click the "OK" button. 12.
User's Manual 2436Vw
Page 48
... monitor directly to see "Input Not Supported" on the screen? No images on , reboot the computer to the video card output connector on every model. Use the maximum refresh rate your are not using . 48 Make sure you see the initial screen (the login screen), which can handle properly.... Make sure the AOC Monitor Drivers are installed. Check the power cord connection and power supply. If the power is properly connected to a grounded power outlet and to...
... monitor directly to see "Input Not Supported" on the screen? No images on , reboot the computer to the video card output connector on every model. Use the maximum refresh rate your are not using . 48 Make sure you see the initial screen (the login screen), which can handle properly.... Make sure the AOC Monitor Drivers are installed. Check the power cord connection and power supply. If the power is properly connected to a grounded power outlet and to...
User's Manual 2436Vw
Page 50
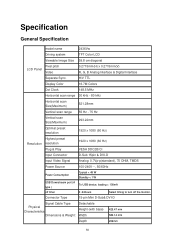
Specification General Specification model name 2436Vw Driving system TFT Color LCD Viewable Image Size 59.8 cm diagonal Pixel pitch LCD Panel Video 0.2715mm(H) x 0.2715mm(V) R, G, B Analog lnterface & Digital Interface Separate Sync. H/V TTL ...
Specification General Specification model name 2436Vw Driving system TFT Color LCD Viewable Image Size 59.8 cm diagonal Pixel pitch LCD Panel Video 0.2715mm(H) x 0.2715mm(V) R, G, B Analog lnterface & Digital Interface Separate Sync. H/V TTL ...
User's Manual 2436Vw
Page 55
Regulation FCC Notice FCC Class B Radio Frequency Interference Statement WARNING: (FOR FCC CERTIFIED MODELS) NOTE: This equipment has been tested and found to comply with the limits for a Class B digital device, pursuant to Part 15 of the following measures: ...
Regulation FCC Notice FCC Class B Radio Frequency Interference Statement WARNING: (FOR FCC CERTIFIED MODELS) NOTE: This equipment has been tested and found to comply with the limits for a Class B digital device, pursuant to Part 15 of the following measures: ...
