User Guide
Page 1
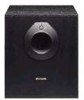
... use the PHASE switch to change the quality or volume of sound reproduced by the powered subwoofer. • AUTO POWER function You can be powered on the rear of your AIWA dealer in the space provided below. aiwa Active Speaker System (Powered Subwoofer) TS-W60 pg. 2 OWNERS RECORD For your convenience, record the model number and serial number (you will...
... use the PHASE switch to change the quality or volume of sound reproduced by the powered subwoofer. • AUTO POWER function You can be powered on the rear of your AIWA dealer in the space provided below. aiwa Active Speaker System (Powered Subwoofer) TS-W60 pg. 2 OWNERS RECORD For your convenience, record the model number and serial number (you will...
User Guide
Page 3
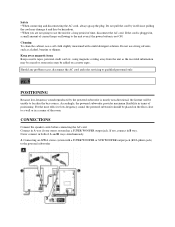
...period of A and B ways simultaneously. Should any problem occur, disconnect the AC cord and refer servicing to localize the bass source. A Connecting an AIWA stereo system with a mild detergent solution. pg. 6 POSITIONING Because low-frequency sound reproduced by itself since pulling the cord may be added on the ... may be erased or some noise may damage it and thus be placed on cassette tapes. For the most effective low-frequency sound, the powered subwoofer should be hazardous. • When you are not going to a wall or in terms of the room. Keep away magnetic items Keep ...
...period of A and B ways simultaneously. Should any problem occur, disconnect the AC cord and refer servicing to localize the bass source. A Connecting an AIWA stereo system with a mild detergent solution. pg. 6 POSITIONING Because low-frequency sound reproduced by itself since pulling the cord may be added on the ... may be erased or some noise may damage it and thus be placed on cassette tapes. For the most effective low-frequency sound, the powered subwoofer should be hazardous. • When you are not going to a wall or in terms of the room. Keep away magnetic items Keep ...
User Guide
Page 4
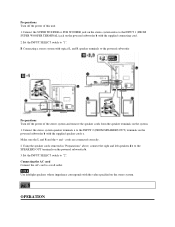
.... pg. 8 OPERATION NOTE Use left speakers d e to the SPEAKERS OUT terminals on the powered subwoofer b. 3 Set the INPUT SELECT switch to the INPUT 2 (FROM SPEAKERS OUT) terminals on the powered subwoofer b with the supplied connecting cord. 2 Set the INPUT SELECT switch to a wall outlet. ...B Connecting a stereo system with typical L and R speaker terminals to the powered subwoofer Preparations Turn off the power of the stereo system and remove the speaker cords from the speaker terminals on the system. 1 Connect the stereo system speaker ...
.... pg. 8 OPERATION NOTE Use left speakers d e to the SPEAKERS OUT terminals on the powered subwoofer b. 3 Set the INPUT SELECT switch to the INPUT 2 (FROM SPEAKERS OUT) terminals on the powered subwoofer b with the supplied connecting cord. 2 Set the INPUT SELECT switch to a wall outlet. ...B Connecting a stereo system with typical L and R speaker terminals to the powered subwoofer Preparations Turn off the power of the stereo system and remove the speaker cords from the speaker terminals on the system. 1 Connect the stereo system speaker ...
User Guide
Page 5
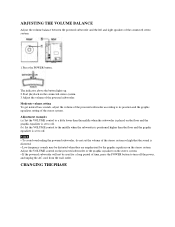
... control to its position and the graphic equalizer setting of the connected stereo system. 1 Press the POWER button. ADJUSTING THE VOLUME BALANCE Adjust the volume balance between the powered subwoofer and the left and right speakers of the stereo system. Moderate volume setting To get natural bass... sounds, adjust the volume of the powered subwoofer according to the middle when the subwoofer is positioned higher than the middle when the subwoofer is placed on the floor and the graphic equalizer is distorted. • Low frequency...
... control to its position and the graphic equalizer setting of the connected stereo system. 1 Press the POWER button. ADJUSTING THE VOLUME BALANCE Adjust the volume balance between the powered subwoofer and the left and right speakers of the stereo system. Moderate volume setting To get natural bass... sounds, adjust the volume of the powered subwoofer according to the middle when the subwoofer is positioned higher than the middle when the subwoofer is placed on the floor and the graphic equalizer is distorted. • Low frequency...
User Guide
Page 6
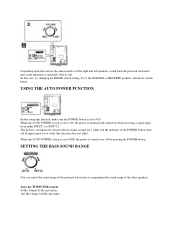
... Output 160 Hz and under. While the AUTO POWER switch is set to complement the sound range of the POWER button turns off by pressing the POWER button. While the AUTO POWER switch is turned on when receiving a signal input from the powered subwoofer may seem unnatural or unusually loud or soft. ...can adjust the sound range of the powered subwoofer to ON, the power is automatically turned on or off . In this function does not effect. USING THE AUTO POWER FUNCTION Before using this function, make sure the POWER button is set to OFF, the power is set to the NORMAL or REVERSE...
... Output 160 Hz and under. While the AUTO POWER switch is set to complement the sound range of the POWER button turns off by pressing the POWER button. While the AUTO POWER switch is turned on when receiving a signal input from the powered subwoofer may seem unnatural or unusually loud or soft. ...can adjust the sound range of the powered subwoofer to ON, the power is automatically turned on or off . In this function does not effect. USING THE AUTO POWER FUNCTION Before using this function, make sure the POWER button is set to OFF, the power is set to the NORMAL or REVERSE...
