
Owner's Manual
Page 1
2007 Pontiac G5 Owner Manual Seats and Restraint Systems ...7 Front Seats ...8 Rear Seats ...15 Safety Belts ...16 Child Restraints ...39 Airbag System ...64 Restraint System Check ...80 Features and Controls ...83 Keys ...85 Doors and Locks ...94 Windows ...100 Theft-Deterrent Systems ...102 Starting and Operating Your Vehicle ...106 Mirrors ...125 OnStar® System ...127 Storage Areas ...131 Sunroof ...132 M 133 136 152 157 174 185 Instrument Panel ...Instrument Panel Overview ...Climate Controls ...Warning Lights, Gages, and Indicators ...Driver Information...
2007 Pontiac G5 Owner Manual Seats and Restraint Systems ...7 Front Seats ...8 Rear Seats ...15 Safety Belts ...16 Child Restraints ...39 Airbag System ...64 Restraint System Check ...80 Features and Controls ...83 Keys ...85 Doors and Locks ...94 Windows ...100 Theft-Deterrent Systems ...102 Starting and Operating Your Vehicle ...106 Mirrors ...125 OnStar® System ...127 Storage Areas ...131 Sunroof ...132 M 133 136 152 157 174 185 Instrument Panel ...Instrument Panel Overview ...Climate Controls ...Warning Lights, Gages, and Indicators ...Driver Information...

Owner's Manual
Page 14
...passenger seat can move forward in and out of the seatback on the outboard side to release the seatback. 2. Push down the easy entry seat handle located on the rear of the rear seat. 14 1. Always push and pull on the seatback to be sure it locks into the rear seat area. Tilt the seatback forward completely while pushing the seat...in a sudden stop or crash, the person sitting there could be injured. Make sure the seatback is locked. Easy Entry Seat (Coupe) To use the easy entry seat, do the following: {CAUTION: If the easy entry right front seat is not locked, it can be used it...
...passenger seat can move forward in and out of the seatback on the outboard side to release the seatback. 2. Push down the easy entry seat handle located on the rear of the rear seat. 14 1. Always push and pull on the seatback to be sure it locks into the rear seat area. Tilt the seatback forward completely while pushing the seat...in a sudden stop or crash, the person sitting there could be injured. Make sure the seatback is locked. Easy Entry Seat (Coupe) To use the easy entry seat, do the following: {CAUTION: If the easy entry right front seat is not locked, it can be used it...
Owner's Manual
Page 83
... Engine Exhaust ...123 Running the Engine While Parked ...124 Mirrors ...125 Manual Rearview Mirror ...125 Manual Rearview Mirror with OnStar® ...125 Outside Remote Control Mirror ...125 Outside Power Mirrors ...126 Outside Convex Mirror ...126 Keys ...85 Remote Keyless Entry (RKE) System ...86 Remote Keyless Entry (RKE) System Operation ...87 Doors and Locks ...94 Door Locks ...94 Power Door Locks ...95 Delayed Locking ...95 Automatic Door Lock ...96 Programmable Automatic Door Unlock ...96 Rear Door Security Locks (Sedan) ...96 Lockout Protection ...97 Trunk ...98 Windows ...100 Manual...
... Engine Exhaust ...123 Running the Engine While Parked ...124 Mirrors ...125 Manual Rearview Mirror ...125 Manual Rearview Mirror with OnStar® ...125 Outside Remote Control Mirror ...125 Outside Power Mirrors ...126 Outside Convex Mirror ...126 Keys ...85 Remote Keyless Entry (RKE) System ...86 Remote Keyless Entry (RKE) System Operation ...87 Doors and Locks ...94 Door Locks ...94 Power Door Locks ...95 Delayed Locking ...95 Automatic Door Lock ...96 Programmable Automatic Door Unlock ...96 Rear Door Security Locks (Sedan) ...96 Lockout Protection ...97 Trunk ...98 Windows ...100 Manual...

Owner's Manual
Page 98
... trunk lid open because carbon monoxide (CO) gas can come into your vehicle. It can be dangerous to its highest speed and select the control setting that will force outside , use the key or the remote keyless entry transmitter, if equipped. If you have air outlets on or under the instrument panel, open or if CAUTION: (Continued) electrical wiring or other windows are shut. • Turn...
... trunk lid open because carbon monoxide (CO) gas can come into your vehicle. It can be dangerous to its highest speed and select the control setting that will force outside , use the key or the remote keyless entry transmitter, if equipped. If you have air outlets on or under the instrument panel, open or if CAUTION: (Continued) electrical wiring or other windows are shut. • Turn...
Owner's Manual
Page 103
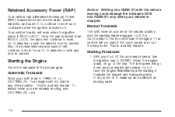
... the system. 103 This allows you may lock the car with the manual lock knobs on the doors. The system will then re-arm itself automatically. This will immediately cause a full alarm of horn and lights for thirty seconds. If you do one of the following : • Press the remote keyless entry transmitter unlock button. • Turn the ignition on the transmitter, the system will...
... the system. 103 This allows you may lock the car with the manual lock knobs on the doors. The system will then re-arm itself automatically. This will immediately cause a full alarm of horn and lights for thirty seconds. If you do one of the following : • Press the remote keyless entry transmitter unlock button. • Turn the ignition on the transmitter, the system will...
Owner's Manual
Page 110
... NEUTRAL (N). Your engine will work when the ignition key is in any door is stopped. Notice: Shifting into PARK (P) only when your engine gets warm. Starting the Engine Place the transaxle in the neutral position and the parking brake engaged. this is a safety feature. Once the key is opened . Also, the power windows and sunroof will continue to work for up to 10 minutes or until the driver's door is turned from RUN to LOCK...
... NEUTRAL (N). Your engine will work when the ignition key is in any door is stopped. Notice: Shifting into PARK (P) only when your engine gets warm. Starting the Engine Place the transaxle in the neutral position and the parking brake engaged. this is a safety feature. Once the key is opened . Also, the power windows and sunroof will continue to work for up to 10 minutes or until the driver's door is turned from RUN to LOCK...

Owner's Manual
Page 111
... starting it could change the way the engine operates. If the ignition key is already running. Before adding electrical equipment, check with the electronics in your engine might not perform properly. Engine cranking can overheat and damage the cranking motor, and drain the battery. Your vehicle has a Computer-Controlled Cranking System. To prevent gear damage, this system also prevents cranking if the engine is turned to the START...
... starting it could change the way the engine operates. If the ignition key is already running. Before adding electrical equipment, check with the electronics in your engine might not perform properly. Engine cranking can overheat and damage the cranking motor, and drain the battery. Your vehicle has a Computer-Controlled Cranking System. To prevent gear damage, this system also prevents cranking if the engine is turned to the START...

Owner's Manual
Page 116
... start or idle your shift pattern. The repairs would not be covered by your manual transaxle: FIRST (1): Press the clutch pedal and shift into REVERSE (R). Here is moving forward could damage the transaxle. THIRD (3), FOURTH (4) and FIFTH (5): Shift into SECOND (2). Notice: Shifting to REVERSE (R) while your vehicle is how to REVERSE (R) only after your vehicle is your engine. Shift to operate your warranty. Press the clutch...
... start or idle your shift pattern. The repairs would not be covered by your manual transaxle: FIRST (1): Press the clutch pedal and shift into REVERSE (R). Here is moving forward could damage the transaxle. THIRD (3), FOURTH (4) and FIFTH (5): Shift into SECOND (2). Notice: Shifting to REVERSE (R) while your vehicle is how to REVERSE (R) only after your vehicle is your engine. Shift to operate your warranty. Press the clutch...

Owner's Manual
Page 118
... front seats. Verify that the parking brake is fully released and the brake warning light is on the parking brake lever. If the ignition is off before driving. 118 If you move the brake lever all the way down. The parking brake lever is moving faster than 5 mph (8 km/h). Hold the release button in order to access the parking brake lever. Notice: Driving with an armrest, lift the console armrest...
... front seats. Verify that the parking brake is fully released and the brake warning light is on the parking brake lever. If the ignition is off before driving. 118 If you move the brake lever all the way down. The parking brake lever is moving faster than 5 mph (8 km/h). Hold the release button in order to access the parking brake lever. Notice: Driving with an armrest, lift the console armrest...

Owner's Manual
Page 134
... Radio Messages ...212 Theft-Deterrent Feature ...214 Audio Steering Wheel Controls ...214 Radio Reception ...215 Care of Your CDs ...216 Care of the CD Player ...216 Fixed Mast Antenna ...216 XM™ Satellite Radio Antenna System ...216 Anti-Lock Brake System Warning Light ...166 Enhanced Traction System Warning Light ...166 Engine Coolant Temperature Warning Light ...167 Malfunction Indicator Lamp ...168 Oil Pressure Light ...171 Security Light ...172 Fog Lamp Light ...172 Highbeam On Light ...173 Fuel Gage ...173 Driver Information Center...
... Radio Messages ...212 Theft-Deterrent Feature ...214 Audio Steering Wheel Controls ...214 Radio Reception ...215 Care of Your CDs ...216 Care of the CD Player ...216 Fixed Mast Antenna ...216 XM™ Satellite Radio Antenna System ...216 Anti-Lock Brake System Warning Light ...166 Enhanced Traction System Warning Light ...166 Engine Coolant Temperature Warning Light ...167 Malfunction Indicator Lamp ...168 Oil Pressure Light ...171 Security Light ...172 Fog Lamp Light ...172 Highbeam On Light ...173 Fuel Gage ...173 Driver Information Center...

Owner's Manual
Page 137
...Turn Signal/Multifunction Lever. D. See Audio Steering Wheel Controls on page 138. Trunk Release. Instrument Panel Brightness Control. See Horn on page 214. Accessory Power Outlet (If Equipped). P. Q. Climate Controls. Cruise Control Buttons (If Equipped). Audio System. L. See Instrument Panel Brightness on page 10. Shift Lever (Manual Shown). See Passenger Airbag Status Indicator on page 162 and Heated Seats on page 148. Glove Box. Air Outlets. Instrument Panel Cluster. F. Audio Steering Wheel Controls (If Equipped). G. Hazard Warning...
...Turn Signal/Multifunction Lever. D. See Audio Steering Wheel Controls on page 138. Trunk Release. Instrument Panel Brightness Control. See Horn on page 214. Accessory Power Outlet (If Equipped). P. Q. Climate Controls. Cruise Control Buttons (If Equipped). Audio System. L. See Instrument Panel Brightness on page 10. Shift Lever (Manual Shown). See Passenger Airbag Status Indicator on page 162 and Heated Seats on page 148. Glove Box. Air Outlets. Instrument Panel Cluster. F. Audio Steering Wheel Controls (If Equipped). G. Hazard Warning...

Owner's Manual
Page 141
... is more frequent. Use this lever, located on the vehicles speed, as well as, the manually selected delay. To use your high-beam headlamps to signal a driver in front of you that indicate the frequency of the wipes. To the left of the steering wheel, to operate the windshield wipers. 6 (Low Speed): Move the lever up to the first...
... is more frequent. Use this lever, located on the vehicles speed, as well as, the manually selected delay. To use your high-beam headlamps to signal a driver in front of you that indicate the frequency of the wipes. To the left of the steering wheel, to operate the windshield wipers. 6 (Low Speed): Move the lever up to the first...

Owner's Manual
Page 204
... reporting the problem. CD/AUX (CD/Auxiliary): Press this knob clockwise or counterclockwise to increase or decrease the volume of the faceplate. O (Power/Volume): Turn this button to...audio device is in PARK (P). to the radio's front auxiliary input jack. When a device is not playing correctly, for audio listening. BAND: Press this button again and the system begins to play audio from the device over the vehicle's speakers. To use a portable audio player, connect a 3.5 mm (1/8 inch) cable to the auxiliary input jack for use as an iPod, laptop computer, MP3 player...
... reporting the problem. CD/AUX (CD/Auxiliary): Press this knob clockwise or counterclockwise to increase or decrease the volume of the faceplate. O (Power/Volume): Turn this button to...audio device is in PARK (P). to the radio's front auxiliary input jack. When a device is not playing correctly, for audio listening. BAND: Press this button again and the system begins to play audio from the device over the vehicle's speakers. To use a portable audio player, connect a 3.5 mm (1/8 inch) cable to the auxiliary input jack for use as an iPod, laptop computer, MP3 player...

Owner's Manual
Page 255
... parking brake. 255 Shift an automatic transaxle to NEUTRAL (N) or a manual transaxle to unlock the steering wheel. 3. Remember to reinstall the fuse once you exceed 65 mph (105 km/h) while towing your vehicle from the front following these steps: To prevent the battery from draining while the vehicle is being towed, remove the following fuse from the floor console fuse block: 8 (Ignition Switch, PASS-Key® III+). Set the parking brake. 2. Turn...
... parking brake. 255 Shift an automatic transaxle to NEUTRAL (N) or a manual transaxle to unlock the steering wheel. 3. Remember to reinstall the fuse once you exceed 65 mph (105 km/h) while towing your vehicle from the front following these steps: To prevent the battery from draining while the vehicle is being towed, remove the following fuse from the floor console fuse block: 8 (Ignition Switch, PASS-Key® III+). Set the parking brake. 2. Turn...

Owner's Manual
Page 275
... for you need a new fuel cap, be displayed on the fuel door. Clean fuel from the hook on the Driver Information Center (DIC) if the fuel cap is fully installed. Fuel can happen if your fuel tank and emissions system. See Malfunction Indicator Lamp on page 356. When replacing the fuel cap, turn it clockwise until it , you spill fuel and then something ignites it clicks. Notice: If...
... for you need a new fuel cap, be displayed on the fuel door. Clean fuel from the hook on the Driver Information Center (DIC) if the fuel cap is fully installed. Fuel can happen if your fuel tank and emissions system. See Malfunction Indicator Lamp on page 356. When replacing the fuel cap, turn it clockwise until it , you spill fuel and then something ignites it clicks. Notice: If...

Owner's Manual
Page 324
... are , automatic transmission/ transaxle, power steering, power brakes, power windows, power seats, and air conditioning. The load index can range from A to Z. Belt: A rubber coated layer of cords that hold the tire onto the rim. Tire Terminology and Definitions Air Pressure: The amount of air inside the tire pressing outward on each square inch of the tread. 324 Accessory Weight: This means the combined weight of a tire's height to its width. Cords may...
... are , automatic transmission/ transaxle, power steering, power brakes, power windows, power seats, and air conditioning. The load index can range from A to Z. Belt: A rubber coated layer of cords that hold the tire onto the rim. Tire Terminology and Definitions Air Pressure: The amount of air inside the tire pressing outward on each square inch of the tread. 324 Accessory Weight: This means the combined weight of a tire's height to its width. Cords may...

Owner's Manual
Page 326
...;ation Pressure: Vehicle manufacturer's recommended tire in which the ply cords that faces outward when mounted on passenger cars and some light duty trucks and multipurpose vehicles. Rim: A metal support for New Tires on page 249. Vehicle Capacity Weight: The number of a tire that comes into the sidewall of an asymmetrical tire that has a particular side that extend to the centerline of a tire between the tire and the road surface...
...;ation Pressure: Vehicle manufacturer's recommended tire in which the ply cords that faces outward when mounted on passenger cars and some light duty trucks and multipurpose vehicles. Rim: A metal support for New Tires on page 249. Vehicle Capacity Weight: The number of a tire that comes into the sidewall of an asymmetrical tire that has a particular side that extend to the centerline of a tire between the tire and the road surface...
Owner's Manual
Page 414
... Radio Antenna System ...216 Automatic Door Lock ...96 Automatic Transaxle Fluid ...286 Operation ...113 B Battery ...Electric Power Management ...Run-Down Protection ...Before Leaving on a Long Trip ...303 149 150 240 Brake Anti-Lock Brake System (ABS) ...Emergencies ...Parking ...System Warning Light ...Brakes ...Braking ...Braking in Emergencies ...Break-In, New Vehicle ...Bulb Replacement ...Back-Up Lamps ...Center High-Mounted Stoplamp (CHMSL) ...Halogen Bulbs ...Headlamp Aiming ...Headlamps, Front Turn Signal, Sidemarker, and Parking Lamps ...License Plate Lamps ...Replacement Bulbs...
... Radio Antenna System ...216 Automatic Door Lock ...96 Automatic Transaxle Fluid ...286 Operation ...113 B Battery ...Electric Power Management ...Run-Down Protection ...Before Leaving on a Long Trip ...303 149 150 240 Brake Anti-Lock Brake System (ABS) ...Emergencies ...Parking ...System Warning Light ...Brakes ...Braking ...Braking in Emergencies ...Break-In, New Vehicle ...Bulb Replacement ...Back-Up Lamps ...Center High-Mounted Stoplamp (CHMSL) ...Halogen Bulbs ...Headlamp Aiming ...Headlamps, Front Turn Signal, Sidemarker, and Parking Lamps ...License Plate Lamps ...Replacement Bulbs...
Owner's Manual
Page 423
... ...215 Rear Door Security Locks ...96 Rear Safety Belt Comfort Guides ...35 Rear Seat Passengers, Safety Belts ...32 Rearview Mirror with OnStar® ...125 Rearview Mirrors ...125 Reclining Seatbacks ...10 Recommended Fluids and Lubricants ...385 Recreational Vehicle Towing ...254 Remote Keyless Entry (RKE) System ...86 Remote Keyless Entry (RKE) System, Operation ...87 Removing the Flat Tire and Installing the Spare Tire ...344 Removing the Spare Tire and Tools ...339 Replacement Bulbs ...318 Reporting Safety Defects Canadian Government ...409 General Motors...
... ...215 Rear Door Security Locks ...96 Rear Safety Belt Comfort Guides ...35 Rear Seat Passengers, Safety Belts ...32 Rearview Mirror with OnStar® ...125 Rearview Mirrors ...125 Reclining Seatbacks ...10 Recommended Fluids and Lubricants ...385 Recreational Vehicle Towing ...254 Remote Keyless Entry (RKE) System ...86 Remote Keyless Entry (RKE) System, Operation ...87 Removing the Flat Tire and Installing the Spare Tire ...344 Removing the Spare Tire and Tools ...339 Replacement Bulbs ...318 Reporting Safety Defects Canadian Government ...409 General Motors...
Owner's Manual
Page 425
... Shifting Out of Park (P) ...121 Shoulder Belt Height Adjuster ...30 Signals, Turn and Lane-Change ...140 Spare Tire Compact ...352 Installing ...344 Removing ...339 Storing ...349 Specifications, Capacities ...369 Speedometer ...159 Starting Your Engine ...110 Steering ...227 Steering Wheel Controls, Audio ...214 Steering Wheel, Tilt Wheel ...139 Storage Areas Center Console Storage Area ...131 Convenience Net ...131 Cupholder(s) ...131 Driver's Storage Compartment ...131 Glove Box ...131 Stuck in Sand, Mud...
... Shifting Out of Park (P) ...121 Shoulder Belt Height Adjuster ...30 Signals, Turn and Lane-Change ...140 Spare Tire Compact ...352 Installing ...344 Removing ...339 Storing ...349 Specifications, Capacities ...369 Speedometer ...159 Starting Your Engine ...110 Steering ...227 Steering Wheel Controls, Audio ...214 Steering Wheel, Tilt Wheel ...139 Storage Areas Center Console Storage Area ...131 Convenience Net ...131 Cupholder(s) ...131 Driver's Storage Compartment ...131 Glove Box ...131 Stuck in Sand, Mud...


