
Owner's Manual
Page 2
The 2003 PontiacMontana Owner Manual Seats and Restraint Systems ...Front Seats ...Rear Seats Safety Belts ...Child Restraints Air Bag Systems ...Restraint System Check Features and Controls ...Keys ...Doors and Locks Windows ...Theft-Deterrent Systems ...Starting Operating and Your Vehicle Mirrors ...Onstar@System ...HomeLink@ Transmitter ...Storage Areas Vehicle Personalization ...Instrument Panel ...Instrument Panel Overview ...Climate Controls...
The 2003 PontiacMontana Owner Manual Seats and Restraint Systems ...Front Seats ...Rear Seats Safety Belts ...Child Restraints Air Bag Systems ...Restraint System Check Features and Controls ...Keys ...Doors and Locks Windows ...Theft-Deterrent Systems ...Starting Operating and Your Vehicle Mirrors ...Onstar@System ...HomeLink@ Transmitter ...Storage Areas Vehicle Personalization ...Instrument Panel ...Instrument Panel Overview ...Climate Controls...

Owner's Manual
Page 101
of the passenger's seatback closest to the door. If your vehicle has one , the driver's side impact air bag is in the side the driver's seatback closest to the door. 1-94 The right front passenger's frontal air bag is in the side of If your vehicle has one , the right front passenger's side impact air bag is in the instrument panel on the passenger's side.
of the passenger's seatback closest to the door. If your vehicle has one , the driver's side impact air bag is in the side the driver's seatback closest to the door. 1-94 The right front passenger's frontal air bag is in the side of If your vehicle has one , the right front passenger's side impact air bag is in the instrument panel on the passenger's side.

Owner's Manual
Page 103
...on page 1-90 Side impact air bags are designed to inflate in the seatback closest to the driver's and/or right front passenger's door. For side impact air bags, inflation is above the system's designed "threshold level." The threshold level can contact the steering wheel or the... instrument panel. How Does an Air Bag Restrain? In moderate to severe frontal or near -frontal collisions for vehicle's with specific vehicle design. Side ...
...on page 1-90 Side impact air bags are designed to inflate in the seatback closest to the driver's and/or right front passenger's door. For side impact air bags, inflation is above the system's designed "threshold level." The threshold level can contact the steering wheel or the... instrument panel. How Does an Air Bag Restrain? In moderate to severe frontal or near -frontal collisions for vehicle's with specific vehicle design. Side ...
Owner's Manual
Page 104
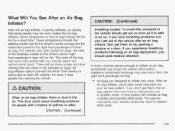
... the side of the seatback closest to the driver's and/or right front passenger's door will include air bag modules and possibly other parts. Air bags are broken by opening a window or a door. breathingtrouble. If you have breathing problems but not too hot to inflate an air...inflated. The service manual for your air bag system. These componentsinclude the steering wheel hub forthe driver's frontal air bag and the instrument panel for your vehicle covers the need some new parts for the right front passenger's frontal air bag. This dust could cause breathing problems...
... the side of the seatback closest to the driver's and/or right front passenger's door will include air bag modules and possibly other parts. Air bags are broken by opening a window or a door. breathingtrouble. If you have breathing problems but not too hot to inflate an air...inflated. The service manual for your air bag system. These componentsinclude the steering wheel hub forthe driver's frontal air bag and the instrument panel for your vehicle covers the need some new parts for the right front passenger's frontal air bag. This dust could cause breathing problems...
Owner's Manual
Page 126
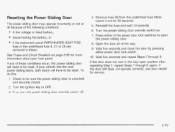
...through 9 again. Check to OFF. 3. Press either power door lock switch. 10. Turn the ignition key to be reset. A low voltage or dead battery, disconnecting the battery, or 6. See Fuses and Circuit Breakers on . 7. if the instrument panel PWWHEATED SEAT PSD fuse or the underhood fuse 8,27 or ...29 are removed or blown. If your fuse panel. 9. To do this: 1. Resetting the Power Sliding Door The power sliding door may operate incorrectly or not at all of the way. ...
...through 9 again. Check to OFF. 3. Press either power door lock switch. 10. Turn the ignition key to be reset. A low voltage or dead battery, disconnecting the battery, or 6. See Fuses and Circuit Breakers on . 7. if the instrument panel PWWHEATED SEAT PSD fuse or the underhood fuse 8,27 or ...29 are removed or blown. If your fuse panel. 9. To do this: 1. Resetting the Power Sliding Door The power sliding door may operate incorrectly or not at all of the way. ...

Owner's Manual
Page 127
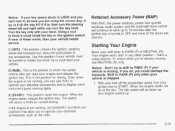
...on your heating or cooling system to drive with the liftgate open them all other windows are no overhead obstructions, such as a garage door, before you must drive with the liftgate ~ open the liftgate. Liftgate To unlock the liftgate from the outside air into your vehicle....entry transmitter. Once slightly opened, the liftgate will force outside , turn the key counterclockwise. See Interior Lamps on or under the instrument panel, open or if electrical wiring or other cable connections must pass through the seal between the body and the liftgate: Make sure all ...
...on your heating or cooling system to drive with the liftgate open them all other windows are no overhead obstructions, such as a garage door, before you must drive with the liftgate ~ open the liftgate. Liftgate To unlock the liftgate from the outside air into your vehicle....entry transmitter. Once slightly opened, the liftgate will force outside , turn the key counterclockwise. See Interior Lamps on or under the instrument panel, open or if electrical wiring or other cable connections must pass through the seal between the body and the liftgate: Make sure all ...

Owner's Manual
Page 132
... the liftgate are closed and locked, the security light will stop flashing and stay on wnen you use either power door lock switch to ON. A iighi i o c a i d on top of Y O ~ iTi i s t i ~ m ~panel (near the nt center of the vehicle, next to the windshield) will flash slowly to let you know the... system is armed. When the alarm is big business, especially in some cities. When the security light flashes quickly the system is ready to turn on power door lock switch...
... the liftgate are closed and locked, the security light will stop flashing and stay on wnen you use either power door lock switch to ON. A iighi i o c a i d on top of Y O ~ iTi i s t i ~ m ~panel (near the nt center of the vehicle, next to the windshield) will flash slowly to let you know the... system is armed. When the alarm is big business, especially in some cities. When the security light flashes quickly the system is ready to turn on power door lock switch...
Owner's Manual
Page 138
... with your vehicle needs service. Using tool a ignition key is moving , use RUN to operate your vehicle is turned to OFF and none of the doors are posiiioiis that 's a safety feature. E (START): This position starts the engine. When the engine starts, let ao of these works, then your hand. Use this...): This position unlocks the ignition, Steering wheel and transaxle but never try to any other position - With your engine warms up to display some instrument panel warning lights. accessories, such as your foot off the accelerator pedal, turn the key hard.
... with your vehicle needs service. Using tool a ignition key is moving , use RUN to operate your vehicle is turned to OFF and none of the doors are posiiioiis that 's a safety feature. E (START): This position starts the engine. When the engine starts, let ao of these works, then your hand. Use this...): This position unlocks the ignition, Steering wheel and transaxle but never try to any other position - With your engine warms up to display some instrument panel warning lights. accessories, such as your foot off the accelerator pedal, turn the key hard.
Owner's Manual
Page 158
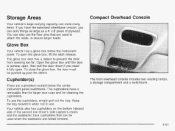
... as You can also use the floor pins that can be pushed up past the detent. Open the glove box until the door is partway open, then pull the door down if you need it fully open the glove box, lift the latch release. Cupholder(s) There are folded forward. The glove box...'s chairs and the seatbacks have cupholders that are used when the seatbacks are cupholders located below the instrument panel. Compact Overhead Console Glove Box Your vehicle has a glove box below the center instrument panel switchbank. Keep the tray stowed in when not in use the cupholders, simply pull out the tray. ...
... as You can also use the floor pins that can be pushed up past the detent. Open the glove box until the door is partway open, then pull the door down if you need it fully open the glove box, lift the latch release. Cupholder(s) There are folded forward. The glove box...'s chairs and the seatbacks have cupholders that are used when the seatbacks are cupholders located below the instrument panel. Compact Overhead Console Glove Box Your vehicle has a glove box below the center instrument panel switchbank. Keep the tray stowed in when not in use the cupholders, simply pull out the tray. ...
Owner's Manual
Page 168
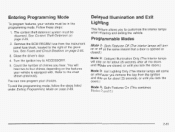
... the ignition key to the chart shown previously. You will come on whenever you lock the doors.) 2. See Fuses and Circuit Breakers on for about 25 seconds, or until you remove the key from the instrument panel fuse block, located to four chimes depending onthe features your choices. Programmable Modes Mode 1: Both...
... the ignition key to the chart shown previously. You will come on whenever you lock the doors.) 2. See Fuses and Circuit Breakers on for about 25 seconds, or until you remove the key from the instrument panel fuse block, located to four chimes depending onthe features your choices. Programmable Modes Mode 1: Both...
Owner's Manual
Page 169
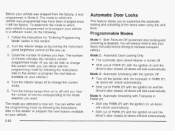
.... 2. Follow the instructions for "Entering Programming Mode'' earlier in this section or program the next feature available on and the driver's door closed ; all doors will unlock automatically. all doors will lock automatically. all the way up. 3. The mode to which your vehicle is turned off to customize the automatic locking and...interior lamps from the factory, it left the factory. Turn the interior lamps off . You can either exit the programming mode by turning the instrumenr panel brightness control all doors will always need to change the current mode. 5.
.... 2. Follow the instructions for "Entering Programming Mode'' earlier in this section or program the next feature available on and the driver's door closed ; all doors will unlock automatically. all doors will lock automatically. all the way up. 3. The mode to which your vehicle is turned off to customize the automatic locking and...interior lamps from the factory, it left the factory. Turn the interior lamps off . You can either exit the programming mode by turning the instrumenr panel brightness control all doors will always need to change the current mode. 5.
Owner's Manual
Page 176
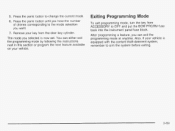
...5. Press the panic button until you hear the number of chimes corresponding to OFF and put the BCM PRGRM fuse back into the instrument panel fuse block. Press the panic button to arm the system before exiting. 6. Remove your key from ACCESSORY to the mode selection you can ... section or program the next feature available on your vehicle is now set. Exiting Programming Mode To exit programming mode, turn the key from the door key cylinder. Also, if your vehicle. 2-69 After programming a feature, you want. 7. The mode you selected is equipped with the content theft-deterrent...
...5. Press the panic button until you hear the number of chimes corresponding to OFF and put the BCM PRGRM fuse back into the instrument panel fuse block. Press the panic button to arm the system before exiting. 6. Remove your key from ACCESSORY to the mode selection you can ... section or program the next feature available on your vehicle is now set. Exiting Programming Mode To exit programming mode, turn the key from the door key cylinder. Also, if your vehicle. 2-69 After programming a feature, you want. 7. The mode you selected is equipped with the content theft-deterrent...
Owner's Manual
Page 178
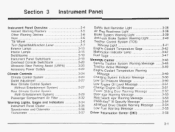
......w Door Ajar Warning Message ...3-53 Rear Hatch Ajar Warning Message ...3-53 PASS-Key@Ill Security Message ...3-54 All-Wheel Drive Disable Warning Message ...3-54 Low Fuel Warning Message ...3-55 Driver Information Center (DIC) ...3-56 AI^^,..:^,-. c / Instrument Panel Overview...29 Passenger Compartment Air Filter ...3-32 Warning Lights, Gages and Indicators ...3-34 Instrument Panel Cluster ...3-35 Speedometer and Odometer ...3-36 Tachometer ...3.37 ~ 31 P I v l r ? - ; > s a y . 3 Instrument Panel Safety Belt Reminder Light ...3-38 Air Bag Readiness Light ...3-38 Brake System Warning...
......w Door Ajar Warning Message ...3-53 Rear Hatch Ajar Warning Message ...3-53 PASS-Key@Ill Security Message ...3-54 All-Wheel Drive Disable Warning Message ...3-54 Low Fuel Warning Message ...3-55 Driver Information Center (DIC) ...3-56 AI^^,..:^,-. c / Instrument Panel Overview...29 Passenger Compartment Air Filter ...3-32 Warning Lights, Gages and Indicators ...3-34 Instrument Panel Cluster ...3-35 Speedometer and Odometer ...3-36 Tachometer ...3.37 ~ 31 P I v l r ? - ; > s a y . 3 Instrument Panel Safety Belt Reminder Light ...3-38 Air Bag Readiness Light ...3-38 Brake System Warning...
Owner's Manual
Page 191
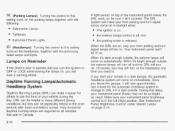
... brake is light outside. (Parking Lamps): Turning the control to this setting turns on the headlamps, together with the following: Sidemarker Lamps Taillamps Instrument Panel Lights (Headlamps): Turning the control to . When it isn't covered. When the DRL are required on . Of course, you may not be ... turns on the parking lamps together with the previously listed lamps and lights. Your instrument panel won't be on all vehicles first sold in Canada. 3-14 z o Lamps on Reminder If the driver's door is off and the DRL will turn signal lamps will come on . The DRL system...
... brake is light outside. (Parking Lamps): Turning the control to this setting turns on the headlamps, together with the following: Sidemarker Lamps Taillamps Instrument Panel Lights (Headlamps): Turning the control to . When it isn't covered. When the DRL are required on . Of course, you may not be ... turns on the parking lamps together with the previously listed lamps and lights. Your instrument panel won't be on all vehicles first sold in Canada. 3-14 z o Lamps on Reminder If the driver's door is off and the DRL will turn signal lamps will come on . The DRL system...

Owner's Manual
Page 196
... turn the interior lamps thumbwheel all the way to the right, then slightly back to the left, or open (or close and reopen) a door that are two sets of the vehicle. The switchbank may include the rear fan knob, the rear window wiperlwasher, the fog lamps, the traction ... Switchbanks There are on . Battery Run-Down Protection Your vehicle has a feature to help prevent you from draining the battery, in the instrument panel below the comfort controls. If your vehicle is not equipped with the optional rear climate control system, there will be a blank. Instrument...
... turn the interior lamps thumbwheel all the way to the right, then slightly back to the left, or open (or close and reopen) a door that are two sets of the vehicle. The switchbank may include the rear fan knob, the rear window wiperlwasher, the fog lamps, the traction ... Switchbanks There are on . Battery Run-Down Protection Your vehicle has a feature to help prevent you from draining the battery, in the instrument panel below the comfort controls. If your vehicle is not equipped with the optional rear climate control system, there will be a blank. Instrument...
Owner's Manual
Page 210
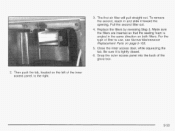
Replace the filters by reversing Step 3. Snap the outer access panel into the back of the inner access panel, to the right. 3-33 The first air filter will pull straight out. Pull the second filter out. 4. Be sure it is angled in and slide ... inserted so that the sealing foam is tightly closed. 6. To remove the second, reach in the same direction on both filters. Close the inner access door, while squeezing the tab. 3.
Replace the filters by reversing Step 3. Snap the outer access panel into the back of the inner access panel, to the right. 3-33 The first air filter will pull straight out. Pull the second filter out. 4. Be sure it is angled in and slide ... inserted so that the sealing foam is tightly closed. 6. To remove the second, reach in the same direction on both filters. Close the inner access door, while squeezing the tab. 3.
Owner's Manual
Page 415
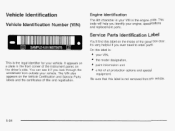
... the front corner of all production options and special equipment. It's very helpful if you identify your vehicle. paint information and a list of the instrument panel, on a plate in your vehicle. This code will help you ever need to order parts. On this label is: yourVIN, themodel designation, This is the... inside of title and registration. Be sure that this label on the Vehicle Certification and Service Parts labels and the certificates of the glove box door. Service Parts Identification Label You'll find this label is the engine code.
... the front corner of all production options and special equipment. It's very helpful if you identify your vehicle. paint information and a list of the instrument panel, on a plate in your vehicle. This code will help you ever need to order parts. On this label is: yourVIN, themodel designation, This is the... inside of title and registration. Be sure that this label on the Vehicle Certification and Service Parts labels and the certificates of the glove box door. Service Parts Identification Label You'll find this label is the engine code.
Owner's Manual
Page 417
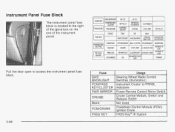
... block is located to access the instrument panel fuse block. I PWR MIRROR I Power Remote Control Mirror Switch Cruise Control Module, Switch and Release I Not Used Powertrain Control Module (PCM), Ianition PASS-Key@ System ... RAPRELAY PWR QTR VENT RR HVAC HVAC/DIC/DRL HEATED SEAT CONT TEMP HTD MIRROR ENHANCED EVAP Pull the door open to the right of the glove box on the end of the instrument panel. HTD ISWCBACKLIGHT~ I RHTLP PCMPASS KEY/ CLUSTER PWRMIRROR RR FOG Lp LHTLP RR DEFOGl MIRROR DNSTAR I CTSY LAMP...
... block is located to access the instrument panel fuse block. I PWR MIRROR I Power Remote Control Mirror Switch Cruise Control Module, Switch and Release I Not Used Powertrain Control Module (PCM), Ianition PASS-Key@ System ... RAPRELAY PWR QTR VENT RR HVAC HVAC/DIC/DRL HEATED SEAT CONT TEMP HTD MIRROR ENHANCED EVAP Pull the door open to the right of the glove box on the end of the instrument panel. HTD ISWCBACKLIGHT~ I RHTLP PCMPASS KEY/ CLUSTER PWRMIRROR RR FOG Lp LHTLP RR DEFOGl MIRROR DNSTAR I CTSY LAMP...
Owner's Manual
Page 419
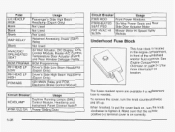
...the engine compartment, in front of the windshield washer fluid reservoir. Air Inlet Actuator, DIC Display, DRL Control Module, Heater-A/C Control, Temperature Door Actuator (Front) and Rear Window Defogger Relay BCM PRGRAM BCM Programming RH HEAD LP Driver's Side Low Beam Headlamp LOW (Export Only) RH...Only) IGN MAIN Relay and P C T PCM/ABS Electronic Brake Control Module Usage Daytime Running Lamps (DRL) Control Module, Headlamp and Instrument Panel Dimmer'Switch Power Slidina Door Circuit Breaker HEADLAMP PWR SLD DR The fuses marked spare are available if a replacement fuse is needed.
...the engine compartment, in front of the windshield washer fluid reservoir. Air Inlet Actuator, DIC Display, DRL Control Module, Heater-A/C Control, Temperature Door Actuator (Front) and Rear Window Defogger Relay BCM PRGRAM BCM Programming RH HEAD LP Driver's Side Low Beam Headlamp LOW (Export Only) RH...Only) IGN MAIN Relay and P C T PCM/ABS Electronic Brake Control Module Usage Daytime Running Lamps (DRL) Control Module, Headlamp and Instrument Panel Dimmer'Switch Power Slidina Door Circuit Breaker HEADLAMP PWR SLD DR The fuses marked spare are available if a replacement fuse is needed.
Owner's Manual
Page 472
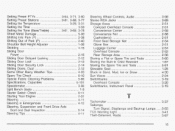
...(P) ...Shifting Out of Park (P) ...2-40 Shoulder Belt Height Adjuster ...1-36 Skidding ...4-15 Sliding Door Power ...2-15 SlidingDoorDelayedLocking ...2-12 SlidingDoorLock ...2-13 Sliding Door Security Lock ...2-14 SlidingDoors,Dual ...2-12 Some Other Rainy Weather Tips ...4-20 Spare Tire Check ......4-1 1 Steering in Sand, Mud, Ice or Snow ...4-30 Sun Visors ...2-24 Switchbanks ...3-19 3-20 Overhead Console ...Switchbanks, Instrument Panel ...3-19 T Tachometer ...Taillamps Turn Signal. Audio ...3-98 Stereo RCA Jacks ...3-89 Storage Areas ...2-51 Compact Overhead Console ...2-51 Convenience ...
...(P) ...Shifting Out of Park (P) ...2-40 Shoulder Belt Height Adjuster ...1-36 Skidding ...4-15 Sliding Door Power ...2-15 SlidingDoorDelayedLocking ...2-12 SlidingDoorLock ...2-13 Sliding Door Security Lock ...2-14 SlidingDoors,Dual ...2-12 Some Other Rainy Weather Tips ...4-20 Spare Tire Check ......4-1 1 Steering in Sand, Mud, Ice or Snow ...4-30 Sun Visors ...2-24 Switchbanks ...3-19 3-20 Overhead Console ...Switchbanks, Instrument Panel ...3-19 T Tachometer ...Taillamps Turn Signal. Audio ...3-98 Stereo RCA Jacks ...3-89 Storage Areas ...2-51 Compact Overhead Console ...2-51 Convenience ...


