
Owner's Manual
Page 1
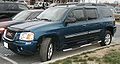
2004 GMC Envoy/Envoy XL Owner Manual Seats and Restraint Systems ...1-1 Front Seats ...1-2 Rear Seats ...1-5 Safety Belts ...1-8 Child Restraints ...1-27 Air Bag Systems ...1-49 Restraint System Check ...1-59 Features and Controls ...2-1 Keys ...2-3 ...
2004 GMC Envoy/Envoy XL Owner Manual Seats and Restraint Systems ...1-1 Front Seats ...1-2 Rear Seats ...1-5 Safety Belts ...1-8 Child Restraints ...1-27 Air Bag Systems ...1-49 Restraint System Check ...1-59 Features and Controls ...2-1 Keys ...2-3 ...

Owner's Manual
Page 2
...is in your vehicle, so it was printed. This manual includes the latest information at the time it will find it can help you learn about the features and controls for GMC whenever it . Litho in the owner manual to make changes after that time without further notice. ...Box 07130 Detroit, MI 48207 GENERAL MOTORS, GM, the GM Emblem, GMC, the GMC Truck Emblem and the name ENVOY/ENVOY XL are registered trademarks of General Motors ...
...is in your vehicle, so it was printed. This manual includes the latest information at the time it will find it can help you learn about the features and controls for GMC whenever it . Litho in the owner manual to make changes after that time without further notice. ...Box 07130 Detroit, MI 48207 GENERAL MOTORS, GM, the GM Emblem, GMC, the GMC Truck Emblem and the name ENVOY/ENVOY XL are registered trademarks of General Motors ...
Owner's Manual
Page 4
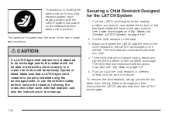
...the notice will find these notices: Notice: These mean there is something that use the same words, CAUTION or NOTICE. When you read other manuals, you might see CAUTION and NOTICE warnings in different colors or in this damage would not be covered by your vehicle. Many times, this... manual you will tell you need help avoid the damage. A notice tells about something that could damage your vehicle's warranty, and it could be costly. ...
...the notice will find these notices: Notice: These mean there is something that use the same words, CAUTION or NOTICE. When you read other manuals, you might see CAUTION and NOTICE warnings in different colors or in this damage would not be covered by your vehicle. Many times, this... manual you will tell you need help avoid the damage. A notice tells about something that could damage your vehicle's warranty, and it could be costly. ...
Owner's Manual
Page 14
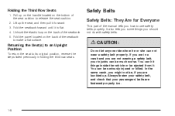
... release the seat cushion. 2. In the same crash, you might not be ejected from it forward. 3. Fold the panel located on the back of the manual tells you are in folding the third row seats. {CAUTION: Do not let anyone ride where he or she can be much worse. You can...
... release the seat cushion. 2. In the same crash, you might not be ejected from it forward. 3. Fold the panel located on the back of the manual tells you are in folding the third row seats. {CAUTION: Do not let anyone ride where he or she can be much worse. You can...
Owner's Manual
Page 42
... restraint instructions are important, so if they are not available, obtain a replacement copy from the manufacturer. Here is designed to be very close to this manual. When securing an add-on child restraint, refer to help reduce the chance of the rear-facing child restraint would be used in a vehicle. If...
... restraint instructions are important, so if they are not available, obtain a replacement copy from the manufacturer. Here is designed to be very close to this manual. When securing an add-on child restraint, refer to help reduce the chance of the rear-facing child restraint would be used in a vehicle. If...
Owner's Manual
Page 48
... child restraint to be seriously injured or killed. Also see Top Strap on the seat. 3. Make sure that restraint, and also the instructions in this manual. 1-42 Find the LATCH anchorages for Children (LATCH System) on page 1-40. 2. The child restraint instructions will show you how. Securing a Child Restraint Designed for...
... child restraint to be seriously injured or killed. Also see Top Strap on the seat. 3. Make sure that restraint, and also the instructions in this manual. 1-42 Find the LATCH anchorages for Children (LATCH System) on page 1-40. 2. The child restraint instructions will show you how. Securing a Child Restraint Designed for...

Owner's Manual
Page 57
... should sit as far back as you are too close to an inflating air bag, as possible while still maintaining control of this manual called "Older Children" or "Infants and Young Children." 1-51 To read how, see the part of the vehicle. The driver should not lean on or...
... should sit as far back as you are too close to an inflating air bag, as possible while still maintaining control of this manual called "Older Children" or "Infants and Young Children." 1-51 To read how, see the part of the vehicle. The driver should not lean on or...
Owner's Manual
Page 64
Additional windshield breakage may not work properly. After an air bag in flate only once. The service manual for your vehicle covers the need some new parts for the driver's or the right front passenger's air bag, or the air bag covering on ...
Additional windshield breakage may not work properly. After an air bag in flate only once. The service manual for your vehicle covers the need some new parts for the driver's or the right front passenger's air bag, or the air bag covering on ...
Owner's Manual
Page 65
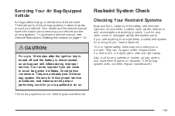
Servicing Your Air Bag-Equipped Vehicle Air bags affect how your vehicle and the air bag systems. To purchase a service manual, see anything that might keep a safety belt system from doing its job, have information about servicing your vehicle should be injured if...Service Publications Ordering Information on page 7-12. They are probably part of the air bag systems in flates. Your dealer and the service manual have it in several places around your belts, buckles, latch plates, retractors and anchorages are working properly. You can be serviced. Avoid yellow ...
Servicing Your Air Bag-Equipped Vehicle Air bags affect how your vehicle and the air bag systems. To purchase a service manual, see anything that might keep a safety belt system from doing its job, have information about servicing your vehicle should be injured if...Service Publications Ordering Information on page 7-12. They are probably part of the air bag systems in flates. Your dealer and the service manual have it in several places around your belts, buckles, latch plates, retractors and anchorages are working properly. You can be serviced. Avoid yellow ...

Owner's Manual
Page 67
... ...2-33 Engine Exhaust ...2-34 Running Your Engine While You Are Parked ...2-34 Mirrors ...2-36 Automatic Dimming Rearview Mirror with OnStar® and Compass ...2-36 Outside Manual Mirrors ...2-38 Outside Power Mirrors ...2-38 Outside Curb View Assist Mirrors ...2-39 Outside Convex Mirror ...2-39 Outside Heated Mirrors ...2-39 Keys ...2-3 Remote Keyless Entry System...
... ...2-33 Engine Exhaust ...2-34 Running Your Engine While You Are Parked ...2-34 Mirrors ...2-36 Automatic Dimming Rearview Mirror with OnStar® and Compass ...2-36 Outside Manual Mirrors ...2-38 Outside Power Mirrors ...2-38 Outside Curb View Assist Mirrors ...2-39 Outside Convex Mirror ...2-39 Outside Heated Mirrors ...2-39 Keys ...2-3 Remote Keyless Entry System...
Owner's Manual
Page 75
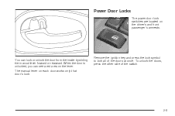
Remove the ignition key and press the lock symbol to lock all of the switch. 2-9 To unlock the doors, press the other side of the doors at once. When the door is unlocked, you can lock or unlock the door from the inside by sliding the manual lever forward or rearward. The manual lever on the driver's and front passenger's armrests. Power Door Locks The power door lock switches are located on each door works only that door's lock. You can see a red area on the lever.
Remove the ignition key and press the lock symbol to lock all of the switch. 2-9 To unlock the doors, press the other side of the doors at once. When the door is unlocked, you can lock or unlock the door from the inside by sliding the manual lever forward or rearward. The manual lever on the driver's and front passenger's armrests. Power Door Locks The power door lock switches are located on each door works only that door's lock. You can see a red area on the lever.
Owner's Manual
Page 84
... theft-deterrent system, the vehicle should also remember that you use a power door lock switch with the door open , or with a key, or use the manual door lock. Get out of the vehicle, close the door and wait for 30 seconds, then will go out. 4. Then reach in through the window... entry transmitter. 3. From inside the vehicle, lower the driver's window and open the door. The alarm won 't activate if you lock the doors with the manual door lock and open the driver's door. 2. Here's how to unlock a door any other way. 2-18 To replace the fuse, see if the horn works...
... theft-deterrent system, the vehicle should also remember that you use a power door lock switch with the door open , or with a key, or use the manual door lock. Get out of the vehicle, close the door and wait for 30 seconds, then will go out. 4. Then reach in through the window... entry transmitter. 3. From inside the vehicle, lower the driver's window and open the door. The alarm won 't activate if you lock the doors with the manual door lock and open the driver's door. 2. Here's how to unlock a door any other way. 2-18 To replace the fuse, see if the horn works...
Owner's Manual
Page 104
... control is a warning that mirror. Push the mirrors back out when finished. 1. Fold the mirrors in the opposite direction. To stop this feature. Outside Manual Mirrors Adjust your outside mirror(s) so you can see a little of the side of your vehicle. Turn the knob toward the vehicle. Adjust the mirror...
... control is a warning that mirror. Push the mirrors back out when finished. 1. Fold the mirrors in the opposite direction. To stop this feature. Outside Manual Mirrors Adjust your outside mirror(s) so you can see a little of the side of your vehicle. Turn the knob toward the vehicle. Adjust the mirror...
Owner's Manual
Page 136
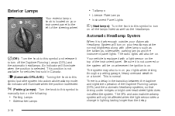
...): Turn the knob to this symbol to this symbol puts the system into automatic headlamp mode. This position is selected. c(Off): Turn the knob to manually turn on . The system may also turn off the Daytime Running Lamps (DRL) and the automatic headlamps. Be sure it is on all the lamps...
...): Turn the knob to this symbol to this symbol puts the system into automatic headlamp mode. This position is selected. c(Off): Turn the knob to manually turn on . The system may also turn off the Daytime Running Lamps (DRL) and the automatic headlamps. Be sure it is on all the lamps...
Owner's Manual
Page 137
... conditions, but they can make your headlamps will automatically switch from DRL to the off . When it is not in PARK (P) When the DRL are manually turned on, the driver's door is open and your ignition is in automatic headlamp mode Lamps On Reminder A reminder tone will sound when your headlamps...
... conditions, but they can make your headlamps will automatically switch from DRL to the off . When it is not in PARK (P) When the DRL are manually turned on, the driver's door is open and your ignition is in automatic headlamp mode Lamps On Reminder A reminder tone will sound when your headlamps...
Owner's Manual
Page 146
...increasing and the word PASS will appear on the driver's side of the vehicle. Passenger's Side Temperature Knob: Turn this button to manually select the air delivery mode to the floor, instrument panel, or windshield outlets. Outside Air Temperature Display A new outside temperature...pressed again or the AUTO button is affecting the true outside temperature. The passenger's side temperature setting also resets and relinks to manually raise or lower the temperature on the display. MODE: Press this knob clockwise or counterclockwise to the driver's side temperature setting...
...increasing and the word PASS will appear on the driver's side of the vehicle. Passenger's Side Temperature Knob: Turn this button to manually select the air delivery mode to the floor, instrument panel, or windshield outlets. Outside Air Temperature Display A new outside temperature...pressed again or the AUTO button is affecting the true outside temperature. The passenger's side temperature setting also resets and relinks to manually raise or lower the temperature on the display. MODE: Press this knob clockwise or counterclockwise to the driver's side temperature setting...
Owner's Manual
Page 147
... show you choose the temperature setting of the air to the instrument panel outlets, then directs the remaining air to the floor outlets. Manual Operation To change the current setting, select one of the following: w9x (Fan): This button allows you the selected fan speed and the driver...'s side temperature setting for five seconds. (MODE): Press this button to manually change the direction of 90°F (32°C), the system will remain at the maximum cooling setting. H(Vent): This mode directs air to the ...
... show you choose the temperature setting of the air to the instrument panel outlets, then directs the remaining air to the floor outlets. Manual Operation To change the current setting, select one of the following: w9x (Fan): This button allows you the selected fan speed and the driver...'s side temperature setting for five seconds. (MODE): Press this button to manually change the direction of 90°F (32°C), the system will remain at the maximum cooling setting. H(Vent): This mode directs air to the ...

Owner's Manual
Page 148
... be used with floor, defog or defrost modes. 6(Floor): This mode directs most of your vehicle more quickly. If you know this button to manually turn the air conditioning off . Press this mode to help prevent outside odors and/or dust from entering your vehicle or to let you turn...
... be used with floor, defog or defrost modes. 6(Floor): This mode directs most of your vehicle more quickly. If you know this button to manually turn the air conditioning off . Press this mode to help prevent outside odors and/or dust from entering your vehicle or to let you turn...

Owner's Manual
Page 155
... part describes the warning lights and gages that may be on when you are familiar with this section, you should not be alarmed when this manual's advice. Warning lights and gages can signal that works along with your vehicle. Paying attention to your warning lights and gages could also save you...
... part describes the warning lights and gages that may be on when you are familiar with this section, you should not be alarmed when this manual's advice. Warning lights and gages can signal that works along with your vehicle. Paying attention to your warning lights and gages could also save you...
Owner's Manual
Page 166
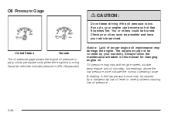
... may vary with engine speed, outside temperature and oil viscosity, but readings above the low pressure zone indicate the normal operating range. A reading in this manual for changing engine oil. Always follow the maintenance schedule in the low pressure zone may be burned. If you do, your vehicle serviced.
... may vary with engine speed, outside temperature and oil viscosity, but readings above the low pressure zone indicate the normal operating range. A reading in this manual for changing engine oil. Always follow the maintenance schedule in the low pressure zone may be burned. If you do, your vehicle serviced.


