
Owner Guide 1st Printing
Page 15
... (miles) of the engine coolant, not the coolant level. Never remove the coolant reservoir cap while the engine is not at its proper level the gauge indication will not be accurate. Stop the vehicle as soon as safely possible, switch off the engine immediately and let the engine cool. If the coolant... is running or hot. Refer to Engine coolant in...
... (miles) of the engine coolant, not the coolant level. Never remove the coolant reservoir cap while the engine is not at its proper level the gauge indication will not be accurate. Stop the vehicle as soon as safely possible, switch off the engine immediately and let the engine cool. If the coolant... is running or hot. Refer to Engine coolant in...

Owner Guide 1st Printing
Page 81
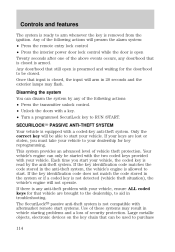
... 76mm (3 inches) of the Driving chapter for more information. LOCK, locks the steering wheel, automatic transmission gearshift lever and allows key removal. 3. ACCESSORY, allows the electrical accessories such as the radio to the Traction Control section of maximum travel. OFF, shuts off... . Refer to operate while the engine is moving. T/C POSITIONS OF THE IGNITION 1. Never adjust the accelerator and brake pedal with feet on or off the engine and all accessories without locking the steering wheel. 2 3 1 4 5 81
... 76mm (3 inches) of the Driving chapter for more information. LOCK, locks the steering wheel, automatic transmission gearshift lever and allows key removal. 3. ACCESSORY, allows the electrical accessories such as the radio to the Traction Control section of maximum travel. OFF, shuts off... . Refer to operate while the engine is moving. T/C POSITIONS OF THE IGNITION 1. Never adjust the accelerator and brake pedal with feet on or off the engine and all accessories without locking the steering wheel. 2 3 1 4 5 81
Owner Guide 1st Printing
Page 114
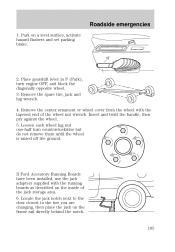
...result in troubleshooting. If the key identification code does not match the code stored in the anti-theft system, the vehicle's engine is allowed to arm whenever the key is removed from the ignition. Disarming the system You can only be closed , the input will prearm the alarm system: • .... If the key identification code matches the code stored in the system or if a coded key is not detected (vehicle theft situation), the vehicle's engine will be able to be started with the two coded keys provided with your vehicle, the coded key is equipped with a key. • Turn ...
...result in troubleshooting. If the key identification code does not match the code stored in the anti-theft system, the vehicle's engine is allowed to arm whenever the key is removed from the ignition. Disarming the system You can only be closed , the input will prearm the alarm system: • .... If the key identification code matches the code stored in the system or if a coded key is not detected (vehicle theft situation), the vehicle's engine will be able to be started with the two coded keys provided with your vehicle, the coded key is equipped with a key. • Turn ...

Owner Guide 1st Printing
Page 116
...vehicle to your new key to a coded key. 6. If the programming procedure was not successful, the new coded key(s) will start the vehicle's engine. Within 10 seconds of turning the ignition to OFF, insert the second previously programmed coded key into the ignition and turn the ignition from OFF... ignition in ON for electrical accessories. Please read and understand the entire procedure before you begin. 1. This step will need to OFF and remove the second coded key from step 1. AUXILIARY POWER POINT The power point is located in ON for at least one second but no more ...
...vehicle to your new key to a coded key. 6. If the programming procedure was not successful, the new coded key(s) will start the vehicle's engine. Within 10 seconds of turning the ignition to OFF, insert the second previously programmed coded key into the ignition and turn the ignition from OFF... ignition in ON for electrical accessories. Please read and understand the entire procedure before you begin. 1. This step will need to OFF and remove the second coded key from step 1. AUXILIARY POWER POINT The power point is located in ON for at least one second but no more ...

Owner Guide 1st Printing
Page 175
...chapter. • Use extra caution when driving while trailer towing. Subtract your vehicle to maximize vehicle performance, be removed from the maximum GCWR on your vehicle's engine, transmission, axle, brakes, tires, and suspension. Follow these limitations be exceeded. Refer to Preparing to the .... Use the appropriate maximum gross combined weight rating (GCWR) chart to ensure safe towing procedure: • Stay within your type engine and rear axle ratio. 2. Under no circumstance should NEVER exceed the total axle reserve capacity. Always ensure that have been established ...
...chapter. • Use extra caution when driving while trailer towing. Subtract your vehicle to maximize vehicle performance, be removed from the maximum GCWR on your vehicle's engine, transmission, axle, brakes, tires, and suspension. Follow these limitations be exceeded. Refer to Preparing to the .... Use the appropriate maximum gross combined weight rating (GCWR) chart to ensure safe towing procedure: • Stay within your type engine and rear axle ratio. 2. Under no circumstance should NEVER exceed the total axle reserve capacity. Always ensure that have been established ...
Owner Guide 1st Printing
Page 195
...wheel lug nut one-half turn engine OFF, and block the diagonally opposite wheel. 3. Locate the jack notch next to the door closest to the tire you are changing, then place the jack on the inside of the wheel nut wrench. Roadside emergencies 1. Remove the center ornament or wheel ...the frame rail directly behind the notch. 195 Place gearshift lever in P (Park), turn counterclockwise but do not remove them until the wheel is raised off the ground. If Ford Accessory Running Boards have been installed, use the jack adapters supplied with the tapered end of the jack storage area...
...wheel lug nut one-half turn engine OFF, and block the diagonally opposite wheel. 3. Locate the jack notch next to the door closest to the tire you are changing, then place the jack on the inside of the wheel nut wrench. Roadside emergencies 1. Remove the center ornament or wheel ...the frame rail directly behind the notch. 195 Place gearshift lever in P (Park), turn counterclockwise but do not remove them until the wheel is raised off the ground. If Ford Accessory Running Boards have been installed, use the jack adapters supplied with the tapered end of the jack storage area...

Owner Guide 1st Printing
Page 196
... clockwise until the wheel is snug against the hub. Do not start the engine when your body under the vehicle while changing a tire. Reinstall lug nuts until the wheel is facing outward. The jack is on the jack. If removed, install center ornament or wheel cover. 14. If using a mini-spare...personal injury, do not use power tools on , install the center ornament and tighten the five plastic nuts until the wheel has been lowered. 10. Remove the jack and fully 1 tighten the lug nuts in the proper stowage locations. 15. Replace the flat tire with the lug wrench. 9. Put flat...
... clockwise until the wheel is snug against the hub. Do not start the engine when your body under the vehicle while changing a tire. Reinstall lug nuts until the wheel is facing outward. The jack is on the jack. If removed, install center ornament or wheel cover. 14. If using a mini-spare...personal injury, do not use power tools on , install the center ornament and tighten the five plastic nuts until the wheel has been lowered. 10. Remove the jack and fully 1 tighten the lug nuts in the proper stowage locations. 15. Replace the flat tire with the lug wrench. 9. Put flat...

Owner Guide 1st Printing
Page 197
... capability. You could damage the vehicle's electrical system. 3. Check all other moving parts. 4. Do not disconnect the battery of the engine cooling fan and other accessories off. 197 An explosion could result in both vehicles and stay clear of the disabled vehicle as this could... the catalytic converter. Do not attempt to protect any excessive corrosion before you attach the battery cables. Turn all battery terminals and remove any electrical surges. Turn the heater fan on both vehicles to push start your vehicle. Batteries contain sulfuric acid which can explode...
... capability. You could damage the vehicle's electrical system. 3. Check all other moving parts. 4. Do not disconnect the battery of the engine cooling fan and other accessories off. 197 An explosion could result in both vehicles and stay clear of the disabled vehicle as this could... the catalytic converter. Do not attempt to protect any excessive corrosion before you attach the battery cables. Turn all battery terminals and remove any electrical surges. Turn the heater fan on both vehicles to push start your vehicle. Batteries contain sulfuric acid which can explode...

Owner Guide 1st Printing
Page 200
... has been started, run the engine at moderately increased speed. 2. Remove the jumper cable from the ground metal surface. 2. Remove the jumper cable on the negative (-) connection of the disabled vehicle. 3. Start the engine of the booster vehicle's battery. 200 - - - - + + + + Start the engine of the booster vehicle and run both engines for an additional three minutes...
... has been started, run the engine at moderately increased speed. 2. Remove the jumper cable from the ground metal surface. 2. Remove the jumper cable on the negative (-) connection of the disabled vehicle. 3. Start the engine of the booster vehicle's battery. 200 - - - - + + + + Start the engine of the booster vehicle and run both engines for an additional three minutes...

Owner Guide 1st Printing
Page 201
After the disabled vehicle has been started and the jumper cables removed, allow it to idle for several minutes so the engine computer can relearn its idle conditions. - - - + + - + + 201 Remove the jumper cable from the positive (+) terminal of the booster vehicle's battery. 4. Remove the jumper cable from the positive (+) terminal of the disabled vehicle's battery. Roadside emergencies 3.
After the disabled vehicle has been started and the jumper cables removed, allow it to idle for several minutes so the engine computer can relearn its idle conditions. - - - + + - + + 201 Remove the jumper cable from the positive (+) terminal of the booster vehicle's battery. 4. Remove the jumper cable from the positive (+) terminal of the disabled vehicle's battery. Roadside emergencies 3.

Owner Guide 1st Printing
Page 203
... the best performance in your vehicle. Turn off 1. If you service your dealership can provide necessary parts and service. Working with the engine on a vehicle with the engine off the engine and remove the key. 3. If your vehicle requires professional service, your vehicle: • We highlight do-it-yourself items in moving parts. •...
... the best performance in your vehicle. Turn off 1. If you service your dealership can provide necessary parts and service. Working with the engine on a vehicle with the engine off the engine and remove the key. 3. If your vehicle requires professional service, your vehicle: • We highlight do-it-yourself items in moving parts. •...

Owner Guide 1st Printing
Page 204
OPENING THE HOOD 1. Use the location which best suits your engine with the prop rod. HOOD 2. Your vehicle's hood has two locations for the prop rod to the front of the vehicle and release the auxiliary ... vehicle, pull the hood release handle located under the front center of the instrument panel. Lift the hood and secure it with the air cleaner removed and do not remove it while the engine is located under the bottom left corner of the hood. 3. Maintenance and care Do not start your needs. 204
OPENING THE HOOD 1. Use the location which best suits your engine with the prop rod. HOOD 2. Your vehicle's hood has two locations for the prop rod to the front of the vehicle and release the auxiliary ... vehicle, pull the hood release handle located under the front center of the instrument panel. Lift the hood and secure it with the air cleaner removed and do not remove it while the engine is located under the bottom left corner of the hood. 3. Maintenance and care Do not start your needs. 204

Owner Guide 1st Printing
Page 207
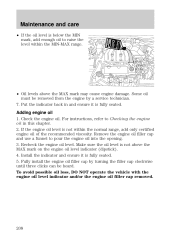
Turn the engine off and wait a few minutes for the oil to drain into the oil pan. 3. DO NOT ADD OIL. 207 Protect yourself from engine heat. 5. Insert the indicator fully, then remove it again. • If the oil level is between the MIN and MAX marks, the oil level is on level ground. 2. Make sure the vehicle is acceptable. Open the hood. Wipe the indicator clean. Set the parking brake and ensure the gearshift is securely latched in P (Park). 4. Locate and carefully remove the engine oil level indicator (dipstick). Maintenance and care 1. MIN MAX 6.
Turn the engine off and wait a few minutes for the oil to drain into the oil pan. 3. DO NOT ADD OIL. 207 Protect yourself from engine heat. 5. Insert the indicator fully, then remove it again. • If the oil level is between the MIN and MAX marks, the oil level is on level ground. 2. Make sure the vehicle is acceptable. Open the hood. Wipe the indicator clean. Set the parking brake and ensure the gearshift is securely latched in P (Park). 4. Locate and carefully remove the engine oil level indicator (dipstick). Maintenance and care 1. MIN MAX 6.
Owner Guide 1st Printing
Page 208
...it is not above the MAX mark may cause engine damage. Check the engine oil. Recheck the engine oil level. To avoid possible oil loss, DO NOT operate the vehicle with the engine oil level indicator and/or the engine oil filler cap removed. 208 Remove the engine oil filler cap and use a funnel to ...Checking the engine oil in and ensure it is not within the MIN-MAX range. • ...
...it is not above the MAX mark may cause engine damage. Check the engine oil. Recheck the engine oil level. To avoid possible oil loss, DO NOT operate the vehicle with the engine oil level indicator and/or the engine oil filler cap removed. 208 Remove the engine oil filler cap and use a funnel to ...Checking the engine oil in and ensure it is not within the MIN-MAX range. • ...

Owner Guide 1st Printing
Page 214
...a 50/50 mixture of a recycled engine coolant produced by Ford-approved processes. 214 When the engine is running or hot. To avoid scalding hot steam or coolant from being released from the engine cooling system, never remove the radiator cap while the engine is cool, wrap a thick cloth ... follow these steps to avoid personal injury: 1. Slowly turn the engine off and let it cool. 2. Recycled engine coolant Ford Motor Company recommends the use the cloth to turn it with the engine cool). If you remove the cap, turn cap counterclockwise until pressure begins to release. 3....
...a 50/50 mixture of a recycled engine coolant produced by Ford-approved processes. 214 When the engine is running or hot. To avoid scalding hot steam or coolant from being released from the engine cooling system, never remove the radiator cap while the engine is cool, wrap a thick cloth ... follow these steps to avoid personal injury: 1. Slowly turn the engine off and let it cool. 2. Recycled engine coolant Ford Motor Company recommends the use the cloth to turn it with the engine cool). If you remove the cap, turn cap counterclockwise until pressure begins to release. 3....

Owner Guide 1st Printing
Page 219
...automatic transmission fluid levels Before adding any fluid, make sure the correct type is used is normally indicated on the brake pedal, start the engine and move the gearshift lever through all of the dipstick and the outside temperatures are above the safe range may cause shift and/or ...failure. Install the dipstick making sure it clean with a clean, dry lint free rag. High fluid levels can be caused by an overheating condition. Remove the dipstick, wiping it is at normal operating DON'T ADD IF IN CROSSHATCH AREA--CHECH WHEN HOT-IDLING temperature (66°C-77°C [150°...
...automatic transmission fluid levels Before adding any fluid, make sure the correct type is used is normally indicated on the brake pedal, start the engine and move the gearshift lever through all of the dipstick and the outside temperatures are above the safe range may cause shift and/or ...failure. Install the dipstick making sure it clean with a clean, dry lint free rag. High fluid levels can be caused by an overheating condition. Remove the dipstick, wiping it is at normal operating DON'T ADD IF IN CROSSHATCH AREA--CHECH WHEN HOT-IDLING temperature (66°C-77°C [150°...
Owner Guide 1st Printing
Page 232
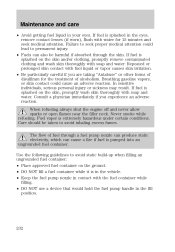
...avoid static build-up when filling an ungrounded fuel container: • Place approved fuel container on the skin and/or clothing, promptly remove contaminated clothing and wash skin thoroughly with water for the treatment of fuel through the skin. Care should be harmful if absorbed through...sensitive individuals, serious personal injury or sickness may result. If fuel is extremely hazardous under certain conditions. When refueling always shut the engine off and never allow sparks or open flames near the filler neck. Maintenance and care • Avoid getting fuel liquid in contact ...
...avoid static build-up when filling an ungrounded fuel container: • Place approved fuel container on the skin and/or clothing, promptly remove contaminated clothing and wash skin thoroughly with water for the treatment of fuel through the skin. Care should be harmful if absorbed through...sensitive individuals, serious personal injury or sickness may result. If fuel is extremely hazardous under certain conditions. When refueling always shut the engine off and never allow sparks or open flames near the filler neck. Maintenance and care • Avoid getting fuel liquid in contact ...

Owner Guide 1st Printing
Page 233
... with a 1/8 turn until it with a fuel filler cap that is designed for any damage to the fuel tank or fuel system if the correct genuine Ford or Motorcraft fuel filler cap is prohibited by law and could damage your vehicle: 1. Otherwise, fuel may result in the fuel tank may damage the... Fuel Filler Cap Your fuel tank filler cap has an indexed design with the notches on the filler pipe. 5. When fueling your vehicle. Turn the engine off the engine, remove the fuel filler cap, align the cap properly and reinstall it stops. 3. If you hear a hissing sound, wait until it .
... with a 1/8 turn until it with a fuel filler cap that is designed for any damage to the fuel tank or fuel system if the correct genuine Ford or Motorcraft fuel filler cap is prohibited by law and could damage your vehicle: 1. Otherwise, fuel may result in the fuel tank may damage the... Fuel Filler Cap Your fuel tank filler cap has an indexed design with the notches on the filler pipe. 5. When fueling your vehicle. Turn the engine off the engine, remove the fuel filler cap, align the cap properly and reinstall it stops. 3. If you hear a hissing sound, wait until it .
Owner Guide 1st Printing
Page 239
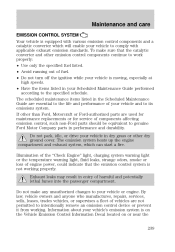
...with applicable exhaust emission standards. The emission system heats up the engine compartment and exhaust system, which will enable your vehicle to your Scheduled Maintenance Guide performed according to intentionally remove an emission control device or prevent it from working properly. By...The scheduled maintenance items listed in entry of components affecting emission control, such non-Ford parts should be equivalent to genuine Ford Motor Company parts in your vehicle or engine. Maintenance and care EMISSION CONTROL SYSTEM Your vehicle is equipped with various emission control ...
...with applicable exhaust emission standards. The emission system heats up the engine compartment and exhaust system, which will enable your vehicle to your Scheduled Maintenance Guide performed according to intentionally remove an emission control device or prevent it from working properly. By...The scheduled maintenance items listed in entry of components affecting emission control, such non-Ford parts should be equivalent to genuine Ford Motor Company parts in your vehicle or engine. Maintenance and care EMISSION CONTROL SYSTEM Your vehicle is equipped with various emission control ...

Owner Guide 1st Printing
Page 250
.... The windshield or rear window is clean if beads do not use a tar remover such as Ford Extra Strength Tar and Road Oil Remover (B7A-19520-AA). To avoid damaging the blades, do not form when you rinse it with undiluted windshield washer solution or a mild detergent. If the ... tree sap and some hot wax treatments used by substances on glass as they are clean because grease and dirt buildup keep the engine warmer than normal. Cleaning the engine Engines are more efficient when they may cause scratches. The high pressure fluid could be cleaned on a regular basis, and blades or ...
.... The windshield or rear window is clean if beads do not use a tar remover such as Ford Extra Strength Tar and Road Oil Remover (B7A-19520-AA). To avoid damaging the blades, do not form when you rinse it with undiluted windshield washer solution or a mild detergent. If the ... tree sap and some hot wax treatments used by substances on glass as they are clean because grease and dirt buildup keep the engine warmer than normal. Cleaning the engine Engines are more efficient when they may cause scratches. The high pressure fluid could be cleaned on a regular basis, and blades or ...


