Owner's Manual
Page 1
2011 Chevrolet Impala Owner Manual M In Brief ...1-1 Instrument Panel ...1-2 Initial Drive Information ...1-3 Vehicle Features ...1-14 Performance and Maintenance ...1-18 Keys, Doors and Windows ...2-1 Keys and Locks ...2-2 Doors ...2-10 ...
2011 Chevrolet Impala Owner Manual M In Brief ...1-1 Instrument Panel ...1-2 Initial Drive Information ...1-3 Vehicle Features ...1-14 Performance and Maintenance ...1-18 Keys, Doors and Windows ...2-1 Keys and Locks ...2-2 Doors ...2-10 ...
Owner's Manual
Page 2
2011 Chevrolet Impala Owner Manual M Electrical System ...10-37 Wheels and Tires ...10-42 Jump Starting ...10-75 Towing ...10-79 Appearance Care ...10-81 Service and Maintenance ...11-1 General Information ...11-1 Scheduled Maintenance ...11-2 Recommended Fluids, Lubricants, and Parts ...11-6 Maintenance Records ...11-9 Technical Data ...12-1 Vehicle Identification ...12-1 Vehicle Data ...12-2 Customer Information ...13-1 Customer Information ...13-1 Reporting Safety Defects ...13-14 Vehicle Data Recording and Privacy...13-15 Index ...i-1
2011 Chevrolet Impala Owner Manual M Electrical System ...10-37 Wheels and Tires ...10-42 Jump Starting ...10-75 Towing ...10-79 Appearance Care ...10-81 Service and Maintenance ...11-1 General Information ...11-1 Scheduled Maintenance ...11-2 Recommended Fluids, Lubricants, and Parts ...11-6 Maintenance Records ...11-9 Technical Data ...12-1 Vehicle Identification ...12-1 Vehicle Data ...12-2 Customer Information ...13-1 Customer Information ...13-1 Reporting Safety Defects ...13-14 Vehicle Data Recording and Privacy...13-15 Index ...i-1
Owner's Manual
Page 3
...this manual including, but not limited to the printing of General Motors LLC, its subsidiaries, affiliates, or licensors. Litho in the vehicle for Chevrolet Motor Division wherever it appears in this manual in U.S.A. Box 07130 Detroit, MI 48207 1-800-551-4123 Numéro de poste 6438... vehicle either because they are options that you did not purchase or due to changes subsequent to , GM, the GM logo, CHEVROLET, the CHEVROLET Emblem, IMPALA, and the IMPALA Emblem are trademarks and/or service marks of this owner manual. All Rights Reserved. Part No. 20782813 B Second Printing ©...
...this manual including, but not limited to the printing of General Motors LLC, its subsidiaries, affiliates, or licensors. Litho in the vehicle for Chevrolet Motor Division wherever it appears in this manual in U.S.A. Box 07130 Detroit, MI 48207 1-800-551-4123 Numéro de poste 6438... vehicle either because they are options that you did not purchase or due to changes subsequent to , GM, the GM logo, CHEVROLET, the CHEVROLET Emblem, IMPALA, and the IMPALA Emblem are trademarks and/or service marks of this owner manual. All Rights Reserved. Part No. 20782813 B Second Printing ©...
Owner's Manual
Page 4
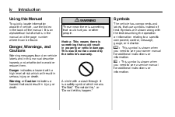
iv Introduction Using this Manual To quickly locate information about the vehicle, use symbols instead of risk which means "Do Not," "Do not do this," or "Do not let this manual describe hazards and what is in property or vehicle damage. Notice: This means there is shown when you need to see a service manual for additional instructions or information. * : This symbol is something that use the Index in the back of what to do to a specific component, control, message, gauge, or indicator. Symbols are shown along with the text describing the operation or information relating...
iv Introduction Using this Manual To quickly locate information about the vehicle, use symbols instead of risk which means "Do Not," "Do not do this," or "Do not let this manual describe hazards and what is in property or vehicle damage. Notice: This means there is shown when you need to see a service manual for additional instructions or information. * : This symbol is something that use the Index in the back of what to do to a specific component, control, message, gauge, or indicator. Symbols are shown along with the text describing the operation or information relating...
Owner's Manual
Page 5
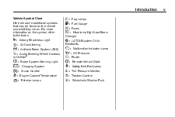
Introduction Vehicle Symbol Chart Here are some additional symbols that may be found on the symbol, refer to the Index. v # : Fog Lamps . : Fuel Gauge + : Fuses 3 : Headlamp High/Low-Beam Changer or OnStar 9 : Airbag Readiness Light # : Air Conditioning ! : Antilock Brake System (ABS) % : Audio Steering Wheel Controls ® $ : Brake System Warning Light " : Charging System I : Cruise Control B : Engine Coolant Temperature O : Exterior Lamps j : LATCH System Child Restraints * : Malfunction Indicator Lamp : : Oil Pressure } : Power / : Remote Vehicle Start > : Safety Belt Reminders 7 ...
Introduction Vehicle Symbol Chart Here are some additional symbols that may be found on the symbol, refer to the Index. v # : Fog Lamps . : Fuel Gauge + : Fuses 3 : Headlamp High/Low-Beam Changer or OnStar 9 : Airbag Readiness Light # : Air Conditioning ! : Antilock Brake System (ABS) % : Audio Steering Wheel Controls ® $ : Brake System Warning Light " : Charging System I : Cruise Control B : Engine Coolant Temperature O : Exterior Lamps j : LATCH System Child Restraints * : Malfunction Indicator Lamp : : Oil Pressure } : Power / : Remote Vehicle Start > : Safety Belt Reminders 7 ...
Owner's Manual
Page 6
vi Introduction 2 NOTES
vi Introduction 2 NOTES
Owner's Manual
Page 7
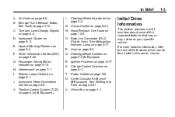
In Brief 1-1 In Brief Instrument Panel Instrument Panel ...1-2 Initial Drive Information Initial Drive Information ...Remote Keyless Entry (RKE) System ...Remote Vehicle Start ...Door Locks ...Trunk Release ...Windows ...Seat Adjustment ...Second Row Seats ...Head Restraint Adjustment ...Safety Belts ...1-3 1-4 1-4 1-5 1-5 1-6 1-6 1-8 1-8 1-8 Sensing System for Passenger Airbag ...1-8 Mirror Adjustment ...1-9 Steering Wheel Adjustment ...1-10 Interior Lighting ...1-10 Exterior Lighting ...1-10 Windshield Wiper/Washer ...1-11 Climate Controls ...1-12 Performance and Maintenance Traction ...
In Brief 1-1 In Brief Instrument Panel Instrument Panel ...1-2 Initial Drive Information Initial Drive Information ...Remote Keyless Entry (RKE) System ...Remote Vehicle Start ...Door Locks ...Trunk Release ...Windows ...Seat Adjustment ...Second Row Seats ...Head Restraint Adjustment ...Safety Belts ...1-3 1-4 1-4 1-5 1-5 1-6 1-6 1-8 1-8 1-8 Sensing System for Passenger Airbag ...1-8 Mirror Adjustment ...1-9 Steering Wheel Adjustment ...1-10 Interior Lighting ...1-10 Exterior Lighting ...1-10 Windshield Wiper/Washer ...1-11 Climate Controls ...1-12 Performance and Maintenance Traction ...
Owner's Manual
Page 9
Hood Release. S. U. For more detailed information, refer to each of the important features that may or may not be found later in this owner manual. Infotainment on page 9‑29 (If Equipped). Traction Control System (TCS) on page 7‑1. Turn and Lane-Change Signals on page 5‑2. 1-3 M. D. F. Steering Wheel Adjustment on page 6‑4. O. Power Outlets on page 5‑16. Passenger Airbag Status Indicator on page 5‑8. C. Driver Information Center (DIC) on page 5‑17. See Malfunction Indicator Lamp on page 5&#...
Hood Release. S. U. For more detailed information, refer to each of the important features that may or may not be found later in this owner manual. Infotainment on page 9‑29 (If Equipped). Traction Control System (TCS) on page 7‑1. Turn and Lane-Change Signals on page 5‑2. 1-3 M. D. F. Steering Wheel Adjustment on page 6‑4. O. Power Outlets on page 5‑16. Passenger Airbag Status Indicator on page 5‑8. C. Driver Information Center (DIC) on page 5‑17. See Malfunction Indicator Lamp on page 5&#...

Owner's Manual
Page 10
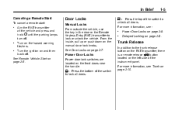
See Vehicle Personalization on page 2‑3. Press L and release to unlock the driver door. Aim the RKE transmitter at the vehicle. 2. Immediately after completing Step 2, press and hold V for approximately one second to sound the panic alarm. 1-4 In Brief Press Remote Keyless Entry (RKE) System The RKE transmitter is running. Remote Vehicle Start With this feature the engine can be started from the vehicle. Press K to locate the vehicle. Press L again to unlock all doors. Press and hold / until the turn on and remain on . The engine will continue to ...
See Vehicle Personalization on page 2‑3. Press L and release to unlock the driver door. Aim the RKE transmitter at the vehicle. 2. Immediately after completing Step 2, press and hold V for approximately one second to sound the panic alarm. 1-4 In Brief Press Remote Keyless Entry (RKE) System The RKE transmitter is running. Remote Vehicle Start With this feature the engine can be started from the vehicle. Press K to locate the vehicle. Press L again to unlock all doors. Press and hold / until the turn on and remain on . The engine will continue to ...
Owner's Manual
Page 11
From the inside, pull up or push down on page 2‑8. Power Door Locks on the manual door lock knobs. Delayed Locking on the front doors near the handle. Power Door Locks Power door lock switches are located on page 2‑8. . For more information, see : . . In Brief Canceling a Remote Start To cancel a remote start: . 1-5 Door Locks Manual Locks From outside the vehicle, use the key in the door or the Remote Keyless Entry (RKE) transmitter to lock all doors. See Door Locks on page 2‑5. Turn the ignition on page 2‑10. . For more information, see ...
From the inside, pull up or push down on page 2‑8. Power Door Locks on the manual door lock knobs. Delayed Locking on the front doors near the handle. Power Door Locks Power door lock switches are located on page 2‑8. . For more information, see : . . In Brief Canceling a Remote Start To cancel a remote start: . 1-5 Door Locks Manual Locks From outside the vehicle, use the key in the door or the Remote Keyless Entry (RKE) transmitter to lock all doors. See Door Locks on page 2‑5. Turn the ignition on page 2‑10. . For more information, see ...
Owner's Manual
Page 12
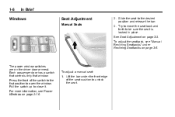
The power window switches are on page 3‑3. Lift the bar under Reclining Seatbacks on page 2‑16. To adjust the seatback, see Power Windows on page 3‑5. Pull the switch up to unlock the seat. To adjust a manual seat: 1. For more information, see "Manual Reclining Seatbacks" under the front edge of the switch to the first position to the desired position and release the bar. 3. Each passenger door has a switch that controls only that window. See Seat Adjustment on the driver door armrest. Press the front of the seat cushion to close it. 1-6 In ...
The power window switches are on page 3‑3. Lift the bar under Reclining Seatbacks on page 2‑16. To adjust the seatback, see Power Windows on page 3‑5. Pull the switch up to unlock the seat. To adjust a manual seat: 1. For more information, see "Manual Reclining Seatbacks" under the front edge of the switch to the first position to the desired position and release the bar. 3. Each passenger door has a switch that controls only that window. See Seat Adjustment on the driver door armrest. Press the front of the seat cushion to close it. 1-6 In ...
Owner's Manual
Page 13
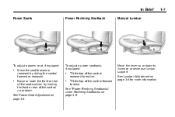
See Lumbar Adjustment on page 3‑5. Tilt the top of the control up or down . See "Power Reclining Seatbacks" under Reclining Seatbacks on page 3‑4 for more information. . . Move the seat forward or rearward by moving the front or rear of the control rearward to raise. Tilt the top of the seat cushion by sliding the control forward or rearward. Raise or lower the front or rear of the control forward to recline. In Brief Power Seats Power Reclining Seatback Manual Lumbar 1-7 To adjust a power seat, if equipped: . Move the lever up or down to ...
See Lumbar Adjustment on page 3‑5. Tilt the top of the control up or down . See "Power Reclining Seatbacks" under Reclining Seatbacks on page 3‑4 for more information. . . Move the seat forward or rearward by moving the front or rear of the control rearward to raise. Tilt the top of the seat cushion by sliding the control forward or rearward. Raise or lower the front or rear of the control forward to recline. In Brief Power Seats Power Reclining Seatback Manual Lumbar 1-7 To adjust a power seat, if equipped: . Move the lever up or down to ...
Owner's Manual
Page 14
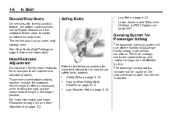
Safety Belts . . Lap Belt on page 3‑51. Lower Anchors and Tethers for Children (LATCH System) on page 3‑23. Safety Belts on the instrument panel when the vehicle is started. The passenger airbag status indicator will turn off the right front passenger frontal airbag under seat storage area. For more information. Lap-Shoulder Belt on page 3‑3. To achieve a comfortable seating position, change the seatback recline angle as little as necessary while keeping the seat and the head restraint height in the proper position. The vehicle also has an under certain ...
Safety Belts . . Lap Belt on page 3‑51. Lower Anchors and Tethers for Children (LATCH System) on page 3‑23. Safety Belts on the instrument panel when the vehicle is started. The passenger airbag status indicator will turn off the right front passenger frontal airbag under seat storage area. For more information. Lap-Shoulder Belt on page 3‑3. To achieve a comfortable seating position, change the seatback recline angle as little as necessary while keeping the seat and the head restraint height in the proper position. The vehicle also has an under certain ...
Owner's Manual
Page 15
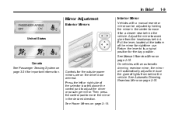
See Manual Rearview Mirror on page 2‑14. Press the left or right side of the mirror for the outside power mirrors are on page 2‑15. See Power Mirrors on page 2‑15. In Brief 1-9 Mirror Adjustment Exterior Mirrors Interior Mirror Vehicles with an automatic dimming rearview mirror, the mirror will automatically adjust to reduce the glare of lights from the headlamps behind. Then press the control pad to move it for important information. On vehicles with a manual rearview mirror can be adjusted by holding the mirror in the desired direction. See ...
See Manual Rearview Mirror on page 2‑14. Press the left or right side of the mirror for the outside power mirrors are on page 2‑15. See Power Mirrors on page 2‑15. In Brief 1-9 Mirror Adjustment Exterior Mirrors Interior Mirror Vehicles with an automatic dimming rearview mirror, the mirror will automatically adjust to reduce the glare of lights from the headlamps behind. Then press the control pad to move it for important information. On vehicles with a manual rearview mirror can be adjusted by holding the mirror in the desired direction. See ...
Owner's Manual
Page 16
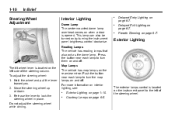
Press the button near each lamp to the left side of the steering wheel. Delayed Entry Lighting on page 6‑7. Delayed Exit Lighting on page 6‑7. To adjust the steering wheel: 1. Do not adjust the steering wheel while driving. For more information on by turning the instrument panel brightness control clockwise. The exterior lamps control is located on the instrument panel to turn the map lamps on and off . . This lamp can also be turned on interior lighting, see: . . Map Lamps The vehicle has map lamps on page 6‑5. Release the lever to turn...
Press the button near each lamp to the left side of the steering wheel. Delayed Entry Lighting on page 6‑7. Delayed Exit Lighting on page 6‑7. To adjust the steering wheel: 1. Do not adjust the steering wheel while driving. For more information on by turning the instrument panel brightness control clockwise. The exterior lamps control is located on the instrument panel to turn the map lamps on and off . . This lamp can also be turned on interior lighting, see: . . Map Lamps The vehicle has map lamps on page 6‑5. Release the lever to turn...
Owner's Manual
Page 17
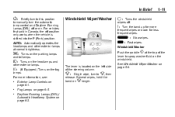
For vehicles first sold in Canada, the off or on. Fog Lamps on 8 longer. . . The lever is shifted into the P (Park) position. Several wipes, hold the band on page 6‑5. Turns on page 6‑3. Daytime Running Lamps (DRL)/ Automatic Headlamp System on the parking lamps and taillamps. AUTO: Automatically operates the headlamps and other exterior lamps. # : (If Equipped) Turns on the fog lamps. For more frequent wipes or down for less frequent wipes. 6 : Slow wipes. ? : Fast wipes. Windshield Washer Push the paddle L at normal brightness. Single wipe, turn...
For vehicles first sold in Canada, the off or on. Fog Lamps on 8 longer. . . The lever is shifted into the P (Park) position. Several wipes, hold the band on page 6‑5. Turns on page 6‑3. Daytime Running Lamps (DRL)/ Automatic Headlamp System on the parking lamps and taillamps. AUTO: Automatically operates the headlamps and other exterior lamps. # : (If Equipped) Turns on the fog lamps. For more frequent wipes or down for less frequent wipes. 6 : Slow wipes. ? : Fast wipes. Windshield Washer Push the paddle L at normal brightness. Single wipe, turn...

Owner's Manual
Page 18
1-12 In Brief Climate Controls This vehicle may have a dual or single climate control system. Outside Air C. Air Delivery Mode Control E. Driver and Passenger Heated Seats G. Driver and Passenger Temperature Controls H. Recirculation D. Rear Window Defogger The heating, cooling, defrost, defog, and ventilation can be controlled with either of these systems. Dual Zone with Optional Heated Seat Controls A. Fan Control B. Air Conditioning F.
1-12 In Brief Climate Controls This vehicle may have a dual or single climate control system. Outside Air C. Air Delivery Mode Control E. Driver and Passenger Heated Seats G. Driver and Passenger Temperature Controls H. Recirculation D. Rear Window Defogger The heating, cooling, defrost, defog, and ventilation can be controlled with either of these systems. Dual Zone with Optional Heated Seat Controls A. Fan Control B. Air Conditioning F.

Owner's Manual
Page 19
Rear Window Defogger See Climate Control Systems on page 8‑1. Outside Air C. Temperature Control D. Recirculation E. Fan Control B. Air Delivery Mode Control F. Air Conditioning G. In Brief 1-13 Single Zone A.
Rear Window Defogger See Climate Control Systems on page 8‑1. Outside Air C. Temperature Control D. Recirculation E. Fan Control B. Air Delivery Mode Control F. Air Conditioning G. In Brief 1-13 Single Zone A.
Owner's Manual
Page 20
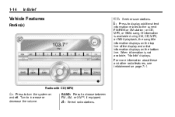
Radio with CD (MP3) O : Press to increase or decrease the volume. For more information about these and other radio features, see Infotainment on the bottom line. Turn to turn the system on and off. If information is not available, "No Info" displays. BAND: Press to the current FM-RDS or XM station; f: Select radio stations. 1-14 In Brief Vehicle Features Radio(s) © ¨ : Seek or scan stations. 4 : Press to display additional text information related to choose between FM, AM, or XM™, if equipped. When information is available during XM, CD, MP3, or WMA ...
Radio with CD (MP3) O : Press to increase or decrease the volume. For more information about these and other radio features, see Infotainment on the bottom line. Turn to turn the system on and off. If information is not available, "No Info" displays. BAND: Press to the current FM-RDS or XM station; f: Select radio stations. 1-14 In Brief Vehicle Features Radio(s) © ¨ : Seek or scan stations. 4 : Press to display additional text information related to choose between FM, AM, or XM™, if equipped. When information is available during XM, CD, MP3, or WMA ...
Owner's Manual
Page 21
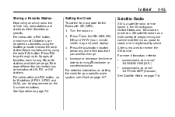
Press FAV to go through up to change. 4. See Operation on page 7‑2. 1-15 Setting the Clock To set the time and date for your specific audio system, see Clock on setting the clock for the Radio with a FAV button, a maximum of 36 stations can be stored as either favorites or presets. Increase or decrease the time or date by using the 6 softkeys located below any combination of the tabs that you want to 18 stations (6 FM1, 6 FM2, and 6 AM), can be programmed on . 2. XM satellite radio has a wide variety of programming and commercial-free music, coast to 6 pages of ...
Press FAV to go through up to change. 4. See Operation on page 7‑2. 1-15 Setting the Clock To set the time and date for your specific audio system, see Clock on setting the clock for the Radio with a FAV button, a maximum of 36 stations can be stored as either favorites or presets. Increase or decrease the time or date by using the 6 softkeys located below any combination of the tabs that you want to 18 stations (6 FM1, 6 FM2, and 6 AM), can be programmed on . 2. XM satellite radio has a wide variety of programming and commercial-free music, coast to 6 pages of ...
