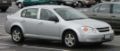
Owner's Manual
Page 1
2007 Chevrolet Cobalt Owner Manual Seats and Restraint Systems ...7 Front Seats ...9 Rear Seats ...16 Safety Belts ...18 Child Restraints ...40 Airbag System ...66 Restraint System Check ...82 Features and Controls ...85 Keys ...87 Doors and Locks ...96 Windows ...102 Theft-Deterrent Systems ...104 Starting and Operating Your Vehicle ...108 Mirrors ...127 OnStar® System ...129 Storage Areas ...133 Sunroof ...134 M 135 138 154 160 177 188 Instrument Panel ...Instrument Panel Overview ...Climate Controls ...Warning Lights, Gages, and Indicators ...Driver Information...
2007 Chevrolet Cobalt Owner Manual Seats and Restraint Systems ...7 Front Seats ...9 Rear Seats ...16 Safety Belts ...18 Child Restraints ...40 Airbag System ...66 Restraint System Check ...82 Features and Controls ...85 Keys ...87 Doors and Locks ...96 Windows ...102 Theft-Deterrent Systems ...104 Starting and Operating Your Vehicle ...108 Mirrors ...127 OnStar® System ...129 Storage Areas ...133 Sunroof ...134 M 135 138 154 160 177 188 Instrument Panel ...Instrument Panel Overview ...Climate Controls ...Warning Lights, Gages, and Indicators ...Driver Information...

Owner's Manual
Page 2
Service and Appearance Care ...Service ...Fuel ...Checking Things Under the Hood ...Headlamp Aiming ...Bulb Replacement ...Windshield Wiper Blade Replacement ...Tires ...Appearance Care ...Vehicle Identification ...Electrical System ...Capacities and Specifications ... 271 274 276 282 323 326 333 334 369 378 378 385 Maintenance Schedule ...387 Maintenance Schedule ...388 Customer Assistance Information ...409 Customer Assistance and Information ...410 Reporting Safety Defects ...428 Index ...431 2
Service and Appearance Care ...Service ...Fuel ...Checking Things Under the Hood ...Headlamp Aiming ...Bulb Replacement ...Windshield Wiper Blade Replacement ...Tires ...Appearance Care ...Vehicle Identification ...Electrical System ...Capacities and Specifications ... 271 274 276 282 323 326 333 334 369 378 378 385 Maintenance Schedule ...387 Maintenance Schedule ...388 Customer Assistance Information ...409 Customer Assistance and Information ...410 Reporting Safety Defects ...428 Index ...431 2

Owner's Manual
Page 15
... sure it is locked. Move the seat rearward until it locks into the rear seat area. That could move . Push down the easy entry seat handle located on the rear of the rear seat. 1. Always push and pull on the outboard side to release the seatback. 2. Tilt the seatback forward completely while pushing the seat forward. 3. Easy Entry Seat (Coupe) To use the easy entry seat, do the...
... sure it is locked. Move the seat rearward until it locks into the rear seat area. That could move . Push down the easy entry seat handle located on the rear of the rear seat. 1. Always push and pull on the outboard side to release the seatback. 2. Tilt the seatback forward completely while pushing the seat forward. 3. Easy Entry Seat (Coupe) To use the easy entry seat, do the...
Owner's Manual
Page 85
... Parking Brake ...120 Shifting Into Park (P) (Automatic Transaxle) ...121 Shifting Out of Park (P) (Automatic Transaxle) ...123 Parking Over Things That Burn ...124 Engine Exhaust ...125 Running the Engine While Parked ...126 Keys ...87 Remote Keyless Entry (RKE) System ...88 Remote Keyless Entry (RKE) System Operation ...89 Doors and Locks ...96 Door Locks ...96 Power Door Locks ...97 Delayed Locking ...97 Automatic Door Lock ...98 Programmable Automatic Door Unlock ...98 Rear Door Security Locks (Sedan) ...98 Lockout Protection ...99 Trunk ...100 Windows ...102 Manual Windows ...103 Power...
... Parking Brake ...120 Shifting Into Park (P) (Automatic Transaxle) ...121 Shifting Out of Park (P) (Automatic Transaxle) ...123 Parking Over Things That Burn ...124 Engine Exhaust ...125 Running the Engine While Parked ...126 Keys ...87 Remote Keyless Entry (RKE) System ...88 Remote Keyless Entry (RKE) System Operation ...89 Doors and Locks ...96 Door Locks ...96 Power Door Locks ...97 Delayed Locking ...97 Automatic Door Lock ...98 Programmable Automatic Door Unlock ...98 Rear Door Security Locks (Sedan) ...98 Lockout Protection ...99 Trunk ...100 Windows ...102 Manual Windows ...103 Power...

Owner's Manual
Page 94
The engine will start. 94 Your vehicle's engine can be started two times, per ignition cycle, using the remote start feature, do any of the following. To start the vehicle using the transmitter's remote start feature. To manually shut off to drive the vehicle. 4. If the remote start procedure is inserted into the ignition switch and turn to RUN to indicate the engine is running , insert the key into the ignition switch and turned to RUN and then LOCK. When the vehicle starts, the parking lamps...
The engine will start. 94 Your vehicle's engine can be started two times, per ignition cycle, using the remote start feature, do any of the following. To start the vehicle using the transmitter's remote start feature. To manually shut off to drive the vehicle. 4. If the remote start procedure is inserted into the ignition switch and turn to RUN to indicate the engine is running , insert the key into the ignition switch and turned to RUN and then LOCK. When the vehicle starts, the parking lamps...

Owner's Manual
Page 100
... its highest speed and select the control setting that will force outside , use the key or the remote keyless entry transmitter, if equipped. You cannot see or smell CO. See Engine Exhaust on or under the instrument panel, open because carbon monoxide (CO) gas can cause unconsciousness and even death. It can come into your heating or cooling system to drive with the trunk lid...
... its highest speed and select the control setting that will force outside , use the key or the remote keyless entry transmitter, if equipped. You cannot see or smell CO. See Engine Exhaust on or under the instrument panel, open because carbon monoxide (CO) gas can cause unconsciousness and even death. It can come into your heating or cooling system to drive with the trunk lid...

Owner's Manual
Page 109
... the key. If you turn the key to operate your engine and release the switch. It is turned to remove your electrical accessories. You will lock the steering column and result in a loss of your key when the ignition is a theft-deterrent feature. It unlocks the steering wheel and ignition. 9 (LOCK): This position locks your hand. The switch stays in . If it is running , you have an automatic transaxle, the ignition switch cannot be turned...
... the key. If you turn the key to operate your engine and release the switch. It is turned to remove your electrical accessories. You will lock the steering column and result in a loss of your key when the ignition is a theft-deterrent feature. It unlocks the steering wheel and ignition. 9 (LOCK): This position locks your hand. The switch stays in . If it is running , you have an automatic transaxle, the ignition switch cannot be turned...

Owner's Manual
Page 111
... the driver's door while turning the ignition key to 10 minutes or until the driver's door is turned off. Also, the power windows and sunroof will work for 10 minutes or until any door is in the proper gear. 111 Have your vehicle serviced at your finger into the access hole and locate the plunger. 4. Starting the Engine Place the transaxle in RUN or ACC. Remove the key.
... the driver's door while turning the ignition key to 10 minutes or until the driver's door is turned off. Also, the power windows and sunroof will work for 10 minutes or until any door is in the proper gear. 111 Have your vehicle serviced at your finger into the access hole and locate the plunger. 4. Starting the Engine Place the transaxle in RUN or ACC. Remove the key.
Owner's Manual
Page 113
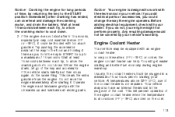
... the plug end of the cord. Wait at least 15 seconds between each try , to allow the cranking motor to cool down . 2. Usually, the coolant heater should be covered by returning the key to the START position immediately after cranking has ended, can help. Your vehicle may be flooded with your vehicle's warranty. If the engine does not start after starting and better fuel...
... the plug end of the cord. Wait at least 15 seconds between each try , to allow the cranking motor to cool down . 2. Usually, the coolant heater should be covered by returning the key to the START position immediately after cranking has ended, can help. Your vehicle may be flooded with your vehicle's warranty. If the engine does not start after starting and better fuel...
Owner's Manual
Page 118
... clutch pedal. Notice: Shifting to shift into FIRST (1), put the shift lever in NEUTRAL and let up on the accelerator pedal and shift into REVERSE (R). If you press the accelerator pedal. The repairs would not be covered by your manual transaxle: FIRST (1): Press the clutch pedal and shift into FIRST (1). Just before the vehicle stops, press the clutch pedal and the brake pedal, and shift...
... clutch pedal. Notice: Shifting to shift into FIRST (1), put the shift lever in NEUTRAL and let up on the accelerator pedal and shift into REVERSE (R). If you press the accelerator pedal. The repairs would not be covered by your manual transaxle: FIRST (1): Press the clutch pedal and shift into FIRST (1). Just before the vehicle stops, press the clutch pedal and the brake pedal, and shift...

Owner's Manual
Page 120
..., lift the console armrest in as you forget to release your parking brake, a chime will sound and the PARKING BRAKE message will come on , the brake system warning light will appear along with the brake system warning light when the parking brake is applied and the vehicle is off before driving. 120 Parking Brake To set the parking brake, hold the brake pedal down. If the ignition is located between the front seats. Hold...
..., lift the console armrest in as you forget to release your parking brake, a chime will sound and the PARKING BRAKE message will come on , the brake system warning light will appear along with the brake system warning light when the parking brake is applied and the vehicle is off before driving. 120 Parking Brake To set the parking brake, hold the brake pedal down. If the ignition is located between the front seats. Hold...

Owner's Manual
Page 136
... ...207 XM Radio Messages ...215 Theft-Deterrent Feature ...217 Audio Steering Wheel Controls ...217 Radio Reception ...218 Care of Your CDs ...219 Care of the CD Player ...219 Fixed Mast Antenna ...219 XM™ Satellite Radio Antenna System ...219 Engine Coolant Temperature Warning Light ...170 Malfunction Indicator Lamp ...170 Oil Pressure Light ...174 Security Light ...175 Fog Lamp Light ...175 Highbeam On Light ...175 Fuel Gage ...175 Boost Gage ...176 Driver Information Center (DIC) ...177...
... ...207 XM Radio Messages ...215 Theft-Deterrent Feature ...217 Audio Steering Wheel Controls ...217 Radio Reception ...218 Care of Your CDs ...219 Care of the CD Player ...219 Fixed Mast Antenna ...219 XM™ Satellite Radio Antenna System ...219 Engine Coolant Temperature Warning Light ...170 Malfunction Indicator Lamp ...170 Oil Pressure Light ...174 Security Light ...175 Fog Lamp Light ...175 Highbeam On Light ...175 Fuel Gage ...175 Boost Gage ...176 Driver Information Center (DIC) ...177...

Owner's Manual
Page 139
.... C. See Turn Signal/Multifunction Lever on page 133. 139 Windshield Wiper/Washer Controls. K. M. R. Side Window Outlets. D. See Audio Steering Wheel Controls on page 11. Audio System. See Passenger Airbag Status Indicator on page 164 and Heated Seats on page 217. Glove Box. See Cruise Control on page 145 and Driver Information Center (DIC) on page 115. Audio Steering Wheel Controls (If Equipped). Instrument Panel Brightness Control. O. See Manual Transaxle Operation on page 118 and Automatic Transaxle Operation...
.... C. See Turn Signal/Multifunction Lever on page 133. 139 Windshield Wiper/Washer Controls. K. M. R. Side Window Outlets. D. See Audio Steering Wheel Controls on page 11. Audio System. See Passenger Airbag Status Indicator on page 164 and Heated Seats on page 217. Glove Box. See Cruise Control on page 145 and Driver Information Center (DIC) on page 115. Audio Steering Wheel Controls (If Equipped). Instrument Panel Brightness Control. O. See Manual Transaxle Operation on page 118 and Automatic Transaxle Operation...

Owner's Manual
Page 143
... band are bars, increasing in size from bottom to this position for a single wiping cycle. second setting past intermittent, for steady wiping at high speed. 9 (Off): Move the lever to this position, the delay will vary depending on the right side of the steering wheel, to operate the windshield wipers. Speed Sensitive Wipers): Move the lever to turn signal/multifunction lever...
... band are bars, increasing in size from bottom to this position for a single wiping cycle. second setting past intermittent, for steady wiping at high speed. 9 (Off): Move the lever to this position, the delay will vary depending on the right side of the steering wheel, to operate the windshield wipers. Speed Sensitive Wipers): Move the lever to turn signal/multifunction lever...

Owner's Manual
Page 260
.... Release the parking brake. 260 Remember to unlock the steering wheel. 3. Set the parking brake. 2. See Floor Console Fuse Block on page 380 for more information. Never exceed 65 mph (105 km/h) while towing your vehicle from the front following these steps: To prevent the battery from draining while the vehicle is being towed, remove the following fuse from the floor console fuse block: 8 (Ignition Switch, PASS-Key® III+). Turn...
.... Release the parking brake. 260 Remember to unlock the steering wheel. 3. Set the parking brake. 2. See Floor Console Fuse Block on page 380 for more information. Never exceed 65 mph (105 km/h) while towing your vehicle from the front following these steps: To prevent the battery from draining while the vehicle is being towed, remove the following fuse from the floor console fuse block: 8 (Ignition Switch, PASS-Key® III+). Turn...

Owner's Manual
Page 281
.... See DIC Warnings and Messages on you if you have finished pumping before removing the nozzle. Fuel can happen if your fuel tank and emissions system. The CHECK GAS CAP message will be sure to stop. Be careful not to evaporate into the atmosphere. Clean fuel from painted surfaces as soon as possible. When replacing the fuel cap, turn it clockwise until...
.... See DIC Warnings and Messages on you if you have finished pumping before removing the nozzle. Fuel can happen if your fuel tank and emissions system. The CHECK GAS CAP message will be sure to stop. Be careful not to evaporate into the atmosphere. Clean fuel from painted surfaces as soon as possible. When replacing the fuel cap, turn it clockwise until...

Owner's Manual
Page 339
... the tread. Speed ratings range from A to -width measurements. Tire Terminology and Definitions Air Pressure: The amount of air inside the tire pressing outward on each square inch of the tread. 339 Bias Ply Tire: A pneumatic tire in which the plies are , automatic transmission/transaxle, power steering, power brakes, power windows, power seats, and air conditioning. The letter R means radial ply construction; Bead: The tire bead contains steel wires wrapped by steel...
... the tread. Speed ratings range from A to -width measurements. Tire Terminology and Definitions Air Pressure: The amount of air inside the tire pressing outward on each square inch of the tread. 339 Bias Ply Tire: A pneumatic tire in which the plies are , automatic transmission/transaxle, power steering, power brakes, power windows, power seats, and air conditioning. The letter R means radial ply construction; Bead: The tire bead contains steel wires wrapped by steel...

Owner's Manual
Page 431
...Radio Antenna System ...Anti-Lock Brake System (ABS) ...Anti-Lock Brake, System Warning Light ...Appearance Care Aluminum or Chrome-Plated Wheels ...Care of Safety Belts ...Chemical Paint Spotting ...Cleaning Exterior Lamps/Lenses ...Cleaning the Inside of Your Vehicle ...Fabric/Carpet ...Finish Care ...Finish Damage ...Instrument Panel, Vinyl, and Other Plastic Surfaces ...Leather ...Sheet Metal Damage ...Tires ...Underbody Maintenance ...Vehicle Care/Appearance Materials ...Washing Your Vehicle ...Weatherstrips ...Windshield and Wiper Blades ...Ashtray(s) ...Audio System(s) ...Audio Steering...
...Radio Antenna System ...Anti-Lock Brake System (ABS) ...Anti-Lock Brake, System Warning Light ...Appearance Care Aluminum or Chrome-Plated Wheels ...Care of Safety Belts ...Chemical Paint Spotting ...Cleaning Exterior Lamps/Lenses ...Cleaning the Inside of Your Vehicle ...Fabric/Carpet ...Finish Care ...Finish Damage ...Instrument Panel, Vinyl, and Other Plastic Surfaces ...Leather ...Sheet Metal Damage ...Tires ...Underbody Maintenance ...Vehicle Care/Appearance Materials ...Washing Your Vehicle ...Weatherstrips ...Windshield and Wiper Blades ...Ashtray(s) ...Audio System(s) ...Audio Steering...

Owner's Manual
Page 440
... Competitive Driving ...of Your CD Player ...of Your CDs ...237 188 219 219 Radios (cont.) Radio with CD ...192, 197 Setting the Time ...189, 190 Theft-Deterrent ...217 Understanding Reception ...218 Rear Door Security Locks ...98 Rear Safety Belt Comfort Guides ...36 Rear Seat Passengers, Safety Belts ...33 Rearview Mirror with OnStar® ...127 Rearview Mirrors ...127 Reclining Seatbacks ...12 Recommended Fluids and Lubricants ...402 Recreational Vehicle Towing ...259 Remote Keyless Entry (RKE) System ...88 Remote Keyless Entry...
... Competitive Driving ...of Your CD Player ...of Your CDs ...237 188 219 219 Radios (cont.) Radio with CD ...192, 197 Setting the Time ...189, 190 Theft-Deterrent ...217 Understanding Reception ...218 Rear Door Security Locks ...98 Rear Safety Belt Comfort Guides ...36 Rear Seat Passengers, Safety Belts ...33 Rearview Mirror with OnStar® ...127 Rearview Mirrors ...127 Reclining Seatbacks ...12 Recommended Fluids and Lubricants ...402 Recreational Vehicle Towing ...259 Remote Keyless Entry (RKE) System ...88 Remote Keyless Entry...
Owner's Manual
Page 442
... Servicing Your Airbag-Equipped Vehicle ...80 Setting the Time ...189, 190 Sheet Metal Damage ...375 Shifting Into Park (P) ...121 Shifting Out of Park (P) ...123 Shoulder Belt Height Adjuster ...31 Signals, Turn and Lane-Change ...142 Spare Tire Compact ...368 Installing ...360 Removing ...356 Storing ...365 Specifications, Capacities ...385 Speedometer ...162 Split Folding Rear Seat ...16 Starting Your Engine ...111 Steering ...231 Steering Wheel Controls, Audio ...217 Steering Wheel, Tilt Wheel ...140 Storage Areas Center Console Storage...
... Servicing Your Airbag-Equipped Vehicle ...80 Setting the Time ...189, 190 Sheet Metal Damage ...375 Shifting Into Park (P) ...121 Shifting Out of Park (P) ...123 Shoulder Belt Height Adjuster ...31 Signals, Turn and Lane-Change ...142 Spare Tire Compact ...368 Installing ...360 Removing ...356 Storing ...365 Specifications, Capacities ...385 Speedometer ...162 Split Folding Rear Seat ...16 Starting Your Engine ...111 Steering ...231 Steering Wheel Controls, Audio ...217 Steering Wheel, Tilt Wheel ...140 Storage Areas Center Console Storage...


