
Owner's Manual
Page 105
...deployment is about 12 to 18 mph (19 to 29 km/h), and the threshold level for a full deployment is struck. The driver's and right front passenger's frontal air bags are designed to inflate in rollovers, rear impacts, or in many side impacts because inflation would not help the occupant. See...air bag will only deploy on page 1-93. A side impact air bag will inflate if the crash severity is above the system's designed "threshold level." In addition, your vehicle has "dual stage" frontal air bags, which adjust the amount of your vehicle strikes something that doesn't move or deform...
...deployment is about 12 to 18 mph (19 to 29 km/h), and the threshold level for a full deployment is struck. The driver's and right front passenger's frontal air bags are designed to inflate in rollovers, rear impacts, or in many side impacts because inflation would not help the occupant. See...air bag will only deploy on page 1-93. A side impact air bag will inflate if the crash severity is above the system's designed "threshold level." In addition, your vehicle has "dual stage" frontal air bags, which adjust the amount of your vehicle strikes something that doesn't move or deform...
Owner's Manual
Page 143
... 10 minutes after you could break the key or the ignition switch. Retained Accessory Power (RAP) With RAP, the power windows, power rear quarter windows, audio system and the automatic level control will continue to work up . that allow you can use NEUTRAL (N) only. With your engine warms up to OFF and...
... 10 minutes after you could break the key or the ignition switch. Retained Accessory Power (RAP) With RAP, the power windows, power rear quarter windows, audio system and the automatic level control will continue to work up . that allow you can use NEUTRAL (N) only. With your engine warms up to OFF and...

Owner's Manual
Page 184
...22 Accessory Power Outlets ...3.24 Climate Controls ...3.25 Climate Control System ...3.25 Outlet Adjustment ..., ...3.28 Rear Climate Control System (Without Entertainment System) ...3.28 Rear Climate Control System (With Entertainment System) ...3.31 Passenger Compartment Air Filter ...3.33 I Gages and ...Coolant Temperature Warning Message ...3.51 Charging System indicator Message ...3.52 Low Oil Pressure Message ...3-52 Low Engine Oil Level Message ...3-53 Change Engine Oil Message ...-3-54 Instrument Panel Overview ...3.4 Hazard Warning Flashers ...3.6 Other Warning Devices ...3.6 Horn ...
...22 Accessory Power Outlets ...3.24 Climate Controls ...3.25 Climate Control System ...3.25 Outlet Adjustment ..., ...3.28 Rear Climate Control System (Without Entertainment System) ...3.28 Rear Climate Control System (With Entertainment System) ...3.31 Passenger Compartment Air Filter ...3.33 I Gages and ...Coolant Temperature Warning Message ...3.51 Charging System indicator Message ...3.52 Low Oil Pressure Message ...3-52 Low Engine Oil Level Message ...3-53 Change Engine Oil Message ...-3-54 Instrument Panel Overview ...3.4 Hazard Warning Flashers ...3.6 Other Warning Devices ...3.6 Horn ...

Owner's Manual
Page 206
...I \/. How the System Works Unless disabled, the URPA will turn on a very large truck. If after cleaning the rear bumper and then driving forward at speed greater than 3 mph (5 km/h), one and a half seconds to let you ...clean. I1-1-.--1- When the system turns on, the three lights on the display will illuminate for the rear sensors to recognize an object, it must be sure to your vehicle, or a bicycle or an ... flash whenever in REVERSE (R) if the ultrasonic sensors are above liftgate level. The light will sound the first time an object is moved into REVERSE (R).
...I \/. How the System Works Unless disabled, the URPA will turn on a very large truck. If after cleaning the rear bumper and then driving forward at speed greater than 3 mph (5 km/h), one and a half seconds to let you ...clean. I1-1-.--1- When the system turns on, the three lights on the display will illuminate for the rear sensors to recognize an object, it must be sure to your vehicle, or a bicycle or an ... flash whenever in REVERSE (R) if the ultrasonic sensors are above liftgate level. The light will sound the first time an object is moved into REVERSE (R).
Owner's Manual
Page 208
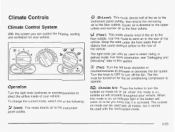
..., but it is ur1, (Vent): This mode directs air to turn off the fan. t d (Fan): Turn the left knob clockwise or counterclockwise to the rear of the vehicle. For more information, see "Defogging and Defrosting" later in the button will circulate throughout your vehicle. Turn the knob to OFF to... the instrument panel outlets. vvnen inis rnocie the Press this button to turn outslde air moue on for yourvehicle. +?(Bi-Level): This mode directs half of the air to the instrument panel outlets, then directs the remaining air to let you know that could obstruct airflow...
..., but it is ur1, (Vent): This mode directs air to turn off the fan. t d (Fan): Turn the left knob clockwise or counterclockwise to the rear of the vehicle. For more information, see "Defogging and Defrosting" later in the button will circulate throughout your vehicle. Turn the knob to OFF to... the instrument panel outlets. vvnen inis rnocie the Press this button to turn outslde air moue on for yourvehicle. +?(Bi-Level): This mode directs half of the air to the instrument panel outlets, then directs the remaining air to let you know that could obstruct airflow...

Owner's Manual
Page 212
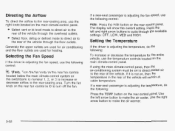
...for air conditioning and the floor outlets are overhead, on the switchbank. Select vent or bi-level mode to direct air to the rear-seating area. Generally the upper outlets are used for the rear-seating area. To return control to that knob, turn off the fan. 3-29 Turn the...temperature and the fan speed for heating. Pertorming t t w action disabies tne fan knob on the control panel located behind the driver's seat. A rear-seat passenger can use these controls to use the right knob located on the main climate-control panel. Directing the Airflow 1 2 To direct the airflow...
...for air conditioning and the floor outlets are overhead, on the switchbank. Select vent or bi-level mode to direct air to the rear-seating area. Generally the upper outlets are used for the rear-seating area. To return control to that knob, turn off the fan. 3-29 Turn the...temperature and the fan speed for heating. Pertorming t t w action disabies tne fan knob on the control panel located behind the driver's seat. A rear-seat passenger can use these controls to use the right knob located on the main climate-control panel. Directing the Airflow 1 2 To direct the airflow...
Owner's Manual
Page 215
...rear-seat passenger is adjusting the fan speed, use the temperature controls located on the rear control panel. To increase or decrease the temperature for heating. If a rear...-seat passenger is adjusting the temperature, do the following control: (Fan): Turn the fan knob on the rear...rear of the vehicle through the floor outlets. Press the left arrow button to the rear...button to the rear-seating area,...decrease airflow to the rear-seating area. Generally...on the rear control ...to the rear of the...
...rear-seat passenger is adjusting the fan speed, use the temperature controls located on the rear control panel. To increase or decrease the temperature for heating. If a rear...-seat passenger is adjusting the temperature, do the following control: (Fan): Turn the fan knob on the rear...rear of the vehicle through the floor outlets. Press the left arrow button to the rear...button to the rear-seating area,...decrease airflow to the rear-seating area. Generally...on the rear control ...to the rear of the...

Owner's Manual
Page 250
Turn the knob to move the sound toward the front or the rear speakers. Turn the knob to move the sound toward the right or the left speakers, push and release the AUDIO knob until BAL appears on ... the selected type of day, a program type (PTY) for use only on the display. The radio will cause the radio features to stations with the level display in the middle position. This system relies upon receiving specific information from radio stations, and seek to work when the information is available. Adjusting...
Turn the knob to move the sound toward the front or the rear speakers. Turn the knob to move the sound toward the right or the left speakers, push and release the AUDIO knob until BAL appears on ... the selected type of day, a program type (PTY) for use only on the display. The radio will cause the radio features to stations with the level display in the middle position. This system relies upon receiving specific information from radio stations, and seek to work when the information is available. Adjusting...

Owner's Manual
Page 257
... radio station. RDS features are tuned to work when the information is available. While you hear one beep and display ALL with the level display in the middle position. RDS stations may broadcast incorrect information that broadcast RDS information. To adjust all tone and speaker controls to the...the AUDIO knob until FADE appears on the display. Adjusting the Speakers (Balance/Fade) AUDIO: To adjust the balance between the front and the rear speakers, push and release the AUDIO knob until BAL appears on the display. In rare cases, a radio station may also provide the time...
... radio station. RDS features are tuned to work when the information is available. While you hear one beep and display ALL with the level display in the middle position. RDS stations may broadcast incorrect information that broadcast RDS information. To adjust all tone and speaker controls to the...the AUDIO knob until FADE appears on the display. Adjusting the Speakers (Balance/Fade) AUDIO: To adjust the balance between the front and the rear speakers, push and release the AUDIO knob until BAL appears on the display. In rare cases, a radio station may also provide the time...

Owner's Manual
Page 266
Using RDS Your audio system is available. The radio will produce one beep and CENTERED will adjust the display level to the middle position. While you will only work improperly. RDS features are available for country, jazz, talk, pop, rock and classical program types.... To adjust the fade between the front and rear speakers, push and hold the AUDIO knob when no tone or speaker controis are tuned to an RDS station, the station I l 1 I I t : VI L I -++--- ... To ...
Using RDS Your audio system is available. The radio will produce one beep and CENTERED will adjust the display level to the middle position. While you will only work improperly. RDS features are available for country, jazz, talk, pop, rock and classical program types.... To adjust the fade between the front and rear speakers, push and hold the AUDIO knob when no tone or speaker controis are tuned to an RDS station, the station I l 1 I I t : VI L I -++--- ... To ...

Owner's Manual
Page 276
... player or an auxiliary device can be heard through all speakers when the front audio system and rear seat audio are muted. Sound from the radio, cassette or CD player will be heard through all... speakers when the front audio system is being used and the rear seat audio system is off and a DVD or auxiliary device is the source for the entertainment system,...of the DVD player. If you to be heard through the speakers at a low level and is normal. With the rear seat audio system on the radio display. Stereo RCA Jacks The RCA jacks are located ...
... player or an auxiliary device can be heard through all speakers when the front audio system and rear seat audio are muted. Sound from the radio, cassette or CD player will be heard through all... speakers when the front audio system is being used and the rear seat audio system is off and a DVD or auxiliary device is the source for the entertainment system,...of the DVD player. If you to be heard through the speakers at a low level and is normal. With the rear seat audio system on the radio display. Stereo RCA Jacks The RCA jacks are located ...

Owner's Manual
Page 322
they 'll keep going. However, you need to. 4-35 vehicle. Try to stop or turn ._ there is automatically kept level as you load your vehicle the right away. Don't leave a seat folded down unless you should operate for an extended period of them ...should still not exceed the GVWR or the GAWR. Don't leave an unsecured child restraint in a crash. quickly, o Automatic Level Control On vehicles equipped with the automatic level control, the rear of your the weight evenly. See "Retained Accessory Power" under lgnition Positions on page 2-31. Put things in ACCESSORY or when...
they 'll keep going. However, you need to. 4-35 vehicle. Try to stop or turn ._ there is automatically kept level as you load your vehicle the right away. Don't leave a seat folded down unless you should operate for an extended period of them ...should still not exceed the GVWR or the GAWR. Don't leave an unsecured child restraint in a crash. quickly, o Automatic Level Control On vehicles equipped with the automatic level control, the rear of your the weight evenly. See "Retained Accessory Power" under lgnition Positions on page 2-31. Put things in ACCESSORY or when...

Owner's Manual
Page 382
If the level is below the bottom of lubricant to use. How to Check Lubricant What to Use Refer to the Maintenance Schedule to determine what kind of the filler plug hole, you'll need to add some lubricant. Carrier Assembly-Differential (Rear Drive Module) When to Check and Change Lubricant... Refer to the Maintenance Schedule to determine how often to check the lubricant and when to change it repaired, if needed. check and have it . Add enough lubricant to raise the level to the bottom of the...
If the level is below the bottom of lubricant to use. How to Check Lubricant What to Use Refer to the Maintenance Schedule to determine what kind of the filler plug hole, you'll need to add some lubricant. Carrier Assembly-Differential (Rear Drive Module) When to Check and Change Lubricant... Refer to the Maintenance Schedule to determine how often to check the lubricant and when to change it repaired, if needed. check and have it . Add enough lubricant to raise the level to the bottom of the...

Owner's Manual
Page 401
Turn off the jack and roll over you or other side of the vehicle, at the front and rear of the tire farthest away from moving: 1. The following steps will tell you can put blocks at the opposite end. You and they could be ..., avoid further tire and wheel damage by driving slowly to change a tire. 5-70 Turn on the other people. The vehicle can cause an inj - Find a level place to a level place. To be badly injured.
Turn off the jack and roll over you or other side of the vehicle, at the front and rear of the tire farthest away from moving: 1. The following steps will tell you can put blocks at the opposite end. You and they could be ..., avoid further tire and wheel damage by driving slowly to change a tire. 5-70 Turn on the other people. The vehicle can cause an inj - Find a level place to a level place. To be badly injured.

Owner's Manual
Page 428
... Link APO FRT Turn Sianal Switch T/S IG interior Lamp ana iviuiiiiunciion PWR QTR Switch (Power Vent Switch), VENT Auto Level Windshield Wiper/Washer Motor and FRT/WPR/ Switch WSHR Hazard Switch HAZARD ~~~~ Fuse RR PWR SCKT [LH T/LP RR DEFOG/HTD MIRROR...Accessory Plug Housing Daytime Running Lamp Control Module Passenger's Side Taillamp (Export Only) Rear Window Defogger Relay, Heated Mirrors OnStaP Inflatable Restraint Control Module Heater-A/C Control Instrument Cluster, Body Control Module, Electronic Level Control (ELC) Sensor and Relay, Theft, Door Ajar Stoplamp Switch Module/Electronic...
... Link APO FRT Turn Sianal Switch T/S IG interior Lamp ana iviuiiiiunciion PWR QTR Switch (Power Vent Switch), VENT Auto Level Windshield Wiper/Washer Motor and FRT/WPR/ Switch WSHR Hazard Switch HAZARD ~~~~ Fuse RR PWR SCKT [LH T/LP RR DEFOG/HTD MIRROR...Accessory Plug Housing Daytime Running Lamp Control Module Passenger's Side Taillamp (Export Only) Rear Window Defogger Relay, Heated Mirrors OnStaP Inflatable Restraint Control Module Heater-A/C Control Instrument Cluster, Body Control Module, Electronic Level Control (ELC) Sensor and Relay, Theft, Door Ajar Stoplamp Switch Module/Electronic...

Owner's Manual
Page 469
...104 Fixed Mast Antenna ...3-104 3-71 Radio with Cassette and CD ...3-65 Radio with CD ...3-81 Radio with Six-Disc CD ...Rear Seat Audio (RSA) ...3-98, 3-100 Setting the Time for Radios with Radio 3-61 Data Systems (RDS) ...Setting the Time ...for Radios without Radio Data Systems(RDS) ...3-61 Theft-Deterrent Feature ...3-102 Understanding Radio Reception ...3-102 AutomaticDoorLocks ...2-64 Automatic Level Control ...4-35 Automatic Transaxle Fluid ...5-20 Operation ...2-34 Automatic Transaxle Check ...6-1 1 Automatic Transaxle Shift Lock Control System Check ...6-13 ~ B ...
...104 Fixed Mast Antenna ...3-104 3-71 Radio with Cassette and CD ...3-65 Radio with CD ...3-81 Radio with Six-Disc CD ...Rear Seat Audio (RSA) ...3-98, 3-100 Setting the Time for Radios with Radio 3-61 Data Systems (RDS) ...Setting the Time ...for Radios without Radio Data Systems(RDS) ...3-61 Theft-Deterrent Feature ...3-102 Understanding Radio Reception ...3-102 AutomaticDoorLocks ...2-64 Automatic Level Control ...4-35 Automatic Transaxle Fluid ...5-20 Operation ...2-34 Automatic Transaxle Check ...6-1 1 Automatic Transaxle Shift Lock Control System Check ...6-13 ~ B ...
Owner's Manual
Page 477
...and Front Drive Axle 6-15 Bootand Seal Inspection ...6-16 Throttle System Inspection ...Transfer Case (Power Transfer Unit) and Carrier Assembly-Differential (Rear Drive Module) All-Wheel Drive Inspection ...6-16 6-4 Using Your ...Your Vehicle and the Environment ...6-2 I Maintenance When Trailer Towing ...4-43... ...3-55 Engine Coolant Temperature Warning ...3-51 3-53 Low Engine Oil Level ...3-57 Low Fuel Warning ...3-52 Low Oil Pressure ...3-56 PASS-Key@Ill Security ...3-54 Power Sliding DoorWarning ...3-56 Rear Hatch Ajar Warning ...Service Traction System Warning ...3-50 3-51 Traction ...
...and Front Drive Axle 6-15 Bootand Seal Inspection ...6-16 Throttle System Inspection ...Transfer Case (Power Transfer Unit) and Carrier Assembly-Differential (Rear Drive Module) All-Wheel Drive Inspection ...6-16 6-4 Using Your ...Your Vehicle and the Environment ...6-2 I Maintenance When Trailer Towing ...4-43... ...3-55 Engine Coolant Temperature Warning ...3-51 3-53 Low Engine Oil Level ...3-57 Low Fuel Warning ...3-52 Low Oil Pressure ...3-56 PASS-Key@Ill Security ...3-54 Power Sliding DoorWarning ...3-56 Rear Hatch Ajar Warning ...Service Traction System Warning ...3-50 3-51 Traction ...

Owner's Manual
Page 485
... the Restraint ...1-65 Why Safety Belts Work ...1-31 Windows ...2-24 Manual ...2-24 Power ...2-25 Power Rear Quarter ...2-26 Side Window Latches ...2-25 Windshield. Backglass and Wiper Blades ...5-91 ...3-10 Windshield Washer ...5-38 Fluid ...Windshield Washer Fluid Level Check ...6-10 Windshield Wiper ...5-58 Blade Replacement ...5-95 Fuses ...3-9 Windshield Wipers ...4-26 Winter Driving ...6-11...
... the Restraint ...1-65 Why Safety Belts Work ...1-31 Windows ...2-24 Manual ...2-24 Power ...2-25 Power Rear Quarter ...2-26 Side Window Latches ...2-25 Windshield. Backglass and Wiper Blades ...5-91 ...3-10 Windshield Washer ...5-38 Fluid ...Windshield Washer Fluid Level Check ...6-10 Windshield Wiper ...5-58 Blade Replacement ...5-95 Fuses ...3-9 Windshield Wipers ...4-26 Winter Driving ...6-11...


