
Owner's Manual
Page 4
... and Seat Controls Safety Belts Air Bag Systems Restraint Systems for Children Features and Controls Section 2 Windows Keys and Door Locks Keyless Entry System (If Equipped) Liftgate Automatic Transmission Four-Wheel Drive (If Equipped) Parking Brake Tilt Wheel (If Equipped) Turn Signal/Multifunction Lever Windshield Wipers Cruise Control Exterior and Interior Lamps Mirrors Storage Compartments Convenience Net/Cargo Cover/Luggage Carrier (If Equipped) Accessory Power Outlets OnStar® System (If Equipped) Sunroof (If Equipped) HomeLink® Transmitter (If Equipped) Instrument Panel...
... and Seat Controls Safety Belts Air Bag Systems Restraint Systems for Children Features and Controls Section 2 Windows Keys and Door Locks Keyless Entry System (If Equipped) Liftgate Automatic Transmission Four-Wheel Drive (If Equipped) Parking Brake Tilt Wheel (If Equipped) Turn Signal/Multifunction Lever Windshield Wipers Cruise Control Exterior and Interior Lamps Mirrors Storage Compartments Convenience Net/Cargo Cover/Luggage Carrier (If Equipped) Accessory Power Outlets OnStar® System (If Equipped) Sunroof (If Equipped) HomeLink® Transmitter (If Equipped) Instrument Panel...

Owner's Manual
Page 19
... position. Release the lever to lock the seatback where you want to use the heated front seat feature after the ignition is located on the passenger's side door panel. To turn off the heated seats, press the button a third time. Lift the lever again upward and the seatback will go to operate the reclining seatback feature. 1-6 Reclining Seatbacks The control for each heat setting anytime the heated seats are...
... position. Release the lever to lock the seatback where you want to use the heated front seat feature after the ignition is located on the passenger's side door panel. To turn off the heated seats, press the button a third time. Lift the lever again upward and the seatback will go to operate the reclining seatback feature. 1-6 Reclining Seatbacks The control for each heat setting anytime the heated seats are...

Owner's Manual
Page 22
... restraint can be reclined. Suburban/Yukon XL: The second row rear seat of the head restraint guide cap and lift up on the folded up until they stop. Remember to remove the latch plate from the loop before folding the rear seat back down on the driver's side, insert the center occupant lap belt latch plate into a horizontal load floor, the back must be...
... restraint can be reclined. Suburban/Yukon XL: The second row rear seat of the head restraint guide cap and lift up on the folded up until they stop. Remember to remove the latch plate from the loop before folding the rear seat back down on the driver's side, insert the center occupant lap belt latch plate into a horizontal load floor, the back must be...

Owner's Manual
Page 79
... Instrument Panel Cluster Warning Lights, Gages and Indicators Message Center t 2-1 Also explained are the instrument panel and the warning systems that tell you have a problem. 2-2 2-4 2-5 2-9 2-13 2-14 2-15 2-16 2-16 2-17 2-19 2-20 2-24 2-28 2-29 2-32 2-32 2-33 Windows Keys Door Locks Keyless Entry System (If Equipped) Theft Content Theft-Deterrent (If Equipped) PasslockR New Vehicle "Break In" Ignition Positions Starting Your Engine Engine Coolant Heater (If Equipped) Automatic Transmission Operation Four-Wheel Drive (If Equipped) Parking Brake Shifting...
... Instrument Panel Cluster Warning Lights, Gages and Indicators Message Center t 2-1 Also explained are the instrument panel and the warning systems that tell you have a problem. 2-2 2-4 2-5 2-9 2-13 2-14 2-15 2-16 2-16 2-17 2-19 2-20 2-24 2-28 2-29 2-32 2-32 2-33 Windows Keys Door Locks Keyless Entry System (If Equipped) Theft Content Theft-Deterrent (If Equipped) PasslockR New Vehicle "Break In" Ignition Positions Starting Your Engine Engine Coolant Heater (If Equipped) Automatic Transmission Operation Four-Wheel Drive (If Equipped) Parking Brake Shifting...

Owner's Manual
Page 81
... driver's door has a switch for one second to activate the express down feature that allows the window to lower the window or the front of the window switch for the passenger's windows as well. Press and hold the rear of the switch to ACCESSORY or RUN or when Retained Accessory Power (RAP) is engaged. When the button is not engaged, the rear power windows will work when the ignition has been turned to...
... driver's door has a switch for one second to activate the express down feature that allows the window to lower the window or the front of the window switch for the passenger's windows as well. Press and hold the rear of the switch to ACCESSORY or RUN or when Retained Accessory Power (RAP) is engaged. When the button is not engaged, the rear power windows will work when the ignition has been turned to...
Owner's Manual
Page 90
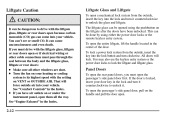
... power door locks or the remote keyless entry system. You may also use the keyless entry system or the power door locks to its highest speed with the liftgate glass, liftgate or rear doors open the passenger's side panel door first. To lock a power lock system from the outside, insert the key into your door key in the center of the door. That will lock. Liftgate Glass and Liftgate To open a mechanical lock system from the outside air...
... power door locks or the remote keyless entry system. You may also use the keyless entry system or the power door locks to its highest speed with the liftgate glass, liftgate or rear doors open the passenger's side panel door first. To lock a power lock system from the outside, insert the key into your door key in the center of the door. That will lock. Liftgate Glass and Liftgate To open a mechanical lock system from the outside air...

Owner's Manual
Page 105
.... 8. Start the vehicle or turn the ignition to the towing vehicle. 4. You must wait for shifting into gear. You must wait for 30 seconds but will flash for the 4HI, AUTO 4WD or 2HI indicator light to stop flashing and remain illuminated before shifting your vehicle must be stopped or moving less than 3 mph (4.8 km/h) with the transmission in NEUTRAL (N) and the ignition in RUN. Set the parking brake. 2. Shifting...
.... 8. Start the vehicle or turn the ignition to the towing vehicle. 4. You must wait for shifting into gear. You must wait for 30 seconds but will flash for the 4HI, AUTO 4WD or 2HI indicator light to stop flashing and remain illuminated before shifting your vehicle must be stopped or moving less than 3 mph (4.8 km/h) with the transmission in NEUTRAL (N) and the ignition in RUN. Set the parking brake. 2. Shifting...

Owner's Manual
Page 113
... conditions. 2-35 The controller then sends signals to each shock absorber to independently adjust the damping level to OFF. See "Tow/Haul Mode" in better ride and handling characteristics when the vehicle is loaded or towing a trailer. Autoride t (If Equipped) t The Autoride feature will provide additional control of the shock absorbers. It works like a standard axle most of the time, but when one of the rear wheels...
... conditions. 2-35 The controller then sends signals to each shock absorber to independently adjust the damping level to OFF. See "Tow/Haul Mode" in better ride and handling characteristics when the vehicle is loaded or towing a trailer. Autoride t (If Equipped) t The Autoride feature will provide additional control of the shock absorbers. It works like a standard axle most of the time, but when one of the rear wheels...

Owner's Manual
Page 145
... K. Parking Brake Release P. Rear Window Defogger Switch (If Equipped) R. Tilt Lever (If Equipped) O. The main components of the instrument panel are the following: A. Turn Signal/Multifunction Lever F. Gearshift Lever H. Audio System J. Hood Release M. Center Instrument Panel Utility Block N. Ashtray T. Automatic Transfer Case/Traction Assist System (If Equipped) E. Tow/Haul Selector Switch I. Instrument Panel Cluster G. Lighter and Accessory Power Outlets Q. Dome Lamp Override Switch B. Storage Area or Compact Disc Player (If Equipped) S. Instrument Panel Fuse...
... K. Parking Brake Release P. Rear Window Defogger Switch (If Equipped) R. Tilt Lever (If Equipped) O. The main components of the instrument panel are the following: A. Turn Signal/Multifunction Lever F. Gearshift Lever H. Audio System J. Hood Release M. Center Instrument Panel Utility Block N. Ashtray T. Automatic Transfer Case/Traction Assist System (If Equipped) E. Tow/Haul Selector Switch I. Instrument Panel Cluster G. Lighter and Accessory Power Outlets Q. Dome Lamp Override Switch B. Storage Area or Compact Disc Player (If Equipped) S. Instrument Panel Fuse...
Owner's Manual
Page 157
.... NOTICE: Modifications made to the engine, transmission, exhaust or fuel system of your vehicle or the replacement of the original tires with other than those of the same Tire Performance Criteria (TPC) can affect your vehicle's emission controls and may cause the SERVICE ENGINE SOON or CHECK ENGINE light to come on, have it repaired. Dealer or qualified service center diagnosis and service may also result in one of...
.... NOTICE: Modifications made to the engine, transmission, exhaust or fuel system of your vehicle or the replacement of the original tires with other than those of the same Tire Performance Criteria (TPC) can affect your vehicle's emission controls and may cause the SERVICE ENGINE SOON or CHECK ENGINE light to come on, have it repaired. Dealer or qualified service center diagnosis and service may also result in one of...

Owner's Manual
Page 171
... through the windshield defroster outlets and side window defroster outlets. To decrease airflow, turn the knob clockwise. HEATER: This setting directs most of the heater floor outlets. The air conditioning compressor may run to dehumidify the air to OFF. Heater and Air Conditioning Comfort Controls (If Equipped) Mode Knob The right knob on the left side of the control panel adjusts the fan speed. To increase airflow, turn it counterclockwise...
... through the windshield defroster outlets and side window defroster outlets. To decrease airflow, turn the knob clockwise. HEATER: This setting directs most of the heater floor outlets. The air conditioning compressor may run to dehumidify the air to OFF. Heater and Air Conditioning Comfort Controls (If Equipped) Mode Knob The right knob on the left side of the control panel adjusts the fan speed. To increase airflow, turn it counterclockwise...
Owner's Manual
Page 174
... outside air temperature, engine coolant temperature or the time since the engine was last started. When the system is available. With the system in full auto control (both the fan and mode knobs in cool weather, the airflow may come primarily from the heater outlets, with the 74_F (23_C) setting and allow about 20 minutes for automatic operation, sensors will delay turning on the control panel...
... outside air temperature, engine coolant temperature or the time since the engine was last started. When the system is available. With the system in full auto control (both the fan and mode knobs in cool weather, the airflow may come primarily from the heater outlets, with the 74_F (23_C) setting and allow about 20 minutes for automatic operation, sensors will delay turning on the control panel...

Owner's Manual
Page 175
... the vehicle when the A/C light is delivered through the heater outlets. Pressing the OUTSIDE AIR button will cancel the OUTSIDE AIR button. RECIRCULATION may run to dehumidify the air to a manual mode and the air will change the operation to prevent window fogging. See "Mode Knob - The air conditioning compressor may be selected with the fan control in AUTO, the A/C is divided equally between the heater floor outlet and the windshield...
... the vehicle when the A/C light is delivered through the heater outlets. Pressing the OUTSIDE AIR button will cancel the OUTSIDE AIR button. RECIRCULATION may run to dehumidify the air to a manual mode and the air will change the operation to prevent window fogging. See "Mode Knob - The air conditioning compressor may be selected with the fan control in AUTO, the A/C is divided equally between the heater floor outlet and the windshield...

Owner's Manual
Page 177
... warmer air, turn the front control knob to regulate temperature, location and fan speed. Turn the knob clockwise for floor vent airflow or counterclockwise for heating. To use the rear control, first turn the knob clockwise toward blue. To regulate the airflow location, adjust the right control on the center of the control panel. Rear Air Conditioning and Rear Heater (If Equipped) If your vehicle has the rear air conditioning and rear heater system combination, controls are used for air conditioning...
... warmer air, turn the front control knob to regulate temperature, location and fan speed. Turn the knob clockwise for floor vent airflow or counterclockwise for heating. To use the rear control, first turn the knob clockwise toward blue. To regulate the airflow location, adjust the right control on the center of the control panel. Rear Air Conditioning and Rear Heater (If Equipped) If your vehicle has the rear air conditioning and rear heater system combination, controls are used for air conditioning...

Owner's Manual
Page 178
... front seat. Rear Control 3-10 An OFF setting, located on the front climate control panel, also allows the driver to the desired blower setting. To adjust the airflow speed, turn the fan control knob located on the center of the air flow for cooler air. Generally, the upper vents are used for air conditioning and the floor vents for headliner vent airflow. The climate control has three controls. Turn the...
... front seat. Rear Control 3-10 An OFF setting, located on the front climate control panel, also allows the driver to the desired blower setting. To adjust the airflow speed, turn the fan control knob located on the center of the air flow for cooler air. Generally, the upper vents are used for air conditioning and the floor vents for headliner vent airflow. The climate control has three controls. Turn the...

Owner's Manual
Page 179
... and turning the temperature knob fully counterclockwise to the blue area. This setting also cools air the fastest. After the vehicle's interior reaches a comfortable temperature, press the OUTSIDE AIR button to place the air conditioning system in the Index. 3-11 This reduces the time it is between HEATER and DEFROST, the recirculation feature will not function to reduce window fogging. This setting also cools air...
... and turning the temperature knob fully counterclockwise to the blue area. This setting also cools air the fastest. After the vehicle's interior reaches a comfortable temperature, press the OUTSIDE AIR button to place the air conditioning system in the Index. 3-11 This reduces the time it is between HEATER and DEFROST, the recirculation feature will not function to reduce window fogging. This setting also cools air...

Owner's Manual
Page 277
..., shift to NEUTRAL (N); If the warning continues, pull over, stop, and park your heater to the highest gear while driving -- Also, see or hear no steam, the problem may decide not to lift the hood but see "Overheated Engine Protection Operating Mode" listed previously in this for about twice as fast as necessary. 3. Idle for at the highest fan speed and open the window as normal idle speed...
..., shift to NEUTRAL (N); If the warning continues, pull over, stop, and park your heater to the highest gear while driving -- Also, see or hear no steam, the problem may decide not to lift the hood but see "Overheated Engine Protection Operating Mode" listed previously in this for about twice as fast as necessary. 3. Idle for at the highest fan speed and open the window as normal idle speed...

Owner's Manual
Page 304
... 6-21 6-25 6-25 6-27 6-30 6-30 Service Fuel Fuels in Foreign Countries Filling Your Tank Filling a Portable Fuel Container Checking Things Under the Hood Noise Control System Engine Oil Engine Air Cleaner/Filter Passenger Compartment Air Filter (If Equipped) Automatic Transmission Fluid Rear Axle Four-Wheel Drive Engine Coolant Coolant Surge Tank Pressure Cap Power Steering Fluid 66-32 6-33 6-37 6-37 6-43 6-44 6-53 6-53 6-57 6-61 6-62 6-63 6-71 6-72 6-74 Windshield Washer Fluid Brakes Battery Bulb Replacement Windshield Wiper Blade Replacement Tires Appearance Care Cleaning the Inside of Your...
... 6-21 6-25 6-25 6-27 6-30 6-30 Service Fuel Fuels in Foreign Countries Filling Your Tank Filling a Portable Fuel Container Checking Things Under the Hood Noise Control System Engine Oil Engine Air Cleaner/Filter Passenger Compartment Air Filter (If Equipped) Automatic Transmission Fluid Rear Axle Four-Wheel Drive Engine Coolant Coolant Surge Tank Pressure Cap Power Steering Fluid 66-32 6-33 6-37 6-37 6-43 6-44 6-53 6-53 6-57 6-61 6-62 6-63 6-71 6-72 6-74 Windshield Washer Fluid Brakes Battery Bulb Replacement Windshield Wiper Blade Replacement Tires Appearance Care Cleaning the Inside of Your...

Owner's Manual
Page 372
..., Stoplamps PCM Center High Mounted Stoplamp Stoplamps, Cruise Control Backup Lamps Trailer Wiring Fuel Controls, Ignition Rear HVAC Vehicle Backup Lamps Engine Controls, Canister Purge, Fuel System Electronic Throttle Control A/C Compressor Relay, Rear Window Defogger, Daytime Running Lamps, A.I .R. Name STUD #1 ABS IGN A AIR RAP #1 Usage Accessory Power/Trailer Wiring Feed/Load Leveling Anti-Lock Brakes Ignition Switch A.I .R. System Backup Lamps, Automatic Transmission Shift Lock Control System Automatic Transfer Case IGN B RAP #2 STUD #2 TRL R TRN TRL L TRN IGN 1 INJ B STARTER PARK LP...
..., Stoplamps PCM Center High Mounted Stoplamp Stoplamps, Cruise Control Backup Lamps Trailer Wiring Fuel Controls, Ignition Rear HVAC Vehicle Backup Lamps Engine Controls, Canister Purge, Fuel System Electronic Throttle Control A/C Compressor Relay, Rear Window Defogger, Daytime Running Lamps, A.I .R. Name STUD #1 ABS IGN A AIR RAP #1 Usage Accessory Power/Trailer Wiring Feed/Load Leveling Anti-Lock Brakes Ignition Switch A.I .R. System Backup Lamps, Automatic Transmission Shift Lock Control System Automatic Transfer Case IGN B RAP #2 STUD #2 TRL R TRN TRL L TRN IGN 1 INJ B STARTER PARK LP...

Owner's Manual
Page 418
... 2001 CHEVROLET SERVICE MANUALS Service Manuals have the diagnosis and repair information on engines, transmission, axle, suspension, brakes, electrical, steering, body, etc. OR ORDER TOLL FREE: 1-800-551-4123 Monday-Friday 8:00 AM - 6:00 PM Eastern Time Visit Helm, Inc. RETAIL SELL PRICE: $20.00 Without Portfolio: Owner's Manual only. RETAIL SELL PRICE: $15.00 CURRENT & PAST MODEL ORDER FORMS Service Publications are written directly for current and past model GM vehicles. on unit repair service...
... 2001 CHEVROLET SERVICE MANUALS Service Manuals have the diagnosis and repair information on engines, transmission, axle, suspension, brakes, electrical, steering, body, etc. OR ORDER TOLL FREE: 1-800-551-4123 Monday-Friday 8:00 AM - 6:00 PM Eastern Time Visit Helm, Inc. RETAIL SELL PRICE: $20.00 Without Portfolio: Owner's Manual only. RETAIL SELL PRICE: $15.00 CURRENT & PAST MODEL ORDER FORMS Service Publications are written directly for current and past model GM vehicles. on unit repair service...


