

Owner's Manual
Page 1
2006 Cadillac CTS/CTS-V Owner Manual Seats and Restraint Systems ...1-1 Front Seats ...1-2 Rear Seats ...1-8 Safety Belts ...1-10 Child Restraints ...1-29 Airbag System ...1-50 Restraint System Check......2-52 Instrument Panel ...3-1 Instrument Panel Overview ...3-4 Climate Controls ...3-23 Warning Lights, Gages, and Indicators ...3-30 Message Center ...3-47 M Driver Information Center (DIC) ...3-53 Audio System(s) ...3-83 Driving Your Vehicle ...4-1 Your Driving, the Road, and Your Vehicle ...4-2 Towing ...4-37 Service and Appearance Care ...5-1 Service ...5-3 Fuel ...5-5 Checking Things Under...
2006 Cadillac CTS/CTS-V Owner Manual Seats and Restraint Systems ...1-1 Front Seats ...1-2 Rear Seats ...1-8 Safety Belts ...1-10 Child Restraints ...1-29 Airbag System ...1-50 Restraint System Check......2-52 Instrument Panel ...3-1 Instrument Panel Overview ...3-4 Climate Controls ...3-23 Warning Lights, Gages, and Indicators ...3-30 Message Center ...3-47 M Driver Information Center (DIC) ...3-53 Audio System(s) ...3-83 Driving Your Vehicle ...4-1 Your Driving, the Road, and Your Vehicle ...4-2 Towing ...4-37 Service and Appearance Care ...5-1 Service ...5-3 Fuel ...5-5 Checking Things Under...

Owner's Manual
Page 4
... Restraint Systems in Section 1 Features and Controls in Section 2 Instrument Panel Overview in Section 3 Climate Controls in Section 3 Warning Lights, Gages, and Indicators in Section 3 Audio System(s) in Section 3 Engine Compartment Overview in Section 5 iv A notice tells about something that could damage your vehicle's warranty, and it could be covered by...
... Restraint Systems in Section 1 Features and Controls in Section 2 Instrument Panel Overview in Section 3 Climate Controls in Section 3 Warning Lights, Gages, and Indicators in Section 3 Audio System(s) in Section 3 Engine Compartment Overview in Section 5 iv A notice tells about something that could damage your vehicle's warranty, and it could be covered by...

Owner's Manual
Page 96
.... 2. Insert a narrow, pointed object into the slot and turn it until the plastic piece detaches from ON to OFF: • Radio • Power Windows • Audio Steering Wheel Controls (CTS, if programmed) • Sunroof Power to release the steering column: 3.
.... 2. Insert a narrow, pointed object into the slot and turn it until the plastic piece detaches from ON to OFF: • Radio • Power Windows • Audio Steering Wheel Controls (CTS, if programmed) • Sunroof Power to release the steering column: 3.
Owner's Manual
Page 128
...(s) ...3-83 Setting the Time ...3-85 Radio with CD ...3-85 Navigation/Radio System ...3-101 Theft-Deterrent Feature ...3-101 Audio Steering Wheel Controls (CTS) ...3-102 Radio Reception ...3-102 Care of Your CDs ...3-103 Care of the CD Player ...3-104 Diversity Antenna System ......3-45 Lights On Reminder ...3-45 Cruise Control Light ...3-46 Highbeam On Light ...3-46 Fuel Gage ...3-46 Message Center ...3-47 Message Center (CTS-V) ...3-47 Transmission Fluid Hot Message ...3-50 Hot Coolant Temperature Warning Message ...3-50 Check Engine Oil Pressure Message ...3-51 Oil Temperature Warning Message...
...(s) ...3-83 Setting the Time ...3-85 Radio with CD ...3-85 Navigation/Radio System ...3-101 Theft-Deterrent Feature ...3-101 Audio Steering Wheel Controls (CTS) ...3-102 Radio Reception ...3-102 Care of Your CDs ...3-103 Care of the CD Player ...3-104 Diversity Antenna System ......3-45 Lights On Reminder ...3-45 Cruise Control Light ...3-46 Highbeam On Light ...3-46 Fuel Gage ...3-46 Message Center ...3-47 Message Center (CTS-V) ...3-47 Transmission Fluid Hot Message ...3-50 Hot Coolant Temperature Warning Message ...3-50 Check Engine Oil Pressure Message ...3-51 Oil Temperature Warning Message...

Owner's Manual
Page 131
...Steering Wheel Controls (CTS) or Message Center Controls (CTS-V). Instrument Panel Cluster. See Hazard Warning Flashers on page 3-102. Audio (Base Audio System) or Audio/Navigation System (If Equipped). Voice Recognition Button. See Audio Steering Wheel Controls (CTS) on page 3-6. .... See Reconfigurable Steering Wheel Controls (SWC) (CTS) on page 3-7 or Message Center (CTS-V) on page 3-9. E. H. L. N. See Outlet Adjustment on page 3-22. B. Audio Volume Knob and Source Button (CTS Only). C. Windshield Wiper Lever. Storage Compartment or Ashtray....
...Steering Wheel Controls (CTS) or Message Center Controls (CTS-V). Instrument Panel Cluster. See Hazard Warning Flashers on page 3-102. Audio (Base Audio System) or Audio/Navigation System (If Equipped). Voice Recognition Button. See Audio Steering Wheel Controls (CTS) on page 3-6. .... See Reconfigurable Steering Wheel Controls (SWC) (CTS) on page 3-7 or Message Center (CTS-V) on page 3-9. E. H. L. N. See Outlet Adjustment on page 3-22. B. Audio Volume Knob and Source Button (CTS Only). C. Windshield Wiper Lever. Storage Compartment or Ashtray....

Owner's Manual
Page 133
Reconfigurable Steering Wheel Controls (SWC) (CTS) If your vehicle is equipped with the OnStar®, the climate controls, audio and traction control systems. The controls for this feature, it allows you to tilt the steering wheel is located on the left side of the ... controls to lock the wheel in place. To tilt the wheel, hold the steering wheel and pull the lever. Access the main menu of the audio system by turning the knob. 3-7 Then move the steering wheel to a comfortable position and release the lever to work with the base...
Reconfigurable Steering Wheel Controls (SWC) (CTS) If your vehicle is equipped with the OnStar®, the climate controls, audio and traction control systems. The controls for this feature, it allows you to tilt the steering wheel is located on the left side of the ... controls to lock the wheel in place. To tilt the wheel, hold the steering wheel and pull the lever. Access the main menu of the audio system by turning the knob. 3-7 Then move the steering wheel to a comfortable position and release the lever to work with the base...
Owner's Manual
Page 144
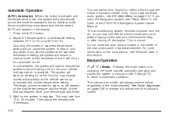
... is set. When it's bright enough outside, the low-beam headlamps will go off, and the DRL will turn on. Once you have the Navigation audio system or the CLR button if you leave the garage, it will take about one minute for the automatic headlamp system to change to the... informs the driver that delay, your vehicle with any vehicle, you should turn it off by pressing the OK button if you have the Base audio system. See Instrument Panel Brightness on page 3-20. When the exterior lamp control is in AUTO and it's dark enough outside, the DRL will turn...
... is set. When it's bright enough outside, the low-beam headlamps will go off, and the DRL will turn on. Once you have the Navigation audio system or the CLR button if you leave the garage, it will take about one minute for the automatic headlamp system to change to the... informs the driver that delay, your vehicle with any vehicle, you should turn it off by pressing the OK button if you have the Base audio system. See Instrument Panel Brightness on page 3-20. When the exterior lamp control is in AUTO and it's dark enough outside, the DRL will turn...
Owner's Manual
Page 150
... on the display. 1. The outboard air outlets will not cause the system to maintain the chosen temperature setting. If you have the Base audio system, see DIC Main Menu on page 3-57. Choosing the coldest or warmest temperature setting will always receive airflow regardless of the... CTS/CTS-V Navigation System Owner Manual. The system will appear on the solar sensor, see "Setup Menu" in the Index of the mode selected. Press ...
... on the display. 1. The outboard air outlets will not cause the system to maintain the chosen temperature setting. If you have the Base audio system, see DIC Main Menu on page 3-57. Choosing the coldest or warmest temperature setting will always receive airflow regardless of the... CTS/CTS-V Navigation System Owner Manual. The system will appear on the solar sensor, see "Setup Menu" in the Index of the mode selected. Press ...

Owner's Manual
Page 179
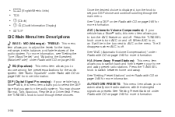
System Controls Use the following controls located on the audio system to operate the DIC: INFO (Information): Use the up or down arrows on this button ...for more information. See DIC Warnings and Messages on page 3-61 and Status of a menu. If your vehicle has the Base audio system, use the information contained in the lower right corner. CLR (Clear): Press this switch to scroll through the menu items ...messages. If your vehicle has the Navigation system, see the Navigation system manual for instructions on the audio system display. Press the knob to select the menu item. 3-53
System Controls Use the following controls located on the audio system to operate the DIC: INFO (Information): Use the up or down arrows on this button ...for more information. See DIC Warnings and Messages on page 3-61 and Status of a menu. If your vehicle has the Base audio system, use the information contained in the lower right corner. CLR (Clear): Press this switch to scroll through the menu items ...messages. If your vehicle has the Navigation system, see the Navigation system manual for instructions on the audio system display. Press the knob to select the menu item. 3-53
Owner's Manual
Page 184
... CD on page 3-85 for more information. H/A (Home/Away Preset Stations): This menu item allows you to turn the AVC feature on the audio system. See "Setting Preset Stations" under Radio with the strongest signals as presets. Press the TUNE/SEL knob to scroll through the main menu....(Digital Signal Processing): If your vehicle has a Bose® radio, this menu item allows you to switch back and forth between home and away. See "Audio Equalizer" under Radio with CD on page 3-85. The X disappears when AVC is off . For more information, see "Setting the Tone (Bass/Treble)" ...
... CD on page 3-85 for more information. H/A (Home/Away Preset Stations): This menu item allows you to turn the AVC feature on the audio system. See "Setting Preset Stations" under Radio with the strongest signals as presets. Press the TUNE/SEL knob to scroll through the main menu....(Digital Signal Processing): If your vehicle has a Bose® radio, this menu item allows you to switch back and forth between home and away. See "Audio Equalizer" under Radio with CD on page 3-85. The X disappears when AVC is off . For more information, see "Setting the Tone (Bass/Treble)" ...

Owner's Manual
Page 185
... Category (CAT) Stations (RDS and XM™)" under Radio with CD on , press the TUNE/SEL knob once. A SEEK LOCAL/DISTANT: This feature instructs the audio system to seek only local radio stations with the strongest signal or to turn the TA feature on page 3-85 for more information. To turn...
... Category (CAT) Stations (RDS and XM™)" under Radio with CD on , press the TUNE/SEL knob once. A SEEK LOCAL/DISTANT: This feature instructs the audio system to seek only local radio stations with the strongest signal or to turn the TA feature on page 3-85 for more information. To turn...
Owner's Manual
Page 186
... for more information. SETUP: When you select this menu item, the following submenu is always at the top of the steering wheel controls (1, 2, 3, or 4) or audio system soft keys to enable/disable the TCS. See Setting the Time on the other items in the glove box, or by pressing the TUNE... using the traction control button located in the SETUP menu, see DIC Vehicle Personalization on page 3-70 and Reconfigurable Steering Wheel Controls (SWC) (CTS) on page 3-7. 8 (Clock): Use this menu item to toggle between on and off using this menu item to set the time on . If you ...
... for more information. SETUP: When you select this menu item, the following submenu is always at the top of the steering wheel controls (1, 2, 3, or 4) or audio system soft keys to enable/disable the TCS. See Setting the Time on the other items in the glove box, or by pressing the TUNE... using the traction control button located in the SETUP menu, see DIC Vehicle Personalization on page 3-70 and Reconfigurable Steering Wheel Controls (SWC) (CTS) on page 3-7. 8 (Clock): Use this menu item to toggle between on and off using this menu item to set the time on . If you ...

Owner's Manual
Page 197
.... Personalization Features The following choices are spaces and other non-letter characters such as the ampersand (&). 4. You will then appear on the back of the audio display. You can also press the TUNE/SEL knob repeatedly to select the letter.
.... Personalization Features The following choices are spaces and other non-letter characters such as the ampersand (&). 4. You will then appear on the back of the audio display. You can also press the TUNE/SEL knob repeatedly to select the letter.

Owner's Manual
Page 209
... on the drive - avoid engaging in this manual and get familiar with no selection made, the SETUP menu will return to the main audio screen. Then, when driving conditions permit, you have finished making your vehicle. Exiting the Personalization Menu To exit the personalization portion ... between the normal and loud settings. You will be injured or killed. You can either exit the programming mode by presetting your vehicle's audio system, you or others can use the following the instructions listed previously. 2. By taking a few moments to read this section or program...
... on the drive - avoid engaging in this manual and get familiar with no selection made, the SETUP menu will return to the main audio screen. Then, when driving conditions permit, you have finished making your vehicle. Exiting the Personalization Menu To exit the personalization portion ... between the normal and loud settings. You will be injured or killed. You can either exit the programming mode by presetting your vehicle's audio system, you or others can use the following the instructions listed previously. 2. By taking a few moments to read this section or program...

Owner's Manual
Page 210
... dealer. If sound equipment can do it properly. 3-84 Here are some ways in your vehicle, find out what your audio system can be added by presetting your vehicle is parked: Added sound equipment may not work. Your vehicle's systems may interfere with ... adjusting the speakers. Your vehicle has a feature called Retained Accessory Power (RAP). For more information. • Familiarize yourself with your vehicle's audio system so you can be added, it is important for more information, see Defensive Driving on page 5-3. Get familiar with all of sound equipment...
... dealer. If sound equipment can do it properly. 3-84 Here are some ways in your vehicle, find out what your audio system can be added by presetting your vehicle is parked: Added sound equipment may not work. Your vehicle's systems may interfere with ... adjusting the speakers. Your vehicle has a feature called Retained Accessory Power (RAP). For more information. • Familiarize yourself with your vehicle's audio system so you can be added, it is important for more information, see Defensive Driving on page 5-3. Get familiar with all of sound equipment...

Owner's Manual
Page 211
... for more information on the display. See "Configurable Radio Display Keys" under Radio with Six-Disc CD similar Radio Data System (RDS) The audio system has a Radio Data System (RDS). Setting the Time 1. Radio with CD Radio with CD shown, Radio with CD on page 3-85 for use only...
... for more information on the display. See "Configurable Radio Display Keys" under Radio with Six-Disc CD similar Radio Data System (RDS) The audio system has a Radio Data System (RDS). Setting the Time 1. Radio with CD Radio with CD shown, Radio with CD on page 3-85 for use only...

Owner's Manual
Page 212
... (if available). A service fee is configured into one of programming • Receive announcements concerning local and national emergencies XM™ provides digital quality audio and text information, including song title and artist name. Press the TUNE/SEL knob to stations broadcasting the selected type of the configurable...
... (if available). A service fee is configured into one of programming • Receive announcements concerning local and national emergencies XM™ provides digital quality audio and text information, including song title and artist name. Press the TUNE/SEL knob to stations broadcasting the selected type of the configurable...

Owner's Manual
Page 213
... seeking. Press the TUNE/SEL knob to the previous station and stay there. The sound will only seek stations with the premium Bose® audio system. This feature is not loaded the display will appear in the selected band. 3-87 VOL (Volume): Turn this knob to increase or ... for the display to select a source, either radio or CD. AVC, which utilizes Bose AudioPilot® noise compensation technology, continuously adjusts the audio system equalization, to select FM1, FM2, AM, or XM1 or XM2 (if equipped). Playing the Radio PWR (Power): Press this knob to play.
... seeking. Press the TUNE/SEL knob to the previous station and stay there. The sound will only seek stations with the premium Bose® audio system. This feature is not loaded the display will appear in the selected band. 3-87 VOL (Volume): Turn this knob to increase or ... for the display to select a source, either radio or CD. AVC, which utilizes Bose AudioPilot® noise compensation technology, continuously adjusts the audio system equalization, to select FM1, FM2, AM, or XM1 or XM2 (if equipped). Playing the Radio PWR (Power): Press this knob to play.

Owner's Manual
Page 216
... fade, perform the following steps: 1. Press the TUNE/SEL knob to enter the main menu. 2. The equalization settings are preset to select customized equalization settings. AUDIO EQUALIZER: This feature allows you to EQ0 (Normal), EQ1 (Pop), EQ2 (Rock), EQ3 (Jazz), EQ4 (Talk), and EQ5 (Country). Press the TUNE/SEL knob to...
... fade, perform the following steps: 1. Press the TUNE/SEL knob to enter the main menu. 2. The equalization settings are preset to select customized equalization settings. AUDIO EQUALIZER: This feature allows you to EQ0 (Normal), EQ1 (Pop), EQ2 (Rock), EQ3 (Jazz), EQ4 (Talk), and EQ5 (Country). Press the TUNE/SEL knob to...

Owner's Manual
Page 217
...to exit the display. DSP NORMAL will not appear on the display when in this setting is used . REAR SEAT: This setting adjusts the audio to exit the display. The radio keeps separate DSP settings for all passengers. Press the CLR button to give the driver the best possible ...display, repeatedly press the CLR button or wait for the display to enter the main menu. 2. Using DSP Available only with the premium Bose® audio system, this feature is used when listening to set the adjustment. 7. SPACIOUS: This setting is used while listening to give the rear seat passenger(s)...
...to exit the display. DSP NORMAL will not appear on the display when in this setting is used . REAR SEAT: This setting adjusts the audio to exit the display. The radio keeps separate DSP settings for all passengers. Press the CLR button to give the driver the best possible ...display, repeatedly press the CLR button or wait for the display to enter the main menu. 2. Using DSP Available only with the premium Bose® audio system, this feature is used when listening to set the adjustment. 7. SPACIOUS: This setting is used while listening to give the rear seat passenger(s)...

