
Owner's Manual
Page 1
2005 Cadillac DeVille Owner Manual Seats and Restraint Systems ...1-1 Front Seats ...1-2 Rear Seats ...1-5 Safety Belts ...1-7 Child Restraints ...1-26 Airbag System ...1-45 Restraint System Check ...1-54 Features and Controls ...2-1 Keys ...2-3 Doors and Locks ...2-8 Windows ...2-15 Theft-Deterrent Systems ...2-19 Starting and Operating Your Vehicle ...2-24 Mirrors ...2-37 OnStar® System ...2-42 HomeLink® Transmitter ...2-44 Storage Areas ...2-48 Sunroof ...2-51 Vehicle Personalization ...2-52 Instrument Panel ...3-1 Instrument Panel Overview ...3-4 Climate Controls ...3-30 Warning ...
2005 Cadillac DeVille Owner Manual Seats and Restraint Systems ...1-1 Front Seats ...1-2 Rear Seats ...1-5 Safety Belts ...1-7 Child Restraints ...1-26 Airbag System ...1-45 Restraint System Check ...1-54 Features and Controls ...2-1 Keys ...2-3 Doors and Locks ...2-8 Windows ...2-15 Theft-Deterrent Systems ...2-19 Starting and Operating Your Vehicle ...2-24 Mirrors ...2-37 OnStar® System ...2-42 HomeLink® Transmitter ...2-44 Storage Areas ...2-48 Sunroof ...2-51 Vehicle Personalization ...2-52 Instrument Panel ...3-1 Instrument Panel Overview ...3-4 Climate Controls ...3-30 Warning ...
Owner's Manual
Page 63
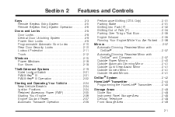
... Keyless Entry System Operation ...2-6 Doors and Locks ...2-8 Door Locks ...2-8 Central Door Unlocking System ...2-9 Power Door Locks ...2-9 Programmable Automatic Door Locks ...2-10 Rear Door Security Locks ...2-10 Lockout Protection ...2-11 Trunk ...2-12 Windows ...2-15 Power Windows ...2-16 Sun Visors ...2-18 Theft-Deterrent Systems ...2-19 Valet Lockout Switch ...2-21 PASS-Key® III ...2-21 PASS-Key® III Operation ...2-22 Starting and Operating Your Vehicle ...2-24 New Vehicle Break-In ...2-24 Ignition Positions ...2-24 Retained Accessory Power (RAP) ...2-25 Starting Your Engine...
... Keyless Entry System Operation ...2-6 Doors and Locks ...2-8 Door Locks ...2-8 Central Door Unlocking System ...2-9 Power Door Locks ...2-9 Programmable Automatic Door Locks ...2-10 Rear Door Security Locks ...2-10 Lockout Protection ...2-11 Trunk ...2-12 Windows ...2-15 Power Windows ...2-16 Sun Visors ...2-18 Theft-Deterrent Systems ...2-19 Valet Lockout Switch ...2-21 PASS-Key® III ...2-21 PASS-Key® III Operation ...2-22 Starting and Operating Your Vehicle ...2-24 New Vehicle Break-In ...2-24 Ignition Positions ...2-24 Retained Accessory Power (RAP) ...2-25 Starting Your Engine...
Owner's Manual
Page 72
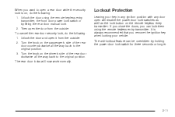
... Automatic Door Locks Your vehicle is programmed so that prevent passengers from the inside when this feature is in ON, the door locks can also lock all the doors will unlock every time you stop the vehicle and move the shift lever into PARK (P). To use . 2-10 The doors will lock. With the vehicle in PARK (P) and the ignition in use these locks, do the following: 1. Use the manual lever or power door lock switch...
... Automatic Door Locks Your vehicle is programmed so that prevent passengers from the inside when this feature is in ON, the door locks can also lock all the doors will unlock every time you stop the vehicle and move the shift lever into PARK (P). To use . 2-10 The doors will lock. With the vehicle in PARK (P) and the ignition in use these locks, do the following: 1. Use the manual lever or power door lock switch...
Owner's Manual
Page 73
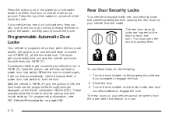
... lifting the rear door manual lock. 2. Turn the knob on , do the following : 1. It is on the passenger's side of the rear door clockwise all the way back to the original position. 3. To cancel the rear door security lock, do the following : 1. Lockout Protection Leaving your vehicle. Turn the knob on the remote keyless entry transmitter. The rear door locks will disable the power door lock switches as well as the lock button on the driver...
... lifting the rear door manual lock. 2. Turn the knob on , do the following : 1. It is on the passenger's side of the rear door clockwise all the way back to the original position. 3. To cancel the rear door security lock, do the following : 1. Lockout Protection Leaving your vehicle. Turn the knob on the remote keyless entry transmitter. The rear door locks will disable the power door lock switches as well as the lock button on the driver...

Owner's Manual
Page 86
... ignition switch could cause damage or break the key. If none of this works, then your new brake linings are not yet broken in . But it will perform better in the long run if you follow these guidelines: Ignition Positions With the key in the ignition switch, you get new brake linings. • Do not tow a trailer during break-in . Starting and Operating Your Vehicle New Vehicle...
... ignition switch could cause damage or break the key. If none of this works, then your new brake linings are not yet broken in . But it will perform better in the long run if you follow these guidelines: Ignition Positions With the key in the ignition switch, you get new brake linings. • Do not tow a trailer during break-in . Starting and Operating Your Vehicle New Vehicle...

Owner's Manual
Page 94
... the shift lever into PARK (P): 1. Turn the ignition key to the left the engine running, the vehicle can be dangerous to shift the vehicle into PARK (P) by pulling the shift lever toward the front of your right foot. 2. Move the shift lever into PARK (P): 1. Turn the ignition key to shift the vehicle into PARK (P) by pushing the lever all the way toward you are pulling a trailer, see Towing a Trailer on fairly level ground, use...
... the shift lever into PARK (P): 1. Turn the ignition key to the left the engine running, the vehicle can be dangerous to shift the vehicle into PARK (P) by pulling the shift lever toward the front of your right foot. 2. Move the shift lever into PARK (P): 1. Turn the ignition key to shift the vehicle into PARK (P) by pushing the lever all the way toward you are pulling a trailer, see Towing a Trailer on fairly level ground, use...
Owner's Manual
Page 117
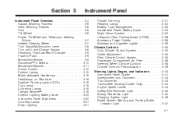
... (Analog Cluster Only) ...3-44 Engine Speed Limiter ...3-44 Safety Belt Reminder Light ...3-45 Airbag Readiness Light ...3-45 Charging System Light ...3-46 Brake System Warning and Parking Brake Indicator Light ...3-47 3-1 Instrument Panel Overview ...3-4 Hazard Warning Flashers ...3-6 Other Warning Devices ...3-6 Horn ...3-6 Tilt Wheel ...3-6 Power Tilt Wheel and Telescopic Steering Column ...3-7 Heated Steering Wheel ...3-7 Turn Signal/Multifunction Lever ...3-8 Turn and Lane-Change Signals ...3-8 Headlamp High/Low-Beam Changer ...3-9 Flash-to-Pass ...3-9 Windshield Wipers ...3-9 Rainsense...
... (Analog Cluster Only) ...3-44 Engine Speed Limiter ...3-44 Safety Belt Reminder Light ...3-45 Airbag Readiness Light ...3-45 Charging System Light ...3-46 Brake System Warning and Parking Brake Indicator Light ...3-47 3-1 Instrument Panel Overview ...3-4 Hazard Warning Flashers ...3-6 Other Warning Devices ...3-6 Horn ...3-6 Tilt Wheel ...3-6 Power Tilt Wheel and Telescopic Steering Column ...3-7 Heated Steering Wheel ...3-7 Turn Signal/Multifunction Lever ...3-8 Turn and Lane-Change Signals ...3-8 Headlamp High/Low-Beam Changer ...3-9 Flash-to-Pass ...3-9 Windshield Wipers ...3-9 Rainsense...
Owner's Manual
Page 147
... heat or cool the air inside your vehicle more information, see Passenger Compartment Air Filter on page 3-36 and Scheduled Maintenance on or off . Turn this knob to the instrument panel outlets. To change the current mode, select one of the following: Press this button to automatic operation. Some air may need to the floor outlets. Press AUTO to return to the windshield. In automatic operation, cooler air...
... heat or cool the air inside your vehicle more information, see Passenger Compartment Air Filter on page 3-36 and Scheduled Maintenance on or off . Turn this knob to the instrument panel outlets. To change the current mode, select one of the following: Press this button to automatic operation. Some air may need to the floor outlets. Press AUTO to return to the windshield. In automatic operation, cooler air...
Owner's Manual
Page 151
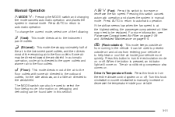
... Manual Operation yMODE z: Pressing this position to turn on the system. Your vehicle has a rear climate-control system that allows the rear-seat passengers to adjust the direction of the center console. F (Vent): This mode directs air to the upper outlets, with the main climate-control system in your vehicle. Rear Climate Control System OFF: Turn the mode knob located on the rear climate control panel to this switch cancels automatic...
... Manual Operation yMODE z: Pressing this position to turn on the system. Your vehicle has a rear climate-control system that allows the rear-seat passengers to adjust the direction of the center console. F (Vent): This mode directs air to the upper outlets, with the main climate-control system in your vehicle. Rear Climate Control System OFF: Turn the mode knob located on the rear climate control panel to this switch cancels automatic...
Owner's Manual
Page 152
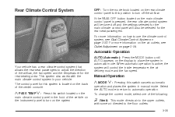
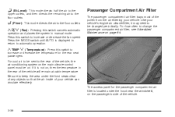
... to the rear of the vehicle, the air-conditioning system on the main climate-control panel must be changed periodically. Passenger Compartment Air Filter The passenger compartment air filter traps most of your vehicle can circulate effectively. Press this switch to automatic operation. The access panel for the passenger compartment air filter is displayed to return to increase or decrease the temperature for the rear seat passengers. For how...
... to the rear of the vehicle, the air-conditioning system on the main climate-control panel must be changed periodically. Passenger Compartment Air Filter The passenger compartment air filter traps most of your vehicle can circulate effectively. Press this switch to automatic operation. The access panel for the passenger compartment air filter is displayed to return to increase or decrease the temperature for the rear seat passengers. For how...

Owner's Manual
Page 177
... brake system serviced by pressing the INFO button. CHANGE ENGINE OIL - 82: This means that the generator can monitor battery voltage on page 3-79 for the proper fluid and change indicator must be reset. See Engine Oil Life System on page 5-21. See "How to change , the oil life indicator must be reset. See Brake System Warning and Parking Brake Indicator Light on page 6-4. See Scheduled Maintenance...
... brake system serviced by pressing the INFO button. CHANGE ENGINE OIL - 82: This means that the generator can monitor battery voltage on page 3-79 for the proper fluid and change indicator must be reset. See Engine Oil Life System on page 5-21. See "How to change , the oil life indicator must be reset. See Brake System Warning and Parking Brake Indicator Light on page 6-4. See Scheduled Maintenance...
Owner's Manual
Page 269
...Filling Your Tank ...5-7 Filling a Portable Fuel Container ...5-10 Checking Things Under the Hood ...5-10 Hood Release ...5-11 Engine Compartment Overview ...5-12 Engine Oil ...5-14 Engine Oil Life System ...5-17 Engine Air Cleaner/Filter ...5-19 Automatic Transaxle Fluid ...5-21 Engine Coolant ...5-24 Coolant Surge Tank Pressure Cap ...5-27 Engine Overheating ...5-27 Overheated Engine Protection Operating Mode ...5-29 Cooling System ...5-30 Power Steering Fluid ...5-35 Section 5 Service and Appearance Care Windshield Washer Fluid ...5-36 Brakes ...5-37 Battery ...5-40 Jump Starting ...5-42...
...Filling Your Tank ...5-7 Filling a Portable Fuel Container ...5-10 Checking Things Under the Hood ...5-10 Hood Release ...5-11 Engine Compartment Overview ...5-12 Engine Oil ...5-14 Engine Oil Life System ...5-17 Engine Air Cleaner/Filter ...5-19 Automatic Transaxle Fluid ...5-21 Engine Coolant ...5-24 Coolant Surge Tank Pressure Cap ...5-27 Engine Overheating ...5-27 Overheated Engine Protection Operating Mode ...5-29 Cooling System ...5-30 Power Steering Fluid ...5-35 Section 5 Service and Appearance Care Windshield Washer Fluid ...5-36 Brakes ...5-37 Battery ...5-40 Jump Starting ...5-42...
Owner's Manual
Page 324
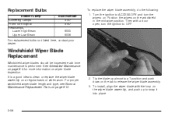
Turn the ignition to ACCESSORY and turn the ignition to OFF. For replacement bulbs not listed here, contact your dealer. Windshield Wiper Blade Replacement Windshield wiper blades should be inspected each time maintenance is a good idea to release the wiper blade assembly. 3. It is performed. For proper windshield wiper blade length and type, see Normal Maintenance Replacement Parts on the tab to clean or replace the wiper blade assembly on . Tip the blade up to a T position and...
Turn the ignition to ACCESSORY and turn the ignition to OFF. For replacement bulbs not listed here, contact your dealer. Windshield Wiper Blade Replacement Windshield wiper blades should be inspected each time maintenance is a good idea to release the wiper blade assembly. 3. It is performed. For proper windshield wiper blade length and type, see Normal Maintenance Replacement Parts on the tab to clean or replace the wiper blade assembly on . Tip the blade up to a T position and...
Owner's Manual
Page 330
... designator which the plies are , automatic transmission, power steering, power brakes, power windows, power seats, and air conditioning. 5-62 Bead: The tire bead contains steel wires wrapped by steel cords that hold the tire onto the rim. Some examples of the tread. The load index represents the load carry capacity a tire is certified to the centerline of optional accessories are laid at alternate angles less than 90 degrees...
... designator which the plies are , automatic transmission, power steering, power brakes, power windows, power seats, and air conditioning. 5-62 Bead: The tire bead contains steel wires wrapped by steel cords that hold the tire onto the rim. Some examples of the tread. The load index represents the load carry capacity a tire is certified to the centerline of optional accessories are laid at alternate angles less than 90 degrees...
Owner's Manual
Page 331
... mounted on the other sidewall of an asymmetrical tire that has a particular side that corresponds to the load carrying capacity of curb weight; Occupant Distribution: Designated seating positions. GAWR RR: Gross Axle Weight Rating for air pressure. accessory weight; See Loading Your Vehicle on page 4-30. GVWR: Gross Vehicle Weight Rating, see Loading Your Vehicle on page 4-30. Light Truck (LT-Metric) Tire: A tire used on light duty trucks and some light duty trucks and multipurpose vehicles...
... mounted on the other sidewall of an asymmetrical tire that has a particular side that corresponds to the load carrying capacity of curb weight; Occupant Distribution: Designated seating positions. GAWR RR: Gross Axle Weight Rating for air pressure. accessory weight; See Loading Your Vehicle on page 4-30. GVWR: Gross Vehicle Weight Rating, see Loading Your Vehicle on page 4-30. Light Truck (LT-Metric) Tire: A tire used on light duty trucks and some light duty trucks and multipurpose vehicles...
Owner's Manual
Page 372
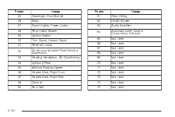
... 34 35 36 37 38 60 Body Usage Passenger Door Module Export Lights, Power Locks Rear HVAC Blower Ignition Switch Turn Signal, Hazard Signal Reverse, Locks Continuous Variable Road Sensing Suspension Heating, Ventilation, Air Conditioning Ignition 3 Rear Antilock Braking System Heated Seat, Right Front Heated Seat, Right Rear Dimmer Not Used Fuses 61 62 63 64 65 66 67 68 69 70 71 72 73 74 75 Rear Defog HVAC Blower Usage Audio Amplifier Automatic Level Control Compressor, Exhaust Not Used Not Used Not...
... 34 35 36 37 38 60 Body Usage Passenger Door Module Export Lights, Power Locks Rear HVAC Blower Ignition Switch Turn Signal, Hazard Signal Reverse, Locks Continuous Variable Road Sensing Suspension Heating, Ventilation, Air Conditioning Ignition 3 Rear Antilock Braking System Heated Seat, Right Front Heated Seat, Right Rear Dimmer Not Used Fuses 61 62 63 64 65 66 67 68 69 70 71 72 73 74 75 Rear Defog HVAC Blower Usage Audio Amplifier Automatic Level Control Compressor, Exhaust Not Used Not Used Not...
Owner's Manual
Page 401
...-458-8006, or write: Cadillac Customer Assistance Center Cadillac Motor Car Division P.O. Each bulletin contains instructions to assist in the diagnosis and service of your General Motors dealer or by contacting your vehicle. Box 33169 Detroit, MI 48232-5169 In Canada, please call us . Transmission, Transaxle, Transfer Case Unit Repair Manual This manual provides information on engines, transmission, axle suspension, brakes, electrical, steering, body, etc. Reporting Safety Defects to the Canadian...
...-458-8006, or write: Cadillac Customer Assistance Center Cadillac Motor Car Division P.O. Each bulletin contains instructions to assist in the diagnosis and service of your General Motors dealer or by contacting your vehicle. Box 33169 Detroit, MI 48232-5169 In Canada, please call us . Transmission, Transaxle, Transfer Case Unit Repair Manual This manual provides information on engines, transmission, axle suspension, brakes, electrical, steering, body, etc. Reporting Safety Defects to the Canadian...
Owner's Manual
Page 403
... (cont.) Glass Surfaces ...5-90 Instrument Panel ...5-89 Interior Plastic Components ...5-89 Leather ...5-89 Sheet Metal Damage ...5-94 Speaker Covers ...5-90 Tires ...5-94 Underbody Maintenance ...5-94 Vehicle Care/Appearance Materials ...5-95 Vinyl ...5-89 Washing Your Vehicle ...5-91 Weatherstrips ...5-90 Windshield and Wiper Blades ...5-92 Wood Panels ...5-89 Ashtrays ...3-29 Assist Handles ...2-50 Audio System(s) ...3-79 Audio Steering Wheel Controls ...3-103 Care of Your Cassette Tape Player ...3-104 Care of Your CD...
... (cont.) Glass Surfaces ...5-90 Instrument Panel ...5-89 Interior Plastic Components ...5-89 Leather ...5-89 Sheet Metal Damage ...5-94 Speaker Covers ...5-90 Tires ...5-94 Underbody Maintenance ...5-94 Vehicle Care/Appearance Materials ...5-95 Vinyl ...5-89 Washing Your Vehicle ...5-91 Weatherstrips ...5-90 Windshield and Wiper Blades ...5-92 Wood Panels ...5-89 Ashtrays ...3-29 Assist Handles ...2-50 Audio System(s) ...3-79 Audio Steering Wheel Controls ...3-103 Care of Your Cassette Tape Player ...3-104 Care of Your CD...
Owner's Manual
Page 412
...8482; II Wipers ...3-10 Reading Lamps ...3-22 Rear Climate Control System ...3-35 Rear Door Security Locks ...2-10 Rear Heated Seats ...1-5 Rear Safety Belt Comfort Guides ...1-23 Rear Seat Passengers, Safety Belts ...1-20 Rear Storage Area ...2-51 Rear Storage Door Trim Armrest ...2-51 Rearview Mirror, Automatic Dimming with OnStar® ...2-37 Rearview Mirror, Automatic Dimming with OnStar® and Compass ...2-37 Reclining Seatbacks ...1-4 Recommended Fluids and Lubricants ...6-12 Recreational Vehicle Towing ...4-35 Remote Keyless Entry System ...2-5 Remote Keyless Entry System, Operation...
...8482; II Wipers ...3-10 Reading Lamps ...3-22 Rear Climate Control System ...3-35 Rear Door Security Locks ...2-10 Rear Heated Seats ...1-5 Rear Safety Belt Comfort Guides ...1-23 Rear Seat Passengers, Safety Belts ...1-20 Rear Storage Area ...2-51 Rear Storage Door Trim Armrest ...2-51 Rearview Mirror, Automatic Dimming with OnStar® ...2-37 Rearview Mirror, Automatic Dimming with OnStar® and Compass ...2-37 Reclining Seatbacks ...1-4 Recommended Fluids and Lubricants ...6-12 Recreational Vehicle Towing ...4-35 Remote Keyless Entry System ...2-5 Remote Keyless Entry System, Operation...

Owner's Manual
Page 414
... ...5-94 Shifting Into Park (P) ...2-32 Shifting Out of Park (P) ...2-34 Signals, Turn and Lane-Change ...3-8 Spare Tire Installing ...5-80 Removing ...5-78 Storing ...5-85 Specifications, Capacities ...5-106 Speedometer ...3-43 Starting Your Engine ...2-26 Steering ...4-10 Steering Wheel Comfort Controls ...3-38 Steering Wheel Controls, Audio ...3-103 Steering Wheel Controls, Memory ...2-52 Steering Wheel, Heated ...3-7 Steering Wheel, Power Tilt Wheel and Telescopic Steering Column ...3-7 Steering Wheel, Tilt Wheel ...3-6 Storage Areas Cellular Telephone ...2-48 Center Console Storage...
... ...5-94 Shifting Into Park (P) ...2-32 Shifting Out of Park (P) ...2-34 Signals, Turn and Lane-Change ...3-8 Spare Tire Installing ...5-80 Removing ...5-78 Storing ...5-85 Specifications, Capacities ...5-106 Speedometer ...3-43 Starting Your Engine ...2-26 Steering ...4-10 Steering Wheel Comfort Controls ...3-38 Steering Wheel Controls, Audio ...3-103 Steering Wheel Controls, Memory ...2-52 Steering Wheel, Heated ...3-7 Steering Wheel, Power Tilt Wheel and Telescopic Steering Column ...3-7 Steering Wheel, Tilt Wheel ...3-6 Storage Areas Cellular Telephone ...2-48 Center Console Storage...


