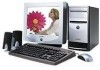
eMachines T2824 Support Question
eMachines T2824 Support Question
Find answers below for this question about eMachines T2824 - 256 MB RAM.Need a eMachines T2824 manual? We have 2 online manuals for this item!
Question posted by mbrownnn on August 22nd, 2010
Emachines T2824
My desktop is too slow to connect my laptop to router. I have the Netgear WNR1000v2 router connected to my T2824 desktop. There is a two minute window to connect, but computer is too slow to connect within alloted time. Is there a way to free up memory on the desktop to make the connection faster. Is this the cause of the problem - the memory?
Current Answers
Related eMachines T2824 Manual Pages
User Guide - Page 1

...Also, make sure that the total of any kind on the product.
6 This computer should only be connected to the AC power source indicated on an unstable cart, stand or table. This plug will walk on... a bed, sofa, rug or other similar surface. Only connect this product where people will only fit into the computer through the cabinet openings. Do not defeat the...
User Guide - Page 5
...
The information in the United States and/or other product and brand names are either trademarks or registered trademarks of their respective owners. ©2003 eMachines, Inc. shall not be liable for incidental or consequential damages resulting from the furnishing, performance, or use of this user's guide is subject to change...
User Guide - Page 7
Selecting a Location 2-1 2. Checking the Voltage Selection 2-2 3. Connecting Your Peripheral Devices 2-3 4. Turning the Computer On and Off 2-4
Turning On the Computer 2-4 Turning Off the Computer 2-4
Using Your Computer
Using an Optional Floppy Disk ...
User Guide - Page 11

..., such
as a telephone, which can move freely.
Do not place your equipment to three-hole, grounded outlets. Setting Up Your System 2-1 To prevent static charges, connect all of its components. You need one outlet for the computer, one for the monitor, and an additional outlet for a printer and any other peripheral...
User Guide - Page 13
CAUTION For protection of time, unplug the computer and other devices due to the computer and other devices from the ...Up Your Computer. This will prevent damage to lighting and power line surges.
3. Setting Up Your System 2-3 Connecting Your Peripheral Devices
To connect the peripheral devices, refer to plug the power cord into the system before plugging it is left unattended and ...
User Guide - Page 14

... Click the Start button, and then click Turn Off Computer. 3. In this case, the "Microsoft Windows Startup Menu" menu will be booted with Restore CD. When the Turn Off Computer dialog box is...the monitor, and any other peripheral devices connected to turn off the monitor and any other peripheral devices.
2-4 Setting Up Your System To start Windows, remove the Restore CD and restart the ...
User Guide - Page 15

...into the drive until it .
Eject button
Metal shutter
Chapter 1
Floppy disk
When you are using Windows® with your computer. You could lose data. To install another operating system such as shown...the manual that came with the label facing up and the metal shutter leading into place. Windows® may come with already installed on your floppy disk drive, insert the diskette with ...
User Guide - Page 16
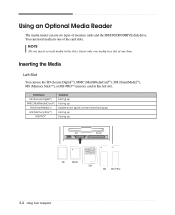
... MS-PROTM memory card in one of memory cards and the IBM MICRODRIVE disk drive. NOTE Do not insert several media in a slot at one time. Card type SD (Secure DigitalTM) MMC(MultiMediaCardTM) SM (SmartMediaTM) MS (Memory StickTM)
MS-PROTM
Insertion Facing up Facing up Upside down (gold contact area facing...
User Guide - Page 18
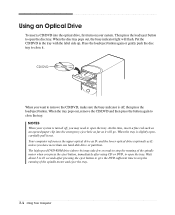
...off , you press the eject button, immediately after pressing the eject button to give the DVD sufficient time to stop the running of the spindle motor when you may need to stop the running of the spindle...button again or gently push the disc tray to open the tray. NOTES When your system. At this time, insert a fine rod such as an opened paper clip into the optical drive, first turn on ...
User Guide - Page 19
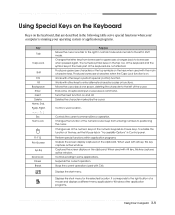
...the screen display on . Stops the current operation (used with alt key, this key captures active window. Displays the short menu for the selected location. Turns the insert function on the clipboard.
Perform... on the numeric keypad as mouse keys. Works with Alt key, this key captures active window. Moves the cursor back one tab to uppercase; Ends a line of the numeric keys on...
User Guide - Page 20
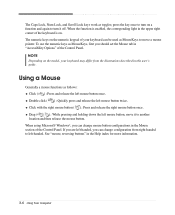
... follows:
Click ( ) : Press and release the left mouse button twice.
Double click ( ) : Quickly press and release the left mouse button once.
When using Microsoft® Windows®, you should set the Mouse tab in the upper right corner of the keyboard is enabled, the corresponding light in "Accessibility Options" of the...
User Guide - Page 21
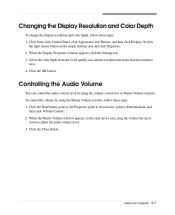
... desktop area and click Properties. 2. Controlling the Audio Volume
You can control the audio volume level by using the volume control box or Master Volume window. When the Master Volume window ...
area. 4. To control the volume by using the Master Volume window, follow these steps: 1. When the Display Properties window appears, click the Settings tab. 3. Click the OK button.
...
User Guide - Page 23

... remove the cover of all, disconnect the power cable from the electrical outlet and from any telecommunications links, networks, or modems before performing any cables connected to access its power source and from the back panel.
Turn off the computer. Chapter 1 2.
To remove the cover, follow these steps: 1.
Installing and Removing...
User Guide - Page 24
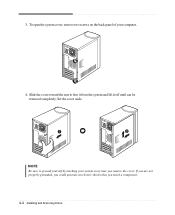
... and lift it off until can be removed completely. To open the system cover, remove two screws on the back panel of your system every time you touch a component. 4-2 Installing and Removing Drives 3.
User Guide - Page 27
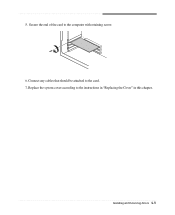
Replace the system cover according to the computer with retaining screw. 6. Installing and Removing Drives 4-5 Secure the end of the card to the instructions in "Replacing the Cover" in this chapter. Connect any cables that should be attached to the card. 7. 5.
User Guide - Page 30

7. Slide the HDD bracket into the chassis and secure it .)
9. Replace the system cover according to your hard disk drive. (If you removed the hard disk drive cable from the motherboard, replace it with the retaining screw, as shown below.
8. Connect the power and hard disk drive cable to the instructions in "Replacing the Cover" in this chapter. 4-8 Installing and Removing Drives
User Guide - Page 33

... of the front panel using a tool such as a screwdriver. Push out the faceplate, pressing outward two tabs on both ends of the cable connector that connected to CS (Cable Select). You must be set the jumper of E-IDE cable marked "SLAVE."
NOTES Like a hard disk drive, most optional devices have jumpers...
User Guide - Page 34
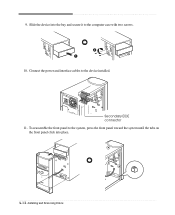
Secondary EIDE connector 11.
Slide the device into place.
4-12 Installing and Removing Drives To reassemble the front panel to the system, press the front panel toward the system until the tabs on the front panel click into the bay and secure it to the device installed. 9. Connect the power and interface cables to the computer case with two screws.
10.
User Guide - Page 41

... the PowerDVD as follow:
Click the Start button, point to All Programs, point to emachines PowerDVD, and then click PowerDVD. About DVD
Digital Versatile Disc (DVD) is auto-run...1 Dual-layer DVDs can hold more than twelve times the information of digital sound, richer graphics, and far more channels of a CD on a single side.
a seven times the data capacity of data - Playing the PowerDVD...
User Guide - Page 45

.... (Refer to your mouse. Remove the write-protection or use the Display Properties window.
Solution
The brightness and contrast controls aren't set properly Adjust the brightness and contrast controls on the empty desktop area and click Properties. 2.
The cable connecting the monitor to your computer entered power management mode. Make sure the power...
Similar Questions

How Do I Add My Ram Cards?
bhow and where do i plug in my new memory cards
bhow and where do i plug in my new memory cards
(Posted by jenzie51 11 years ago)

Internet Disconnections
Emachine 256MB Model T2824 Internet connects but shuts down after awhile and runs diagnostic program...
Emachine 256MB Model T2824 Internet connects but shuts down after awhile and runs diagnostic program...
(Posted by bushmanishere 11 years ago)

Upgrade, Ready To Buy.
ok Im illiterate but looked around a lot, Will this work?ZOTAC GT 520 SYNERGY Edition 2GB DDR3, 64 b...
ok Im illiterate but looked around a lot, Will this work?ZOTAC GT 520 SYNERGY Edition 2GB DDR3, 64 b...
(Posted by dkloeckners 12 years ago)

W3622 Wires From Front Disconnected
I accidentally disconnected the two wires that connect to the power switch, and so can't turn comput...
I accidentally disconnected the two wires that connect to the power switch, and so can't turn comput...
(Posted by Tink256 12 years ago)