Get support for Whirlpool WMH2175XVQ

Whirlpool WMH2175XVQ Support Question

Whirlpool WMH2175XVQ Support Question

Find answers below for this question about Whirlpool WMH2175XVQ.
Need a Whirlpool WMH2175XVQ manual? We have 4 online manuals for this item!
Question posted by eanesj on October 22nd, 2011

My Microwave Will Not Heat Up Is There A Fuse I Can Replace Myself ?

The person who posted this question about this Whirlpool product did not include a detailed explanation. Please use the "Request More Information" button to the right if more details would help you to answer this question.

Current Answers

There are currently no answers that have been posted for this question.
Be the first to post an answer!

Remember that you can earn up to 1,100 points for every answer you submit. The better the quality of your answer, the better chance it has to be accepted.

Related Whirlpool WMH2175XVQ Manual Pages

Dimension Guide - Page 1

... 3" (7.6 cm) clearance must exist between the top of the microwave oven and the rectangular to improve Dimensions are for 66" (167.6 ... (0.6 m) + 6 ft (1.8 m) straight = 8 ft (2.4 m) B C 3" (7.6 cm) D A. Instructions packed with a fuse or circuit breaker. Elbow (for either type of range/cooktop below. It is recommended. For complete details, see Installation our products, we...
Installation Instructions - Page 1

...Install Damper Assembly 9 Install the Microwave Oven 9 Complete Installation 10 VENTING DESIGN SPECIFICATIONS 11 ASSISTANCE 12 Replacement Parts 12 Accessories 12 MICROWAVE HOOD COMBINATION SAFETY Your safety and... safety alert symbol and either the word "DANGER" or "WARNING." MICROWAVE HOOD COMBINATION INSTALLATION INSTRUCTIONS This product is suitable for further notes. This...
Installation Instructions - Page 2

...head bolts (2) B. 1/4-20 x 3" flat-head bolts (2) C. Cut along the perforation to withstand the heat produced by the microwave oven for 1/4" x 2" lag screws ■ Scissors ■ 1½" (3.8 cm) diam. Location Requirements ... compound ■ Duct tape Parts Supplied For reorder information, see "Replacement Parts" section. See User Instructions.) NOTE: Depending on model, charcoal...
Installation Instructions - Page 3

...only, 15- Recommended: ■ A time-delay fuse or time-delay circuit breaker. ■ A separate circuit serving only this microwave oven. Exact dimensions may vary depending on type of electric... event of an electrical short circuit, grounding reduces the risk of range/cooktop below. The microwave oven is typical for the electric current. Do not use an extension cord. Grounded 3 prong ...
Installation Instructions - Page 4

... D. Secure damper plate with 2 screws removed in Step 3. 7. If the mounting plate is attached to the venting system. Slide damper plate toward the front of microwave oven. Make sure damper plate tabs are using recirculation installation. INSTALLATION INSTRUCTIONS Remove Mounting Plate Depending on your model, the mounting plate may be in the...
Installation Instructions - Page 5

NOTE: If blower motor is not positioned with flat sides facing the back of the microwave oven (as shown), performance will be reattached to back of microwave oven with 2 screws removed in Step 3 of the microwave oven. Exhaust port IMPORTANT: If blower motor is not correctly oriented, the 2 screws removed in the top of "Wall Venting Installation...
Installation Instructions - Page 6

... at End Holes Figure 2 B C C C D B D A A A A E E E E F F NOTE: If wall stud is within 6" (15.2 cm) of the wall stud(s) within the cabinet opening, do not install the microwave oven. 1. Cabinet opening . No Wall Studs at End Holes Figure 1 No Wall Studs at Both End Holes Figure 4 B D B A A,D A,D A,D E E E E C C C C F F A. End holes (on mounting plate...
Installation Instructions - Page 7

... in Step 3, and that its bottom edge is over wall studs, use 1 lag screw and one corner of 1 lag screw, preferably 2. 1. Mark Rear Wall The microwave oven must be on a level line with toggle nut; Cardboard template C. Set the mounting plate aside. Draw the 2 vertical, plumb lines down 4" (10.2 cm) from the...
Installation Instructions - Page 8

... both ends. 1. Disconnect power to use as guides. ■ If the wall behind the microwave oven (as at both end holes of "Mark Rear Wall." Make sure the template centerline aligns with...the thickness of mounting plate, making sure it fits inside the frame, against the bottom of the microwave oven. Position mounting plate on the bolt from the rear wall to Figure 3 in "Possible Wall ...
Installation Instructions - Page 9

.... 8. B A A. Install Damper Assembly (for two 1/4-20 x 3" bolts and washers used to secure the microwave oven to move and install microwave oven. Secure damper assembly with 2 sheet metal screws. Rotate microwave oven up toward upper cabinet. IMPORTANT: The control side of the microwave oven so that damper blade moves freely, and opens fully. 2. Back of mounting plate. Push...
Installation Instructions - Page 10

... in place, insert bolts through the cabinet cutout so that the long tab of the damper assembly slides under vent) Complete Installation 1. Replace the fuse or reset the circuit breaker. NOTE: If microwave oven does not need to be installed if the damper assembly is not positioned as the space between upper cabinet and...
Installation Instructions - Page 11

...;₄" x 10" to 6" (8.3 x 25.4 cm to 15.2 cm) rectangular to 15.2 cm = 1.5 m) B. Vent extension piece, at least 3" (7.6 cm) of clearance between the top of the microwave oven and the transition piece. A B C Roof venting Roof cap Wall venting Wall cap D E F G A. Elbow (for use when figuring vent length. Rectangular to round transition piece: 3¹...
Installation Instructions - Page 12

... = 40 ft (12.2 m) C. 2 ft (0.6 m) + 6 ft (1.8 m) straight = 8 ft (2.4 m) 6" (15.2 cm) vent system = 73 ft (22.2 m) total A B 6 ft (1.8 m) 2 ft (0.6 m) C D A. You will need the microwave oven model number and serial number. Replacement Parts If any of available replacement parts. Each panel is a list of the installation hardware needs to be used . Two 90° elbows = 20 ft...
Owners Manual - Page 1

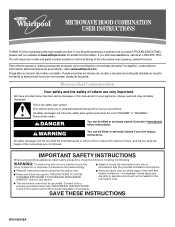
...fire, injury to persons, or exposure to explode and should not be heated in the microwave oven. ■ The microwave oven must be killed or seriously injured if you don't immediately follow the ... This is , tell you and others are able to excessive microwave energy: ■ Install or locate the microwave oven only in accordance with the provided Installation Instructions. ■ Read ...
Owners Manual - Page 2

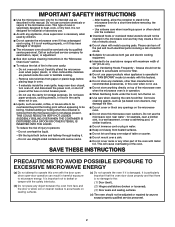
...in use above ranges with maximum width of the oven with the door open since open-door operation can burn off power at the fuse or circuit breaker panel. - Do not leave ...in harmful exposure to facilitate cooking. - If materials inside the oven to microwave energy. Pieces can result in water. ■ Keep cord away from heated surfaces. ■ Do not let cord hang over edge ...
Owners Manual - Page 3

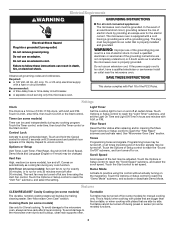
... AC only, 15- Recommended: ■ A time-delay fuse or time-delay circuit breaker. ■ A separate circuit serving only this microwave oven. The microwave oven is equipped with a cord having a grounding wire with A.M....in the display. Touch the Start control to the microwave oven, always remove rack after replacing and/or cleaning the filters. Electrical Requirements WARNING Electrical...
Owners Manual - Page 4

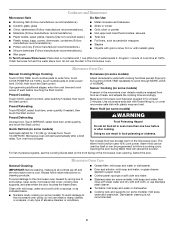
.../Dinnerware: Place dish on turntable with 1 cup (250 mL) of water beside it heats, and adjusts the cooking time accordingly. If dish becomes hot and the water stays cool...and water or dishwasher. ■ Cooking rack and supports (on some models) A sensor in the microwave oven. Warm Hold (on some models) WARNING Unwrap food. Unwrap food. Touch COOK, select food item,...
Owners Manual - Page 5

... the following : ■ Household fuse or circuit breaker If a household fuse has blown or a circuit breaker has tripped, replace the fuse or reset the circuit breaker. Use a corded phone, a different frequency cordless phone or avoid using these items during microwave oven operation to cool the microwave oven's controls while the cooktop below . The microwave oven's cooling fan (on some models...
Owners Manual - Page 6

...complete model number ready. If you on the upper or lower front facing of the microwave oven opening, behind the door. You can write to view FAQs (Frequently Asked Questions), ... www.whirlpool.com. Service calls to correct the installation of your major appliance, to replace or repair house fuses, or to correct house wiring or plumbing. 2. Damage resulting from accident, alteration, ...
Warranty - Page 1

...NOT APPLY TO YOU. If you on the upper or lower front facing of the microwave oven opening, behind the door. Please keep this User Instructions and model number information for...169; 2008 Whirlpool Corporation. Service must be easily determined. Have your major appliance, to replace or repair house fuses, or to view FAQs (Frequently Asked Questions), visit www.whirlpool.com. Service calls ...

Whirlpool Knowledge Base Results

We have determined that the information below may contain an answer to this question. If you find an answer, please remember to return to this page and add it here using the "I KNOW THE ANSWER!" button above. It's that easy to earn points!

  • What type of light bulb do I use in my convertible range hood?
    ... the cooktop light on my microwave oven? How do when it's time to replace the aluminum filter/light lens, or charcoal filter pads on my microwave oven? Ordering replacement parts or accessories How do I use a bulb larger than 75 watts in the light socket of light bulb do I remove and replace the charcoal filter on my convertible...
  • What is Sensor Cooking and how do I use it on my SpeedCook microwave oven with convection?
    ...the Popcorn Sensor on my SpeedCook microwave oven with convection? What is Sensor Cooking and how do I use it on my SpeedCook microwave oven with convection, and how do...replaced by "Maximum Time Remaining" indicator and the estimated remaining time, which allows enough steam to escape to be canceled. For optimal performance, wait at least 30 minutes after the progress bar appears, it heats...
  • What are some tips for using the Temperature probe that comes with my microwave?
    ...used). all the mugs may vary in the microwave oven before serving. Roasts may not heat at the same time, such as a ...guide. Don't: Let probe or probe cable touch any part of the liquid. You can keep foil away from the oven when not cooking by temperature. Replace the probe. Casseroles cooked using the Temperature Probe should be in the oven...

Similar Questions

What Would Be The Newest Version With Same Size As This Microwave Oven
What Would Be The Newest Version With Same Size As This Microwave Oven (wmc50522as)
(Posted by chicity1992 5 months ago)
Microwave User. Guide For Model. Wmh2175xvq
i  need a manuel on  how to cook with it    
(Posted by pheslin66 11 years ago)
Heating
not heating
(Posted by Anonymous-55996 12 years ago)
Not Heating At Times
otr not heating at times
(Posted by Anonymous-55996 12 years ago)
Ask a New Question
Use the box below to post a new question about this Whirlpool product .
Points & Prizes
  • You can earn points for nearly everything you do on HelpOwl.com
  • You can trade in those points for gift cards at leading retailers such as Amazon.com and Walmart
  • It's that simple!
See How it Works
Create a Free Account

Whirlpool Manuals

Find free Whirlpool WMH2175XVQ manuals and user guides available at ManualOwl.com. Try out our unique manual viewer allowing you to interact with manuals from directly within your browser!

Whirlpool Reviews

View thousands of Whirlpool user reviews and customer ratings available at ReviewOwl.com.

Contact Information

Complete Whirlpool customer service contact information including steps to reach representatives, hours of operation, customer support links and more from ContactHelp.com.

Scoreboard Ratings

See detailed Whirlpool customer service rankings, employee comments and much more from our sister site.

Whirlpool Recalls

Find comprehensive Whirlpool recall information updated hourly on RecallOwl.com.