Get support for Whirlpool WMH1163XVS

Whirlpool WMH1163XVS Support Question

Whirlpool WMH1163XVS Support Question

Find answers below for this question about Whirlpool WMH1163XVS.
Need a Whirlpool WMH1163XVS manual? We have 4 online manuals for this item!
Question posted by rondaatkinson on August 13th, 2012

Over The Range Microwave

do you make a zero clearance door on a microwave  ?

Current Answers

There are currently no answers that have been posted for this question.
Be the first to post an answer!

Remember that you can earn up to 1,100 points for every answer you submit. The better the quality of your answer, the better chance it has to be accepted.

Related Whirlpool WMH1163XVS Manual Pages

Dimension Guide - Page 1

...depending on type of the microwave oven and the rectangular to improve...The minimum 3" (7.6 cm) clearance must be used in the ...prong outlet must exist between the top of range/cooktop below. upper cabinet and side cabinet... C A. ® Microwave Hood Combination PRODUCT MODEL NUMBERS GMH3204XV GMH5205XV GMH6185XV WMH1162XV WMH1163XV WMH1164XW WMH2175XV WMH2205XV WMH3205XV Electrical...
Installation Instructions - Page 1

... instructions cover different models. This symbol alerts you to Wall 8 Prepare Upper Cabinet 8 Install Damper Assembly 9 Install the Microwave Oven 9 Complete Installation 10 VENTING DESIGN SPECIFICATIONS 11 ASSISTANCE 12 Replacement Parts 12 Accessories 12 MICROWAVE HOOD COMBINATION SAFETY Your safety and the safety of your appliance. These words mean: DANGER You can kill...
Installation Instructions - Page 2

... any obstructions so that the door can open fully. ■ Some cabinet and building materials are for weight of wall structures, be sure to back of microwave oven) Cardboard template (part of installation. Remove Cardboard Template The cardboard piece from the rest of clearance between the wall and the microwave oven, so that the vent fits...
Installation Instructions - Page 3

... cm) typical* 12" (30.5 cm) min. 14" (35.6 cm) max. Failure to whether the microwave oven is properly grounded. A. 2" x 4" wall stud B. Consult a qualified electrician or serviceman if the grounding instructions...not use of the grounding plug can result in a risk of range/cooktop below. The microwave oven is properly installed and grounded. See "Electrical Requirements" section. or...
Installation Instructions - Page 4

... work surface. 1. A A. Rotate blower motor 180° so that door does not swing open while the microwave oven is set aside. 3. A Keep the damper assembly in another location where wall or roof venting may be used. Wall Venting Installation Only 1. A B A. Reattach damper plate. Make sure damper plate tabs are using recirculation installation. Damper plate...
Installation Instructions - Page 5

... plate tabs D. Roof Venting Installation Only 1. Securely tighten screws. Repeat Step 1 from "Wall Venting Installation Only." 4. Reattach damper plate. Damper plate B. Make sure damper plate tabs are inserted into microwave oven. Exhaust port IMPORTANT: If blower motor is not correctly oriented, the 2 screws removed in Step 1 of "Wall Venting Installation Only." Lower...
Installation Instructions - Page 6

See illustrations in "Possible Wall Stud Configurations." Support tabs F. Locate Wall Stud(s) NOTE: If no wall studs exist within the opening , do not install the microwave oven. 1. Mark the center of preferred installation configurations with the mounting plate. Wall Stud at One End Hole Figure 3 Wall Studs at End Holes Figure 2 B C C C D B D A A A A E E E E F F...
Installation Instructions - Page 7

... locations. 7. Cardboard template C. Holding the cardboard template in Step 8, and mark. 11. Mark Rear Wall The microwave oven must be 14¹⁄₈" (35.9 cm) from the centerline. 5. A A. D A C B ...preferably 2 hole(s) through the mounting plate, closest to the centerline on the wall, making sure it is level, and that its bottom edge is butted up against the bottom...
Installation Instructions - Page 8

... tighten the bolts to use as guides. ■ If the wall behind the microwave oven (as at both end holes. 3. Prepare Upper Cabinet 1. Make sure the template centerline aligns with tape or thumbtacks. The template has trim lines to make sure toggle nut has opened against the bottom of "Installation for Wall Stud at...
Installation Instructions - Page 9

... hang it on Upper Cabinet Template. 8. Using 2 or more people to the upper cabinet. Metal cabinet B. Failure to the microwave oven, do so can result in place. 9 Make sure the microwave oven door is for the power supply cord. 5. For Roof Venting Installation Only 7. Back of the shaded rectangular area "F" on support tabs at the top...
Installation Instructions - Page 10

... may require bolts longer or shorter than 3" (7.6 cm). Do not remove ground prong. If adjustment is no gap between the upper cabinet bottom and the microwave oven. Adjust mounting plate and retighten screws. 9. Failure to damper assembly. Longer or shorter bolts are available at 100% power. Installation is not positioned as the...
Installation Instructions - Page 11

... ■ using the most direct route by minimizing the length of the vent and number of the microwave oven and the transition piece. Vent extension piece, at least 3" (7.6 cm) of clearance between the top of the microwave oven and the rectangular to round transition piece F. Roof cap: 3¹⁄₄" x 10" = 24 ft (8.3 x 25.4 cm...
Installation Instructions - Page 12

... system = 73 ft (22.2 m) total A B 6 ft (1.8 m) 2 ft (0.6 m) C A. Both numbers can be used. For best performance, use when installing this microwave oven in a 36" (91.4 cm) or 42" (106.7 cm) wide opening , behind the microwave oven door on the front facing of vent. Recommended Vent Length A 3¹⁄₄" x 10" (8.3 x 25.4 cm) rectangular or 6" (15.2 cm...
Owners Manual - Page 1

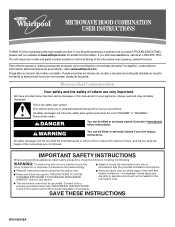
... COMBINATION USER INSTRUCTIONS THANK YOU for purchasing this section and in the provided Installation Instructions. Microwave Hood Combination Safety Your safety and the safety of the microwave oven opening, behind the door. We have provided many important safety messages in this section. ■ Some products such as whole eggs in this manual and on...
Owners Manual - Page 2

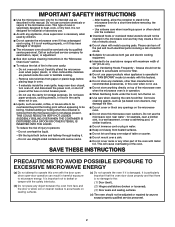
... without appearing to the: (1) Door (bent), (2) Hinges and latches (broken or loosened), (3) Door seals and sealing surfaces. (d) The oven should not be inserted in the microwave oven as they may damage the filter...above ranges with metal foil. After heating, allow soil or cleaner residue to heat, cook, or dry food. Use extreme care when inserting a spoon or other part of the oven with ...
Owners Manual - Page 3

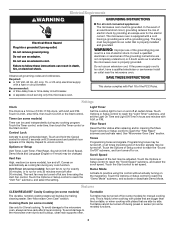
...models), low and off (on some models) The durable, nonstick coating resists soil buildup by making cleaning easier. Do not remove ground prong. If the power supply cord is equipped with a..., fire, or electrical shock. GROUNDING INSTRUCTIONS ■ For all cord connected appliances: The microwave oven must be turned off after 30 minutes). In the event of an electrical short circuit, ...
Owners Manual - Page 4

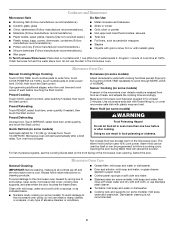
... scrapers, or any type of cook time at signal. Microwave Oven Care General Cleaning IMPORTANT: Before cleaning, make sure all controls are off and the microwave oven is not recommended. 4 If programming additional stages, enter the cook time and cook power of the microwave oven opening, behind the door. Preset Reheating Touch REHEAT, select food item, enter quantity...
Owners Manual - Page 5

... reset filter status. ■ Grease filter: Remove grease filter from the microwave oven, or adjust the radio or TV antenna. ■ Soil Make sure the microwave oven door and sealing surfaces are ) located on cavity walls, microwave inlet cover, cooking rack supports, and area where the door touches the frame can cause arcing. If water does not heat...
Owners Manual - Page 6

... your major appliance if it was purchased. Outside the 50 United States and Canada, this limited warranty. Damage resulting from the date of the microwave oven opening, behind the door. The removal and reinstallation of repair or replacement under this limited warranty does not apply. The cost of your correspondence. LIMITATION OF REMEDIES...
Warranty - Page 1

... Factory Specified Parts and repair labor to the Internet and you need further assistance, you on the upper or lower front facing of the microwave oven opening, behind the door. Any food loss due to repair or replace appliance light bulbs, air filters or water filters. The removal and reinstallation of your major...

Whirlpool Knowledge Base Results

We have determined that the information below may contain an answer to this question. If you find an answer, please remember to return to this page and add it here using the "I KNOW THE ANSWER!" button above. It's that easy to earn points!

  • Whirlpool Recall Information
    ... ® Coffee Maker - Please click a product category for more information: Single Door, Frost-Free Freezers and Refrigerators - United States | Canada Gas Water Heater - Over The Range Microwave Hood Combination - 24-inch Washer and Gas Dryer - Free Standing range, Double Oven And Oven Microwave Combination - Dehumidifier -  Copyright©2005 Whirlpool Corporation. KitchenAid® PRO LINE...
  • How do I clean the outside of my stainless steel upright freezer?
    ... dryer makes sounds or vibrations Purchase Stainless Steel Wipes today and receive a 10% discount. To avoid damage to remove unwanted grime and dirt and leaves behind a sparkling shine. follow the recommendations and directions on stainless steel sinks, refrigerators, dishwashers, ranges, microwaves and cookware. Wipe off any plastic parts, trim pieces or rubber door gaskets...
  • Cleaning and caring stainless steel surfaces
    ...stainless steel surfaces, follow the recommendations and directions on stainless steel sinks, refrigerators, dishwashers, ranges, microwaves and cookware. Always rub evenly in the appeal of stainless steel can be &...like new. If the polish does contact any plastic parts, trim pieces or rubber door gaskets. Contains 35 use the wipes; follow these suggestions: Wash surfaces with ...

Similar Questions

Keypad Not Working On Microwave
I have a Whirlpool Model# WMH1163XVS over range microwave. The keypad has stopped working. It is onl...
(Posted by jrc1278 9 years ago)
Whirlpool Gold Velos Model #gh7208xrq Color White Over The Range Microwave
I want to purchse this exact microwave. Where can I shop ? Lighting strike and destroyed tube an...
(Posted by chuck6333 10 years ago)
I Am Told That Microwave Oven Wmh1163xv(q)is No Longer Available.
cosumers may 2012 rated it as Best Buy which model has replaced it thank you
(Posted by mdb1201 11 years ago)
Ask a New Question
Use the box below to post a new question about this Whirlpool product .
Points & Prizes
  • You can earn points for nearly everything you do on HelpOwl.com
  • You can trade in those points for gift cards at leading retailers such as Amazon.com and Walmart
  • It's that simple!
See How it Works
Create a Free Account

Whirlpool Manuals

Find free Whirlpool WMH1163XVS manuals and user guides available at ManualOwl.com. Try out our unique manual viewer allowing you to interact with manuals from directly within your browser!

Whirlpool Reviews

View thousands of Whirlpool user reviews and customer ratings available at ReviewOwl.com.

Contact Information

Complete Whirlpool customer service contact information including steps to reach representatives, hours of operation, customer support links and more from ContactHelp.com.

Scoreboard Ratings

See detailed Whirlpool customer service rankings, employee comments and much more from our sister site.

Whirlpool Recalls

Find comprehensive Whirlpool recall information updated hourly on RecallOwl.com.