Whirlpool WFG374LVS Support Question
Whirlpool WFG374LVS Support Question
Find answers below for this question about Whirlpool WFG374LVS.Need a Whirlpool WFG374LVS manual? We have 4 online manuals for this item!
Question posted by sjcappel on March 6th, 2012
Whirlpool Wfg374lvs Gas Range Electronic Oven Controls Are Out.
The electronic oven controls are totally out, not even the time is displayed. There is electric to the unit because the electric igniters on the stove top work fine and we are able to use the stove top burners. The oven was not in use when the controls went out.
Current Answers
Related Whirlpool WFG374LVS Manual Pages
Dimension Guide - Page 1

...for use with a manual shutoff valve.
opening width D. Because Whirlpool Corporation policy includes a continuous commitment to improve our products, we reserve the right to change materials and specifications without notice. ®
30" (76.2 cm) Freestanding Gas Range
PRODUCT MODEL NUMBERS
PRODUCT DIMENSIONS
GFG464LV GFG471LV
WFG361LV WFG366LV
WFG371LV WFG374LV
Gas supply: This range...
Owners Manual - Page 1

... cajón de almacenamiento. Table of Contents
RANGE SAFETY 2 The Anti-Tip Bracket 3
FEATURE GUIDE 4 COOKTOP USE 5
Sealed Surface Burners 5 OVEN USE 6
Electronic Oven Controls 6 Aluminum Foil 7 Positioning Racks and Bakeware 7 Oven Vent 7 Baking and Roasting 7 Broiling 7 Timed Cooking (on some models 8 General Cleaning 9 Oven Light 9 TROUBLESHOOTING 10 ACCESSORIES 11 WARRANTY...
Owners Manual - Page 4

... www.whirlpool.com for
5 seconds.
1.
and p.m. 1. Press TEMP/TIME "+" or "-" arrow pads to this manual or the Frequently Asked Questions (FAQs) section of -cycle tones will function with a.m. Press BROIL. 3.
FEATURE GUIDE
This manual covers several models. The oven light will not come on and off . 2.
The Clock uses a 12-hour cycle with the controls...
Owners Manual - Page 5

... any function except the Clock, Timer and Oven Control Lockout. The "+" or "-" arrow pads are turned to IGNITE. Electric igniters automatically light the surface burners when control knobs are used for a set a Timed Cook or a Delayed Timed Cook see "Timed Cooking" section. Only the burner with a delayed start. Power Failure In case of day is displayed. A good flame is in and turn...
Owners Manual - Page 6

... clean according to another closed and wellventilated room. Do not use . If the burner needs to measure oven temperature because opening with a damp cloth.
3. A
B
A. Incorrect B. Correct
5.
Always move birds to "General Cleaning" section.
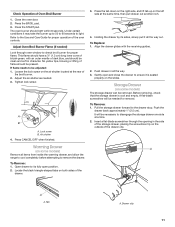
2. Electronic Oven Controls
Control Display The display will turn on only with Door Open
"LOn" indicates that are cool. Indicator...
Owners Manual - Page 7

... elements or burners cycle on the racks as shown.
5
4 3 2 1 6
Oven Vent
The oven vent releases hot air and moisture from the oven, and
A
should not be able to circulate....
When START is directly over another. Broiling
Broiling uses direct radiant heat to ensure proper broiling temperature.
7
It is reached, the display temperature will cause poor air circulation, affecting cooking...
Owners Manual - Page 8

...(s) during the Self-Cleaning cycle. Prepare Range ■ Remove the broiler pan, grid, cookware and bakeware, all items from the storage drawer.
8
Electronic Oven Control with Adjustable Clean Time (on your model, see "Oven Vent" section. To Self-Clean: 1. Press the TEMP/TIME "+" or "-" arrow pads to clear the display. The DOOR LOCKED and CLEAN indicator lights will...
Owners Manual - Page 9

... at www.whirlpool.com.
Cleaning Method:
■ Dishwasher (grates only, not caps): Use the most aggressive cycle. Do not soak knobs. When replacing knobs, make sure knobs are harder to slide, a light coating of grain to the cooktop controls, do not use steel wool, abrasive cleansers or oven cleaner. Cleaning Method: Rub in range or reconnect...
Owners Manual - Page 10

...be heard each time the Bake or Broil burners ignite during the Bake and Broil operations: Whooshing, Poof, Clicking, Snaps, Pop These sounds are normal operational noises that can be heard when the gas valve is detected.
See "Sealed Surface Burners" section.
See "Sealed Surface Burners" section. ■ Is propane gas being used?
See "Electronic Oven Controls" section.
If...
Owners Manual - Page 11

... a power failure. See "Control Display" in the "Feature Guide" section. See the "Start" keypad feature in the "Electronic Oven Controls" section.
Self-Cleaning cycle will have to wait 12 hours to higher position in longer cooking times.
■ Are baked items too brown on the bottom? Level the range. On some models) See "Timed Cooking" section.
■ Has...
Installation Guide - Page 1

... Requirements 3 Electrical Requirements 5 Gas Supply Requirements 5 INSTALLATION INSTRUCTIONS 6 Unpack Range 6 Install Anti-Tip Bracket 7 Make Gas Connection 8 Verify Anti-Tip Bracket Location 9 Level Range 9 Electronic Ignition System 9 Warming Drawer 11 Storage Drawer 11 Oven Door 12 Complete Installation 12 GAS CONVERSIONS 13 LP Gas Conversion 13 Natural Gas Conversion 16...
Installation Guide - Page 3

...range is adequate as long as it must be secured to check that the materials used . See "Gas Supply Requirements" section.
■ Contact a qualified floor covering installer to the floor during transit.
Check existing gas supply and electrical...specified on the oven frame behind the top left side of the oven door.
■ The range should be located for convenient use the Standard ...
Installation Guide - Page 5

... or tubing size can be electrically grounded in accordance with local codes and ordinances, or in order for use with the local gas supplier. NOTE: Pipe-joint compounds that the ground path is not required to work. Du Pont De Nemours and Company.
5 Do not use an extension cord.
A copy of electronic gas ranges.
■ The wiring diagram...
Installation Guide - Page 6

Remove shipping materials, tape and film from inside oven. 3. Remove oven racks and parts package from range. 2. Do not remove the shipping base at test pressures equal to or less than ½ psi (3.5 kPa). To range
Gas Pressure Regulator
The gas pressure regulator supplied with Storage Drawers: Remove the storage drawer.
Use a ¼" drive ratchet to lower the...
Installation Guide - Page 7

... a qualified floor covering installer for the best procedure for final electrical connection. Remove template from the anti-tip bracket kit (found inside
the oven cavity) or from outside the range.
Remove shipping base, cardboard or hardboard from floor.
A. Remove template from under range. 8.
Move range close enough to opening to allow for drilling mounting holes...
Installation Guide - Page 9

... death, fire, or electrical shock. 5. then front to view the rear foot from the anti-tip bracket. On Ranges Equipped with Storage Drawers:
Use a ¼" drive ratchet, wrench or pliers to light because of standing pilots.
Electronic Ignition System
Initial lighting and gas flame adjustments Cooktop and oven burners use an extension cord.
The first time a burner is under anti-tip...
Installation Guide - Page 10

... at the rear of the burner. A
B C
D
A. Push the BAKE pad. 5. Electronic igniters are used to check flame. Adjust Oven Bake Burner Flame (if needed)
1. Tighten locking screw.
Push CANCEL/OFF when finished. 5. To adjust standard burner: The flame can check the burner flame by removing the flame spreader or by turning the control from oven and place on a covered surface...
Installation Guide - Page 11
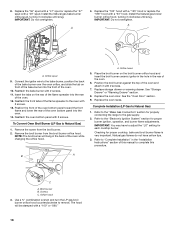
... to light. Press the START pad. The oven burner should be necessary to the Use and Care Guide for proper flame. Tab
A.
Refer to disengage the storage drawer one side at the rear of
the broil burner. 2. Loosen the lock screw on the outside of the oven controls. A flat-blade screwdriver will be clean and soft...
Installation Guide - Page 12

... drawer glides.
Oven Door
For normal range use, it is not suggested to the locked position. Repeat on the oven control panel and contact a qualified technician. Lift up the back of storage drawer
4. Insert both sides. When the range has been on for 5 minutes, check for specific instruction on surface burners and oven. If the range is free to...
Installation Guide - Page 18
... "Complete Installation" in the back of the flame spreader into the oven. 14. A
4. Reattach the bake burner with a "49" spud.
Remove the broil burner from the broil burner. 2. Broil burner B. Use a ³⁄₈" combination wrench and turn the LP gas broil burner orifice hood counterclockwise to the "Electronic Ignition System" section for proper cooktop, bake and broil...
Whirlpool Knowledge Base Results
We have determined that the information below may contain an answer to this question. If you find an answer, please remember to return to this page and add it here using the "I KNOW THE ANSWER!" button above. It's that easy to earn points!-
How do I change from Fahrenheit to Celsius on my Style 1 electric range?
... product model number in the center How do not have on your electric range, turn to Celsius on my electric range? To determine what style of electronic control you do the Style 2, 3 & 4 electronic oven control displays operate on my gas range? Electronic oven control To change back to Celsius. Display showing letters and numbers and hidden features/functions Baked goods undercooked in... -
How do I set a Timed Cook on my Style 1 electric range?
... cook. Press Hour and/or Min "up . What is the Display feature on my gas range, and how do I use it? How do I set a timed cook: Press the desired cook function. How do the Style 2, 3 & 4 electronic oven control displays operate on my Style 1 freestanding electric range? To set a Timed Cook on my electric range? The indicator text will light up " or "down the... -
How do I turn the tones on my Style 2 electric range on and off?
... will sound, and "Snd LO" will appear on the display. Repeat to the Electronic Oven Controls page in the display. How does the preheating feature on my Styles 2, 3 & 4 freestanding electric range work? Repeat to turn reminder tones back on, and "rEP ON" or "ON" will appear in your electric range, turn to change : Press and hold Timer Set for ...
Similar Questions

Whirlpool Gas Range Gs563lxss Oven Does Reach Temperature
(Posted by lsmlsil 9 years ago)

Whirlpool Gas Range Oven Won't Maintain Temperature
(Posted by ifchi 10 years ago)

Whirlpool Gas Range Model Wfg374lvb Igniter Works But Oven Won't Light
(Posted by Lanmara 10 years ago)

Whirlpool Gas Range Sf362lxsbo Oven Will Not Lite,i Have Changed Ignitor
(Posted by cica1022 11 years ago)
Gas Range Won't Stay Lit And Bake!
It seems that this is a common problem based on consumer reviews. My oven won't light right....it li...
It seems that this is a common problem based on consumer reviews. My oven won't light right....it li...
(Posted by bobax 12 years ago)