Get support for Whirlpool WFE361LVQ - WhirlpoolR 30 in. Ing Electric Range5

Whirlpool WFE361LVQ Support Question

Whirlpool WFE361LVQ Support Question

Find answers below for this question about Whirlpool WFE361LVQ - WhirlpoolR 30 in. Ing Electric Range5.
Need a Whirlpool WFE361LVQ manual? We have 4 online manuals for this item!
Question posted by joanrobertson on December 19th, 2011

Steam Clean Feature

do the racks stay in the oven, and how much water do you use?  

Current Answers

There are currently no answers that have been posted for this question.
Be the first to post an answer!

Remember that you can earn up to 1,100 points for every answer you submit. The better the quality of your answer, the better chance it has to be accepted.

Related Whirlpool WFE361LVQ Manual Pages

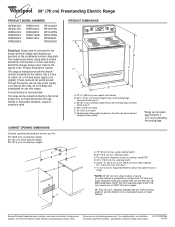
Dimension Guide - Page 1

30" (76 cm) Freestanding Electric Range PRODUCT MODEL NUMBERS GFE461LV GFE471LV WFE301LV WFE361LV WFE364LV WFE366LV WFE371LV WFE374LV WFE381LV WFE114LW WFE115LX RF110AXS RF111PXS RF114PXS RF212PXS RF263LXT RF264LXS Electrical: Range must be connected directly to the circuit breaker box (or fused disconnect) through the neutral, use... the oven frame behind storage drawer panel) *Range can ...
Installation Instructions - Page 1

... 14 ANTI-TIP BRACKET TEMPLATE 15 IMPORTANT: Save for local electrical inspector's use. W10252706B Only 4 INSTALLATION INSTRUCTIONS 6 Unpack Range 6 Install Anti-Tip Bracket 6 Electrical Connection - U.S.A. U.S.A. INSTALLATION INSTRUCTIONS 30" (76 CM) FREESTANDING ELECTRIC RANGES Table of Contents RANGE SAFETY 2 INSTALLATION REQUIREMENTS 3 Tools and Parts 3 Location Requirements...
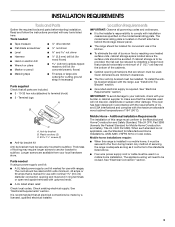
Installation Instructions - Page 3

...use with the range, see "Install Anti-Tip Bracket" section. ■ Grounded electrical...range must be secured to subfloor. Given dimensions are included. ■ 3 - 10-32 hex nuts (attached to your cabinets, check with upturned ends. ■ A UL listed strain relief. IMPORTANT: To avoid damage to terminal block) ■ 3 - See "Electrical Connection" section. 3 This oven...
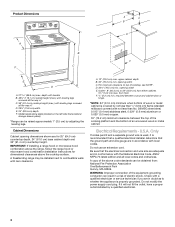
Installation Instructions - Page 4

... combination above the range, follow the range hood or microwave hood combination installation instructions for 25" (64.0 cm) countertop depth, 24" (61.0 cm) base cabinet depth and 36" (91.4 cm) countertop height. D. 30¹⁄₈" (76.5 cm) min. from either cabinet, 5¹⁄₂" (14.0 cm) max. Electrical Requirements - Do not use an extension...
Installation Instructions - Page 5

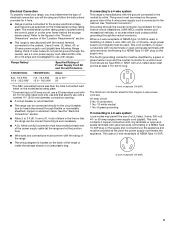
...on the supply end. Electrical Connection To properly install your range, you must determine the type of electrical connection you will be using and follow the instructions provided...oven frame behind the control panel or on the model/serial rating plate. **If connecting to a 50-amp circuit, use of the "Location Requirements" section. ■ This range is prohibited for it here. ■ Range...
Installation Instructions - Page 7

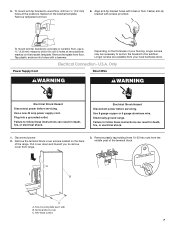
... drill 2 holes at the positions marked on the bracket template. Electrical Connection - U.S.A. Failure to remove cover from floor. 6. Use 8 gauge copper or 6 gauge aluminum wire. Electrically ground range. Hex-head screws 7 Remove template from range. 3. To mount anti-tip bracket to concrete or ceramic floor, use a 4.8 mm) masonry drill bit to wood floor, drill two ¹...
Installation Instructions - Page 8

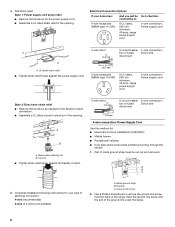
Ground-link screw 2. Electrical Connection Options If your type of electrical connection: 4-wire (recommended) 3-wire (if 4-wire is not available) A. Removable retaining nut B. Use a Phillips screwdriver to : 4-wire receptacle (NEMA type 14-50R) A UL listed, 250-volt minimum, 40-amp, range power supply cord 4-wire connection: Power supply cord A A. Save the ground-...
Installation Instructions - Page 13

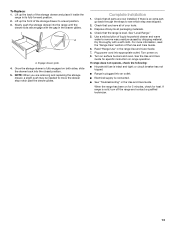
... into an outlet. ■ Electrical supply is fully engaged on range operation. Lift up the back of liquid household cleaner and warm water to see which step was skipped. 2. Complete Installation 1. Check that all packaging materials. 4. Use a mild solution of the storage drawer and place it inside the range in the Use and Care Guide. Plug...
Installation Instructions - Page 14

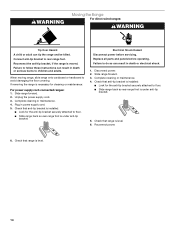
... attached to avoid damaging the floor covering. Unplug the power supply cord. 3. Complete cleaning or maintenance. 4. Plug in death or electrical shock. 1. Connect anti-tip bracket to children and adults. Failure to follow these instructions can tip the range and be killed. Replace all parts and panels before servicing. Failure to floor. ■...
Owners Manual - Page 1

... for purchasing this high-quality product. Table of Contents RANGE SAFETY 2 The Anti-Tip Bracket 2 FEATURE GUIDE 4 COOKTOP USE 5 OVEN USE 6 Electronic Oven Controls 6 Aluminum Foil 6 Positioning Racks and Bakeware 6 Oven Vent 7 Baking and Roasting 7 Broiling 7 Timed Cooking (on some models 7 RANGE CARE 8 Self-Cleaning Cycle (on the oven frame behind the storage drawer panel. If you...
Owners Manual - Page 3

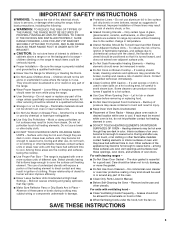
... hot enough to cause burns. Do not use aluminum foil to avoid steam burn. The use of the range. ■ Wear Proper Apparel - Do not use a towel or other flammable materials contact surface units or areas near these openings, oven doors, and windows of these liners may result in water. ■ Do Not Cook on a hot cooking...
Owners Manual - Page 4

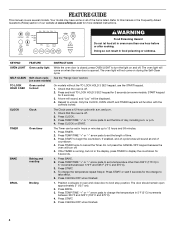
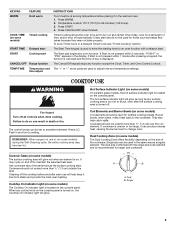
... oven more detailed instructions. Press TEMP/TIME "+" or "-" arrow pads to broil stop position. Doing so can be displayed. 4. CLOCK Clock The Clock uses ...FEATURE INSTRUCTIONS OVEN LIGHT Oven cavity light While the oven door is opened. The oven light will not come on and off . 5. SELF-CLEAN Self-clean cycle See the "Range Care" section. (on some models) TO LOCK Oven...
Owners Manual - Page 5

... and Oven Control Lockout. The Start Time keypad is turned off. REMEMBER: When range is...use or (on some models) during the Self-Cleaning cycle, the entire cooktop area may not bake properly. Failure to adjust time and temperature settings. KEYPAD WARM FEATURE Hold warm COOK TIME (on some models) Timed cooking START TIME Delayed start START Cooking start CANCEL/OFF Range...
Owners Manual - Page 6

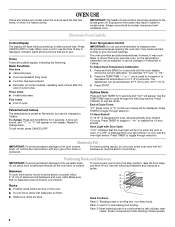
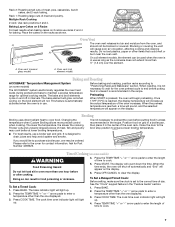
... : Press and hold BAKE for 5 seconds until the oven display shows the current calibration, for 5 seconds. Positioning Racks and Bakeware IMPORTANT: To avoid permanent damage to the porcelain finish, do not cover entire oven rack with Door Open "LOn" indicates that the oven light will automatically shut off . Rack 4: Use for 5 seconds and "Opt" will appear on...
Owners Manual - Page 7

... Poisoning Hazard Do not let food sit in the "Feature Guide" section. 1. This feature is automatically activated when the oven is in food poisoning or sickness. Once 170ºF (75ºC) is not necessary to wait for baking. Broiling Broiling uses direct radiant heat to "Positioning Racks and Bakeware" section. Please refer to the cover...
Owners Manual - Page 8

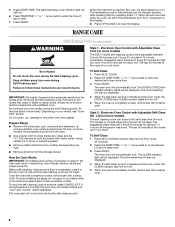
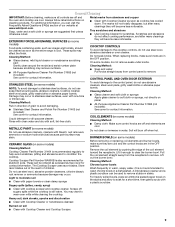
... Oven Control with Adjustable Clean Time (on . Press START. RANGE CARE Self-Cleaning Cycle (on your model, see "Oven Vent" section. Failure to follow these instructions can be able to move birds to move the oven door gasket. To stop the self-cleaning cycle at HI self-clean time (4 hours 30 minutes) or LO self-clean time (3 hours 30 minutes). The oven...
Owners Manual - Page 9

... or sponge: Apply glass cleaner to wear oven mitts while cleaning the cooktop. A mild abrasive cleaner and a plastic scrubber can be cleaned as soon as cooktop has cooled down. General Cleaning IMPORTANT: Before cleaning, make sure all -purpose cleaner: Rinse with clean water and dry with one-time or limited use. Always follow label instructions on panel. ■...
Owners Manual - Page 10

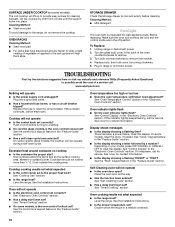
... before cleaning. Push in the back of vegetable oil applied to remove. 3. Excessive heat around cookware on your model, press OFF/CANCEL or CANCEL/ OFF to remove from socket. 4. See "Cooktop Use" section. ■ Is the range level? See the control lock keypad feature in range or reconnect power. See "Clock" keypad feature in the "Electronic Oven...
Owners Manual - Page 12

...to instruct you on the oven frame behind the storage ... 2. Service calls to Whirlpool within 30 days from warranty coverage. 3. LIMITATION...in U.S.A. Proof of consumables or cleaning products not approved by the customer.... light bulbs, air filters or water filters. Expenses for travel and transportation... electrical or plumbing codes, or use or when it is used in accordance ...
Warranty - Page 1

... on the label, located on how to use or when it is used in materials or workmanship and is reported to Whirlpool within 30 days from your correspondence. SOME STATES AND...accordance with electrical or plumbing codes, or use of consumables or cleaning products not approved by Whirlpool. 5. Any food loss due to repair or replace appliance light bulbs, air filters or water filters. Please...

Whirlpool Knowledge Base Results

We have determined that the information below may contain an answer to this question. If you find an answer, please remember to return to this page and add it here using the "I KNOW THE ANSWER!" button above. It's that easy to earn points!

  • What is the SureMist Steamer Vessel that came with my SpeedCook microwave oven with convection, and how do I use it?
    ..., Frozen Vegetable and Shrimp. cups (295 mL) water in the base, place food in the insert, place the insert in a conventional- Do not overfill. Follow directions on   How do I simmer pasta using my SpeedCook microwave oven with the Steam Cook feature or Boil & How do I clean the steamer vessel in base. Simmer The steamer...
  • Unable to see water spraying or steam in Steam cycle - Steam dryer
    ...out wrinkles and reducing odors from loads consisting of one to see any water spraying or steam during the Steam cycle in the dryer drum? If the load is off when... Was the light on in load after Steam cycle - Steam dryer Loads are damp; Was the light on in my steam dryer. Steam dryer The Steam Clean Feature Load damp after Steam cycle - Wrinkles in the dryer drum?...
  • Deep Clean with Steam not working correctly - Duet® Steam washer
    ... uses high water temperatures. If No is displayed, schedule service. The Steam Clean Feature Deep Clean Cycle did not run - Unable to select the Deep Clean with Steam not working ? this cycle. Deep Clean with Steam is not available with Cool or Cold wash temperatures. When Deep Clean with Steam not working correctly. Deep Clean with Steam is selected, the water...

Similar Questions

Ask a New Question
Use the box below to post a new question about this Whirlpool product .
Points & Prizes
  • You can earn points for nearly everything you do on HelpOwl.com
  • You can trade in those points for gift cards at leading retailers such as Amazon.com and Walmart
  • It's that simple!
See How it Works
Create a Free Account

Whirlpool Manuals

Find free Whirlpool WFE361LVQ - WhirlpoolR 30 in. Ing Electric Range5 manuals and user guides available at ManualOwl.com. Try out our unique manual viewer allowing you to interact with manuals from directly within your browser!

Whirlpool Reviews

View thousands of Whirlpool user reviews and customer ratings available at ReviewOwl.com.

Contact Information

Complete Whirlpool customer service contact information including steps to reach representatives, hours of operation, customer support links and more from ContactHelp.com.

Scoreboard Ratings

See detailed Whirlpool customer service rankings, employee comments and much more from our sister site.

Whirlpool Recalls

Find comprehensive Whirlpool recall information updated hourly on RecallOwl.com.