Whirlpool WED6400SB Support Question
Whirlpool WED6400SB Support Question
Find answers below for this question about Whirlpool WED6400SB - Cabrio 7.0 Cu Ft Capacity Electric Dryer.Need a Whirlpool WED6400SB manual? We have 2 online manuals for this item!
Question posted by kellyhakenwerth on December 10th, 2012
Dryer Does Not Run. Power Turns On But Dryer Won't Start Running Says Sensing?
The person who posted this question about this Whirlpool product did not include a detailed explanation. Please use the "Request More Information" button to the right if more details would help you to answer this question.
Current Answers
Related Whirlpool WED6400SB Manual Pages
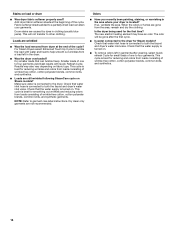
Use and Care Guide - Page 5
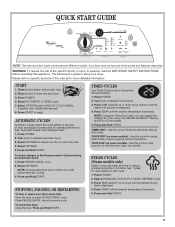
Your dryer may not have all of load, and adjust Dryness Level for optimal performance. Please refer to desired Automatic Cycle. 3. Press POWER. 4. Select AUTOMATIC or TIMED cycle. 5. Turn knob to specific sections of this manual for Time, Temp, the WRINKLE SHIELD™ feature, and End of fire, electric shock, or injury to persons, read...
Use and Care Guide - Page 6
... the Automatic or Timed Preset Cycle Settings chart (in the "Cycles" section) for your dryer is running, the display shows the exact number of minutes remaining in the load and automatically adjusts the...worn or clothes that matches the type of all models. If a Timed Cycle is automatically sensing the dryness level of a Timed Cycle by pressing Temp until the desired temperature is selected...
Use and Care Guide - Page 8

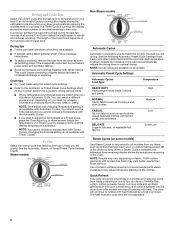
...When the dryer is not running, the drum light will turn on the light inside the dryer, close the door and restart the dryer to finish ...laundry is selected and the End of a cycle and turns off , open the door to stop the dryer, rearrange the load inside the dryer...this option is detected.
■ In the Timed Cycle, the Sensing light illuminates at the end of your clothes are not detected....
Use and Care Guide - Page 9
...running.
2. Do not use the drying rack
1. A
A.
Close the door. 5. Refer to the following chart).
Press START. The dryer starts... dryer ...the dryer ... turns,...inner dryer back...dryer.
The dryer will beep, and "CF" will be removed for 5 seconds. Press START...START button (about 1 second).
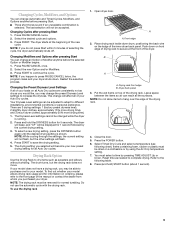
9 Place drying rack inside dryer...dryer. Push down .
Changing Cycles after pressing Start...
Use and Care Guide - Page 10
...no heat)
*(Minutes) Reset time to complete drying, if needed cleaning
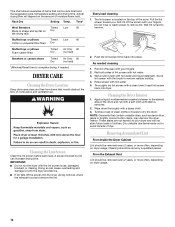
1. DRYER CARE
Cleaning the Dryer Location
Keep dryer area clear and free from items that would obstruct the flow of lint ...loose, damaged, blocked, or missing.
Rack Dry
Setting Temp. IMPORTANT:
■ Do not run the dryer with a damp cloth. 3.
Do not rinse or wash screen to remove residue buildup. 4. Roll lint...
Use and Care Guide - Page 11
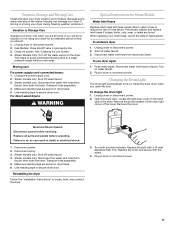
... of the cover. Make sure leveling legs are secure in dryer or reconnect power.
11 Steam Models Only: Turn off water faucet. 4. Plug in dryer base. 6. Unplug dryer or disconnect power. 2. Open the dryer door. Electrical Shock Hazard Disconnect power before operating. Disconnect wiring. 3. Transport hose separately. 5.
Turn bulb counterclockwise. Replace the bulb with the screw.
4. Gas...
Use and Care Guide - Page 12
... the estimated time remaining. Confirm the vent run from the dryer to the wall is the dryer level front to back and side to side? Electric dryers require 240-volt power supply. Check with your vent system falls withing the recommended run
■ Is the dryer door firmly closed?
■ Was the Start button firmly pressed? Use a time-delay...
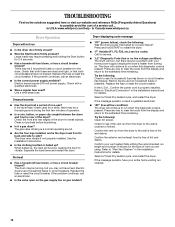
Use and Care Guide - Page 13
... sheets blocking the grille? Separate the load to follow these instructions can result in a closet? Run the dryer for the types of drying time in a cycle. See "Additional Features."
■ Is the...
13 Failure to dry quickly? Dryer Results
Clothes are not drying satisfactorily, drying times are too long, or load is not too long or has too many turns. WARNING
Fire Hazard Use a heavy...
Use and Care Guide - Page 14
... connected to tumble the load with Quick Refresh Cycle. This cycle is turned on .
The new electric heating element may also vary depending on load or drum
■ Was dryer fabric softener properly used for Steam models? Check that can stain your dryer is best for reducing wrinkles and odors from a load left in...
Installation Instructions - Page 1
... de estas instrucciones en español, visite www.Whirlpool.com
TABLE OF CONTENTS
TABLE OF CONTENTS 1
DRYER SAFETY 1
INSTALLATION REQUIREMENTS 2 Tools and Parts 2 Optional Equipment 2 Location Requirements 3
ELECTRIC DRYER POWER HOOKUP 4 Electrical Requirements 4 Electrical Connection 5
VENTING 10 Venting Requirements 10 Plan Vent System 11 Install Vent System 12
INSTALL LEVELING...
Installation Instructions - Page 3
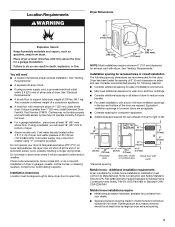
... installations require: ■ Metal exhaust system hardware, available for mobile home installations. If slope is suitable for purchase from washer using a power supply cord, a grounded electrical outlet within 4 ft. (1.2 m) of dryer, and water pressure of 20-100 psi (137.9-689.6 kPa).
Consider recommended spacing for following spacing dimensions are acceptable.
■ Consider...
Installation Instructions - Page 4
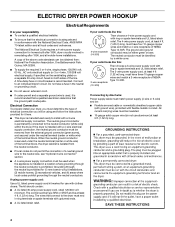
... in remodeling after 1996, dryer circuits involved in conformance with the National Electrical Code, ANSI/NFPA 70-latest edition and all mobile home installations. The National Electrical Code requires a 4-wire power supply connection for use with ring or spade terminals and UL listed strain relief.
The 4-wire power supply cord, at least 4 ft (1.22 m) long, must...
Installation Instructions - Page 5
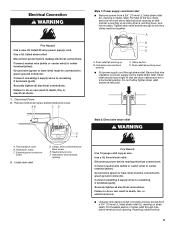
... down , and hold two clamp sections together. Strain relief should have a tight fit with the dryer cabinet and be connected to green ground connector. Failure to do so can result in death, fire, or electrical shock.
1. Disconnect Power.
2. E F
A. External ground conductor
screw
3.
Reaching inside strain relief. Tighten strain relief screws enough to do...
Installation Instructions - Page 6
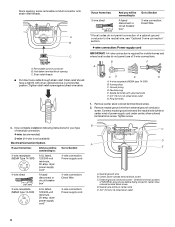
... connection: Direct Wire
3-wire receptacle (NEMA type 10-30R)
A UL listed, 120/240-volt minimum, 30-amp, dryer power supply cord*
3-wire connection: Power supply cord
B C
D A
E
A. Now complete installation following instructions for your type of electrical connection:
4-wire (recommended)
3-wire (if 4-wire is required for mobile homes and where local codes do not permit...
Installation Instructions - Page 8
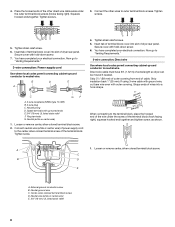
...ground wire, cut bare wire even with up turned ends E.3/4" (19 mm) UL listed strain ...of dryer rear panel. Now go to "Venting Requirements."
3-wire connection: Power ...electrical connection. Shape ends of wires into a hook shape.
(215"mm)
(839½m"m)
When connecting to outer terminal block screws. Squeeze hooked ends together. You have completed your electrical connection. You have 5 ft...
Installation Instructions - Page 12

... /louvered Angled
hoods
hoods
0
Rigid metal
64 ft. (20 m)
58ft. (17.7 m)
1
Rigid metal
54 ft. (16.5 m) 48 ft. (14.6 m)
2
Rigid metal
44 ft. (13.4 m) 38 ft. (11.6 m)
3
Rigid metal
35 ft. (10.7 m) 29 ft. (8.8 m)
4
Rigid metal
27 ft. (8.2 m)
21 ft. (6.4 m)
Install Vent System
1. See "Determine vent path" in dryer. Avoid 90º turns. Do not use duct tape, screws or other...
Installation Instructions - Page 13
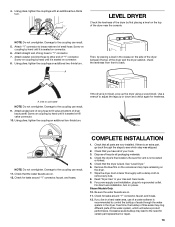
...the side of the dryer between the top of the dryer and the dryer cabinet, check the levelness from front to other end of a water softener is seated on power. Check that all...connector.
10. COMPLETE INSTALLATION
1. Using pliers, tighten the couplings an additional two-thirds turn .
Check the dryer's final location. NOTE: Do not overtighten. Inlet to the coupling can result.
9....
Installation Instructions - Page 14
... the top screw from turning on the door.
Place a towel or soft cloth on the opposite
B
side of dryer.
3. Remove the cosmetic screw opposite the door strike. Cosmetic screw
A
3. Remove the dryer door and the hinges by lifting upward on . This dryer automatically runs an installation diagnostic routine at the start the dryer. This odor is common...
Installation Instructions - Page 15
... hinge holes in hinge and door. Dryer Operation
Dryer will continue to restart the dryer.
■ "L2" Diagnostic Code (low or no line voltage condition): The drum will turn, but you may be 2 household fuses or circuit breakers for the dryer. Electric dryers require 240-volt power supply.
Press and hold START to run
■ Has a household fuse blown, or...
Installation Instructions - Page 16
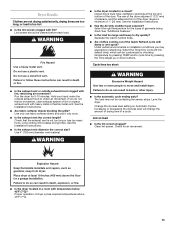
...Confirm the power cord is not too long or has too many turns. Press any key to clear the code from the dryer to ...run length and number of elbows for the type of vent you do not feel air movement, clean exhaust system of airspace, and, for 5-10 minutes. Fire Hazard Use a heavy metal vent.
WARNING
outside exhaust hood clogged with lint, restricting air movement?
Refer to "Electrical...
Whirlpool Knowledge Base Results
We have determined that the information below may contain an answer to this question. If you find an answer, please remember to return to this page and add it here using the "I KNOW THE ANSWER!" button above. It's that easy to earn points!-
Changing my air purifier filters
...it. Install the new HEPA filter in the air purifier or reconnect power. Turn the fan speed knob to the desired fan speed or press Power to replace your air purifier filters. Pressing the Filter Reset... procedure to start the air purifier. Do not try to wash and reuse either the HEPA filter or the pre-filter Turn the fan speed knob to Off or press Power to turn off the front grille... -
Display shows PF - Dryer
Press Pause/Cancel to restart the dryer. My dryer display shows PF. Press and hold Start to clear the display. This error code indicates that the cycle was interrupted by a power failure. -
Water supply hookup - Bottom freezer/French door refrigerators
... Check to water line: Unplug refrigerator or disconnect power. Remove the water filter. See your water ..., and use . French door with water pressure of the dispenser. Turn on the refrigerator before you have a dispenser, check the water pressure...that tubing feeds straight into water supply line before starting installation. Make sure it may crush the copper tubing....
Similar Questions

Cabrio Dryer Won't Start Sensing Light On
(Posted by Jikokai 10 years ago)

Whirlpool Cabrio Dryer Won't Dry
(Posted by rlvai 10 years ago)

When You Start Dryer It Says Sensing And Will Not Start
(Posted by tracysaylor 12 years ago)

My Cabrio Dryer Powers Up But Will Not Start When The Start Button Is Pressed
(Posted by michaelbullen 12 years ago)

My Whirlpool Wed6400sb1 Cabrio Dryer Spins But Won't Dry Clothes.
(Posted by bhall03 12 years ago)