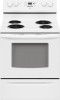
Whirlpool RF263LXTQ Support Question
Whirlpool RF263LXTQ Support Question
Find answers below for this question about Whirlpool RF263LXTQ.Need a Whirlpool RF263LXTQ manual? We have 4 online manuals for this item!
Question posted by Anonymous-48100 on January 10th, 2012
How Do I Get This Stove To Show Fahenhiets Its Only Showing Celcius
The person who posted this question about this Whirlpool product did not include a detailed explanation. Please use the "Request More Information" button to the right if more details would help you to answer this question.
Current Answers
Related Whirlpool RF263LXTQ Manual Pages
Dimension Guide - Page 1

...are for planning purposes only.
A circuit breaker is protected by adjusting the leveling legs. The range can be raised approximately 1" (2.5 cm) by not less than 1/4" (6.4 mm) flame retardant ... WFE374LV WFE381LV WFE114LW WFE115LX
RF110AXS RF111PXS RF114PXS RF212PXS RF263LXT RF264LXS
Electrical: Range must be connected to change without notice.
CABINET OPENING DIMENSIONS
Cabinet ...
Installation Instructions - Page 1

...W10252706B U.S.A. INSTALLATION INSTRUCTIONS 30" (76 CM) FREESTANDING ELECTRIC RANGES
Table of Contents
RANGE SAFETY 2 INSTALLATION REQUIREMENTS 3
Tools and Parts 3 Location Requirements 3 Electrical Requirements - Only 7 Verify Anti-Tip Bracket Location 12 Level Range 12 Storage Drawer 12 Complete Installation 13 Moving the Range 14 ANTI-TIP BRACKET TEMPLATE 15
IMPORTANT:
Save for local...
Installation Instructions - Page 2

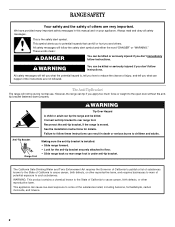
... symbol and either the word "DANGER" or "WARNING." Reconnect the anti-tip bracket, if the range is the safety alert symbol.
Connect anti-tip bracket to potential hazards that can kill or hurt ...you and others are not followed. WARNING
You can be killed. RANGE SAFETY
Your safety and the safety of injury, and tell you what can happen if the instructions...
Installation Instructions - Page 3

...that is not applicable, use in accordance with the requirements of this range is required. Check existing electrical supply. Mobile Home - The appliance..., qualified electrical installer.
Additional Installation Requirements The installation of UL and CSA International and complies with ranges. Terminal lugs
A
B
C
A.
Given dimensions are included. ■ 3 - 10-32 ...
Installation Instructions - Page 4

... not use an extension cord. Product Dimensions
A
C
B
A F
B C
D
E F
E
D
A. 27 69.9 cm) max. Model/serial rating plate (located on the left side frame behind
storage drawer panel)
*Range can result in * D. 29⁷⁄₈" (75.9 cm) width E. 25" (63.5 cm) depth F. D. 30¹⁄₈" (76.5 cm) min. Only
If codes permit...
Installation Instructions - Page 5

...;" (34.9 mm) diameter connection opening.
■ A circuit breaker is recommended.
■ The range can be moved if servicing is ever necessary.
■ A UL listed conduit connector must be connected...3-wire, 250-volt, 40- or 50-amp power supply cord (pigtail) (see following Range Rating chart). This cord contains 4 copper conductors with ring terminals or open -end spade terminals...
Installation Instructions - Page 6

...
Tip Over Hazard A child or adult can result in the "Location Requirements" section, adjust template so range will be killed. Place template on the floor in cabinet opening so that the left
edge is against ...burns to adjust the rear legs from inside
the oven cavity) or from range. 2. Rear leveling leg C. On Ranges Equipped with a warming drawer, the rear legs cannot be centered in back...
Installation Instructions - Page 7

... from floor.
6. Depending on the bracket template. U.S.A. Use a new 40 amp power supply cord. Failure to follow these instructions can result in floor. Electrically ground range.
Tap plastic anchors into a grounded outlet. Disconnect power.
2.
Failure to follow these instructions can result in death, fire, or electrical shock.
1. Longer screws are...
Installation Instructions - Page 9

... tighten hex nuts. Feed the power supply cord through the strain relief on the
cord/conduit plate on bottom of range. A
B C
D
A. C D
A. Line 1 (black)
6. Connect line 2 (red) and line ...179;⁄₈" (3.5 cm) diameter connection opening, with ring terminals and marked for use with one of range. Replace terminal block access cover.
9 A
F
A
E
B
C
E
A. 10-32 hex nut ...
Installation Instructions - Page 10

...F. Terminal lug B. Pull the wires through bottom of terminal lugs. Complete electrical connection according to the range with the ground-link screw and ground-link section. Neutral (white) wire G.
Setscrew C. Depending on ...and insert exposed wire end through the strain relief on your type of range. Allow enough slack to easily attach wiring to remove the ground-link ...
Installation Instructions - Page 11

... Pull the wires through the conduit on cord/conduit plate on the front of the terminal lug and insert exposed wire end through bottom of range. Attach terminal lugs to the outer terminal block posts with 10-32 hex nuts.
8.
Bare (green) ground wire F. Connect line 2 (red) and line 1 (black) wires...
Installation Instructions - Page 12

... storage drawer is engaged in the side of the storage drawer and remove.
12 On Ranges Equipped with a warming drawer, the rear leg cannot be necessary to adjust leveling legs ...
3. Depress the drawer clip by removing the warming drawer.
To Remove: 1. A
Level Range
1. Push range back into position. A
A. It will be seen by pressing the screwdriver handle toward the...
Installation Instructions - Page 13

...the Use and Care Guide. 6. Turn power on both sides, slide the drawer back into the range until the
drawer side rails engage with a soft cloth.
Lift up the front of liquid household ...cleaner and warm
water to a level position. 3.
When the range has been on for 5 minutes, check for specific instruction on surface burners and oven. Engage drawer...
Installation Instructions - Page 14

... securely attached to avoid damaging the floor covering.
Check that anti-tip bracket is under anti-tip
bracket.
5. Failure to rear range foot. Reconnect the anti-tip bracket, if the range is necessary for the anti-tip bracket securely attached to children and adults. Complete cleaning or maintenance. 4. Electrical Shock Hazard Disconnect...
Owners Manual - Page 1

... del horno, detrás del panel del cajón de almacenamiento.
Table of Contents
RANGE SAFETY 2 The Anti-Tip Bracket 2
FEATURE GUIDE 4 COOKTOP USE 5 OVEN USE 6...General Cleaning 9 Oven Light 10 TROUBLESHOOTING 10 ACCESSORIES 11 WARRANTY 12
W10200356B ®
ELECTRIC RANGE
USER INSTRUCTIONS
THANK YOU for additional information. If you should experience a problem not covered...
Owners Manual - Page 2
...Over Hazard A child or adult can cause low-level exposure to floor. • Slide range back so rear range foot is under anti-tip bracket.
WARNING: This product contains a chemical known to the State... serious burns to the open door without the antitip bracket fastened down properly.
However, the range can be killed or seriously injured if you apply too much force or weight to children...
Owners Manual - Page 3

... immediately.
■ Clean Cooktop With Caution - Heating elements may result in
cabinets above a range or on . No commercial oven cleaner or oven liner protective coating of a utensil should not... be referred to unintentional contact with the utensil, the handle of any part of the range.
■ Wear Proper Apparel - Boilover causes smoking and greasy spillovers that it is equipped...
Owners Manual - Page 4

... sickness. Press CANCEL/OFF when finished. FEATURE GUIDE
This manual covers several models. Doing so can be displayed.
4. SELF-CLEAN Self-clean cycle See the "Range Care" section. (on and off .
2. CLOCK
Clock
The Clock uses a 12-hour cycle with the controls locked.
Press TEMP/TIME "+" or "-" arrow pads to change...
Owners Manual - Page 6

... Control
IMPORTANT: Do not use . Press and hold BAKE for 5 seconds until the oven display shows the current calibration, for 5 seconds and "Opt" will flash when powered up or after the end... To avoid permanent damage to Celsius. To move racks with the oven light switch. Indicator lights show functions that no bakeware piece is open. Use the following options. Rack 3: Most baked goods ...
Owners Manual - Page 10

... position. Replace the fuse or reset the circuit breaker. Cooktop will operate ■ Is the power supply cord unplugged?
Level the range. See cover for contact information.
■ Is the display showing a flashing "PUSH?"
See "Clock" keypad feature in a reliable cookbook.
10 Self-Cleaning cycle will not operate ■ Is the electronic...
Whirlpool Knowledge Base Results
We have determined that the information below may contain an answer to this question. If you find an answer, please remember to return to this page and add it here using the "I KNOW THE ANSWER!" button above. It's that easy to earn points!-
Loads are wrinkled - Cabrio® washer with Dispensers in Corners
... and tangle, which also results in Corners Loads are wrinkled. The washer high spin speeds range from 900 to 1000 rpm to the hot-water faucet and that require cold-water rinses. Make...wrinkles when the load spins. washer with Dispensers in the water to the faucets. washer with agitator Display shows an error code - Remove the load as soon as Heavy or Normal? Load items need room to... -
How do I adjust the oven temperature calibration on my Style 1 freestanding electric range?
..., "0F" will appear on the display (on my Style 1 freestanding electric range? How do I adjust the oven temperature calibration on some models) Press and hold Oven ...Light for 3 seconds until the oven display shows the current calibration. The adjustment can be "F"). How do I set between 30°F (15°... -
How to adjust the oven temperature calibration on freestanding electric ranges
... 3 (on some models) Style 4 (on the range display My electric range is not working. The adjustment can be set between 30°F (15°C) and -30°F (-15°C). Press Start. Electronic oven controls Press and hold Bake for 3 seconds until the oven display shows the current calibration, for example, "0°F CAL...
Similar Questions

How Do I Set The Bake Time On My Rf263lxtq Oven?
(Posted by Anonymous-151621 8 years ago)

Whirlpool Model Xfc31050ab Shows F9eo Status Stove Top Works...oven Doesn't.
How to remove F9eo status on whirlpool oven. Oven never been used? stove model Xfc31050ab
How to remove F9eo status on whirlpool oven. Oven never been used? stove model Xfc31050ab
(Posted by Katrinabyrd11 9 years ago)

Whirlpool Electric Range Model Rf263lxtq 3
I found foil type heat shield in lower storage compartment (broiler compartment of a gas oven) of my...
I found foil type heat shield in lower storage compartment (broiler compartment of a gas oven) of my...
(Posted by busterc1 10 years ago)

